Read more about customizing widgets in this article or check out the widget video tutorial.
Option 1 — add to the page source code
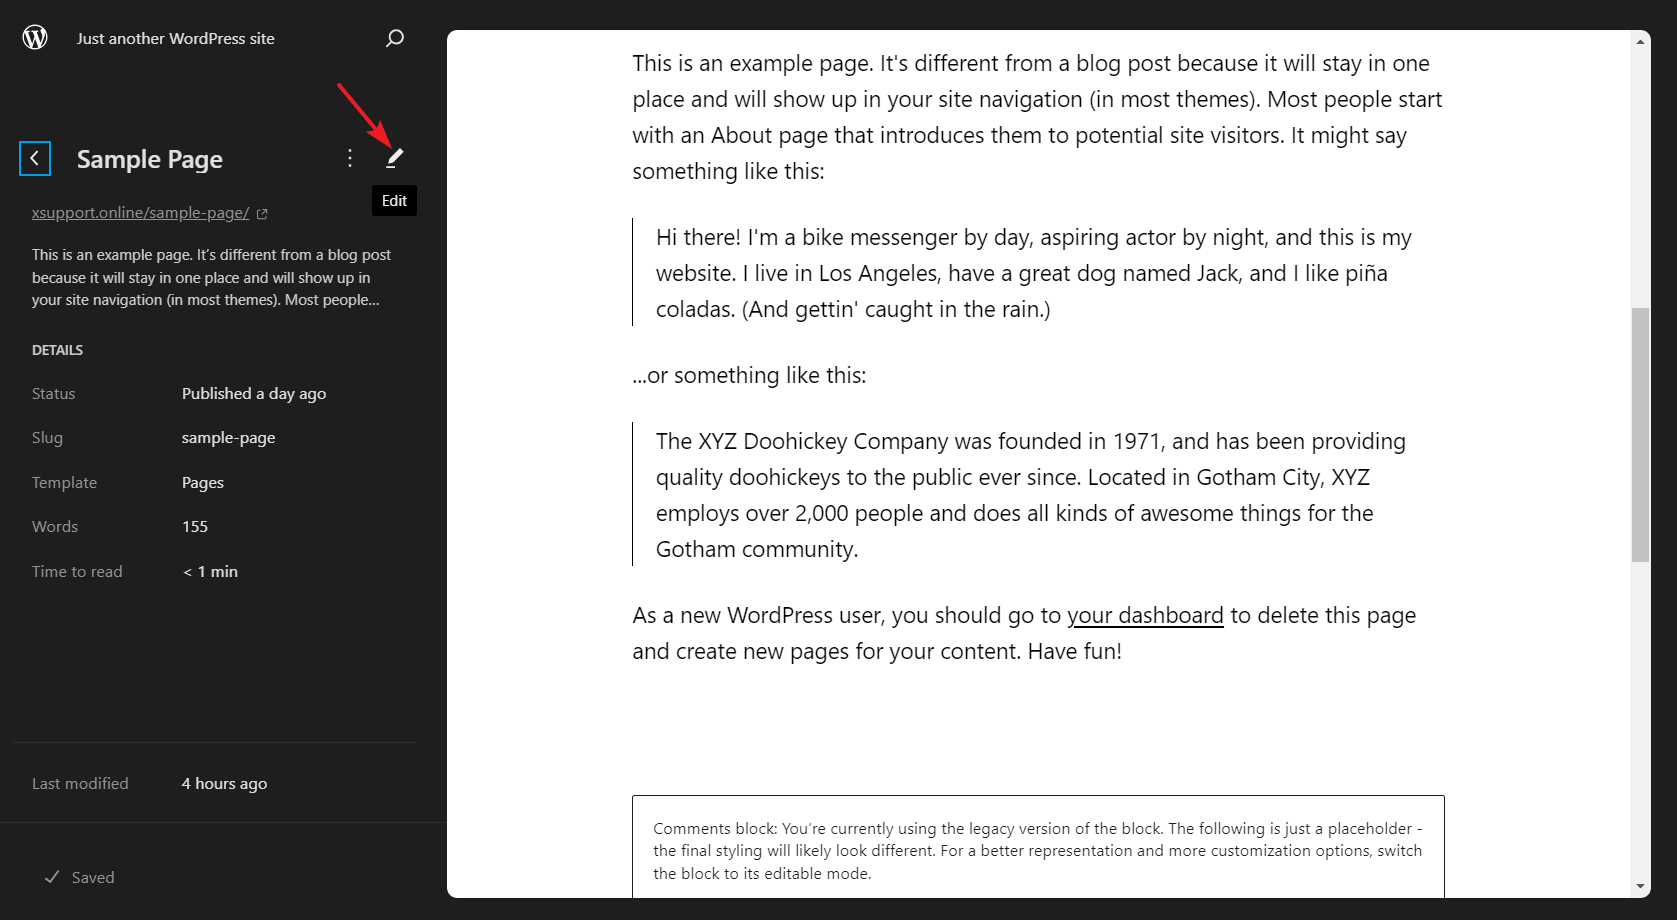
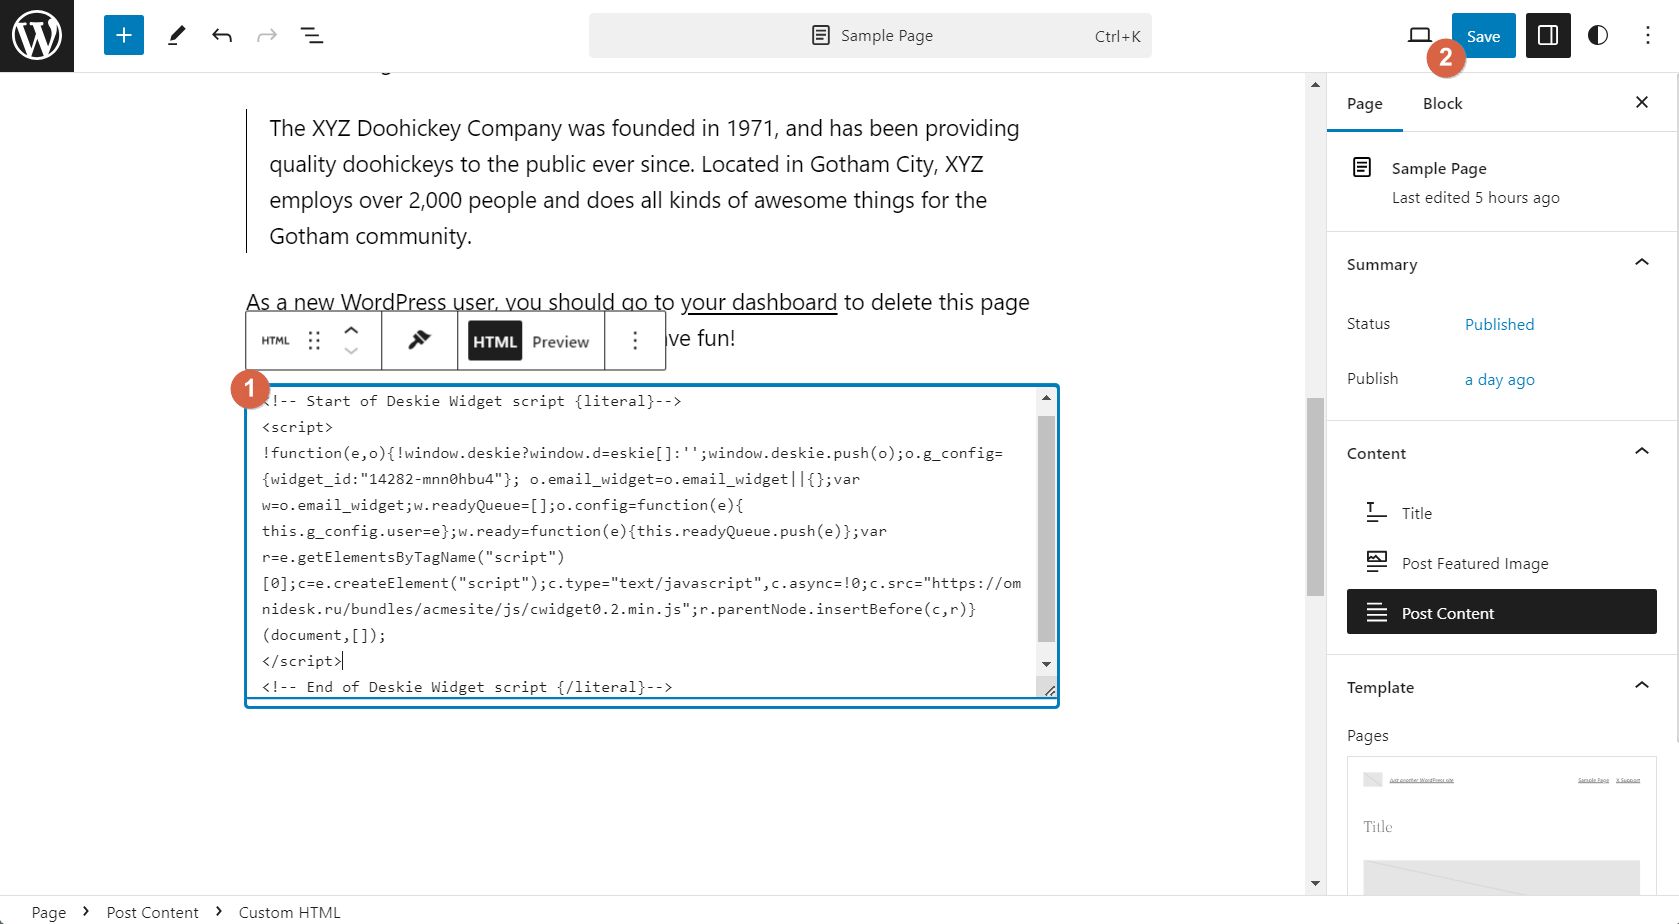
1. In the admin console, select Appearance → "Editor" subsection → Pages → select the page where you want to place the widget and click the "Edit" icon.
2. Display the code insertion tools (plus icon) → select Blocks → find Widgets → select Custom HTML.
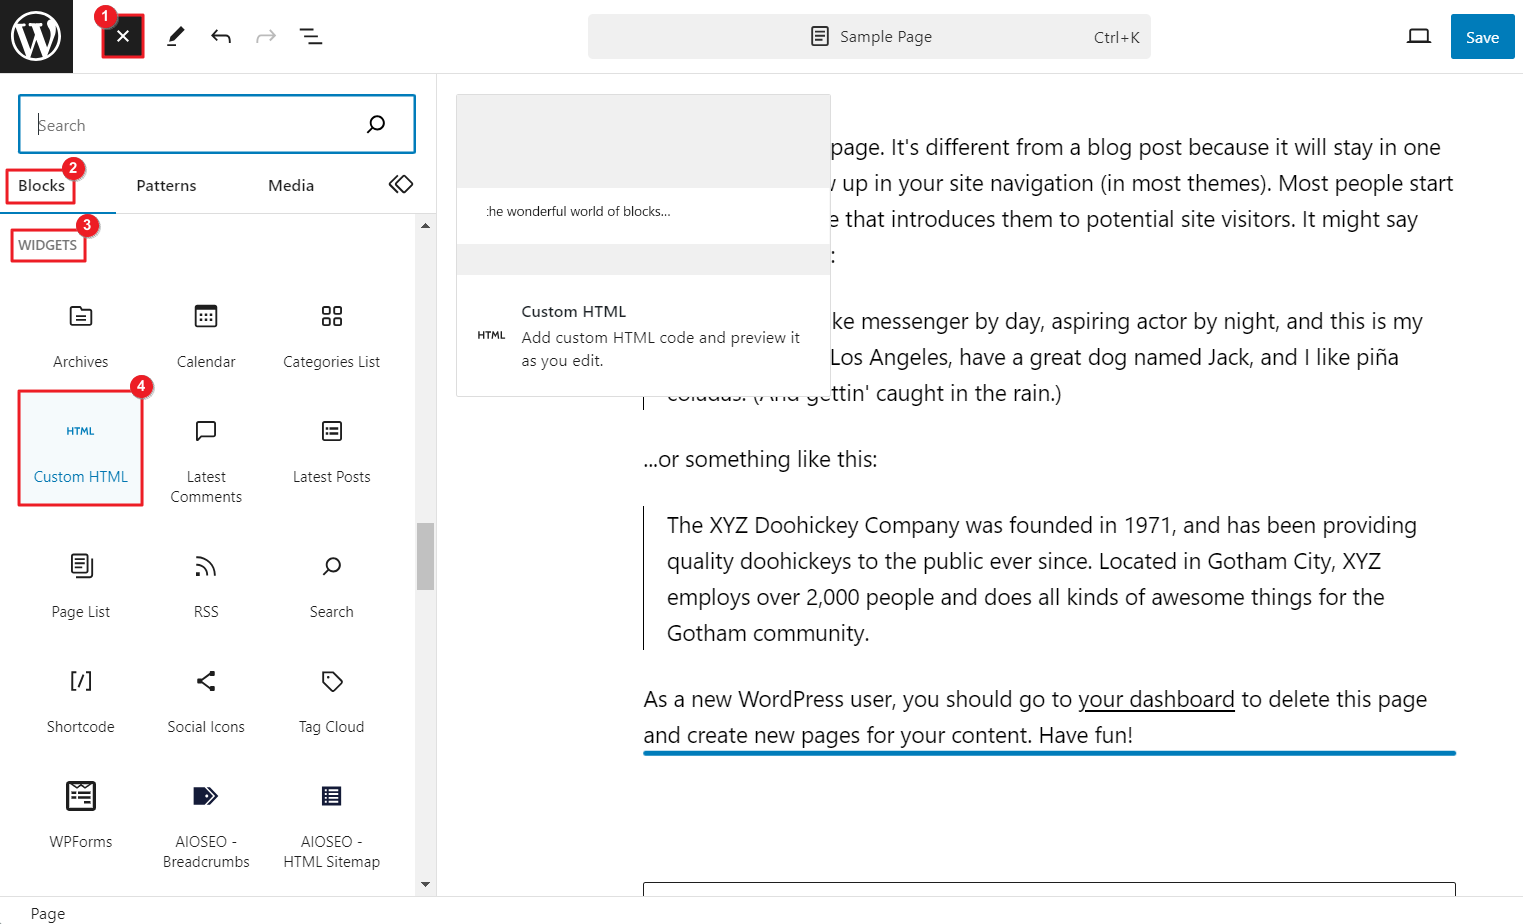
3. Paste the Deskie widget code into the text box and click Save.
PRO Tip
If you want to use one widget on multiple pages, create a pattern based on the widget code to quickly add it to other pages on the website. Click on the three dots of the block → select Create pattern/reusable block → enter a name and click Create → click Save.
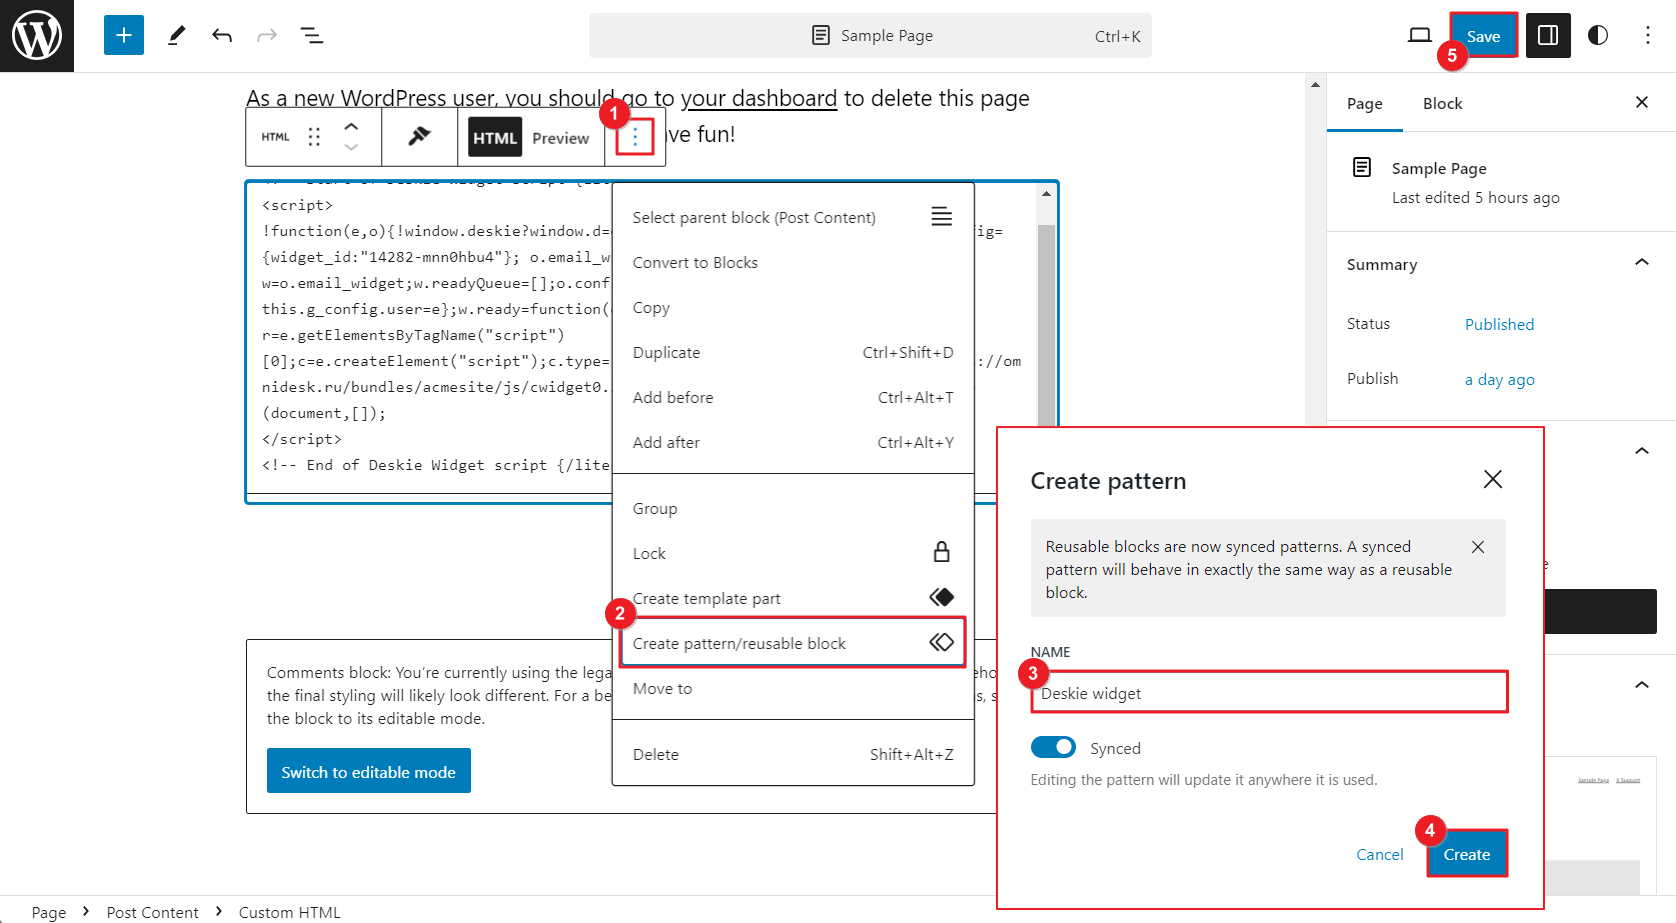
When you want to change widget settings, it will be enough to change it on one page. When synchronization is enabled, the widget will immediately change on all pages where the pattern is added.
Option 2 - using plugins
There are plenty of plugins with the help of which you can add Deskie widget code to Wordpress in one go. Let's have a look at several of them.
DCO insert analytics code
1. Install the DCO insert analytics code plugin and activate it.
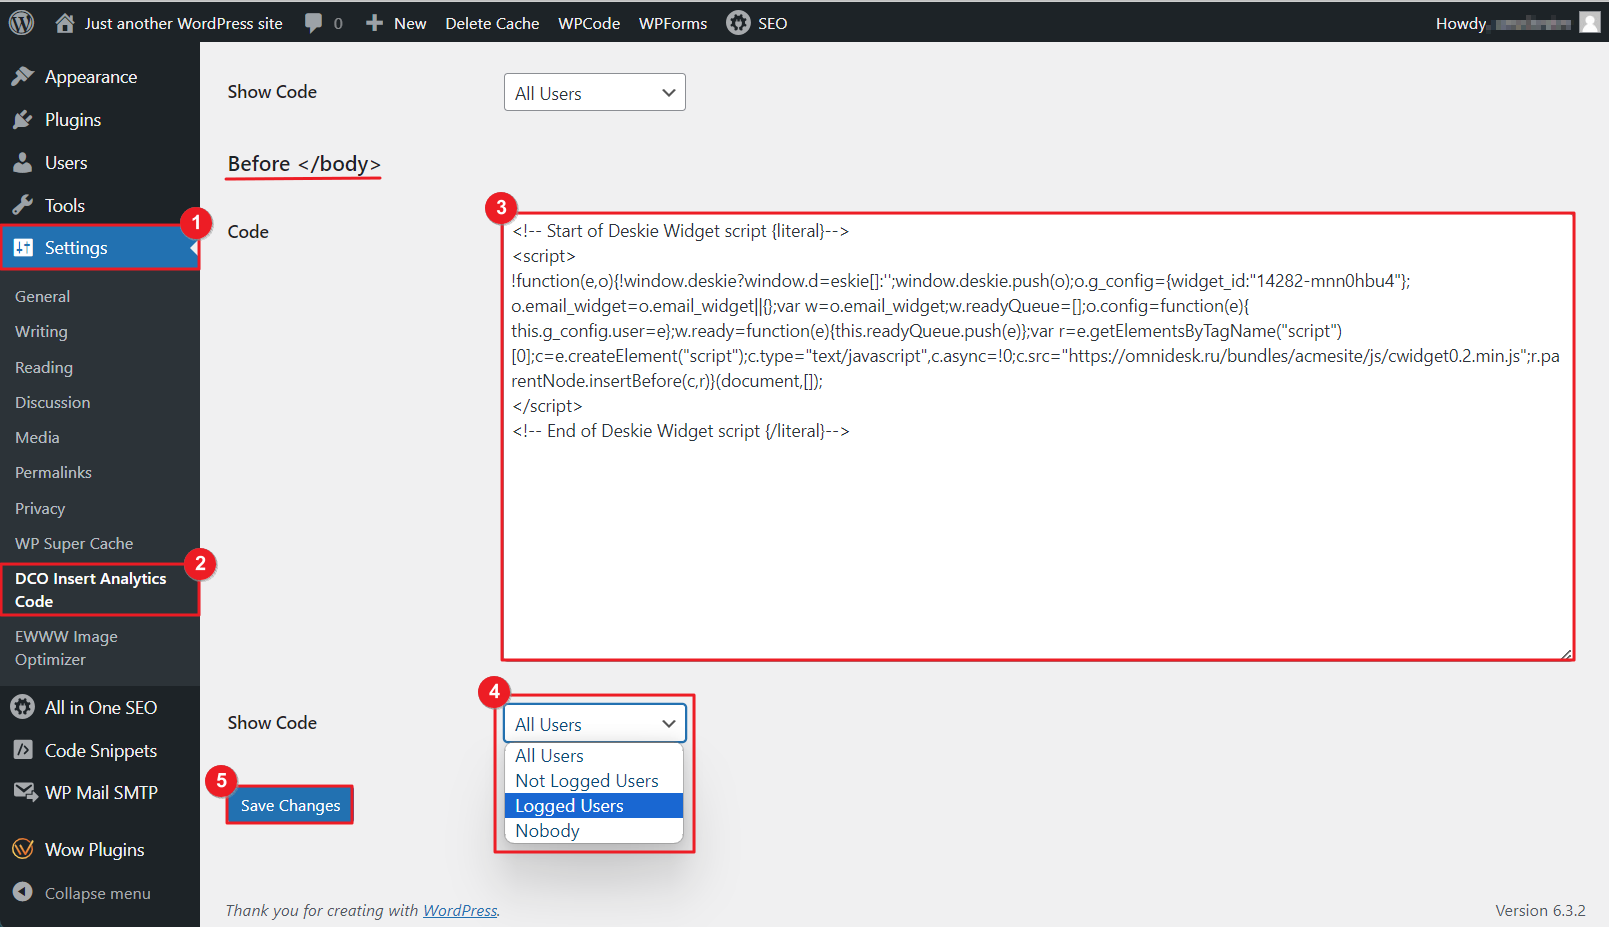
2. Go to the settings of the plugin via Console — Settings — DCO insert analytics code.
3. Select the "Before </body>" block, paste the Deskie widget code into the text box, and save your changes.
With the plugin, you can implement a scenario where authorized and unauthorized users will be shown a different version of the widget. Create two different widgets in the administrator's account in Deskie. Put the code for the first one in the "After <body>" block of the plugin, and the code for the second one in the "Before </body>" block. Under each of the blocks, set whom should the widget be displayed to — to the logged-in users or vice versa. Save your changes.
This way you can, for example, limit the number of channels for creating cases for visitors without an account on your website or set a different SLA level for each group.
WPCode
1. Install the WPCode plugin and activate it.
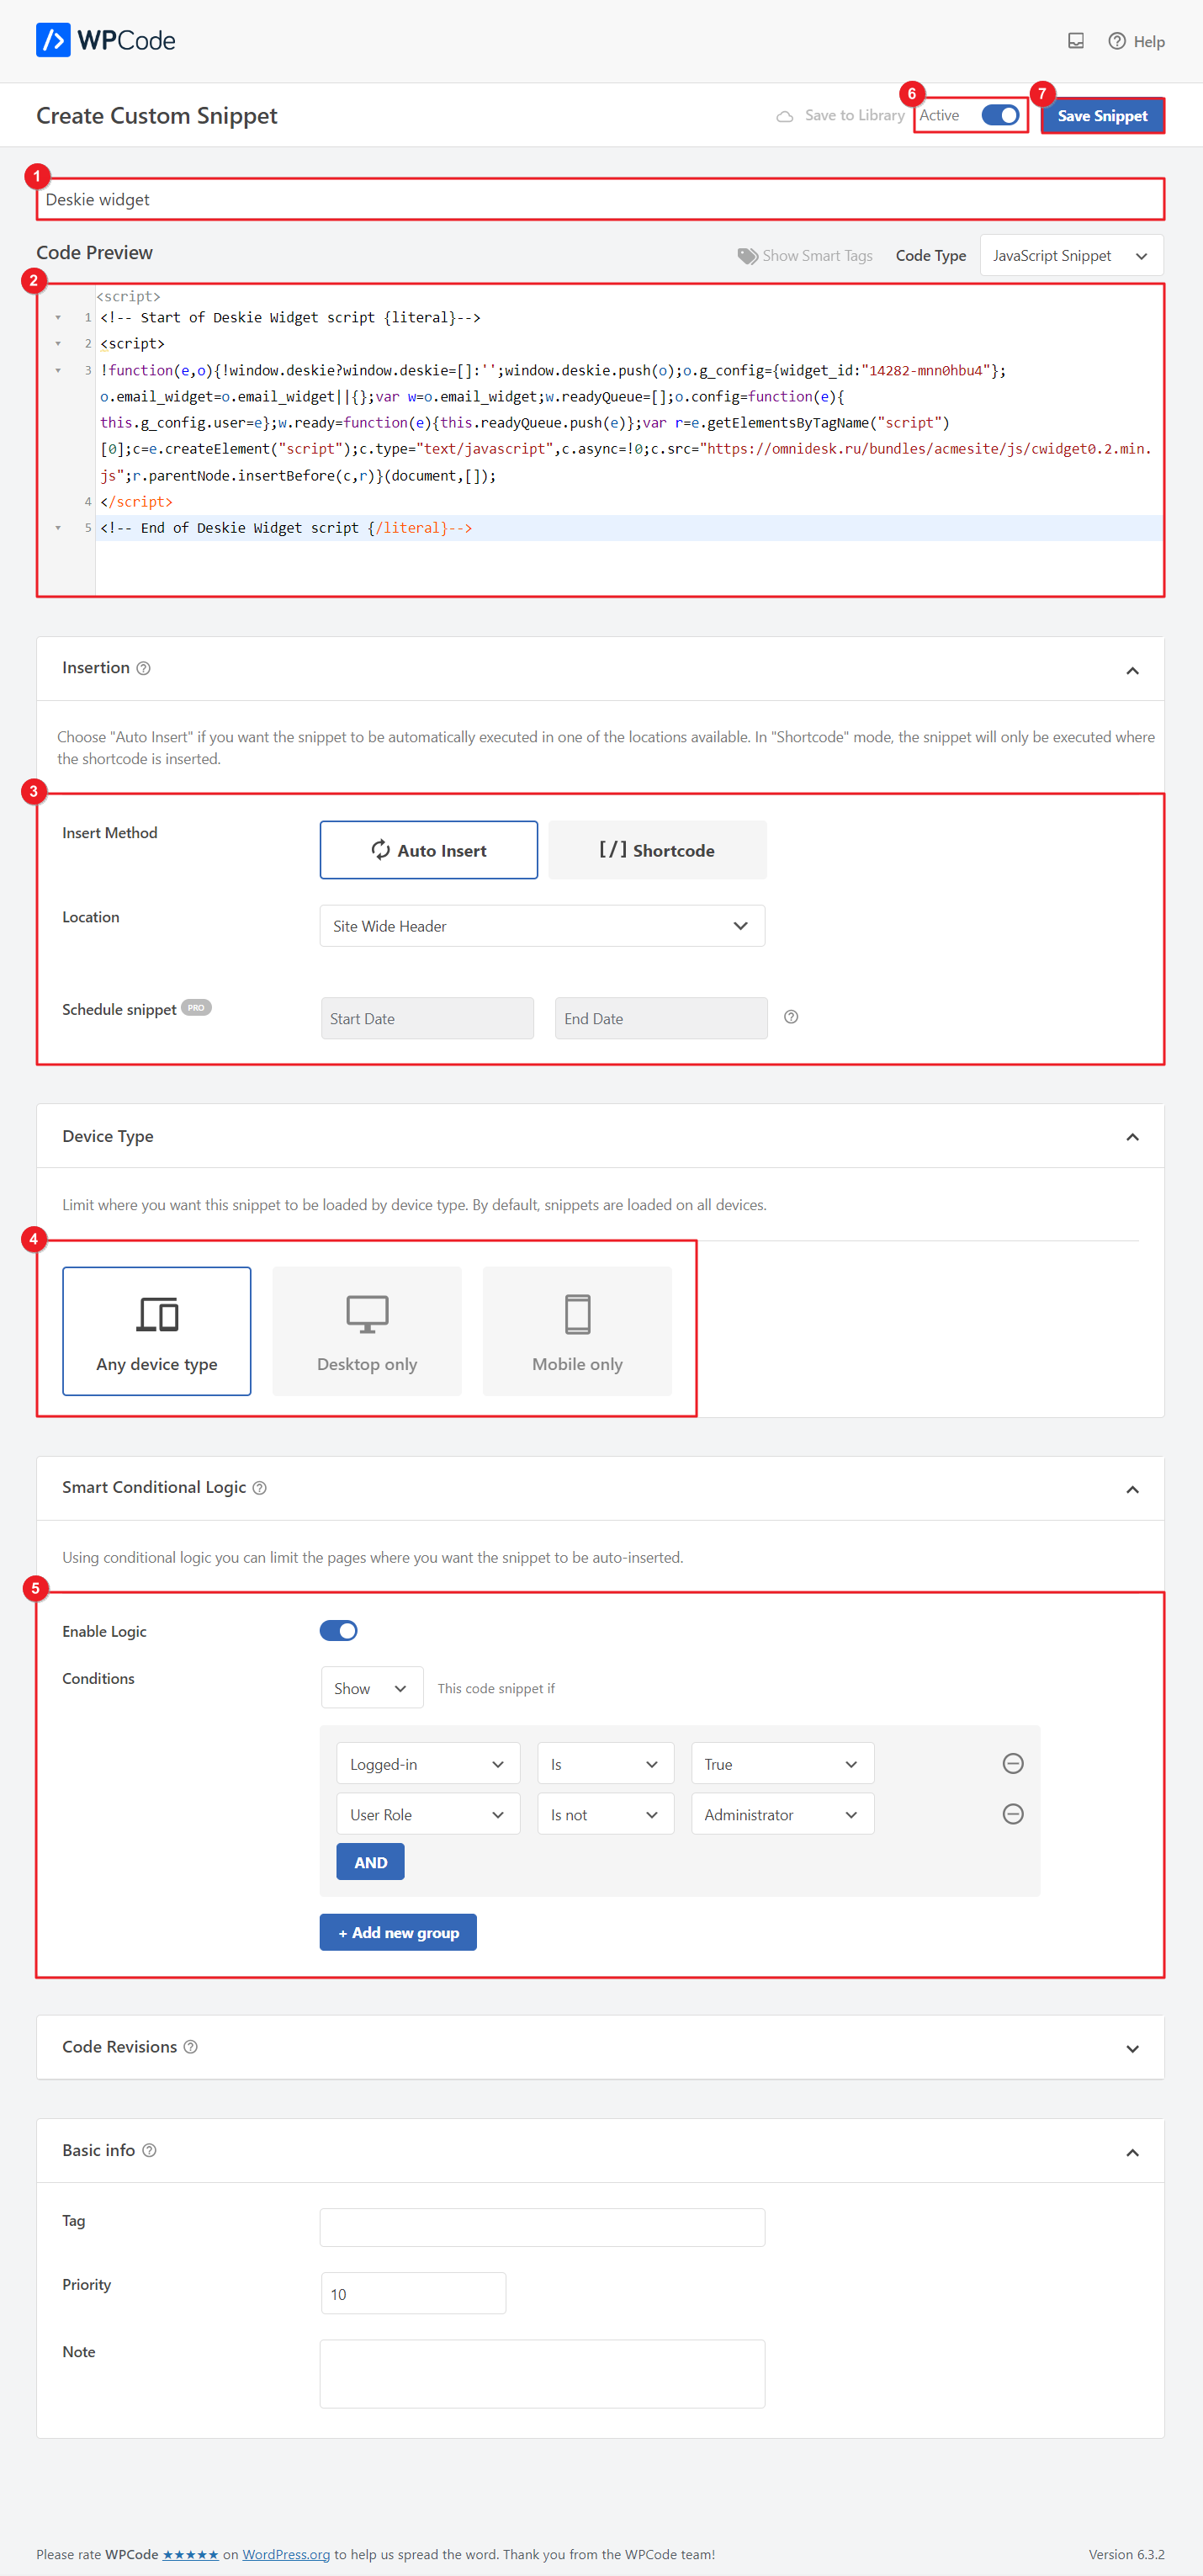
2. Go to Code Snippets → subsection "Add Snippet" → option "Add your custom code" and click Use Snippet.
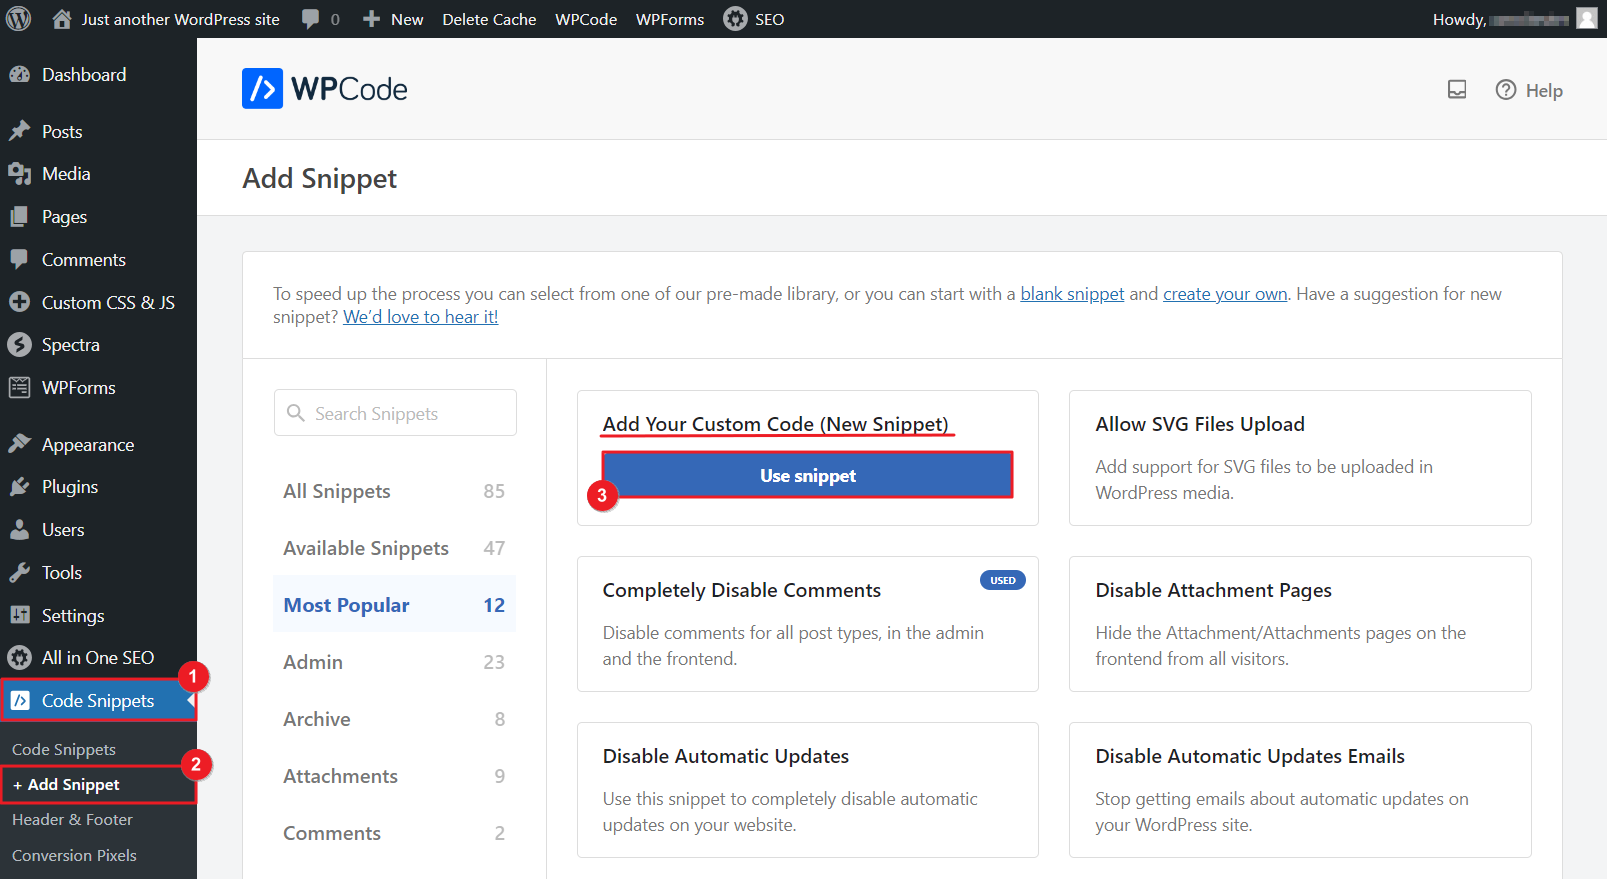
3. Enter the widget name → paste the code in the required format (html with script tags or JavaScript without tags) → select the insert option → select on which devices you want to display the widget on.
You can also configure the logic of displaying only for authorized users, for a certain role, on certain pages, etc. Activate and save the snippet.
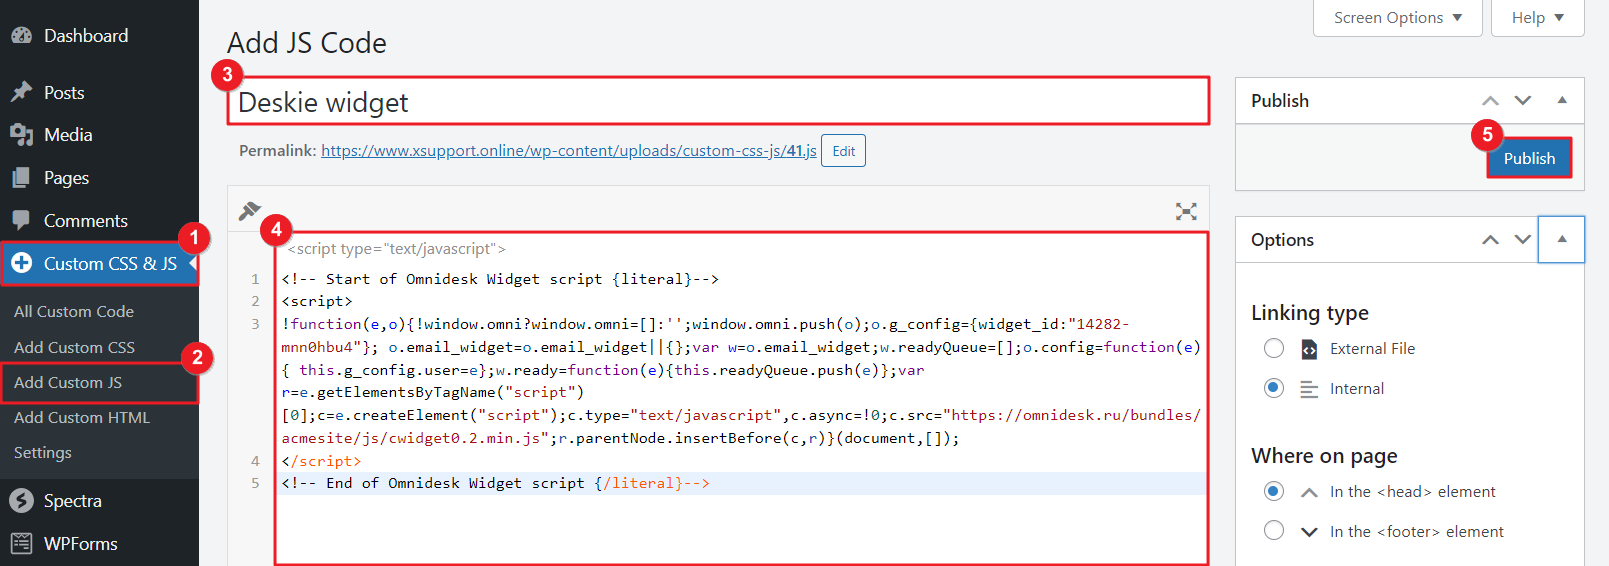
Simple Custom CSS and JS
1. Install the Simple Custom CSS and JS plugin and activate it.
2. Go to the following path: admin console → section "Custom CSS and JS" → subsection "Add Custom JS". Enter a name for the block, paste the Deskie widget code into the text box, and save your changes.