To integrate with Kommo, simply press the "Connect" button on the integration card with Kommo and authorize yourself in your account in the opened modal window.
Choose where to display the data: Select where you want to place the widget from the drop-down list labeled "Panel for displaying data". When the "Information one, along with the user data" option is selected, the data transferred from the integration will be displayed directly below the "Latest cases" block at the bottom of the info panel on the case page. If you select the option "Separate one, for integrations", the data imported from the integration will appear in the integrations tab on the case page — it is the recommended option when dealing with a large amount of data.
Specify who to display the data to : Specify which agents you want to display the widget to from the drop-down list of "Display the integration widget to". You can list specific agents or groups.
Displaying data
Once the integration is enabled, the case page displays data from Kommo in the right sidebar. The amount of data depends on what's in Kommo. Let's take a closer look at the possible options.
1) If there is no such contact in Kommo yet (the user of the current case), then we give the opportunity to quickly create a contact:
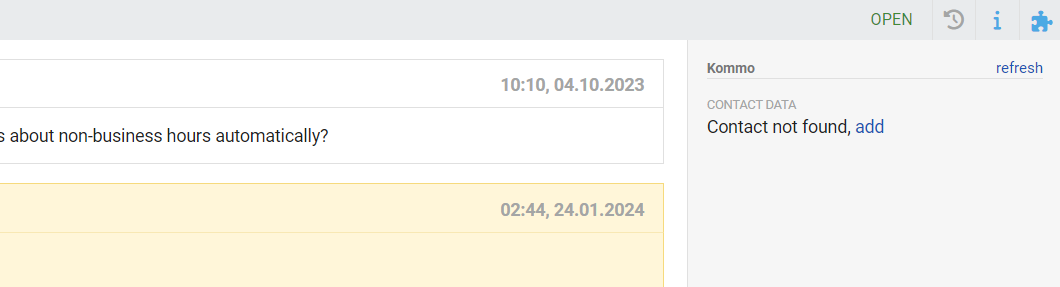
Clicking the "add" link automatically creates the contact and opens a new tab with the created contact so you can enter additional details.
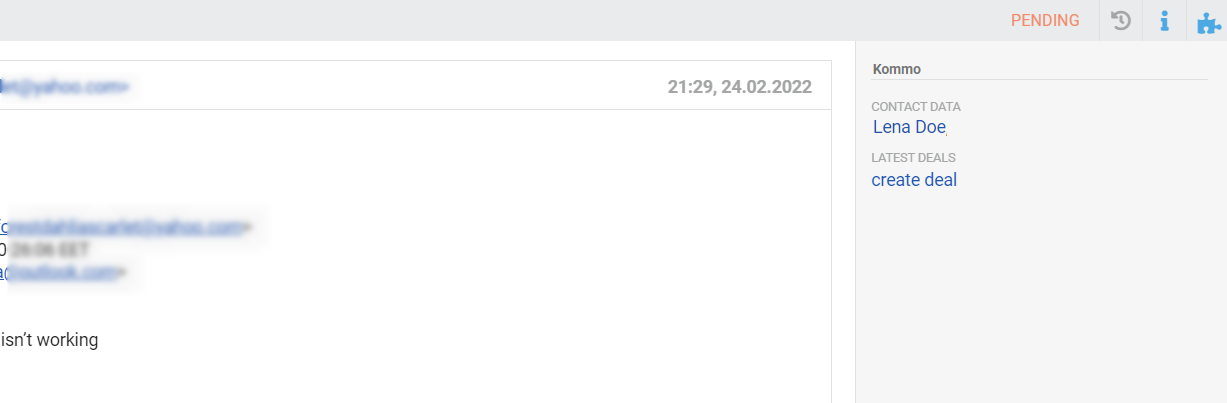
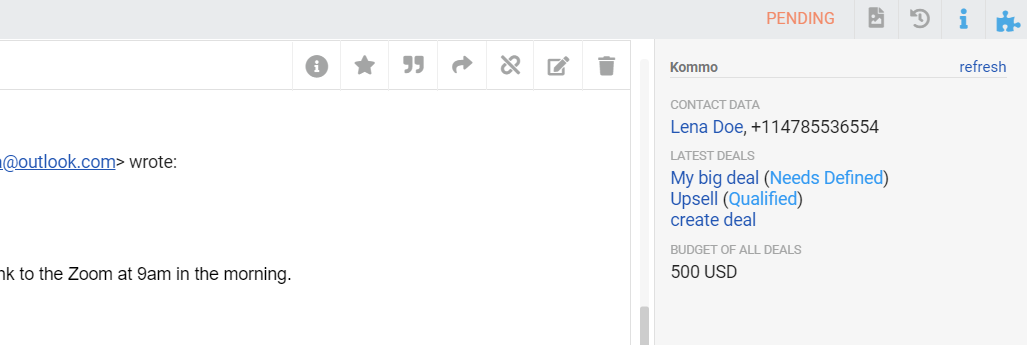
2) If there is a contact, but there are no deals, then an additional item appears — "Latest deals", which has a link to create a deal:
3) If there are deals, all widget items are displayed:
Contact data (full name and phone number, with the name being a link to the contact page in Kommo);
Latest deals (up to three deals, the name of the deal is a link to the deal page in Kommo + the stage of the funnel is displayed in brackets);
Budget of all deals (taking into account their currencies).
4) The presence of tasks in Kommo is displayed using circles in front of the contact name or deal name, depending on what the task belongs to.
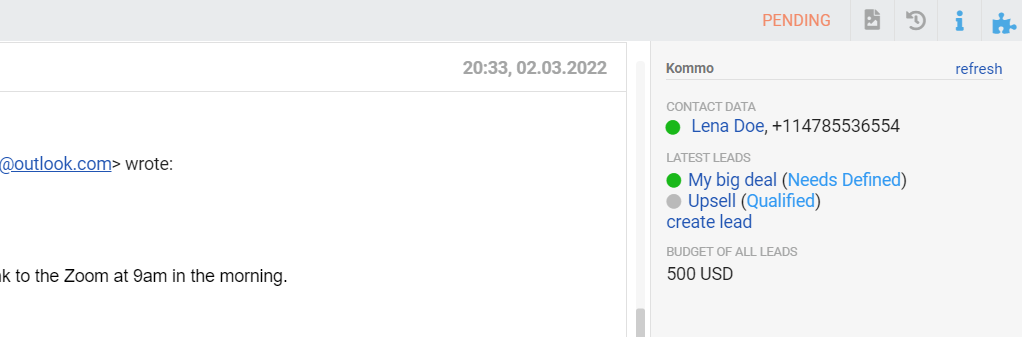
Circles can be of three colors:
red (expired);
green (deadline today);
gray (there is still time before the deadline).
When you hover over the circle, a tooltip appears regarding the deadline date of the nearest task.
5) We check the presence of the contact in Kommo by email address and phone number. However, in both Deskie and Kommo, a single contact can have multiple email addresses, so we check all email addresses from Deskie and Kommo.
a. If there is one contact in Kommo with several email addresses, and we have separate users registered under these addresses, then we display the same data from Kommo for each user.
b. If Kommo has multiple contacts and we have one user with multiple addresses, then we display:
in the "Contact data" field, several contacts, each on a new line;
in the field "Latest deals" three recent deals of all contacts;
in the "Budget of all deals" field, the total amount for all contacts.
Reverse integration
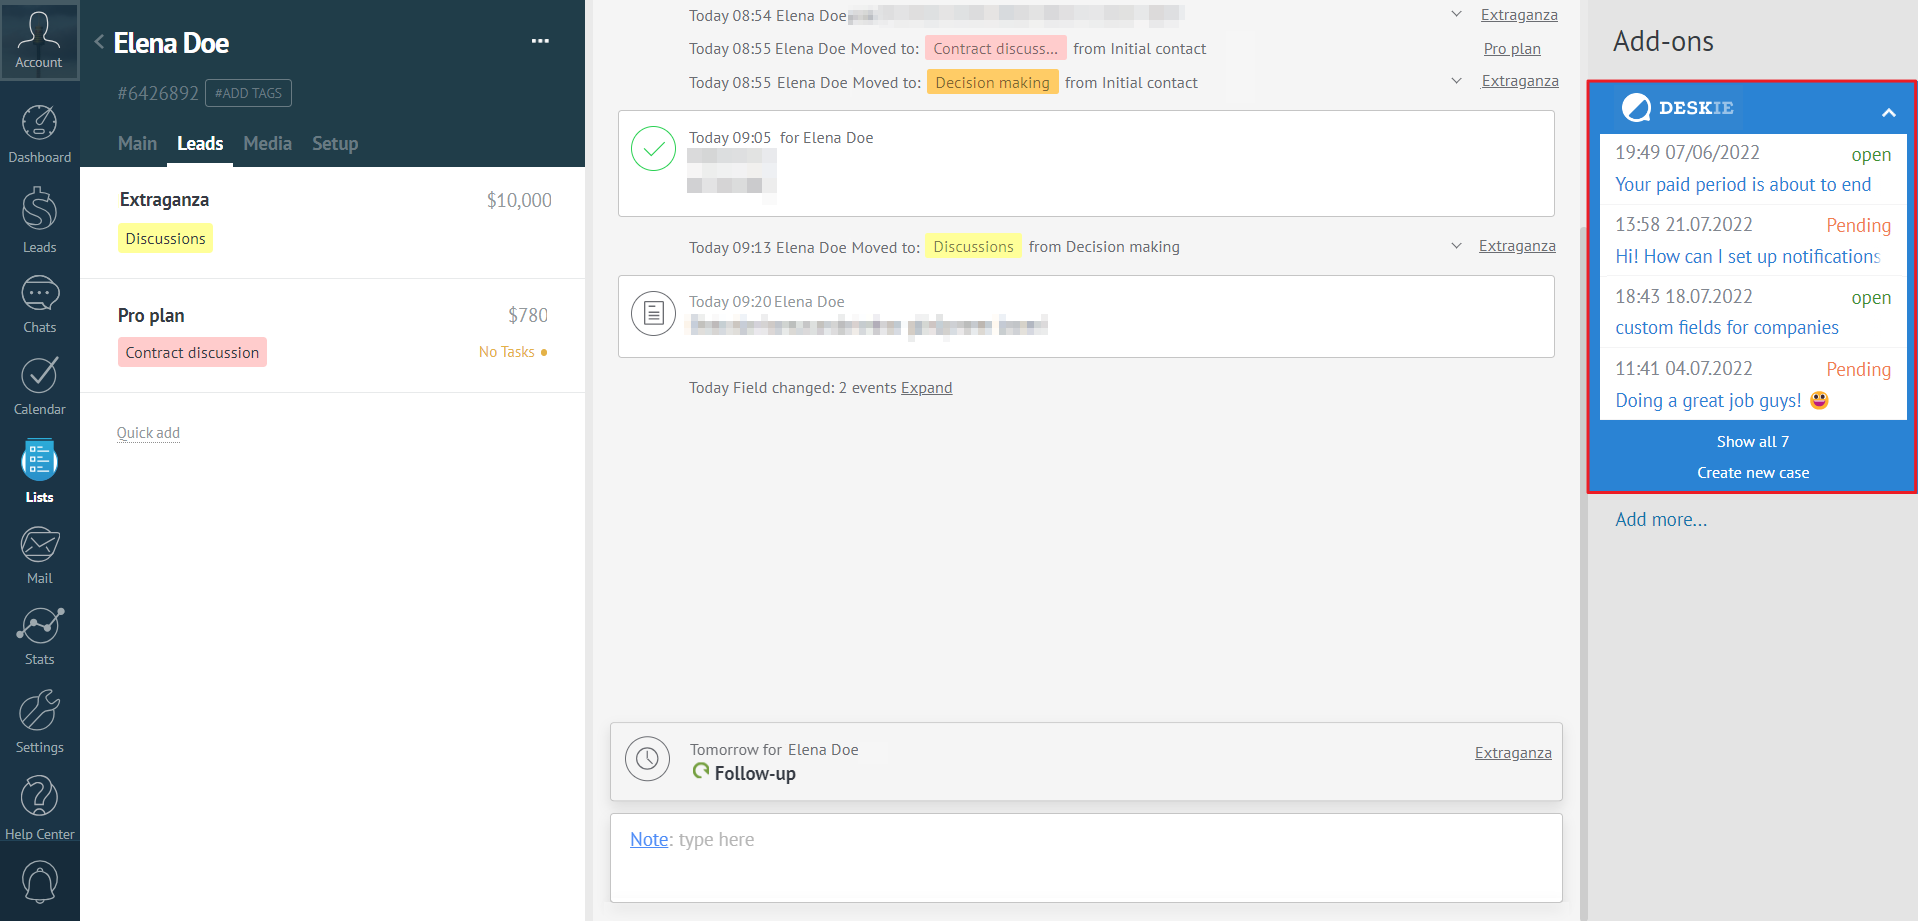
After connecting the Deskie widget in Kommo, the contact, company, and deal pages display the current user(s) cases and their statuses, as well as a link for a quick transition to creating a new case based on the contact:
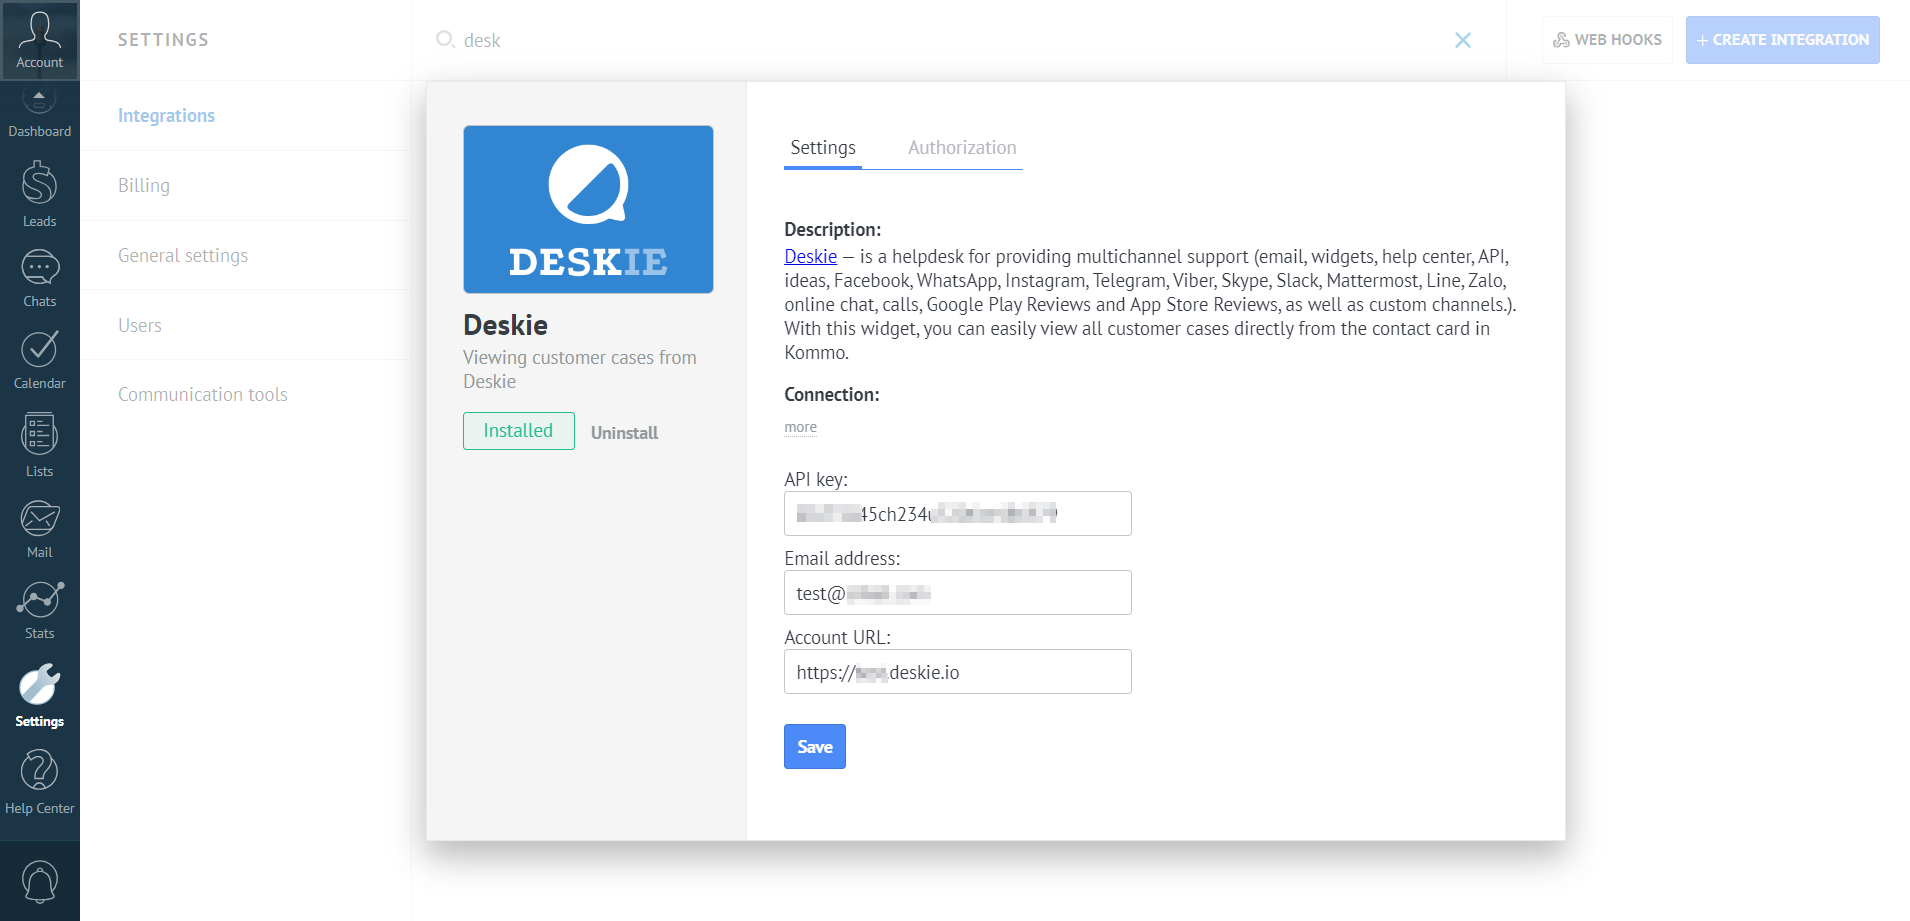
To connect the Deskie widget to Kommo:
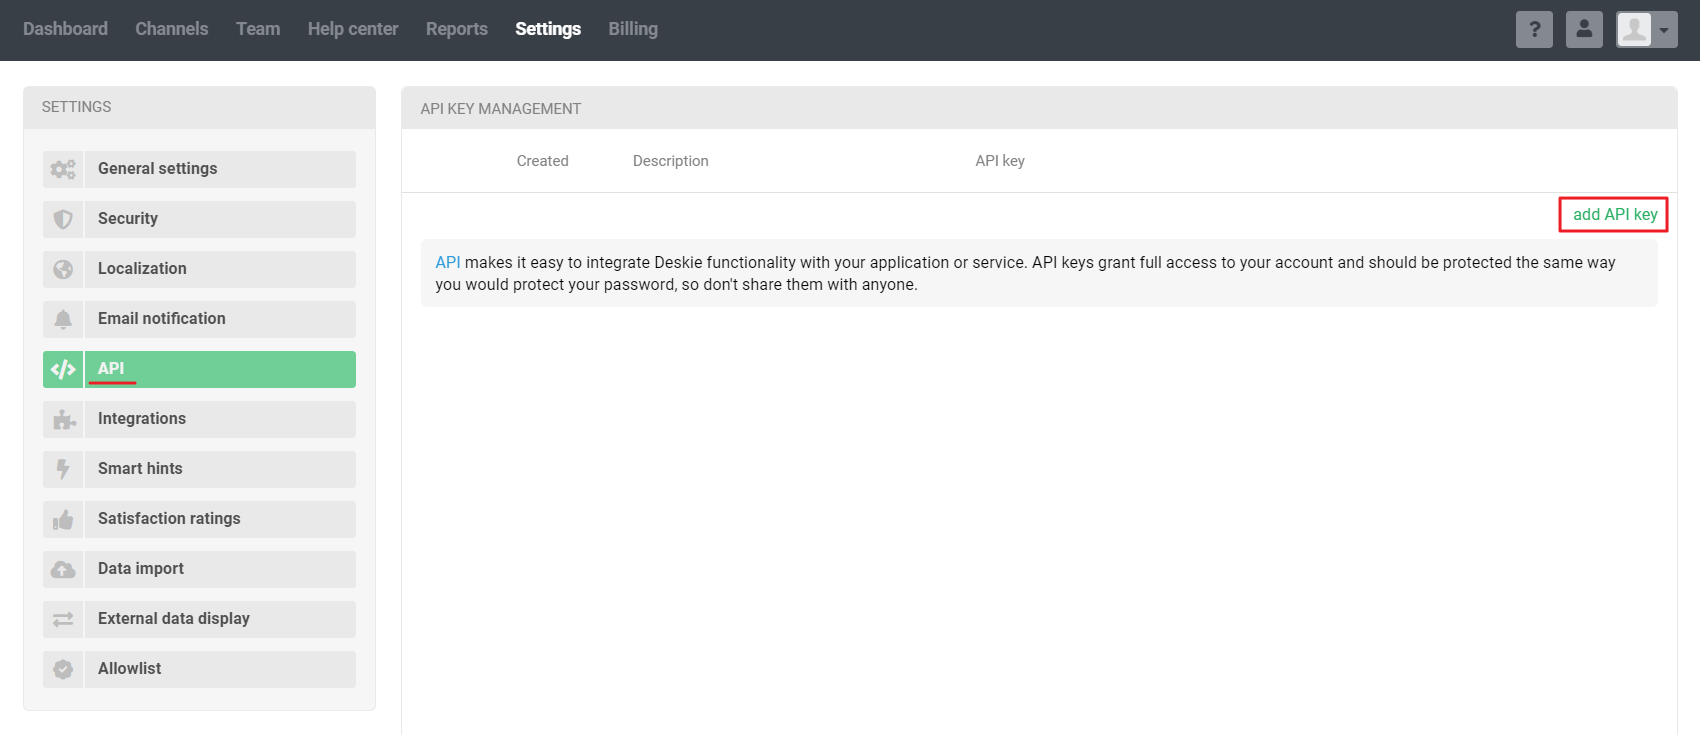
1) Create an API key in Deskie (administrator account — "Settings" section — "API" subsection):
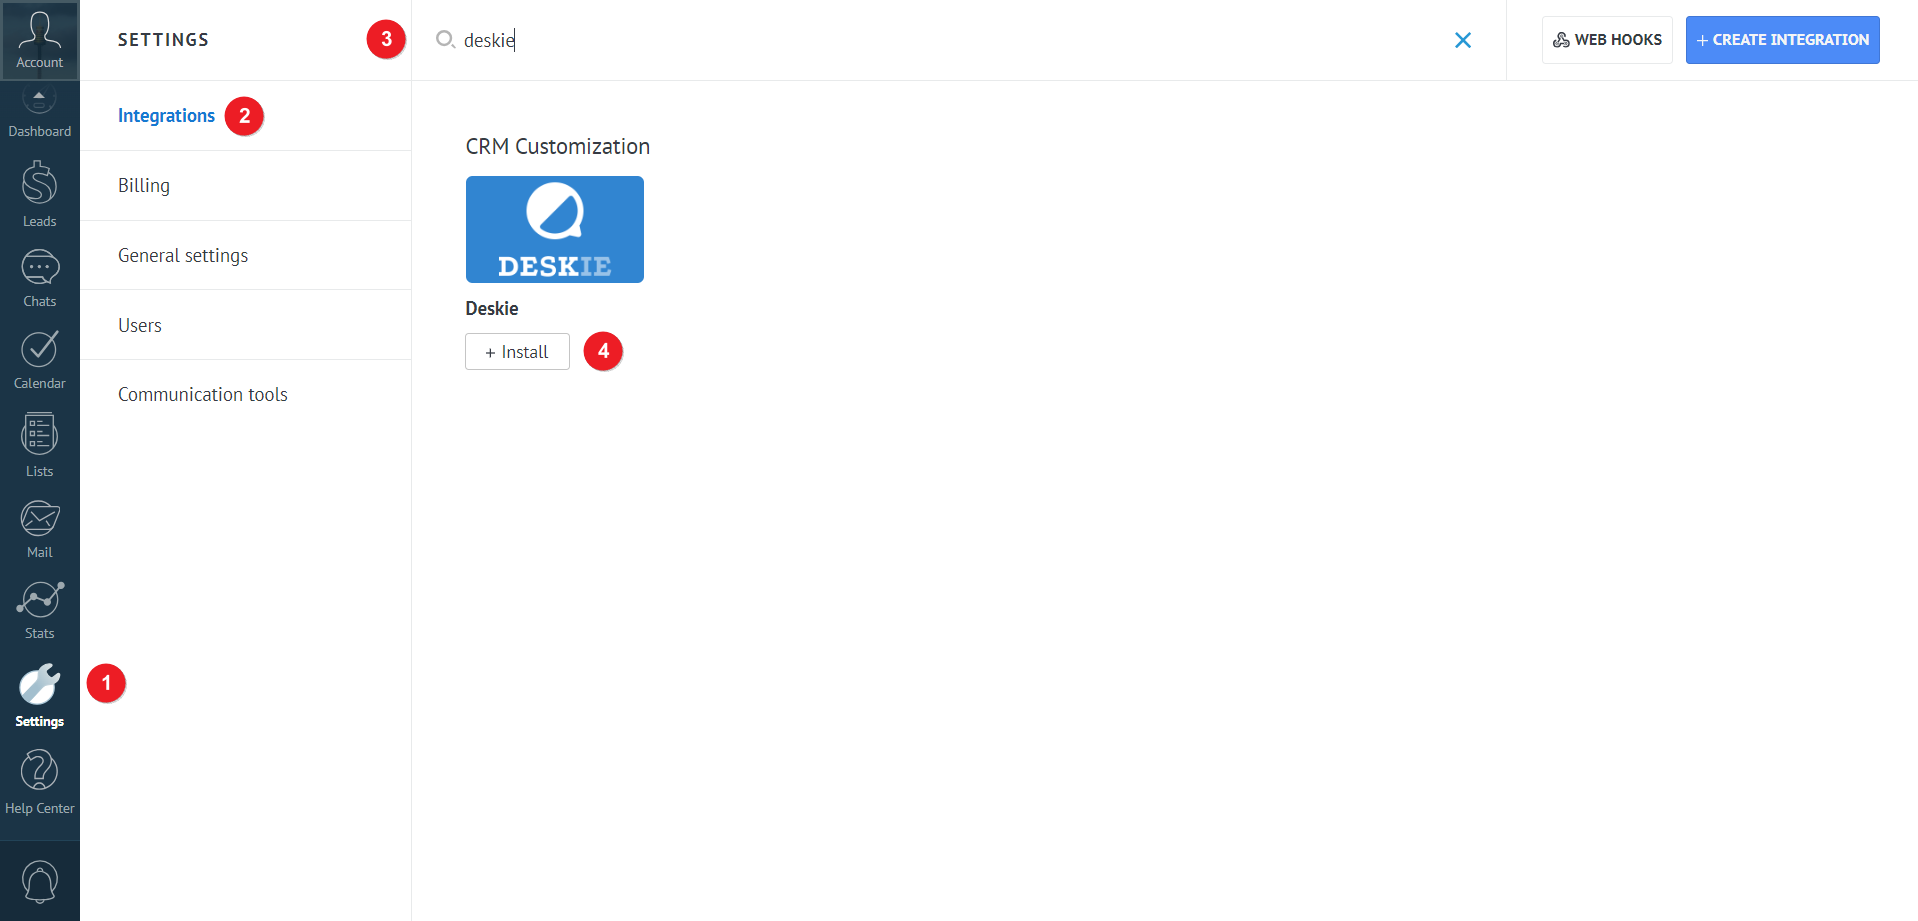
2) Add the widget to your Kommo account by following these steps: Kommo admin account — "Settings" — "Integrations" — search bar — "Deskie" — "Install" .
To connect a widget, specify:
created API key;
agent's email address in Deskie;
The URL of your account in Deskie (you can specify the URL both with our domain (https://[your_subdomain].deskie.io) and without it if you use your own domain).