1. Quick macro creation from the response and note form
Previously, you could create a macro only in the corresponding subsections of the administrator's or agents' accounts. That is, if the agent prepared a good answer, which may be useful in the future, he/she had to copy the text, go to the subsection "Macros", add the necessary actions and create a macro.
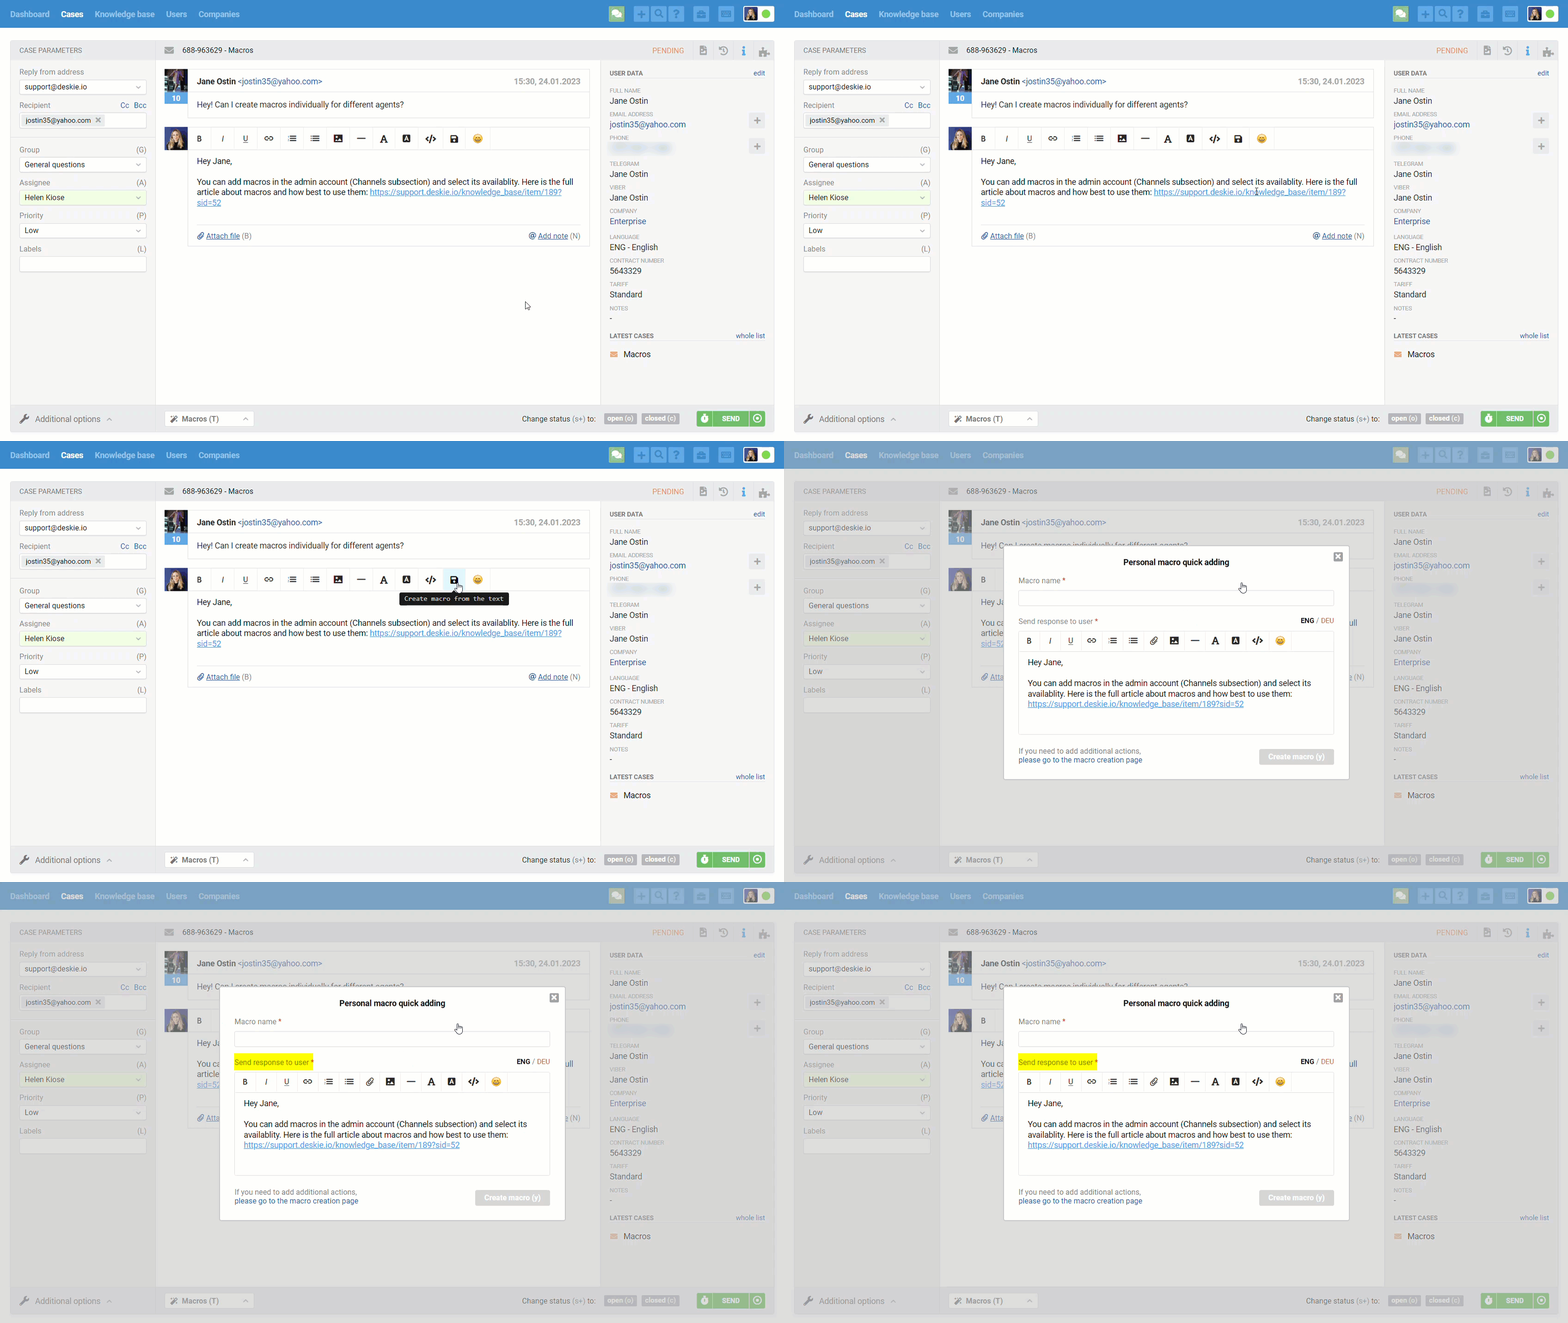
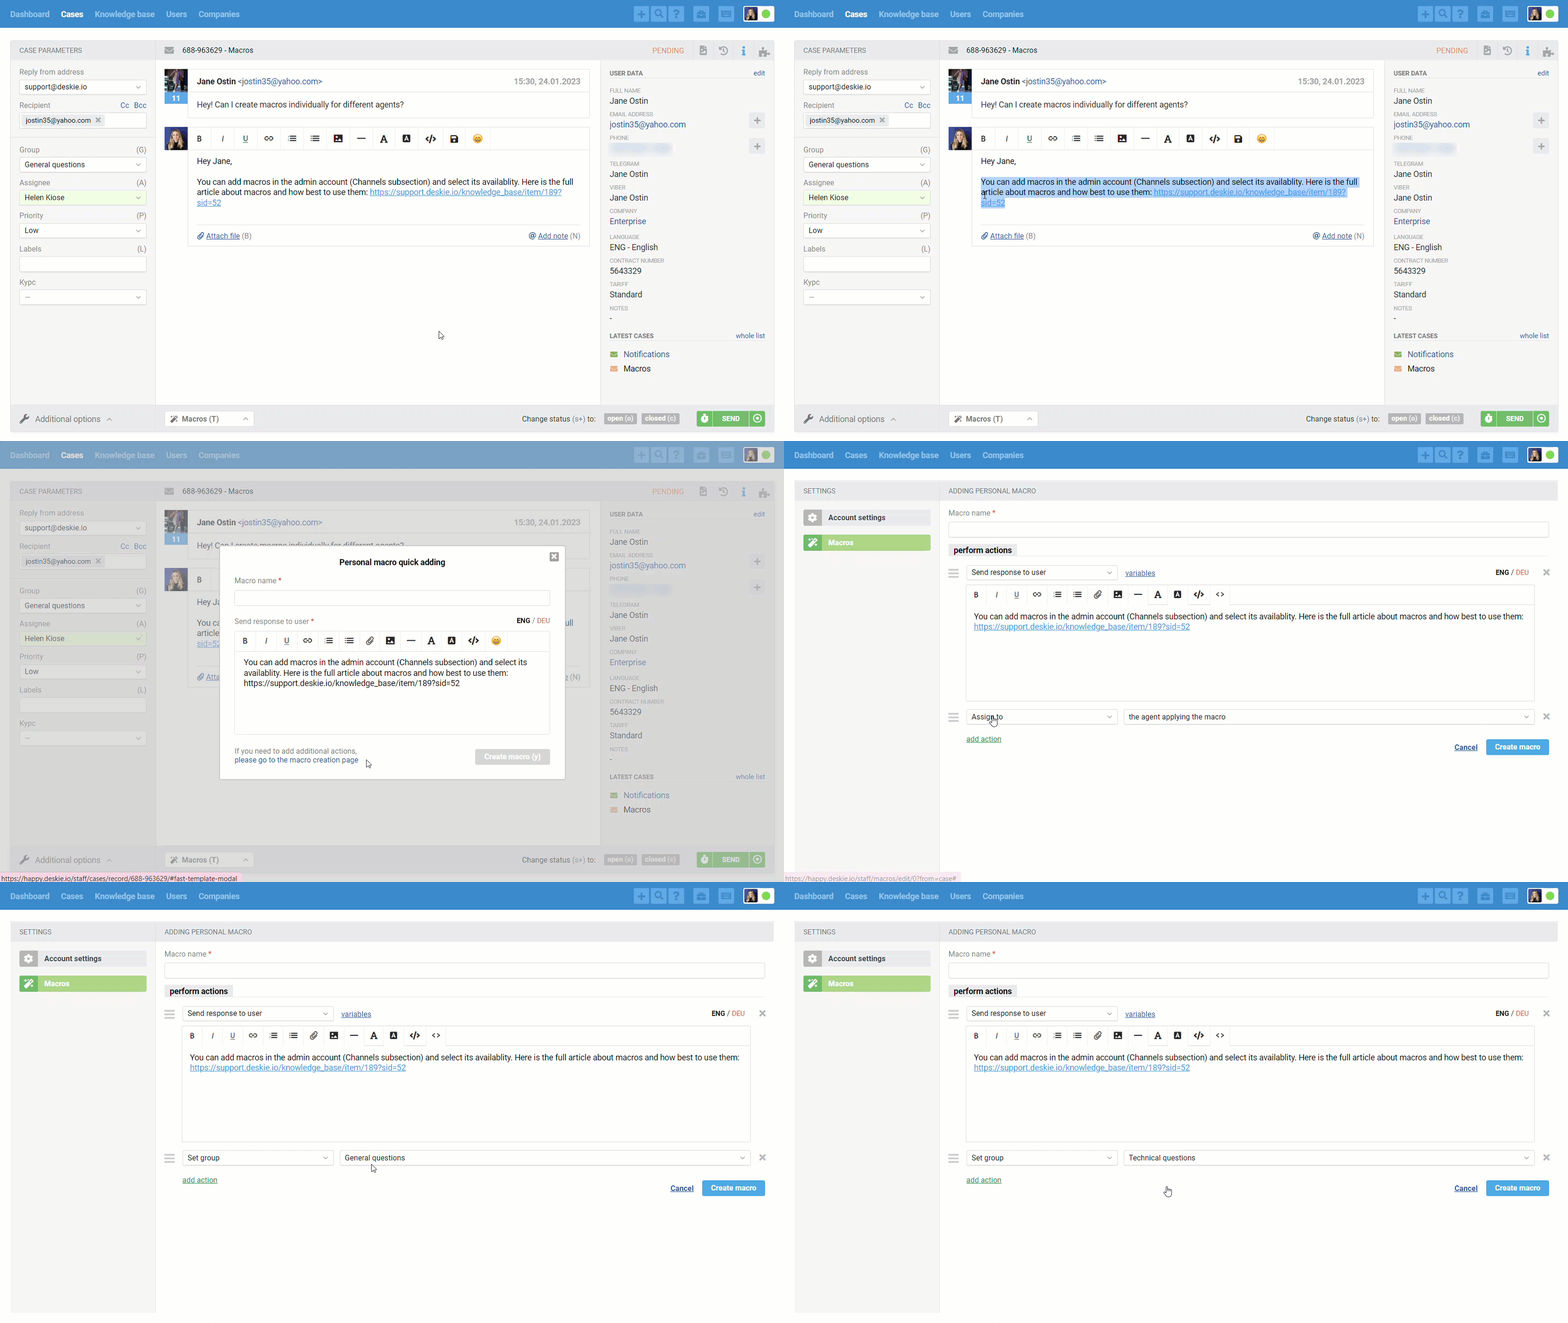
Now you can create macros much faster — just click on the appropriate button in the field for writing a response or note.


The button appears when an agent has typed more than 20 characters.
a) If you click on the button in the response box, a modal window will open to create a macro with the "Send response to user" action.
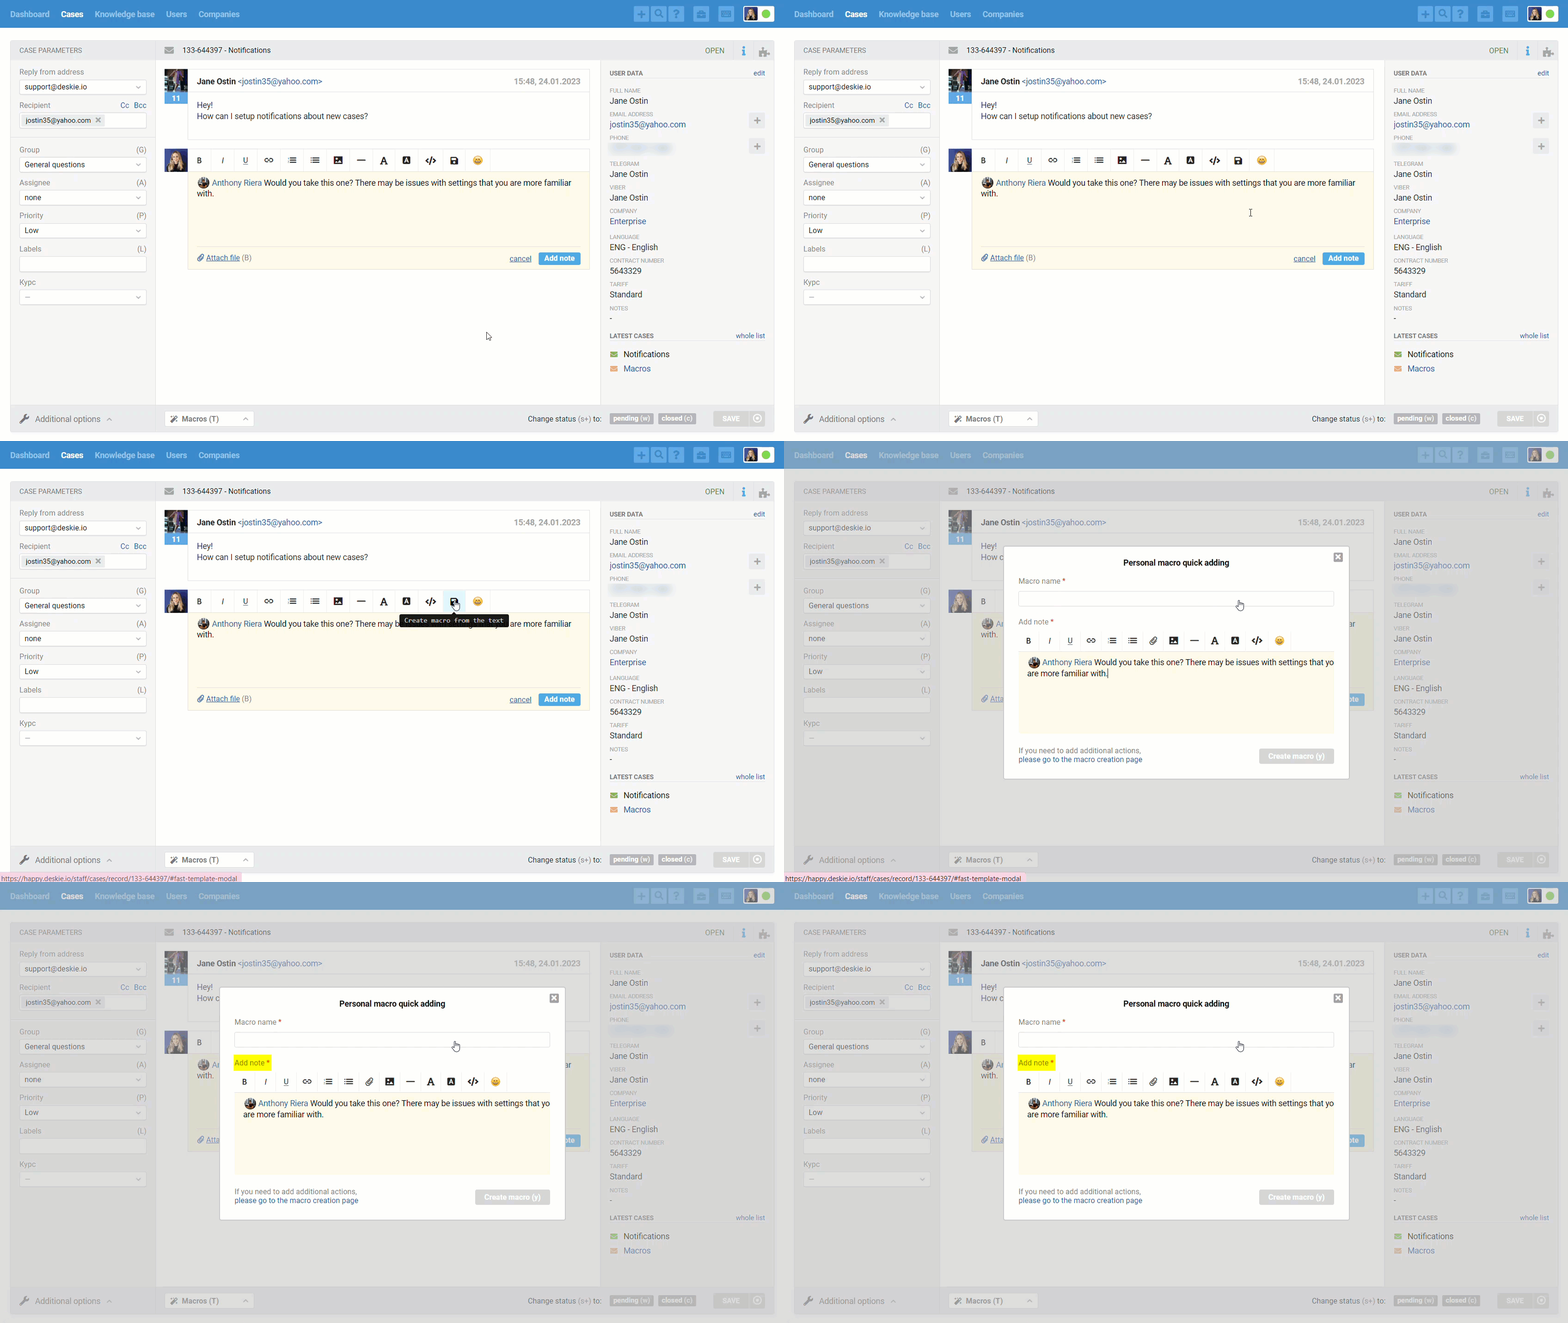
b) If you click on the button in the note writing form, a modal window will open to create a macro with the "Add Note" action.
c) If you don't want to add all the text to the macro, select the desired part before clicking the button.
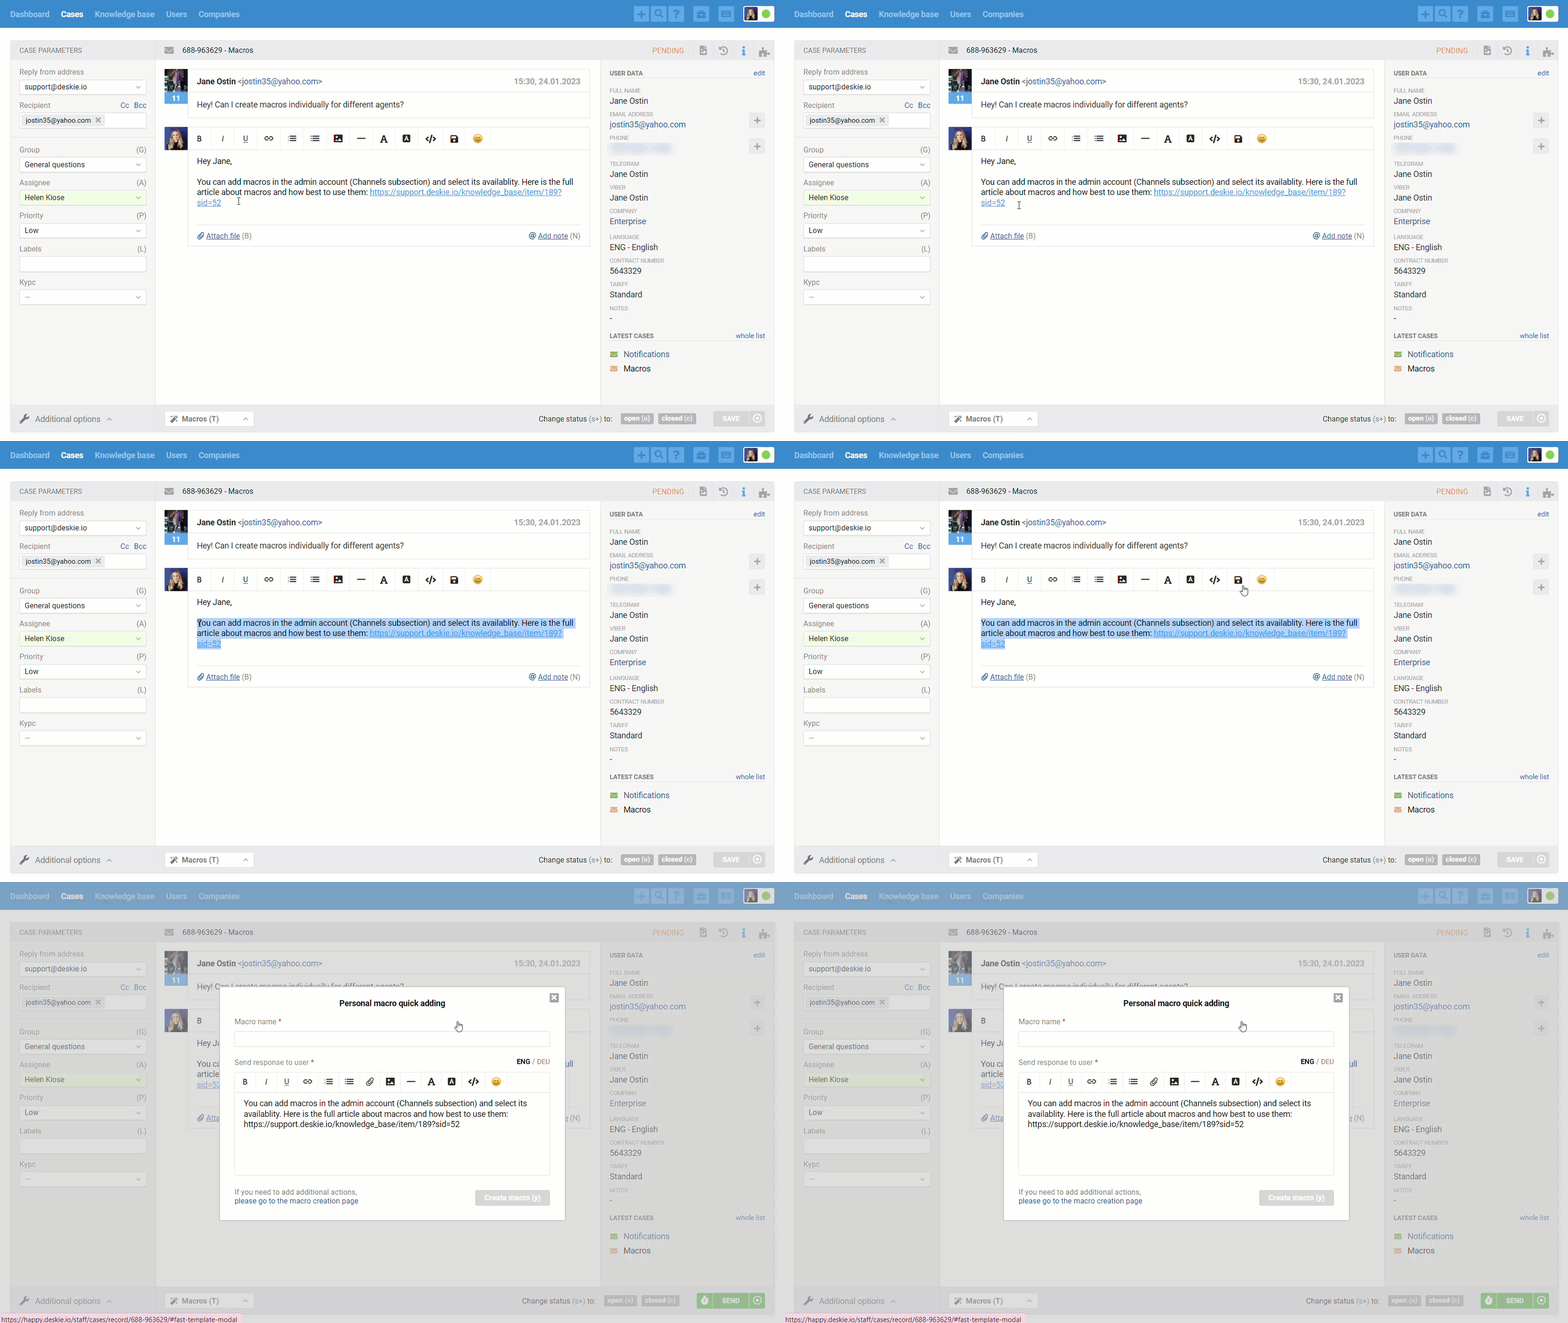
d) If the macro does not need any additional actions, specify the name of it and click the "Save" button to create the macro.
If you want to add other actions to the macro, click the link in the lower left corner to go to the full macro creation form, which will already add the "Send response to user" or "Add note" action.
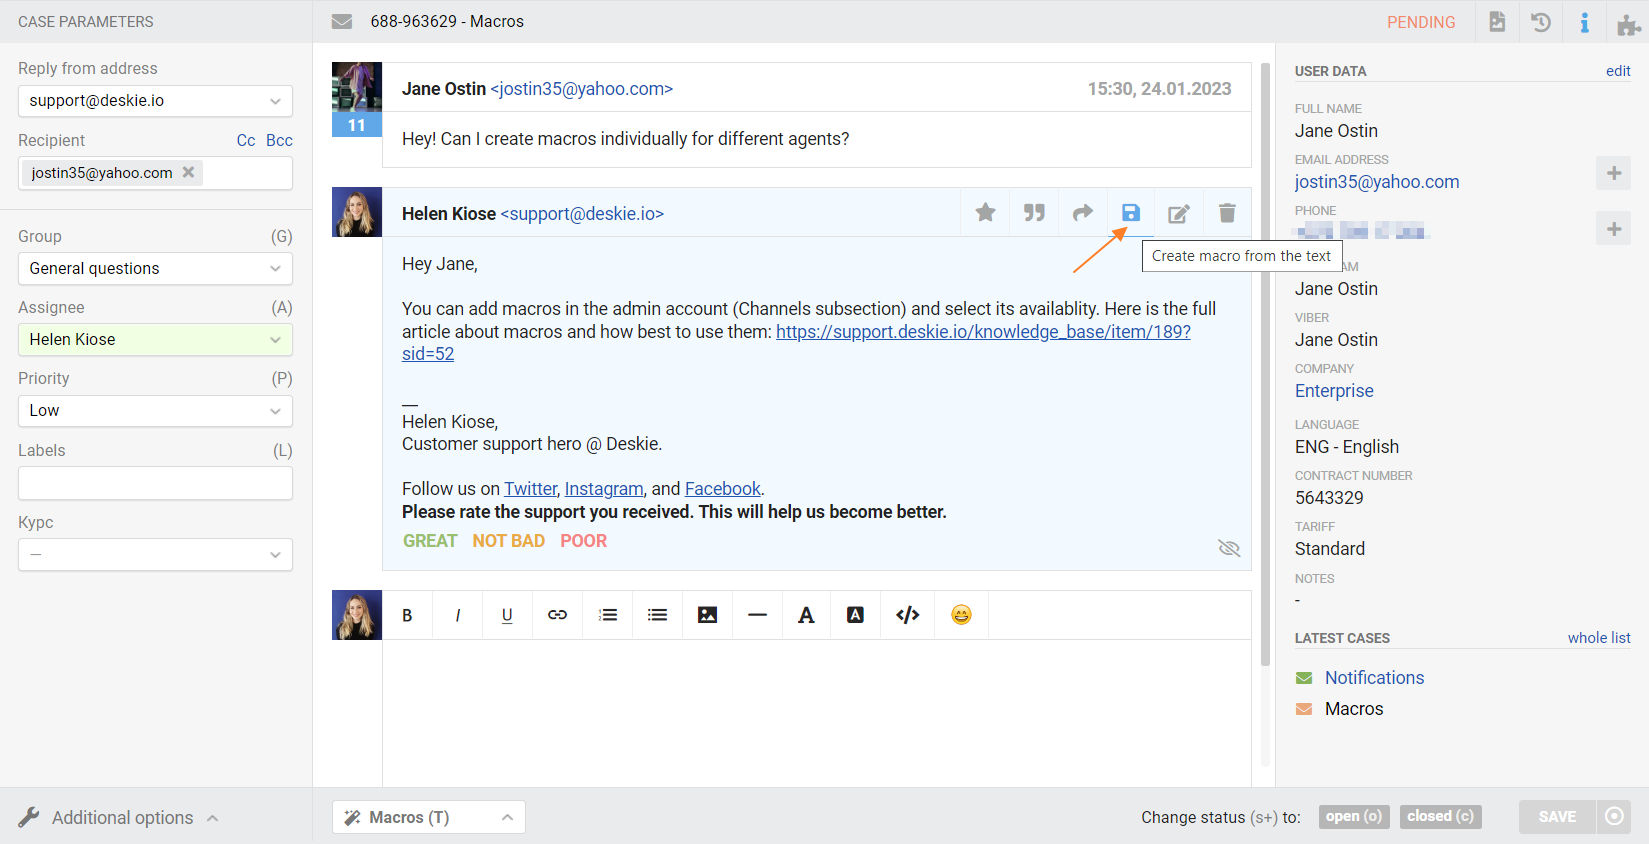
e) In cases via asynchronous channels (email, posts and comments from social networks, custom asynchronous channels) agents can create macros based on sent responses and added notes by clicking the appropriate icon when hovering over the response or note.
2. Attaching files to macros
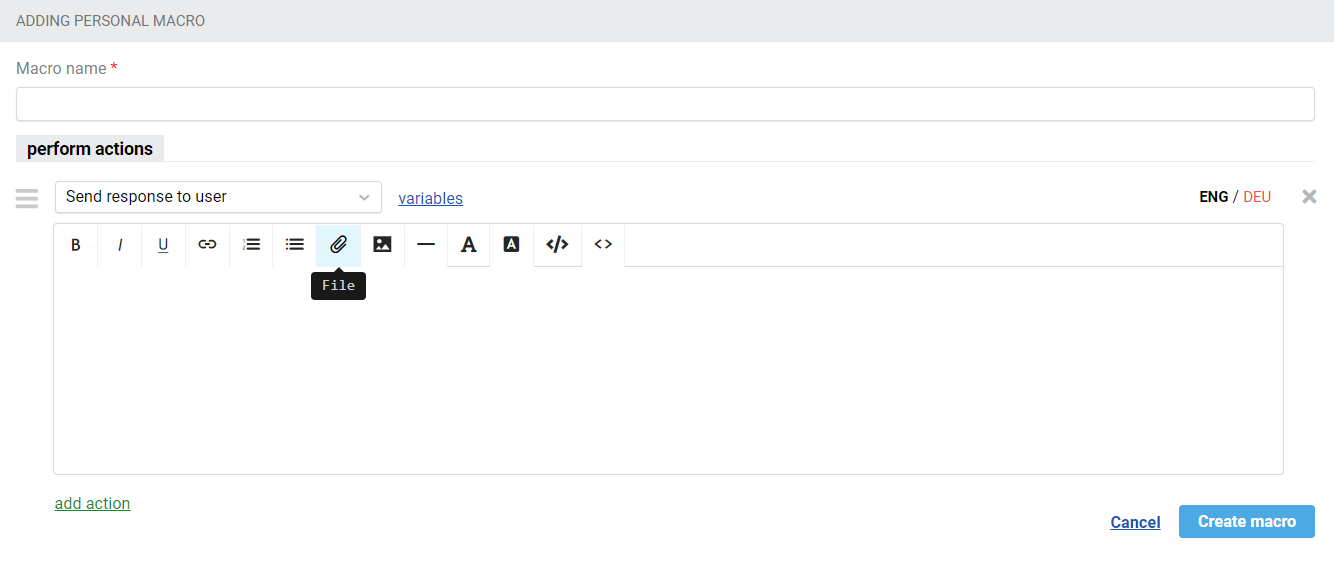
So far, in macros, you have only been able to specify links to files in cloud storage. However, in some situations it is still more convenient to attach files instead of specifying links to them. Therefore, in the editor for macro responses/notes there is a separate button for adding files.
