The Skype channel connects through a bot that represents your company. If your customers want to reach you via this channel, they can add the bot to their contacts, and they will be able to contact you anytime when questions arise.
As of October 31, 2019, the Skype channel no longer accepts new Bot publishing requests. This means that you can continue to develop bots using the Skype channel, but your bot will be limited to 100 users. You will not be able to publish your bot to a larger audience. If you have more users who will use this channel, you will need to create an additional bot and give new users a link to it.
To create a new bot and connect it to Deskie:
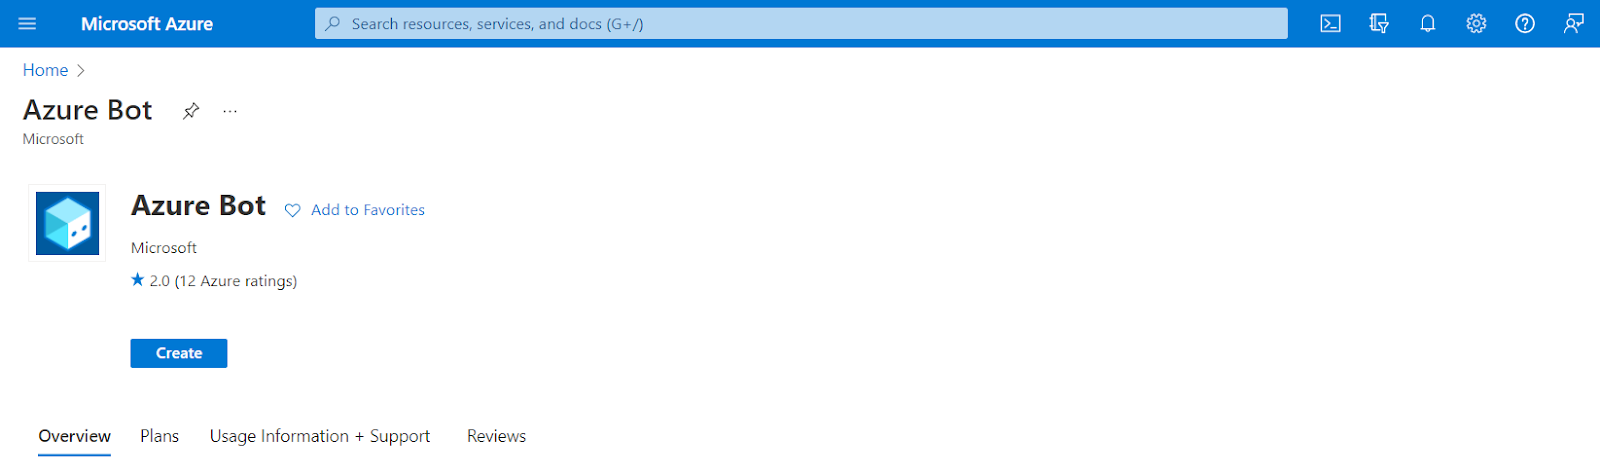
1. Go to the bot creation page on the Microsoft Azure website and click “Create”. If you don’t have a Microsoft account, you’ll need to sign up first.
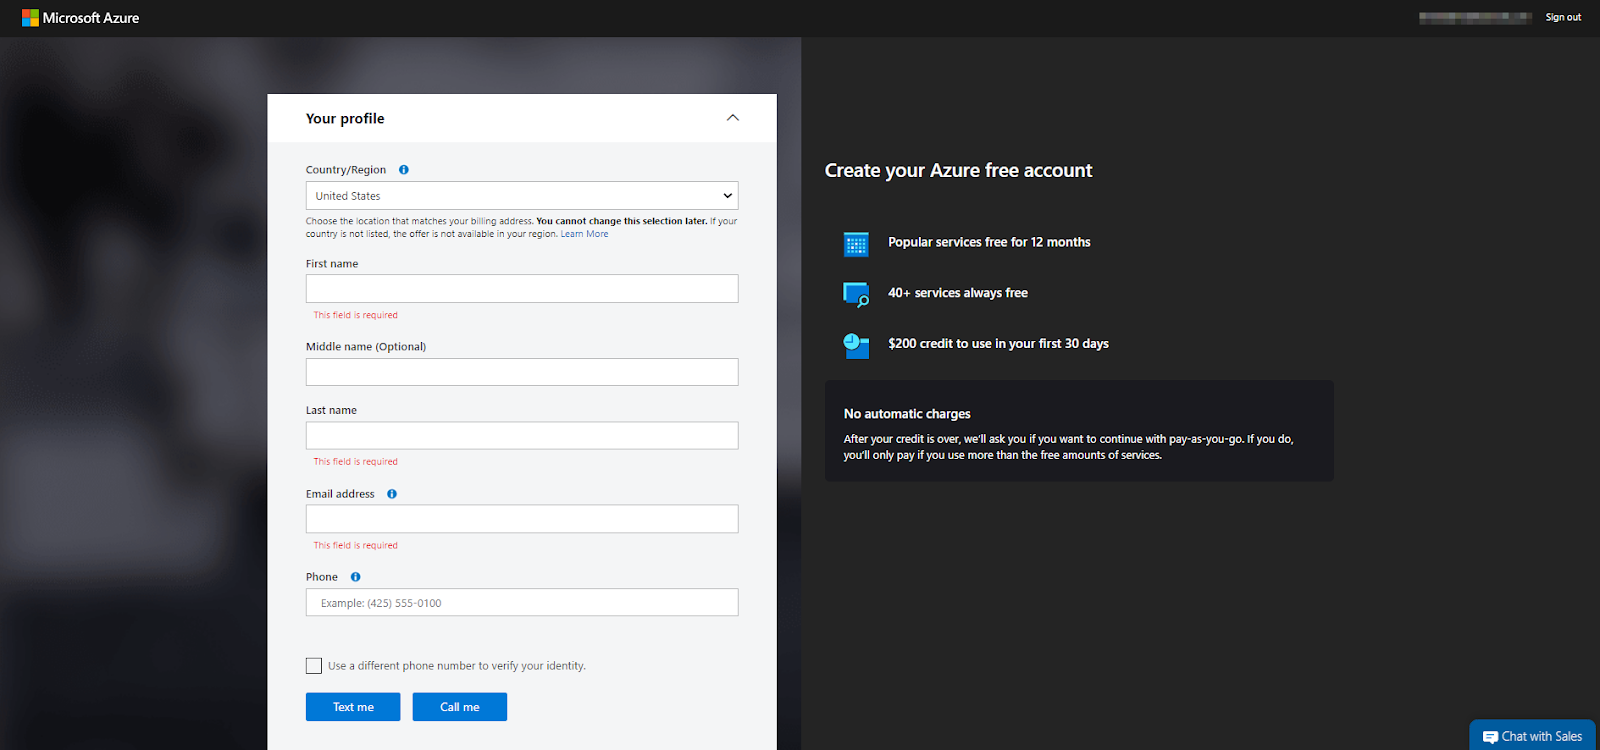
2. If you do not have a Microsoft Azure subscription, you need to register and get one.
Note: During the registration process, you will be required to enter a phone number and credit card information to verify your account (when creating a bot, you can choose a free or advanced usage plan depending on the tasks).
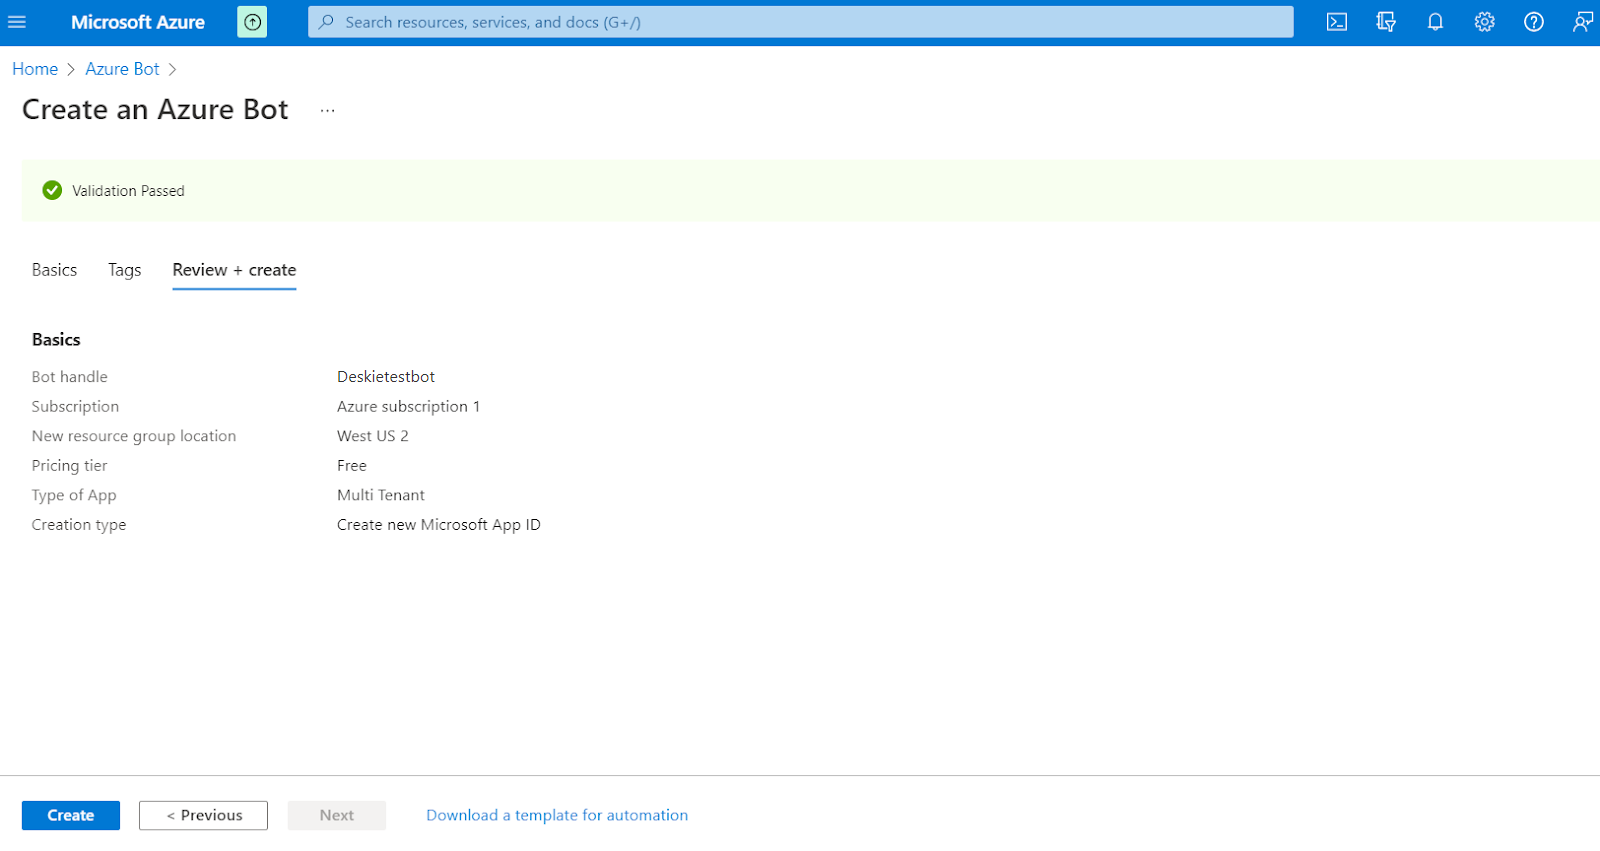
3. After authorization in Microsoft Azure, a form for creating a bot will open. Enter the name of the bot — select a resource group or create a new one — select a price category (Category Free - free) — select Multi Tenant from the dropdown “Type of App” and click “Review+create”.

4. After receiving a notification that the verification has passed, click “Create”.
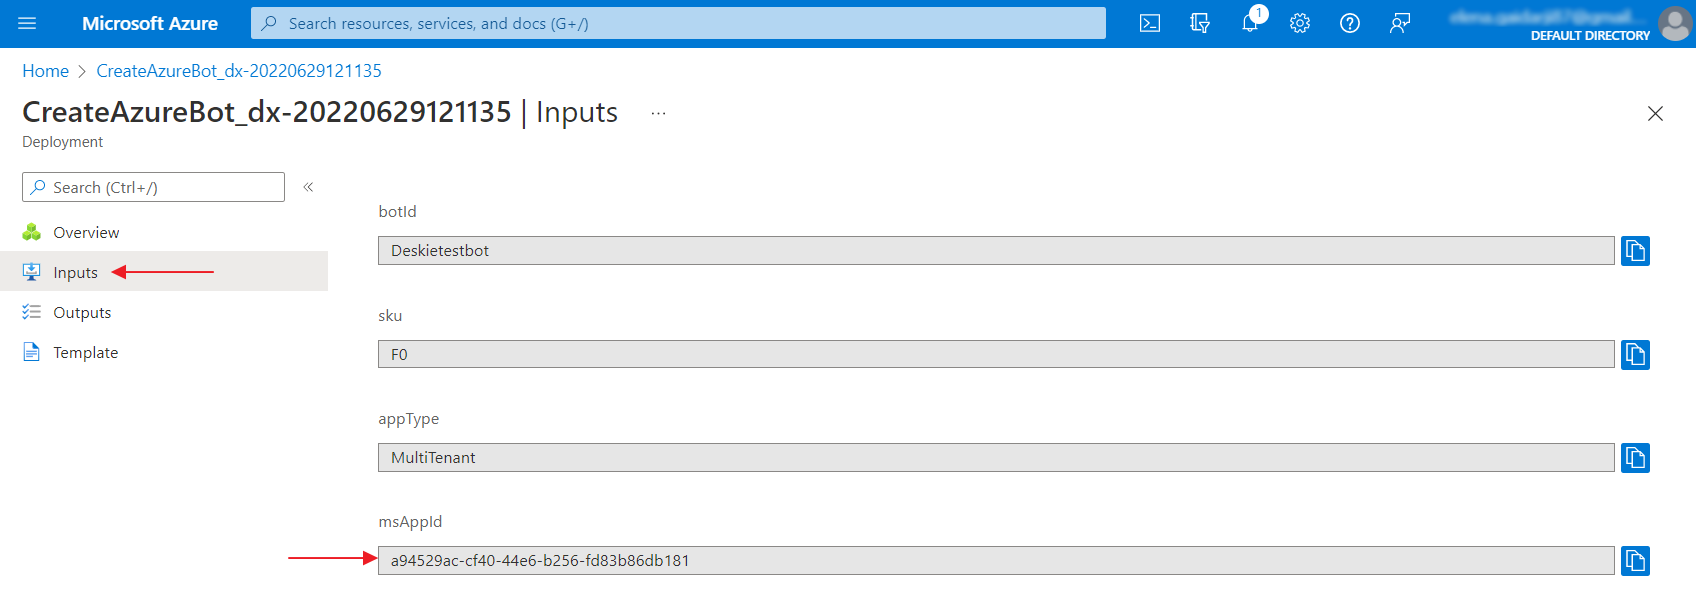
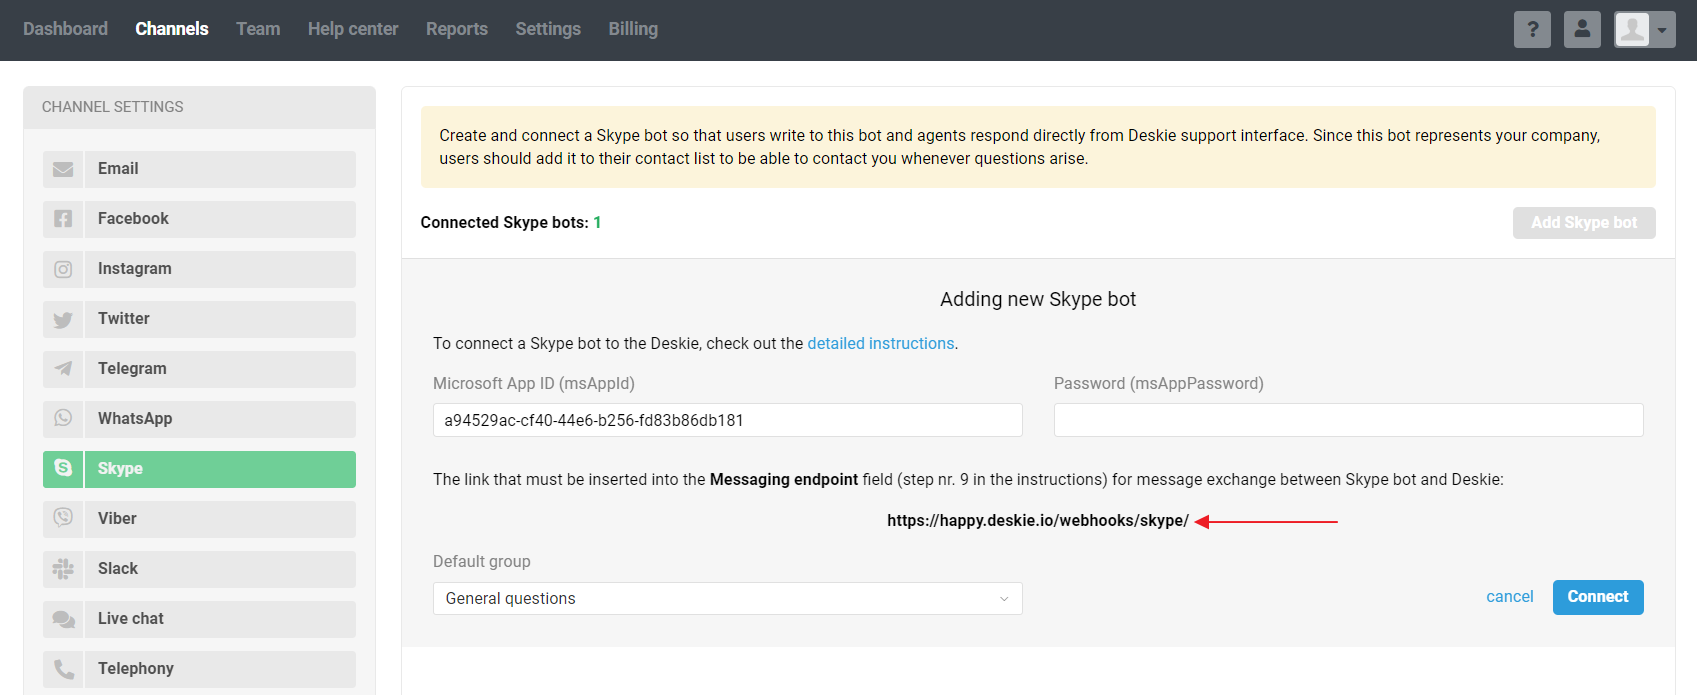
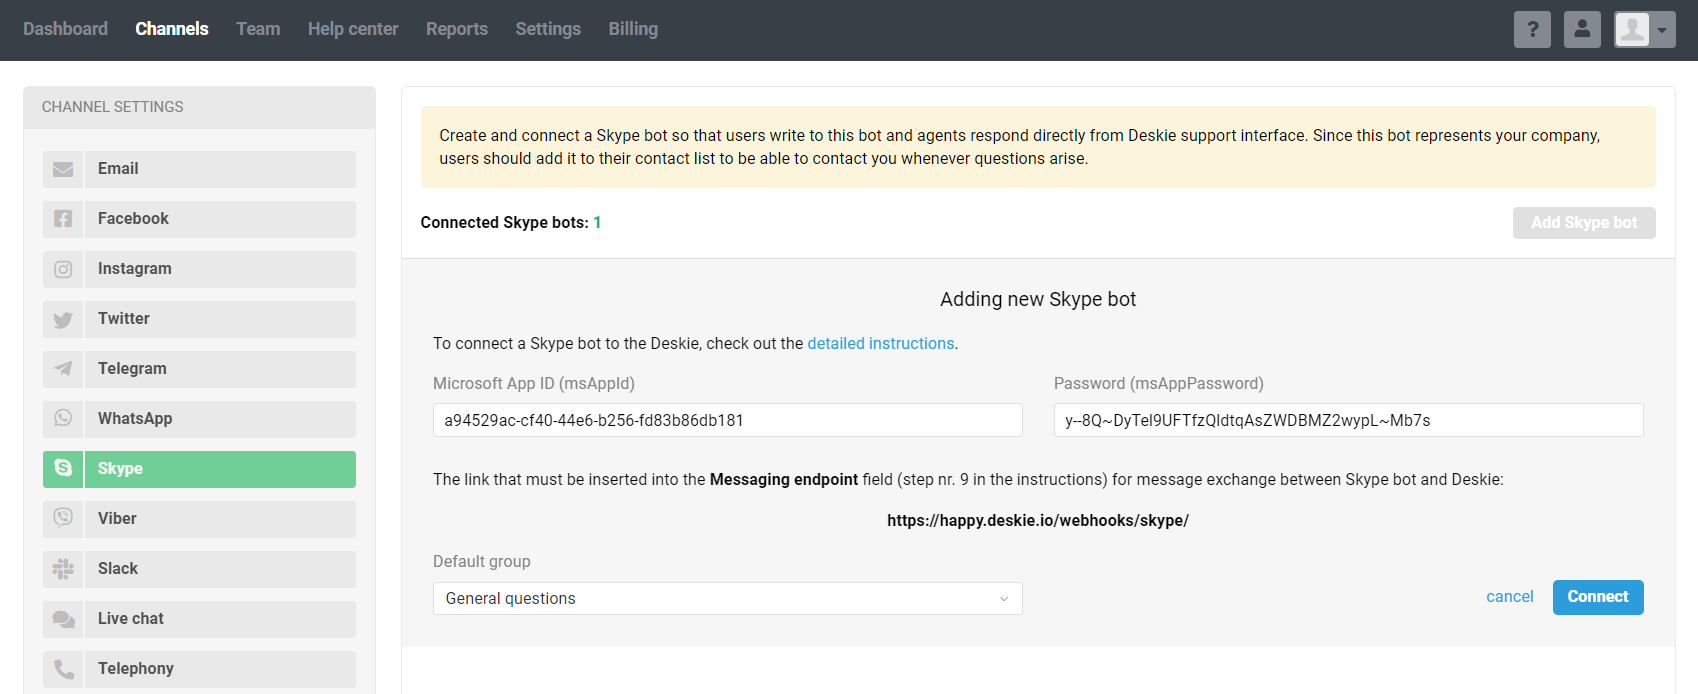
5. Wait for the deployment to complete — go to the “Inputs” section — copy msAppId and paste them into the appropriate fields in the bot connection form, but do not click on the “Connect” button yet and leave the form in Deskie open.
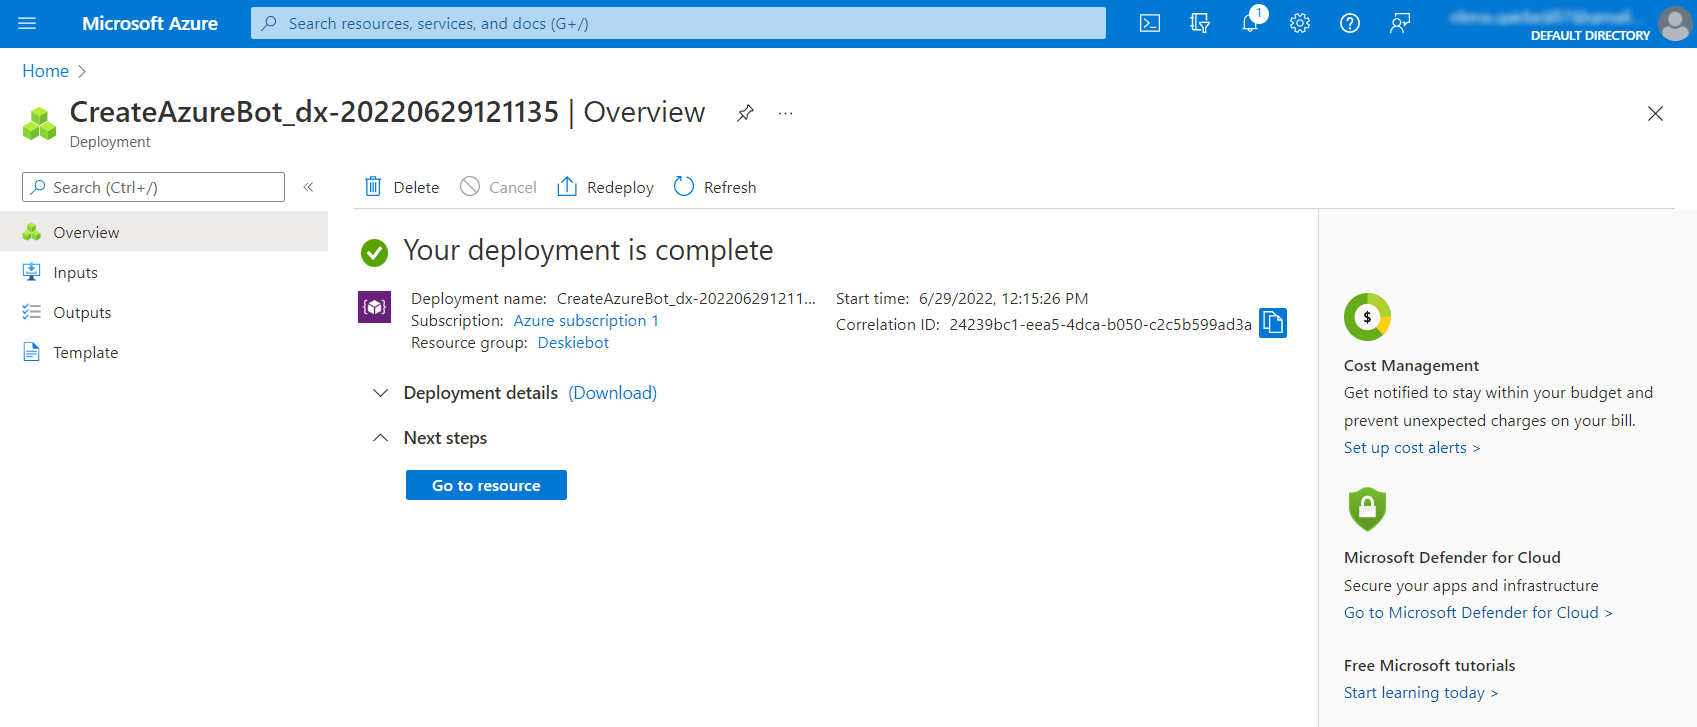
6. Go back to the “Overview” section and click on the “Go to resource” button.

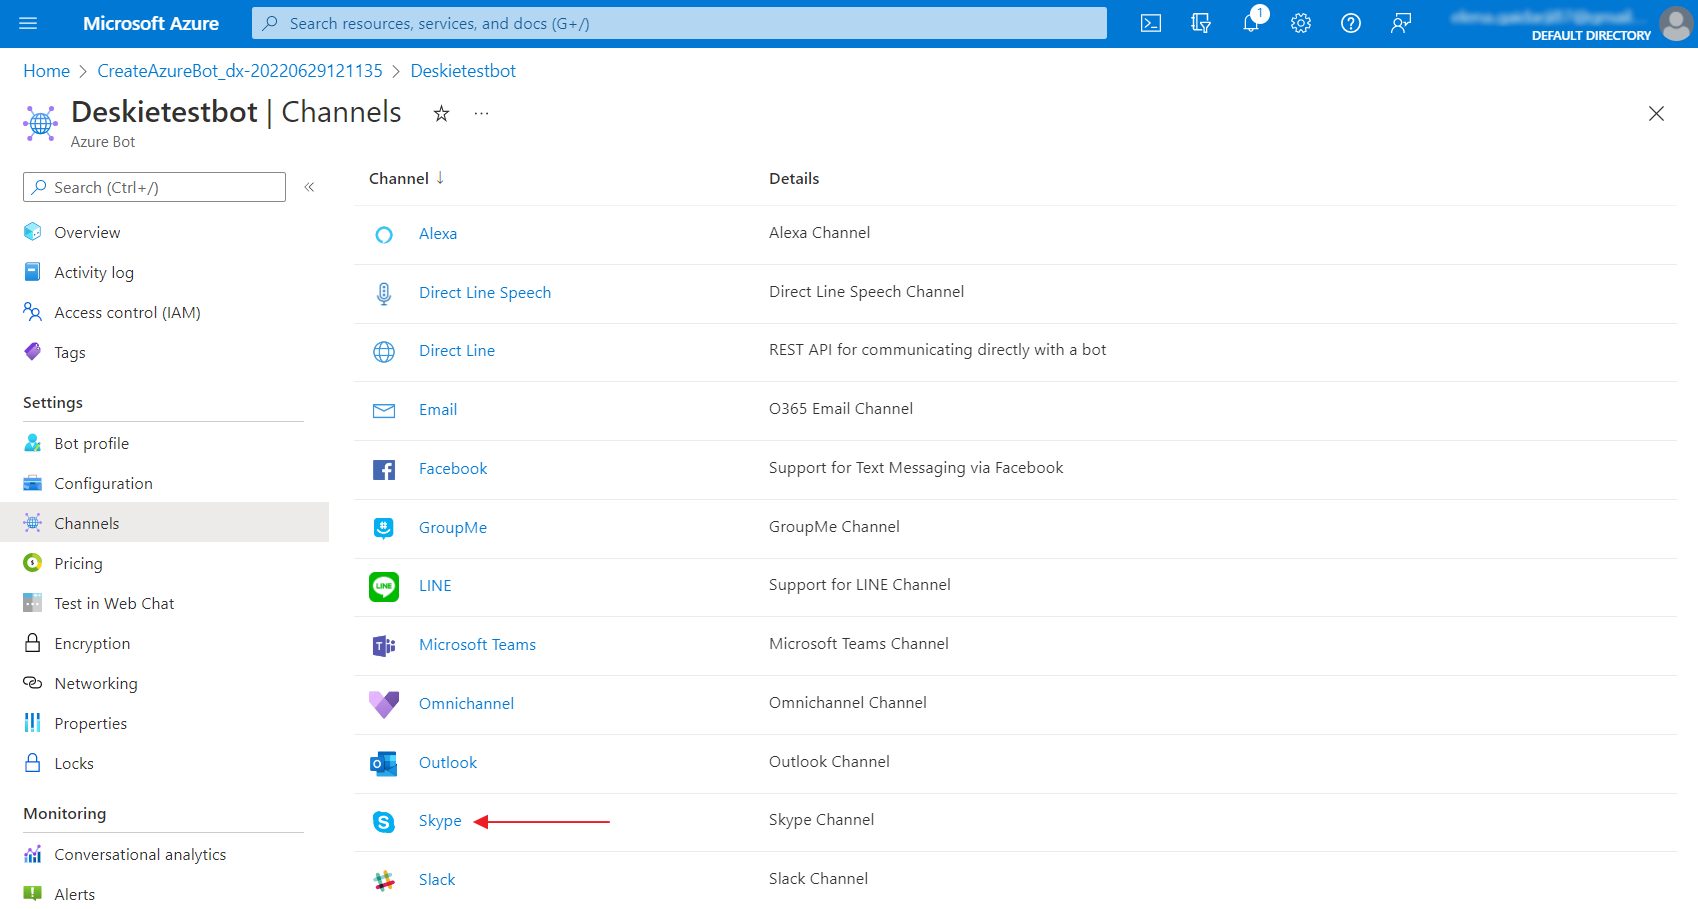
7. In the “Settings” section, go to the “Channels” subsection and click on the Skype icon.
8. On the page that opens, switch any options back and forth (for example, disable and enable Messaging back) so that the “Apply” button becomes active, and click on it.
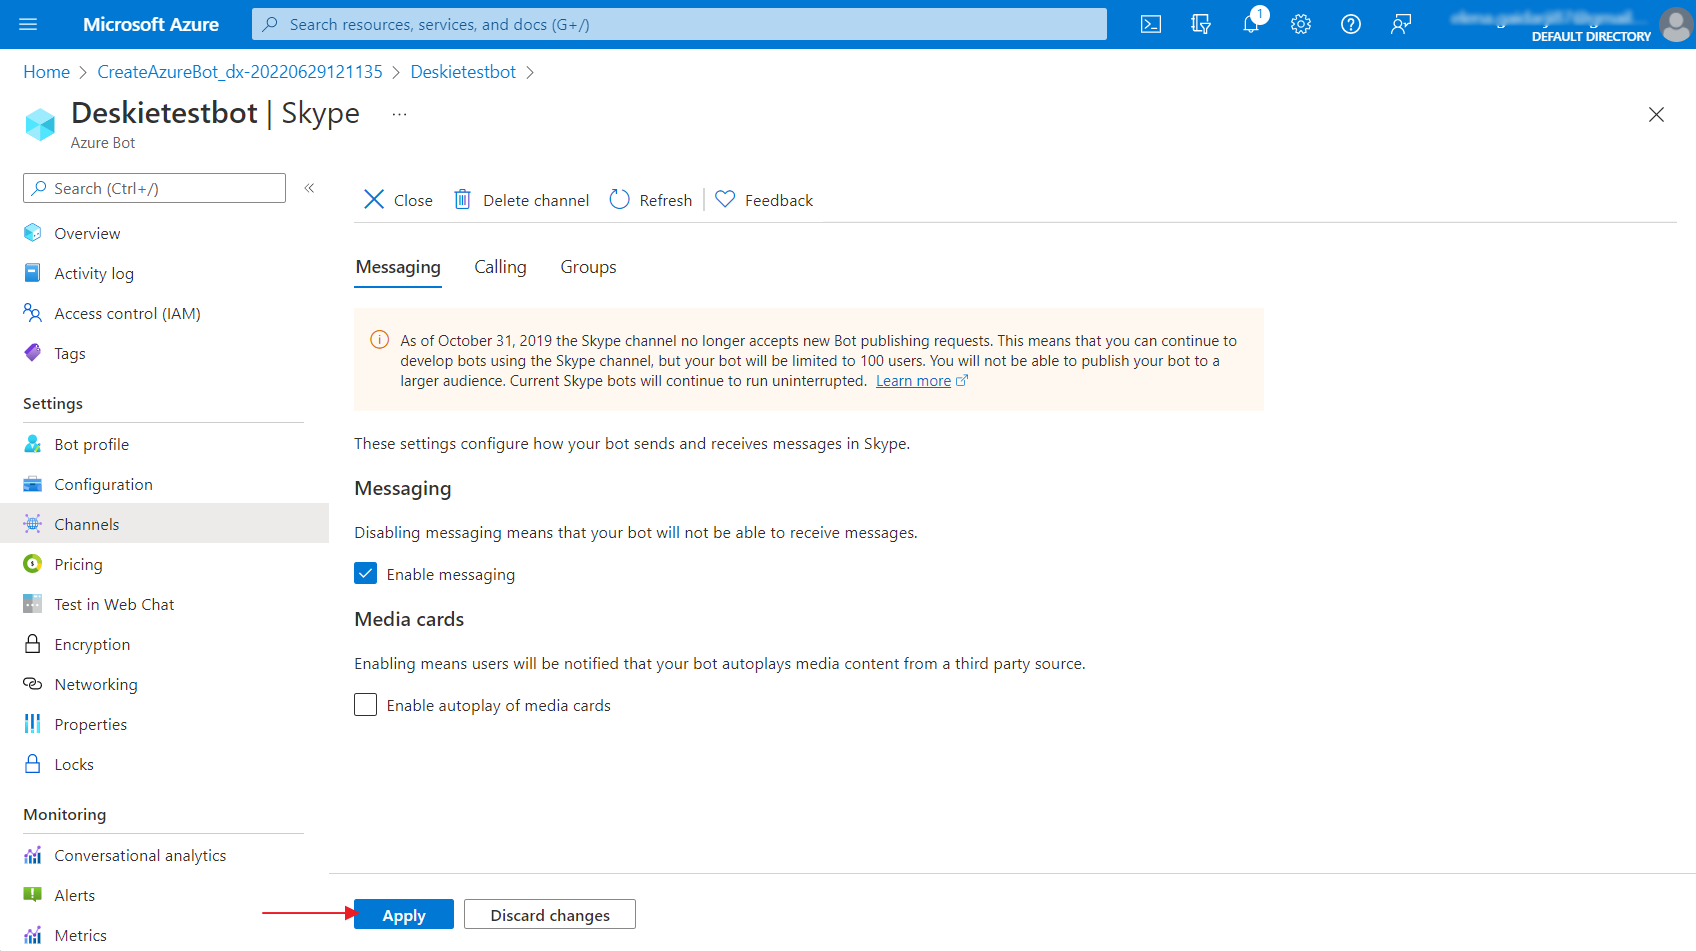
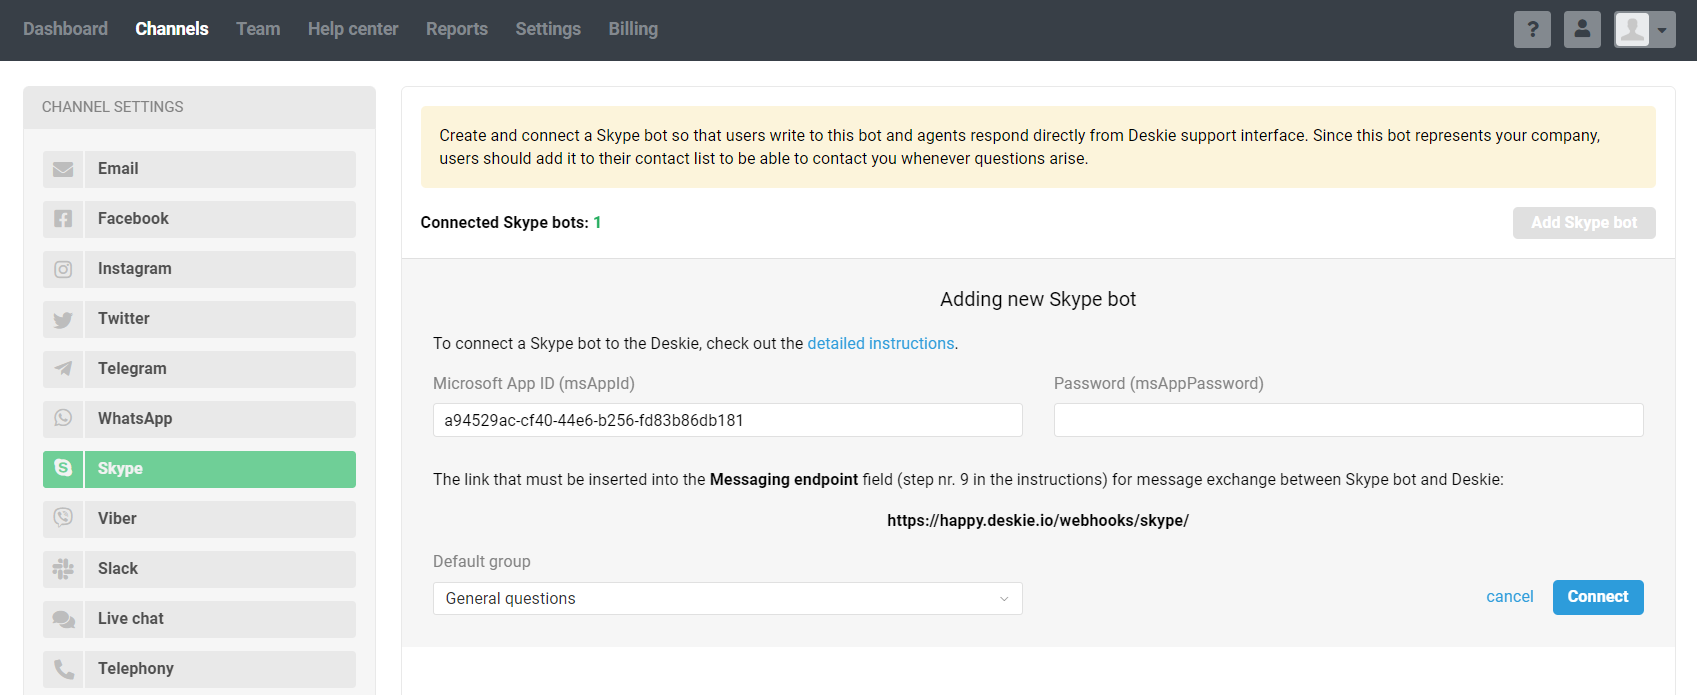
9. In the “Settings” section, go to the “Configuration” subsection — in the “Messaging endpoint” field, add a link from the Skype bot connection form in Deskie — click “Apply”.
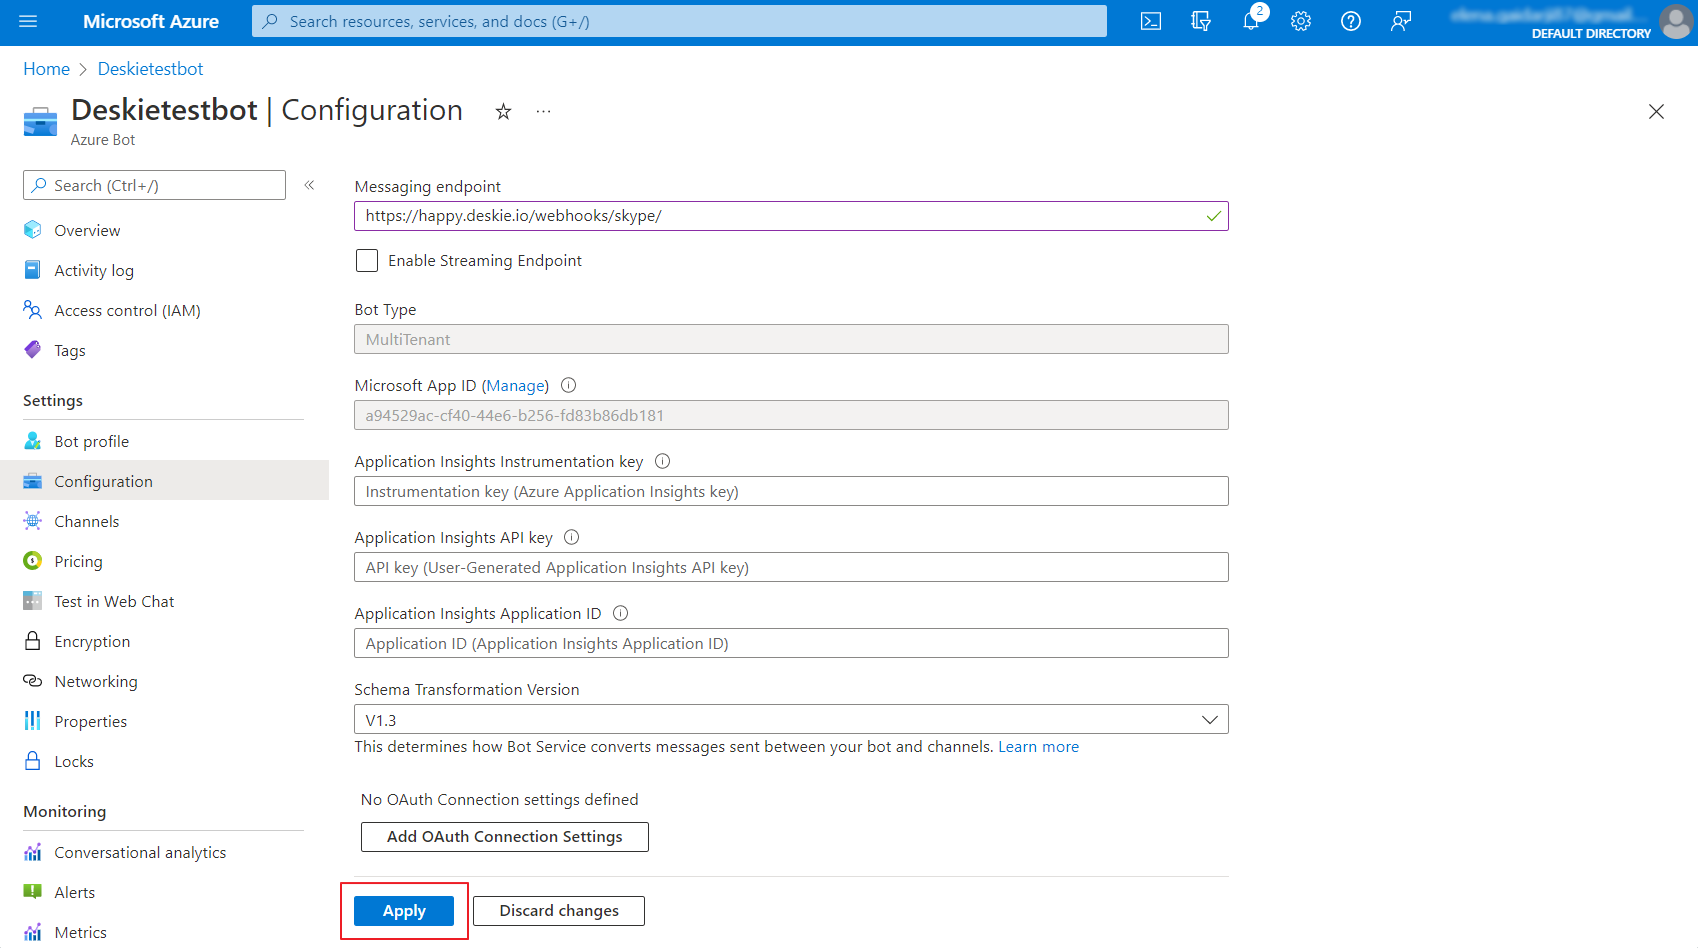
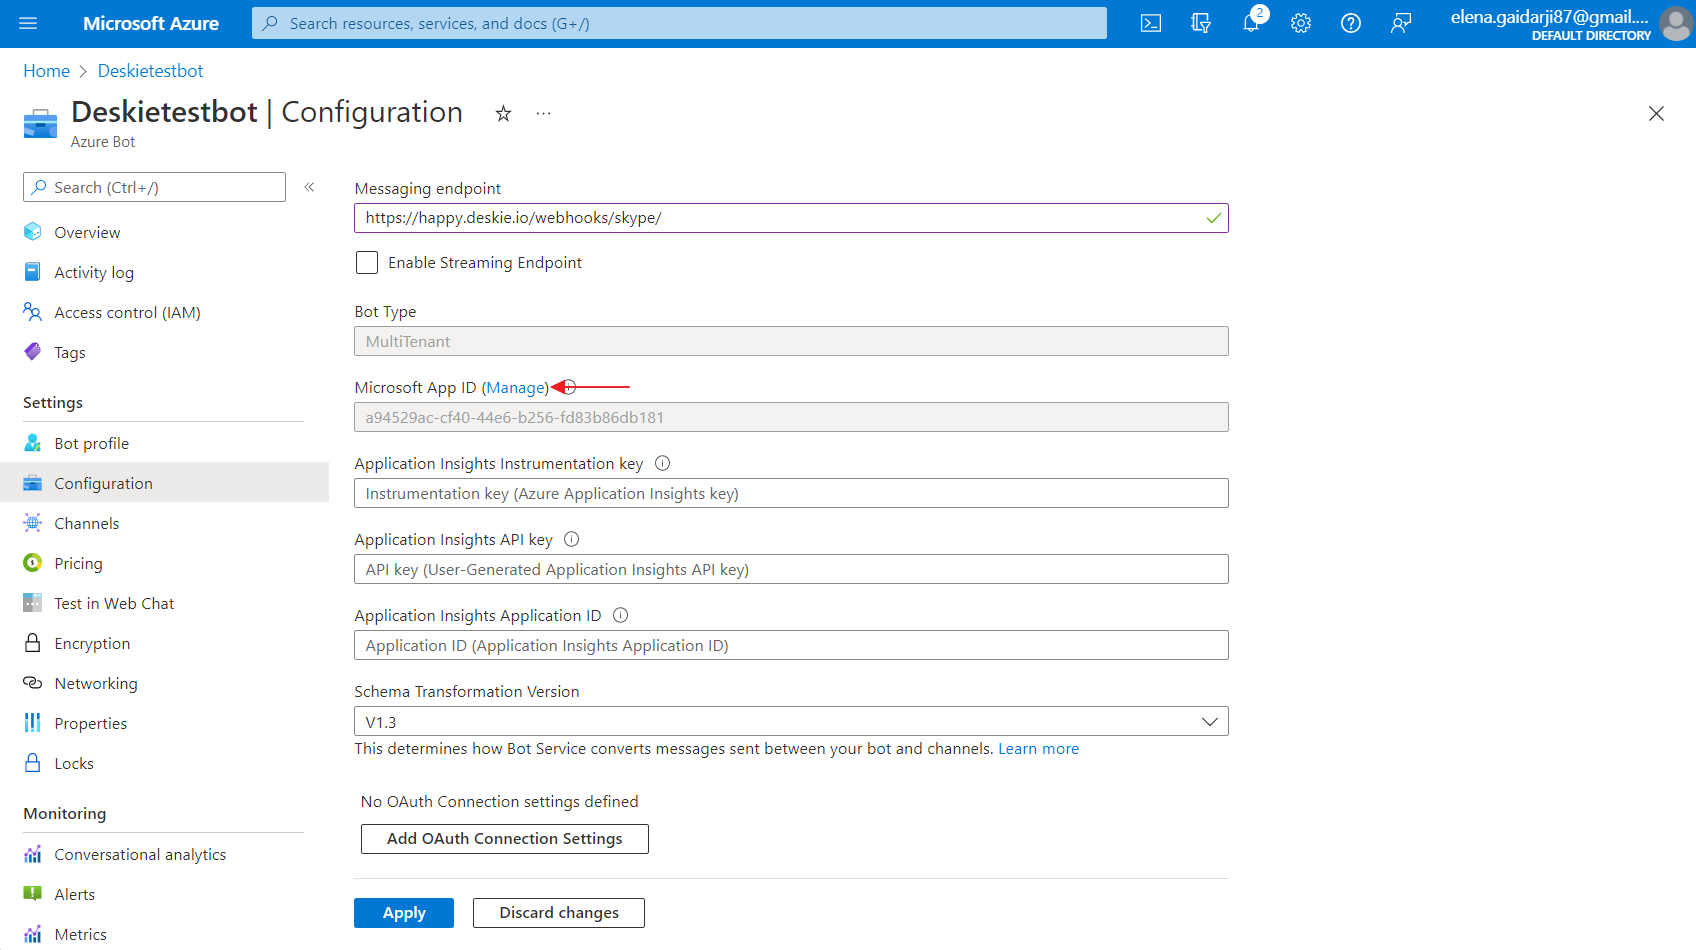
10. Next, click on the "Manage" link next to the Microsoft App ID heading.
11. In the window that opens, click on the "New client secret" button and create a new secret.

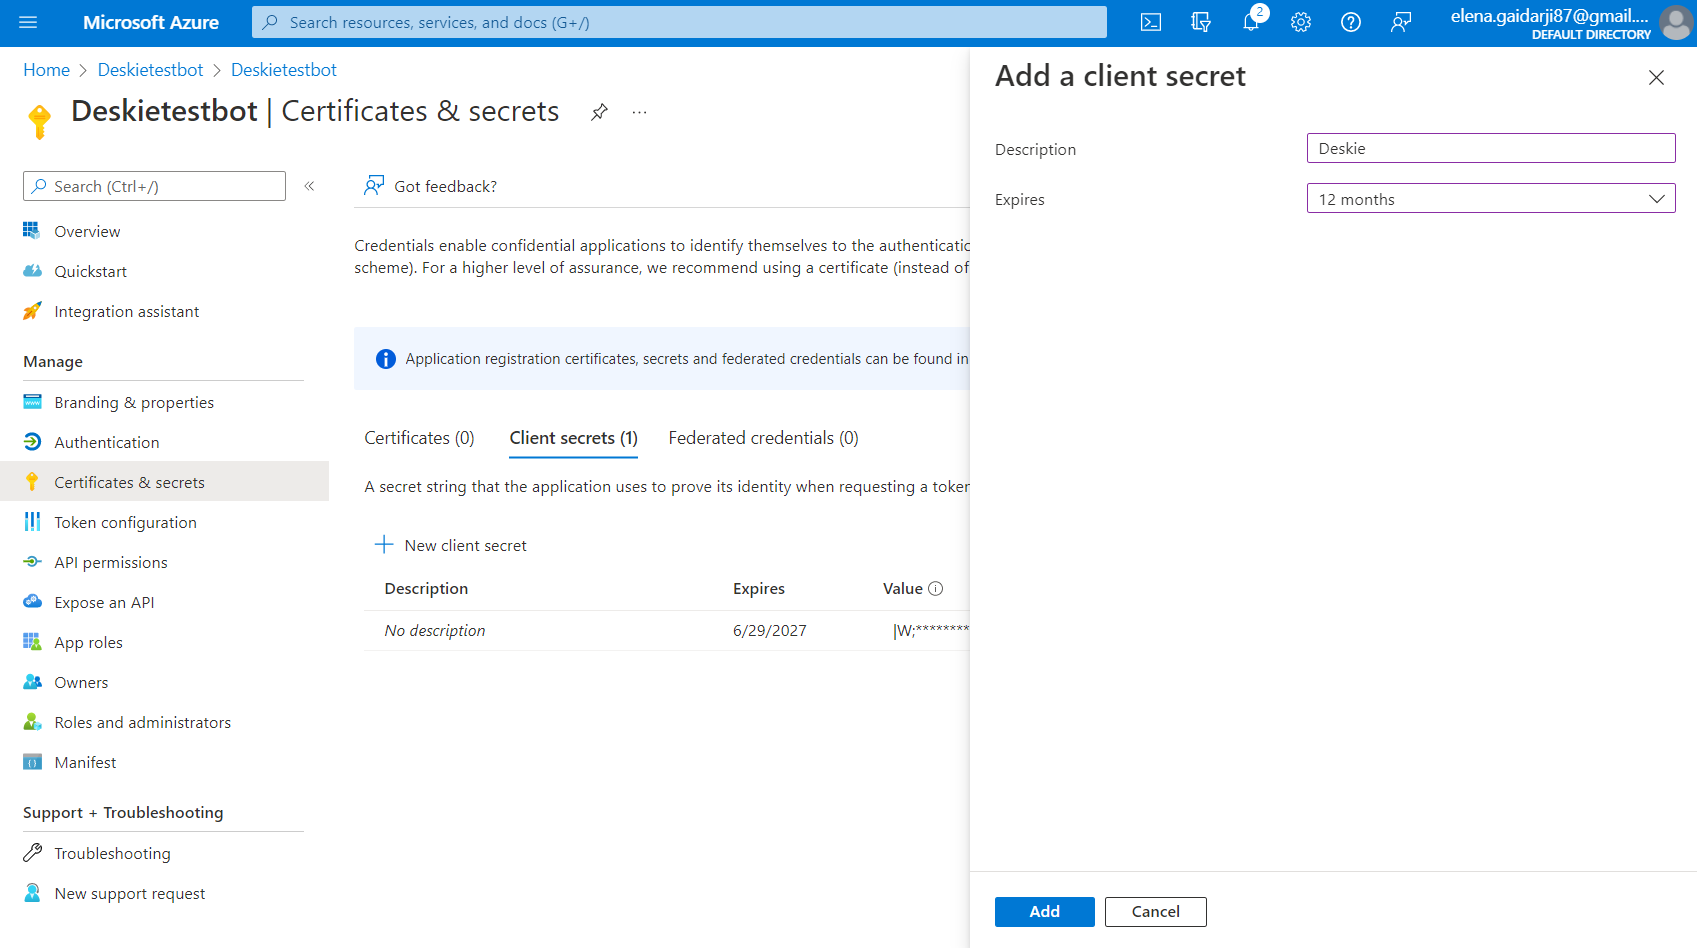
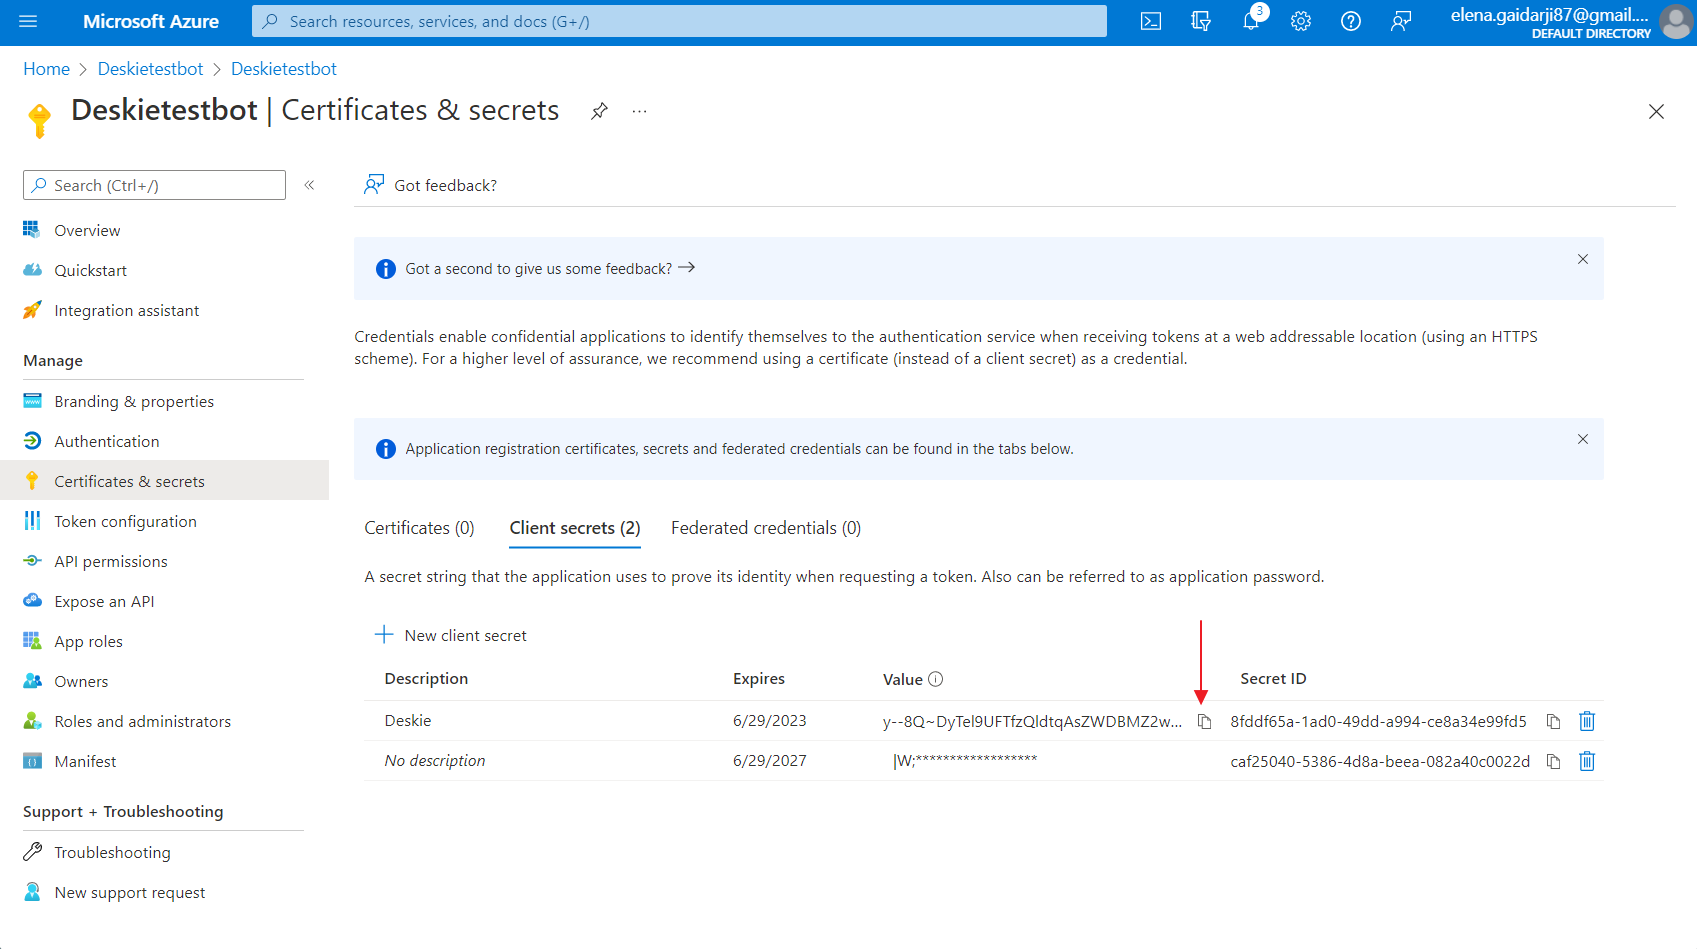
12. Copy the secret value — paste it into the msAppPassword field in the Skype bot connection form in Deskie — click the "Connect" button.
!Important! Microsoft Azure takes about 15-20 minutes for full deployment, so after connecting the bot to Deskie, it’s better to wait this time. Until this moment, messages may not be received by Deskie, and/or messages may not be sent from Deskie.
13. Now, you can add Skype to your widget’s channels settings so that customers can contact you through it.
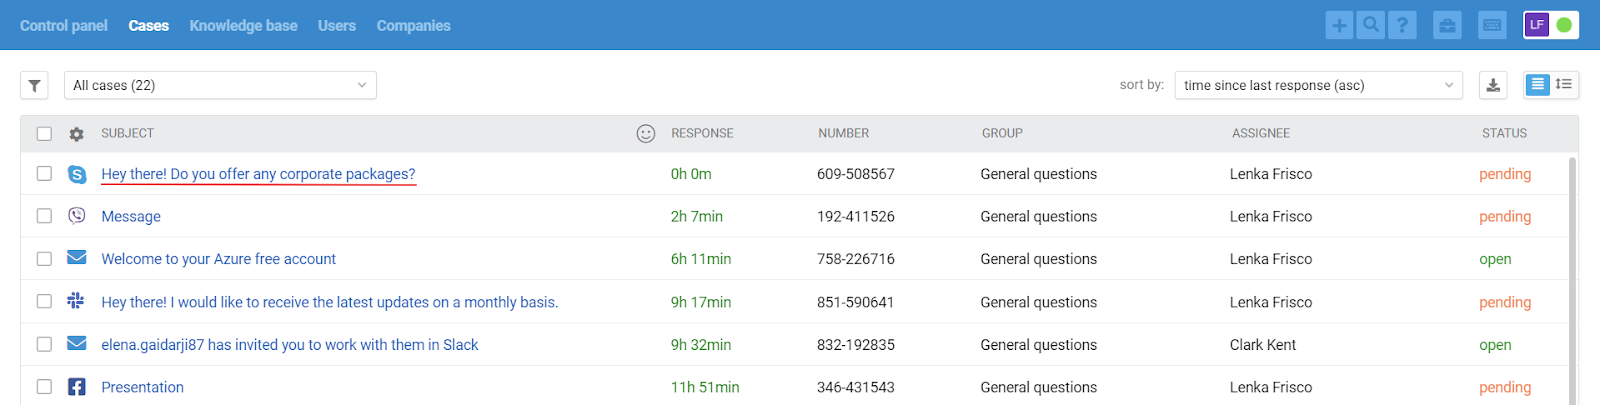
What do Skype messages look like in Deskie?
All cases list displays only the cases coming from asynchronous channels — users on both sides reply when it’s convenient for them. As for real-time chats, they are displayed and processed in a separate interface.
When you get a new chat (Skype, Slack, Telegram, FB messages, Whatsapp, Viber), a green icon appears in the upper right corner of the agent’s account. It displays incoming chats and new chat responses:
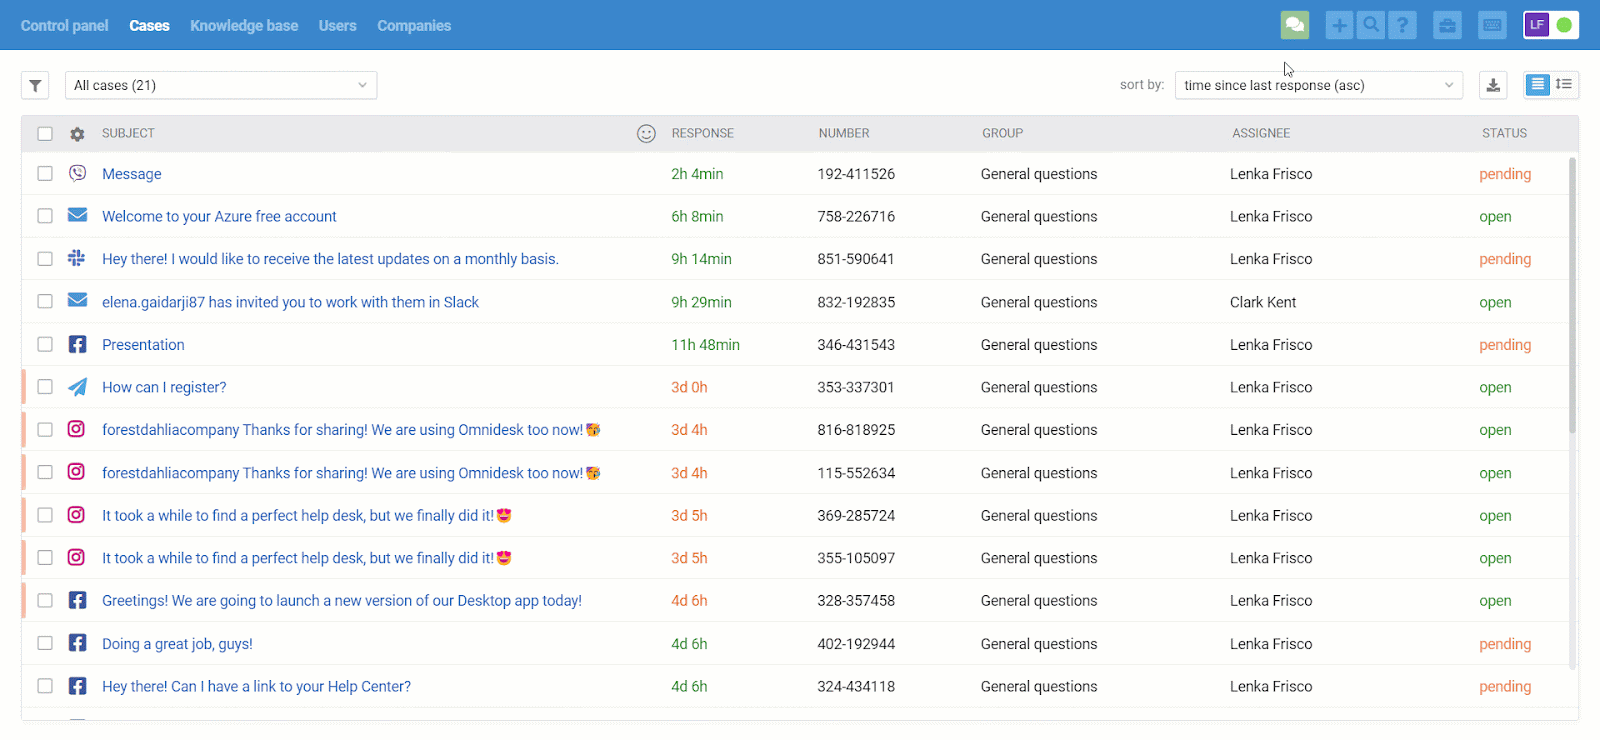
Chats are displayed in the all cases list too, but only after they were ended:
when an agent is ending the chat, clicking “end chat” in the lower right corner;
after 10 minutes (default value) of inactivity on both sides;
when one of the automated rules is applied, that has an “end chat and set status” action (for example, if you don’t plan to process chats and want to get them as cases in the all cases list):
We have separated synchronous and asynchronous communication on purpose because, if you want to provide first-class support, it is necessary to consider the specifics and expectations of customers, depending on the type of channel you use to carry out the communication.
For example, the user is ok to wait for a couple of hours to get a response to his/her email. However, even a 5-minute response delay in chats might seem like an eternity. If you do not take this point into account and treat cases from email and chats equally, some users will get an unpleasant experience interacting with the company.
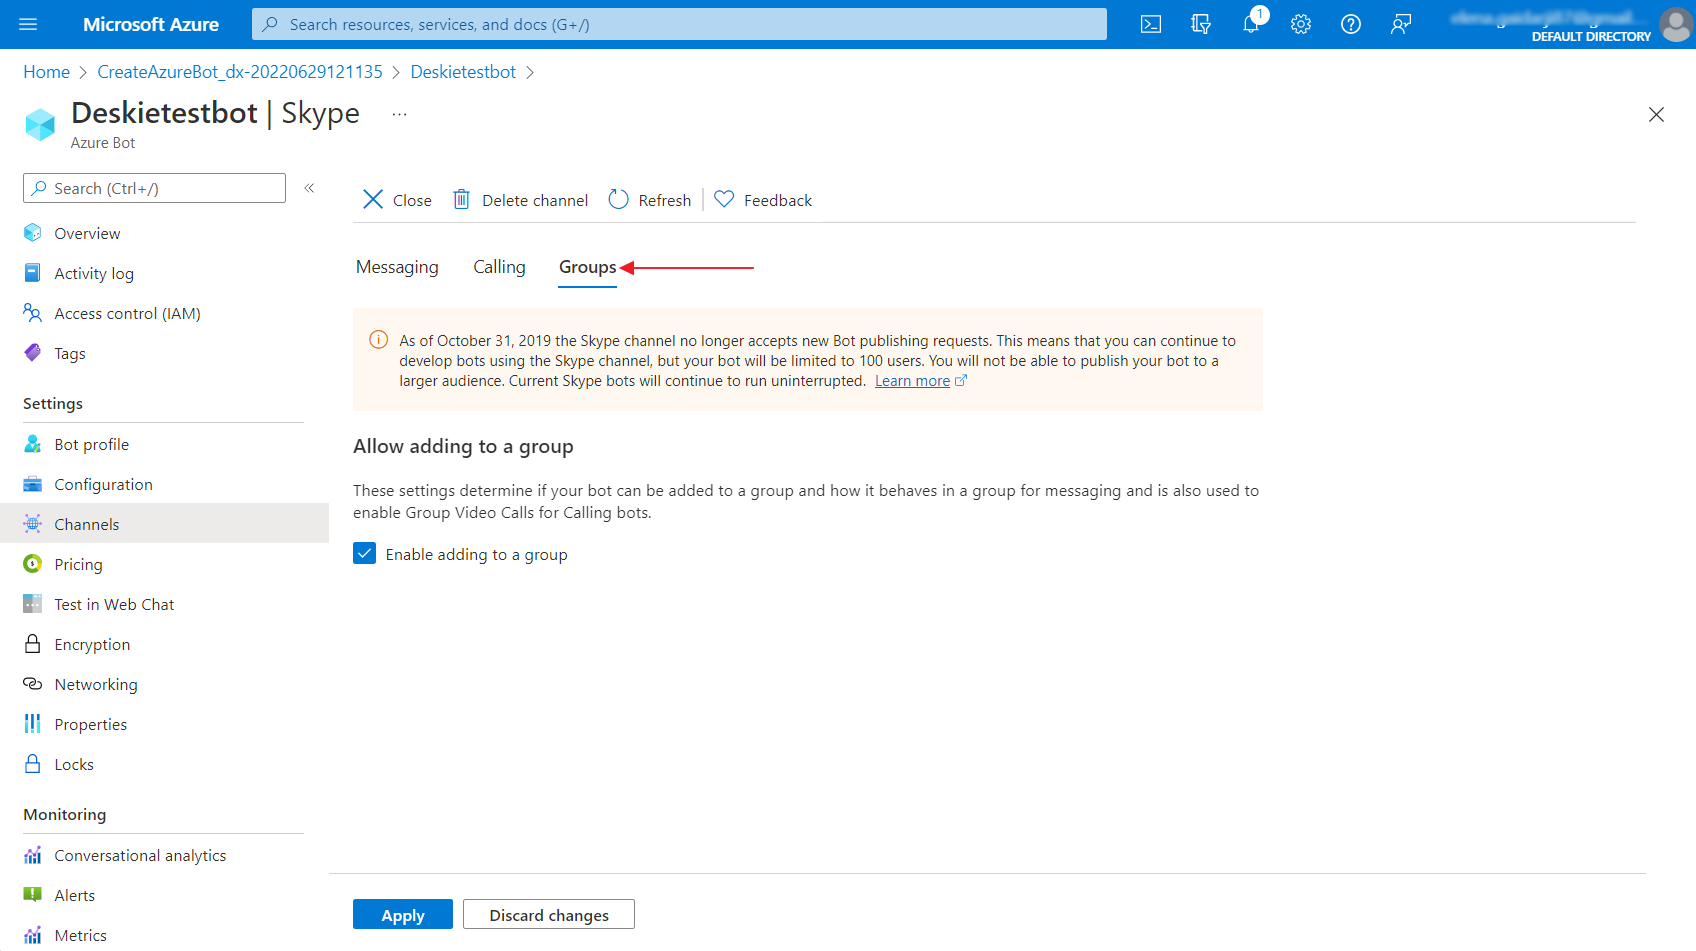
Group chatting on Skype
To get a detailed description of group chat logic, please, refer to our article.
To add a Skype bot to a group as a member, you need to activate this feature in its settings. To do this, in Microsoft Azure, open the bot settings page, go to the “Channels” — “Skype” — “Groups” — “Enable adding to the group” section and save the changes.