The Slack channel is connected through the bot that represents your company. If your customers want to reach you via this channel, they can add the bot to their contacts to be able to contact you anytime when questions arise.
To create a new bot and connect it to Deskie:
1. Go to the Slack application creation form. If you don't have a Slack account, you must first create one, and then follow the link.
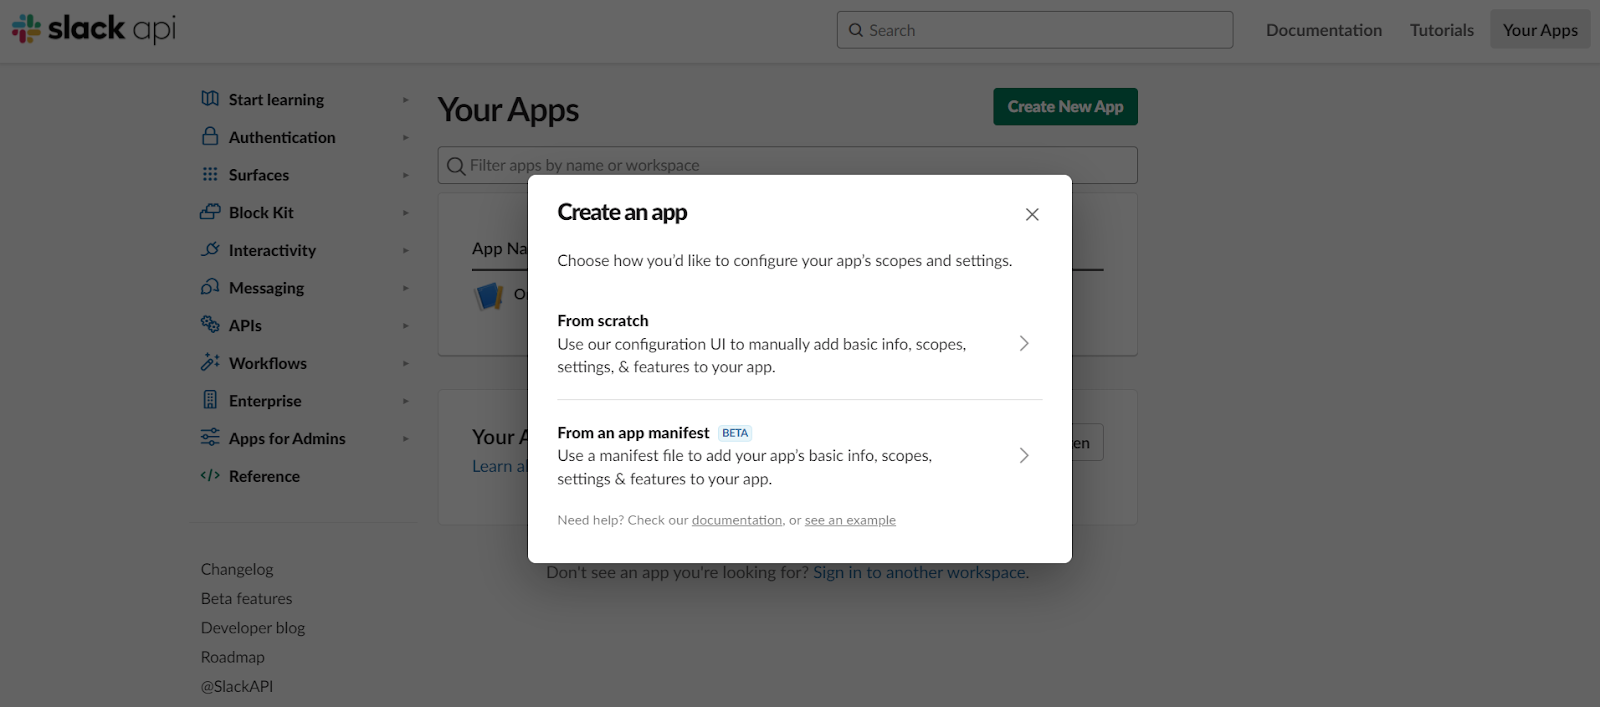
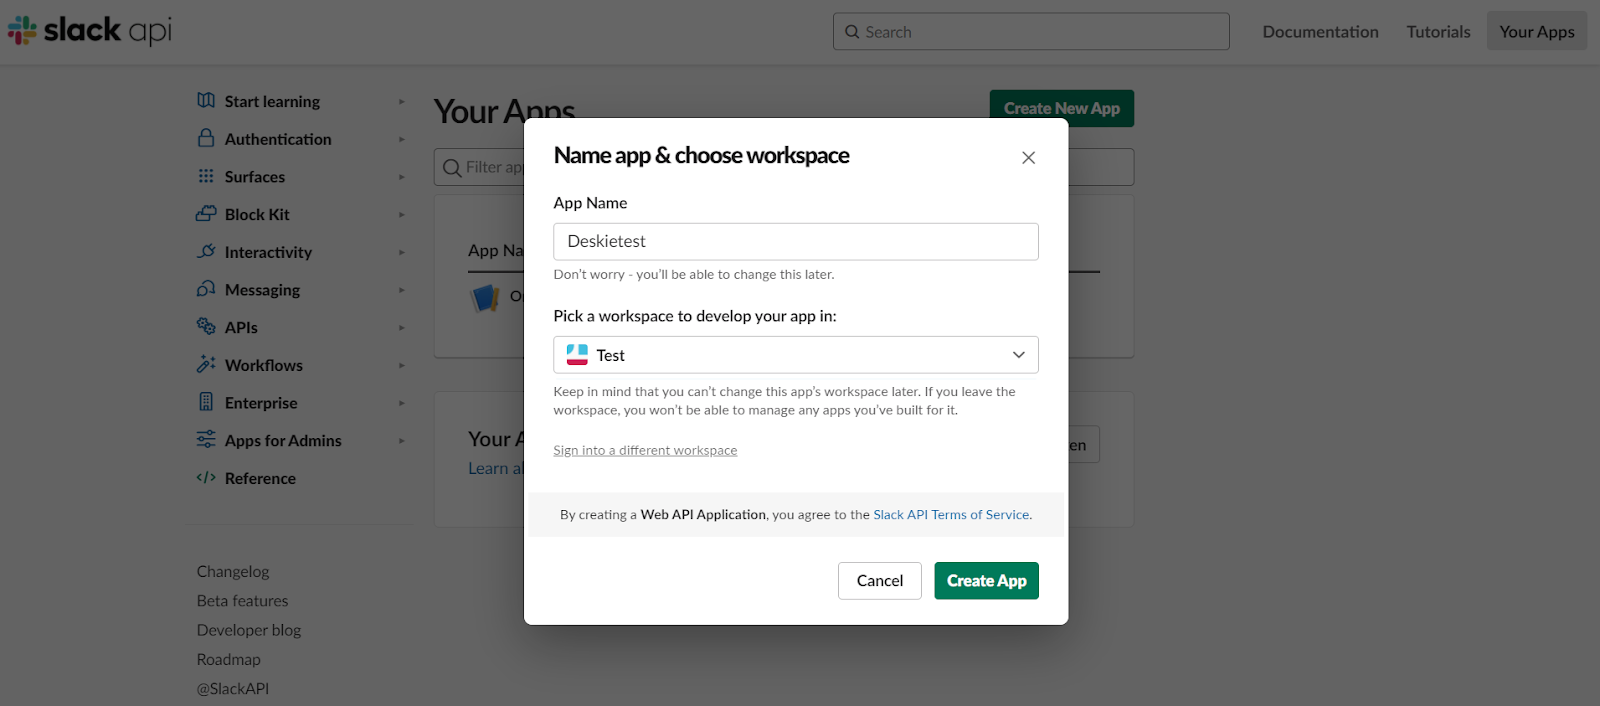
2. In the window that opens, choose if you want to configure your app from scratch or app manifest, specify the name of your application and choose your workspaces from the list. After filling in the fields, click the Create App button:
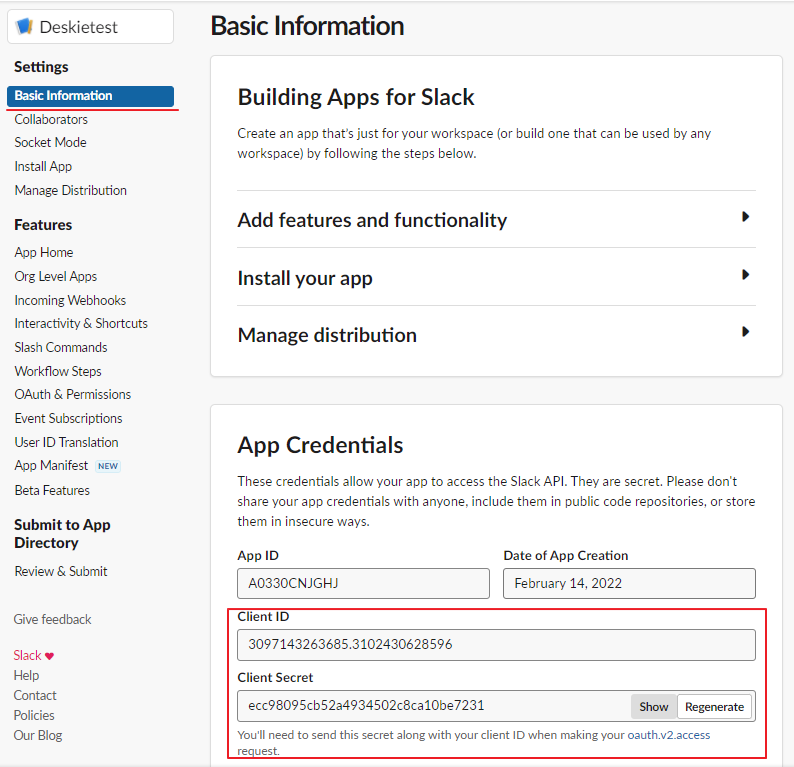
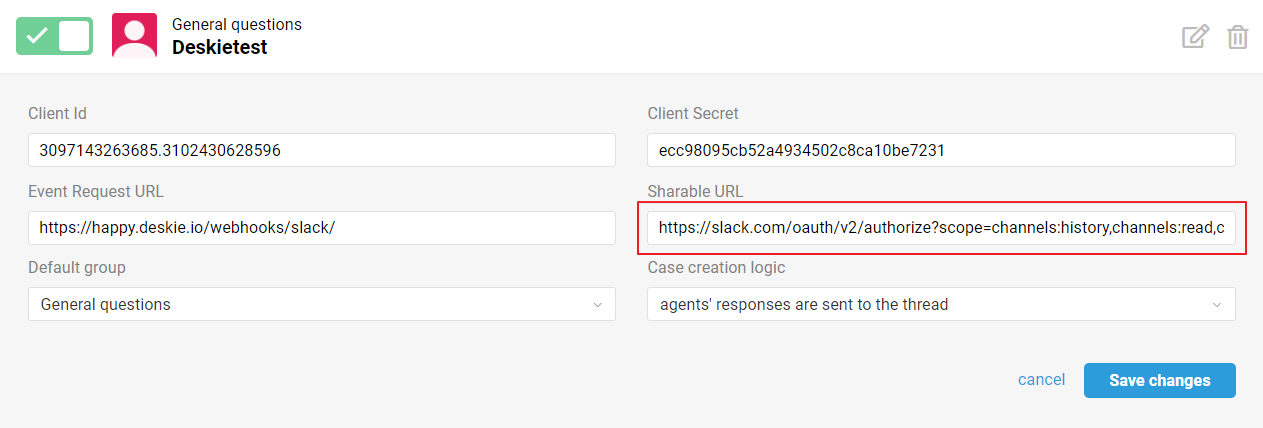
3. In the Basic Information section, copy the Client Id and Client Secret and paste them into relevant fields in Deskie (administrator account — the "Channels" section — the "Slack" subsection — the "Add Slack bot" form), but do not click "Connect" before completing all the steps of this manual:
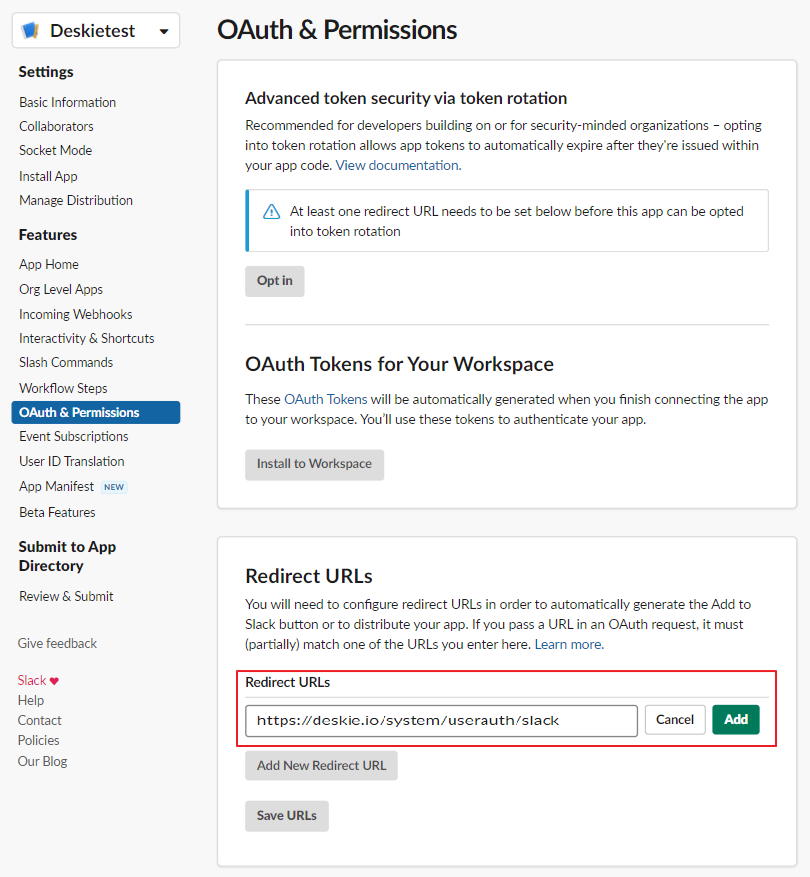
4. Go to the OAuth & Permissions section, add the link https://deskie.io/system/userauth/slack in the Redirect URLs block and click the Save URLs button:
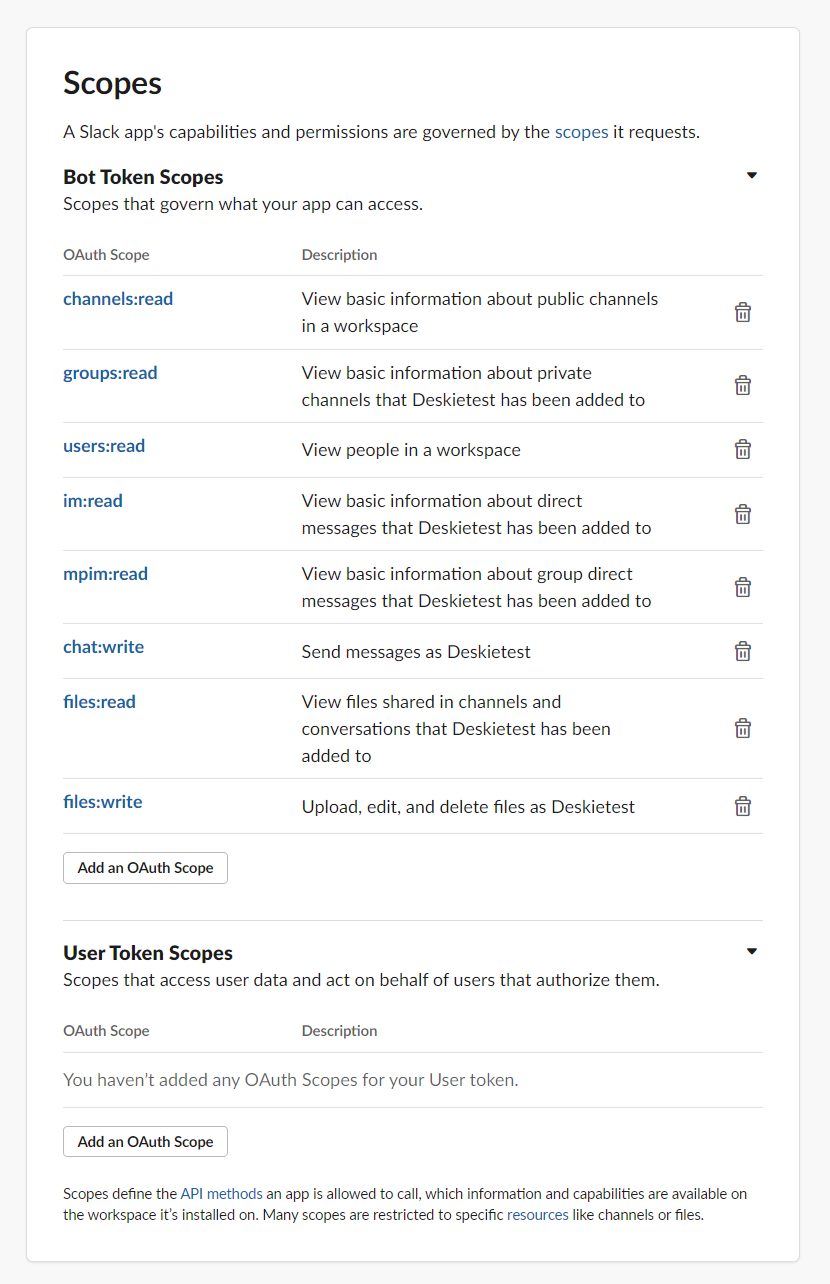
5. Next, in the same OAuth & Permissions section, in the Scopes block, click the Add an OAuth Scope button and add the same options as in the screenshot below:
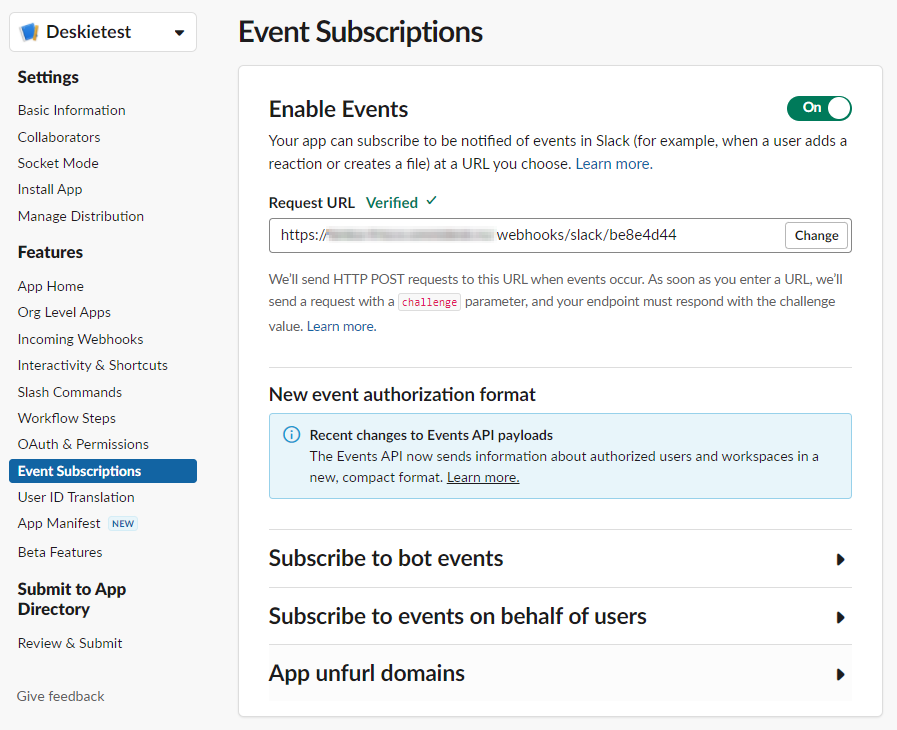
6. Go to the Event Subscriptions section and set Enable Events to ON. In the Request URL field, paste the link from the bot connection form in the administrator account and wait for the Verified message to appear:
7. In the same section, in the Subscribe to Bot Events block, using the search, add the following Events: message.channels, message.im, message.groups, message.mpim, file_shared. Click the Save Changes button:
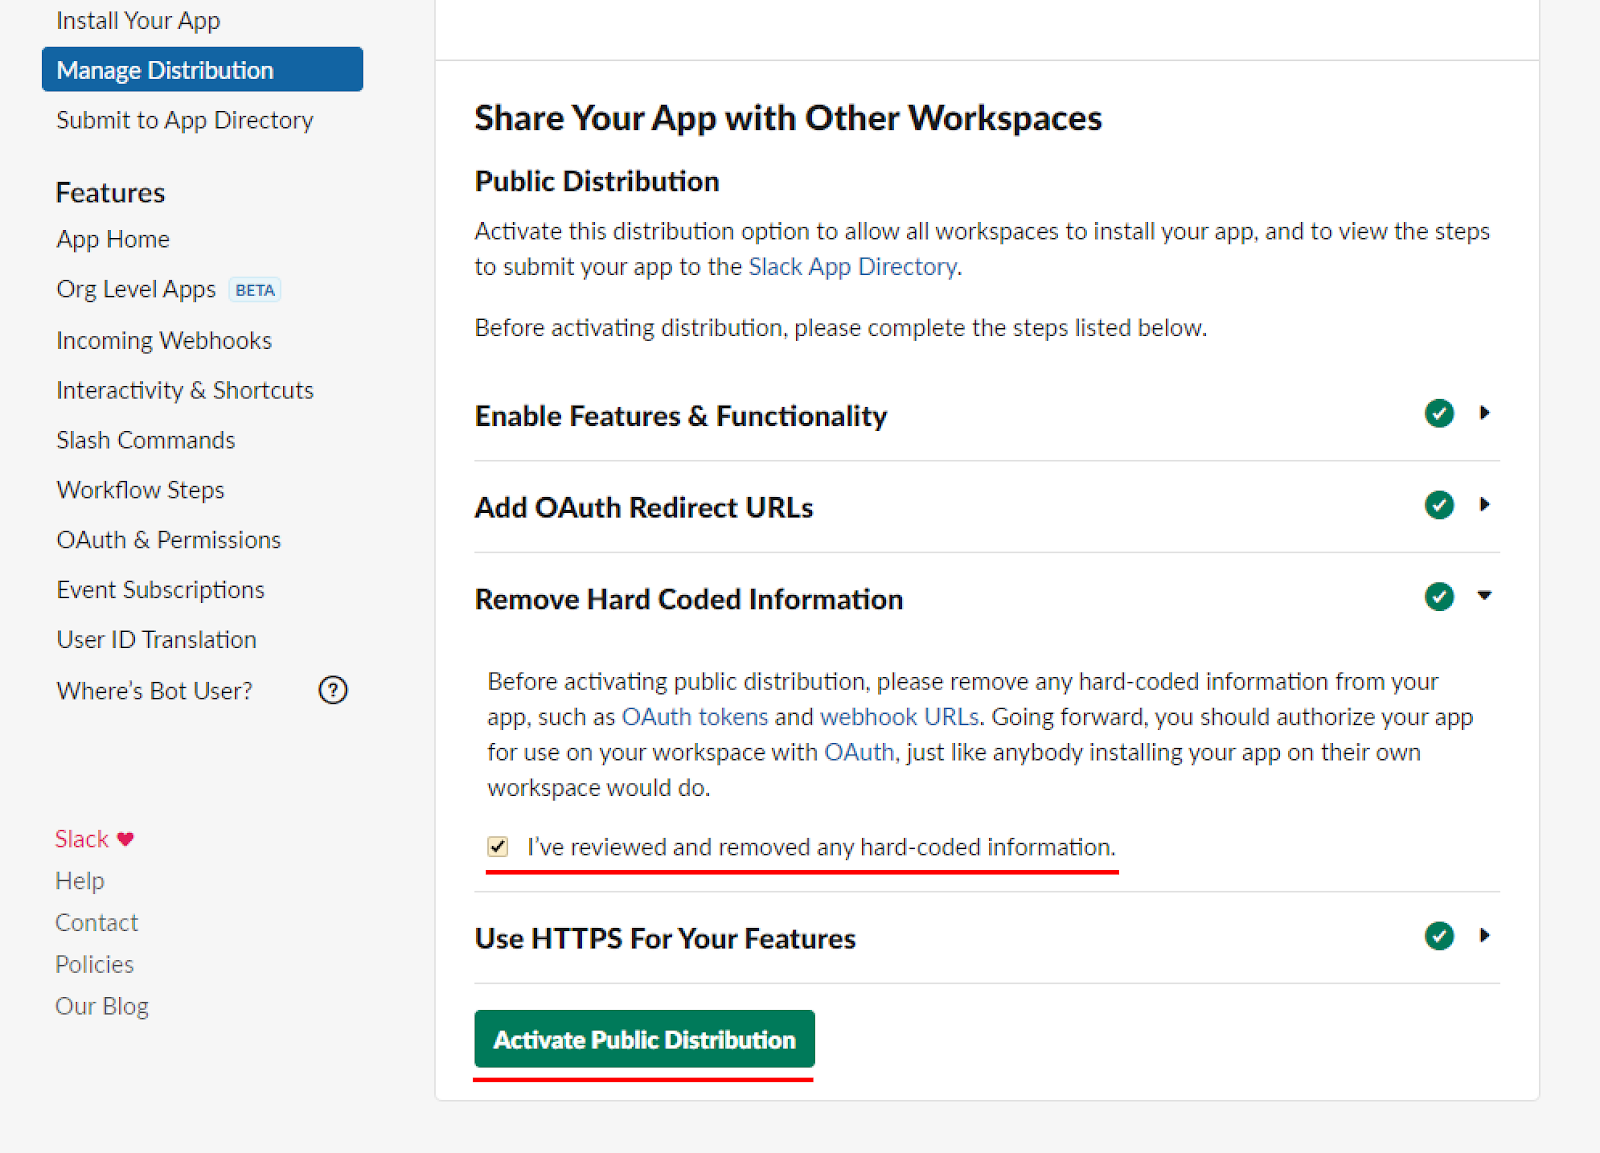
8. (!) If you want your customers to be able to add your bot to their Slack and contact you, take one more step: go to the Manage Distribution section, make sure that all fields in the Share your App with Other Workspaces block are ticked, and click the Activate Public Distribution button:
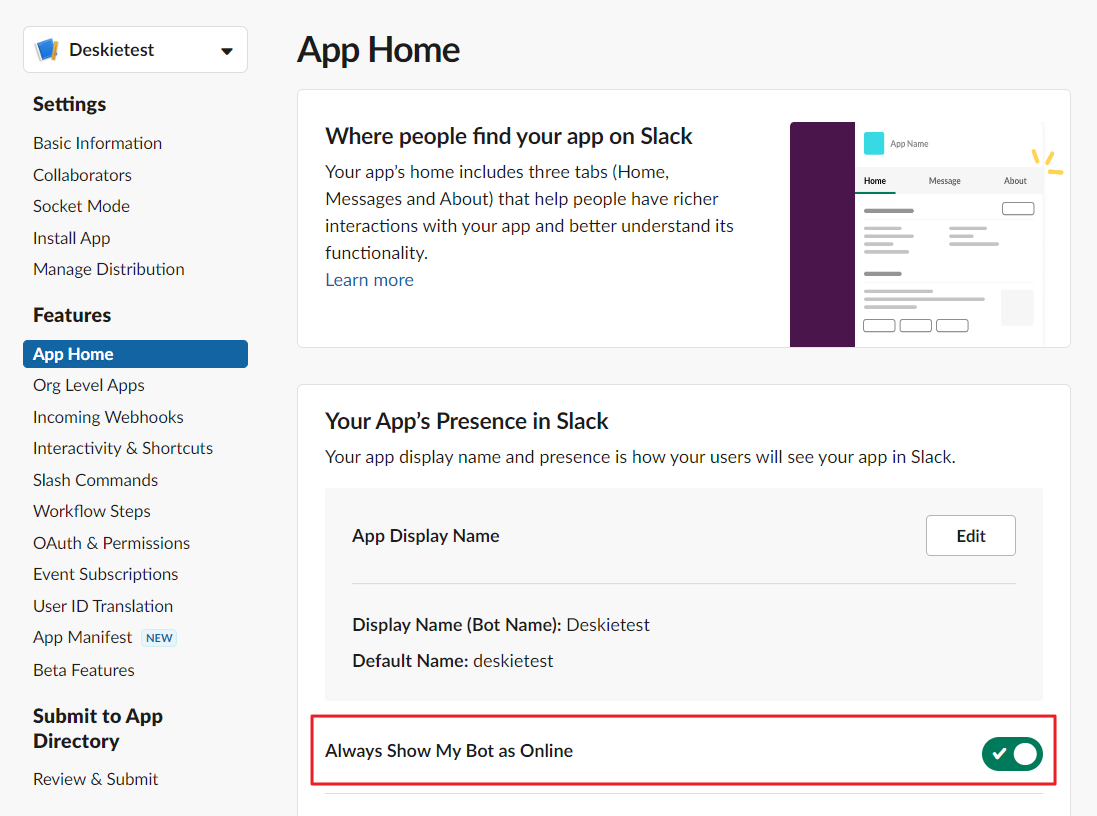
9. Go to the App Home section and set Always Show My Bot as Online to ON:
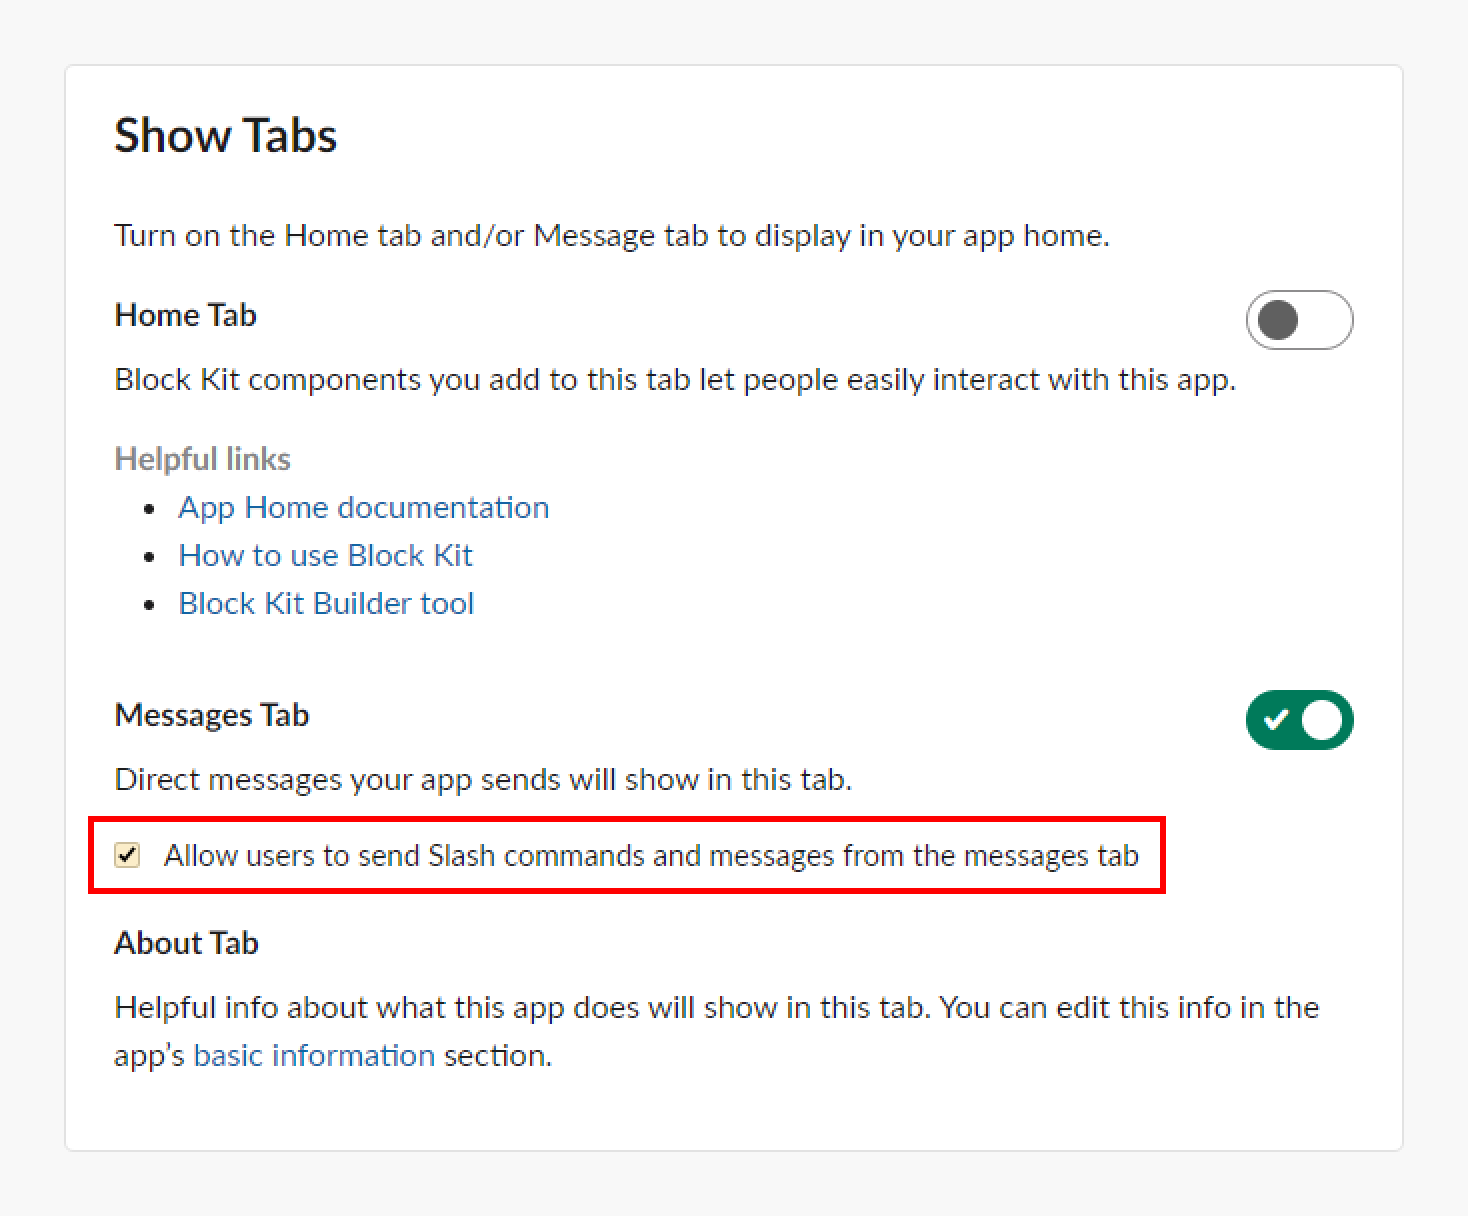
10. In the same section of App Home, in the Show Tabs block, tick the Allow users to send Slash commands and messages from the messages tab checkbox so that users can write directly to the bot, and not just mention it in channels:
11. In the Slack bot connection form in Deskie, select the default group that will receive cases from Slack, as well as case creation logic.
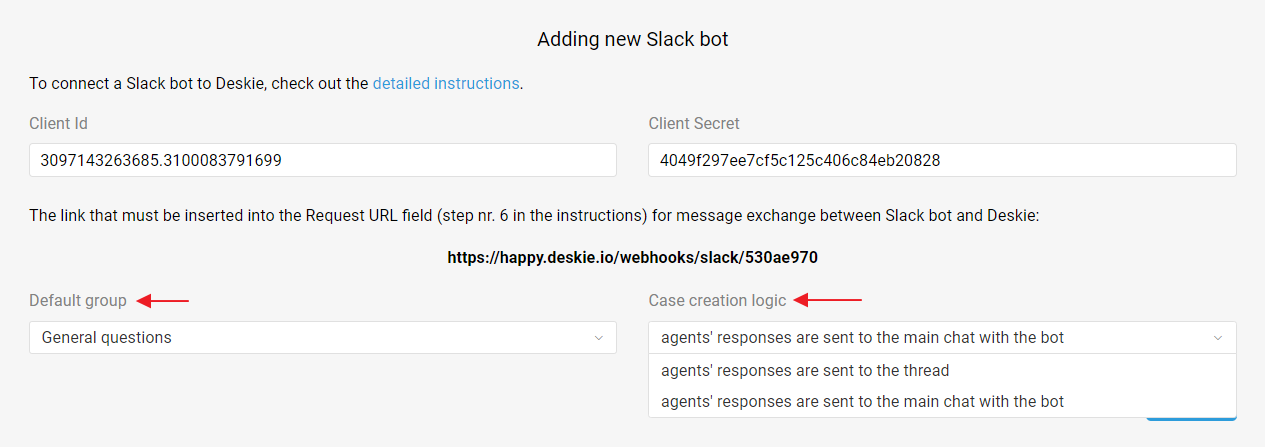
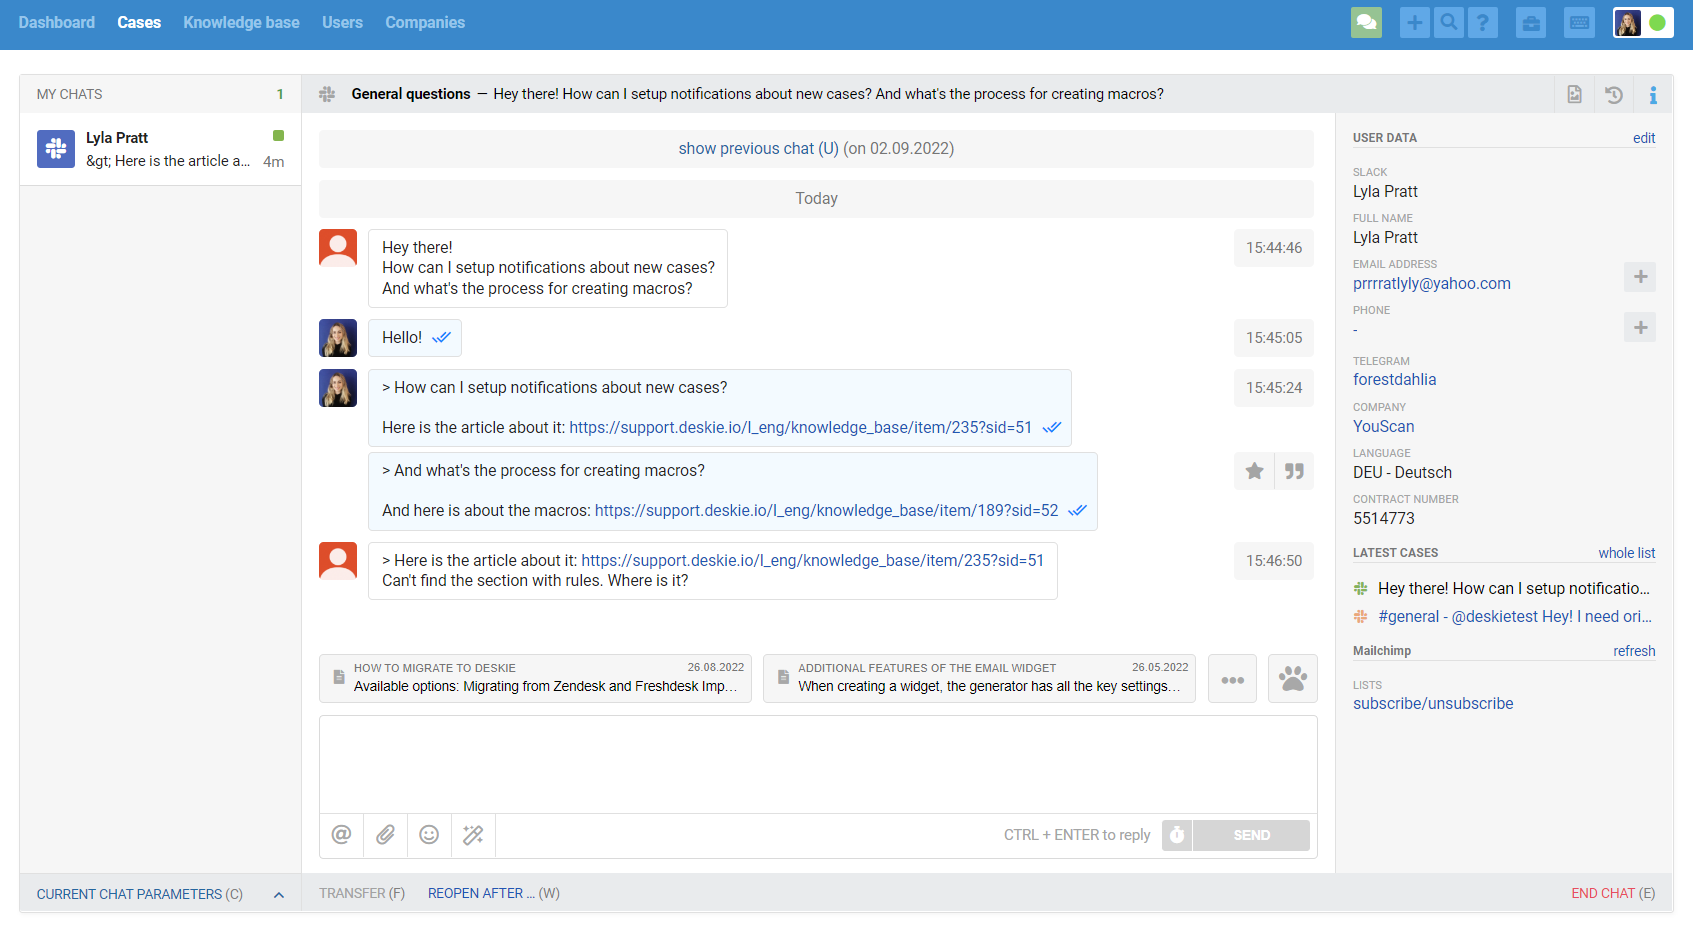
When you select the option “agents' responses are sent to the main chat with the bot”, all messages go to the main chat with the bot, as is implemented in all other messengers.
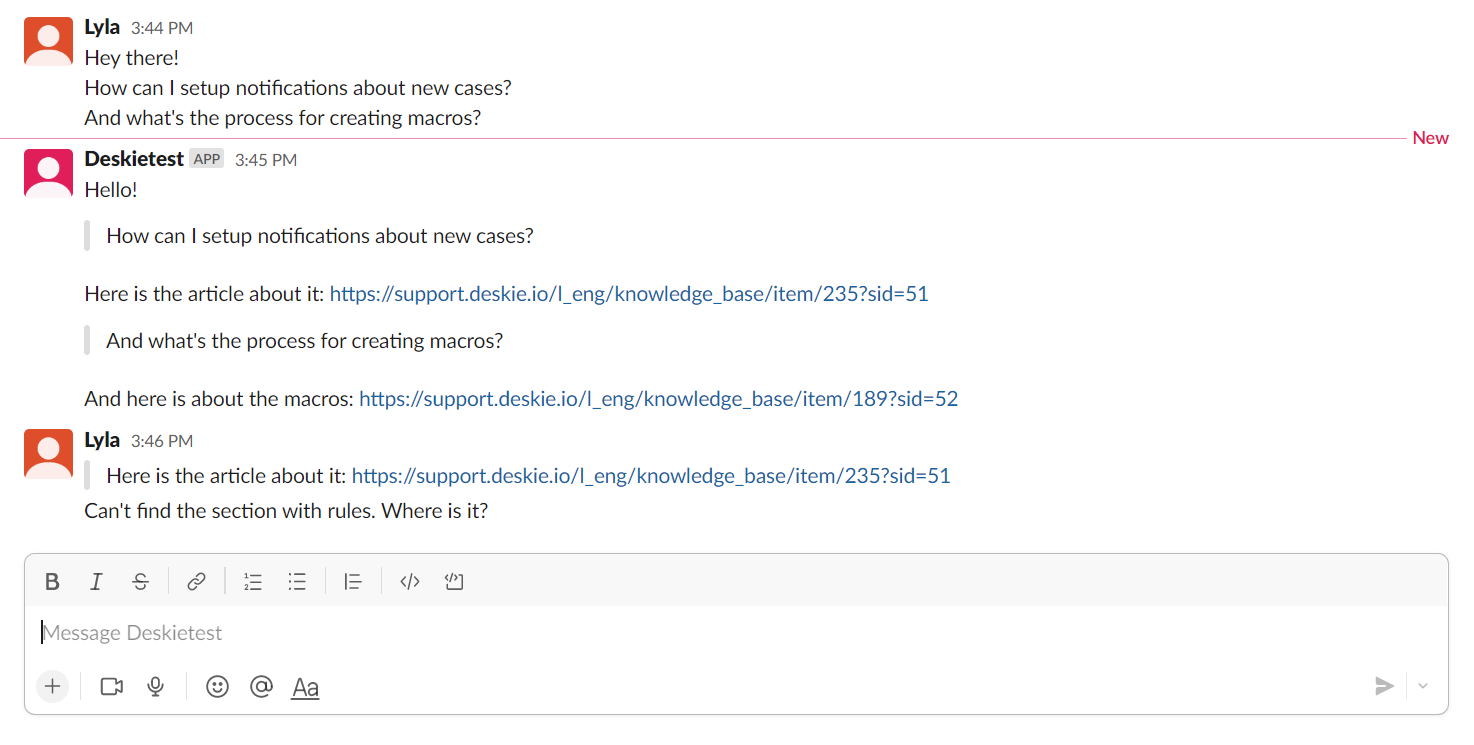
Tip
If the user has written several questions at once, use quotations to make it easier for the user to understand which question the answer relates to.
When you select the “agents' responses are sent to the thread” option, each user message in the main chat creates a separate case in Deskie, and agents’ responses to them are sent to the threads of the corresponding messages in Slack.
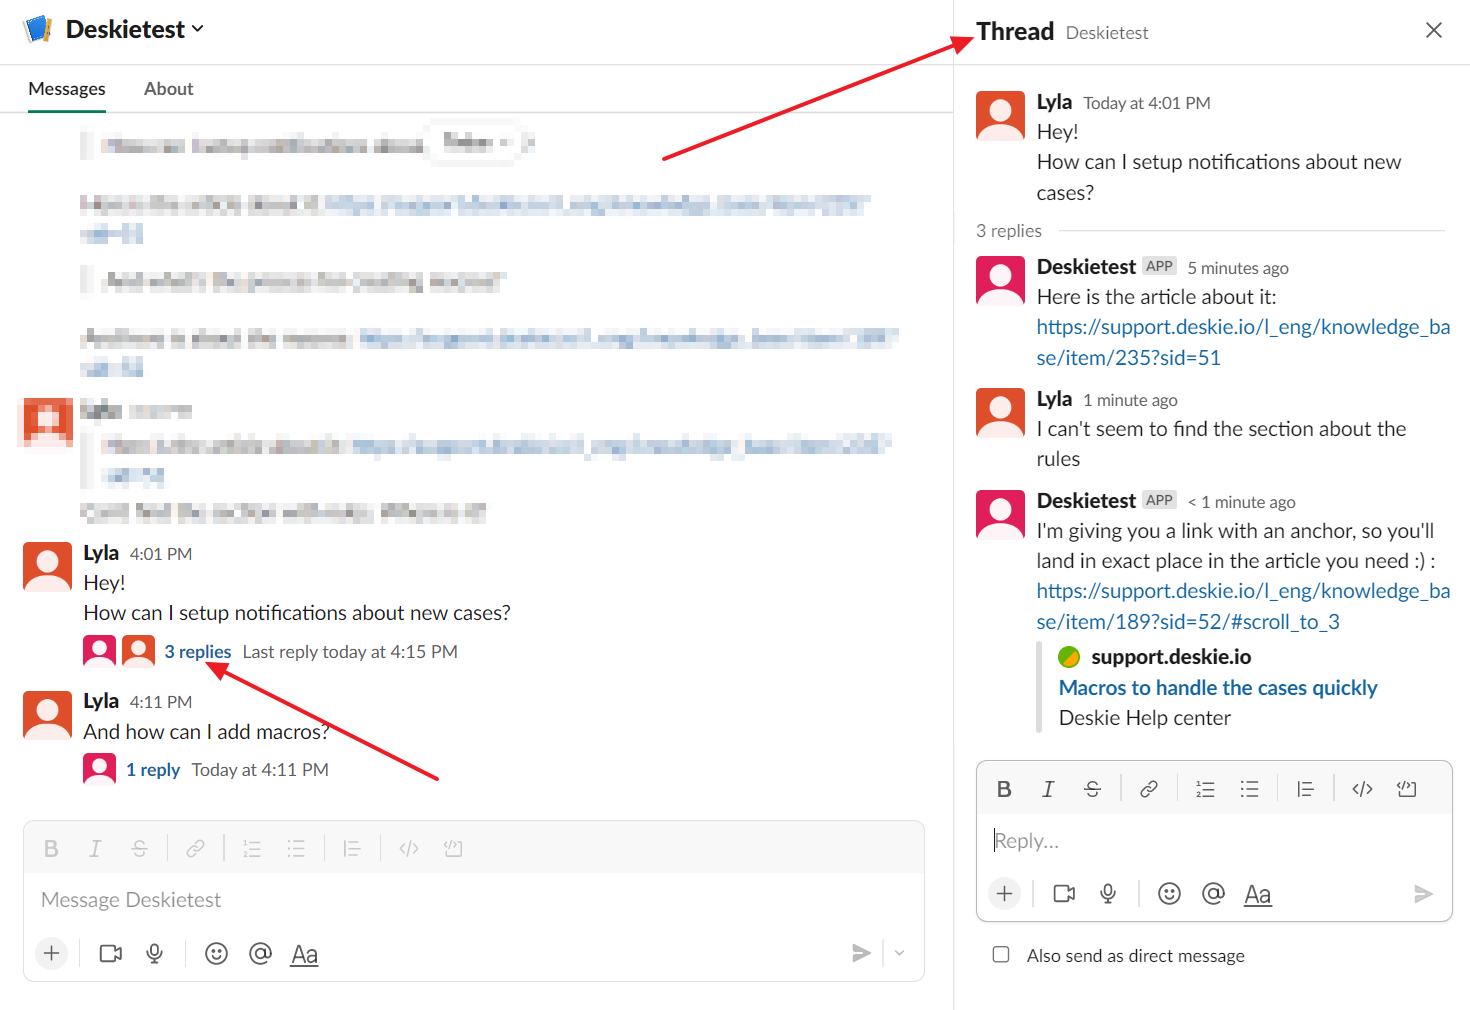
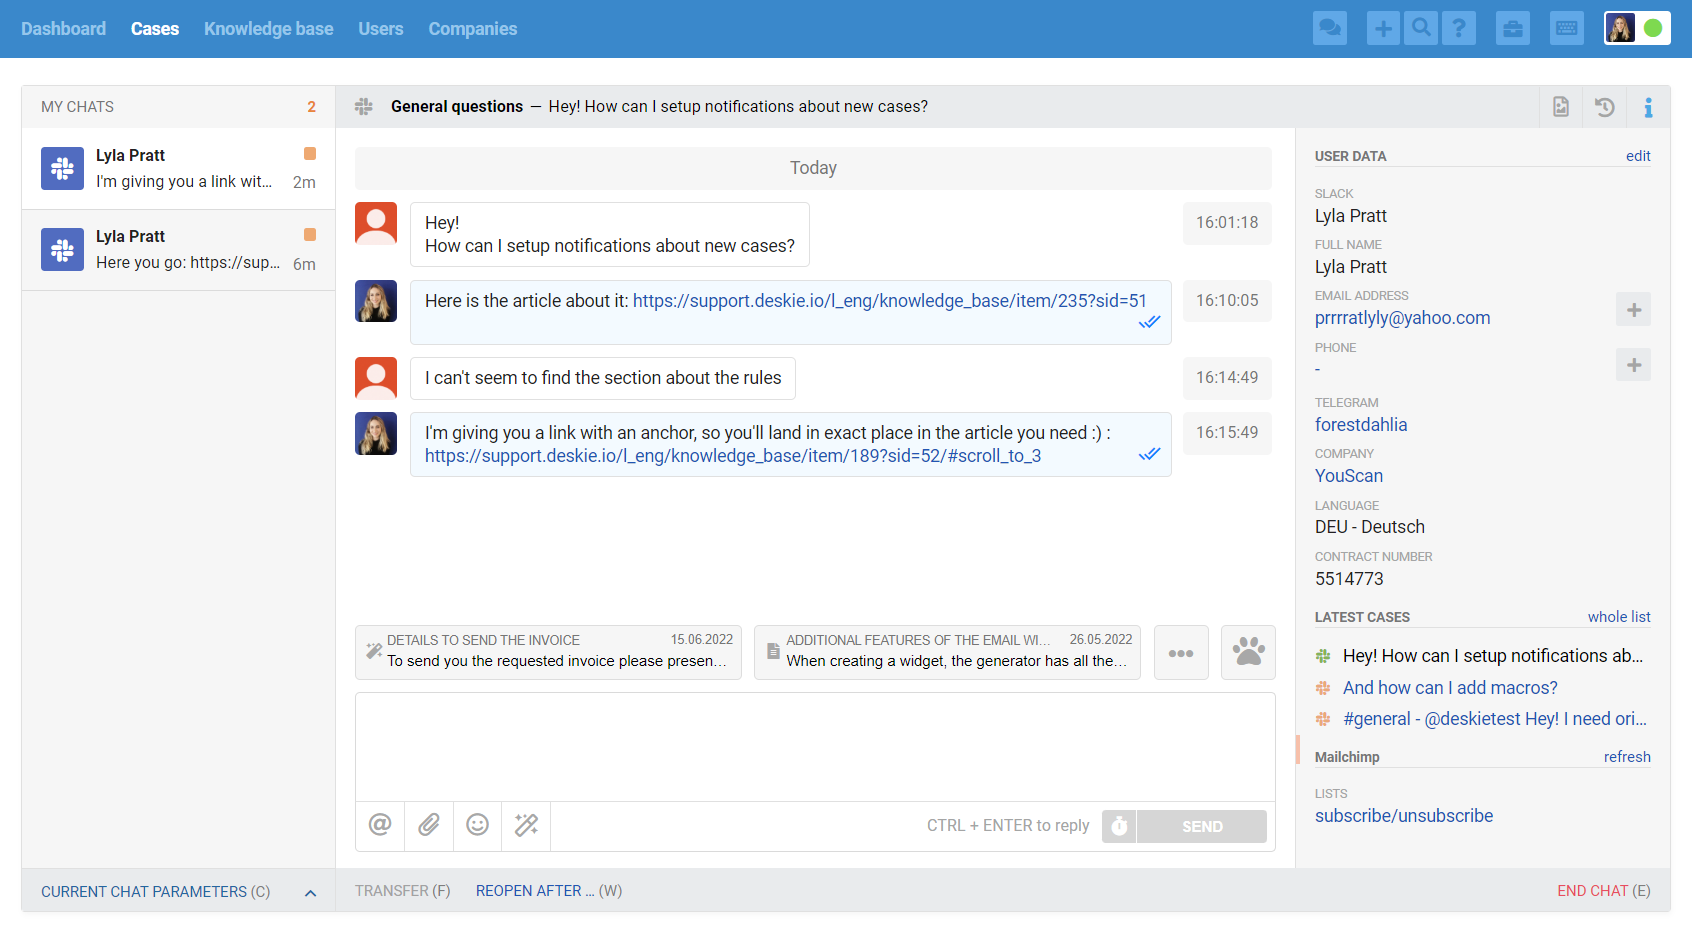
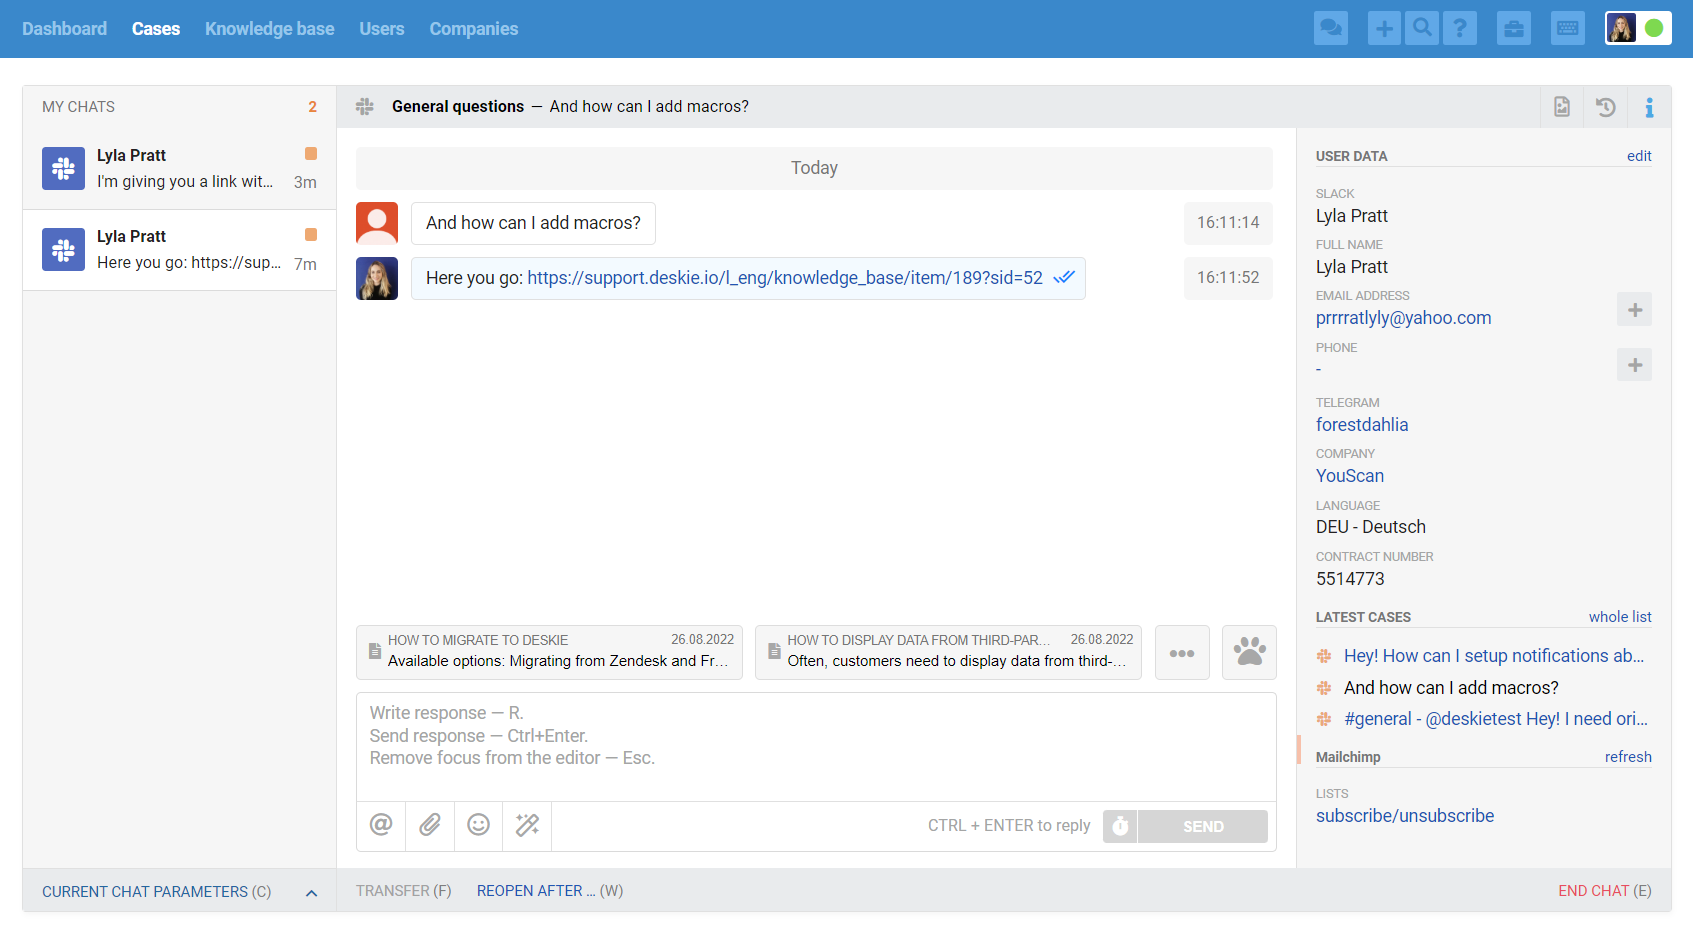
Read more about the nuances of the "agents' responses are sent to the thread" option here.
12. In the form for connecting a Slack bot, click "Connect" and in the pop-up window that appears, authorize the bot in Deskie.
Now you can add a Slack channel to the Deskie widget or place a link to add a Slack bot to the contact list in any place convenient for your customers. To do this, copy the link from the Slack bot edit form.
What do Slack messages look like in Deskie?
All cases list displays only the cases coming from asynchronous channels — users on both sides reply when it’s convenient for them. As for real-time chats, they are displayed and processed in a separate interface.
When you get a new chat (Slack, Telegram, FB messages, Whatsapp, Skype, Viber), a green icon appears in the upper right corner of the agent’s account. It displays incoming chats and new chat responses:
Chats are displayed in the all cases list too, but only after they were ended:
when an agent is ending the chat, clicking “end chat” in the lower right corner;
after 10 minutes (default value) of inactivity on both sides;
when one of the automated rules is applied, that has an “end chat and set status” action (for example, if you don’t plan to process chats and want to get them as cases in the all cases list):

We have separated synchronous and asynchronous communication on purpose because, if you want to provide first-class support, it is necessary to consider the specifics and expectations of customers, depending on the type of channel you use to carry out the communication.
For example, the user is ok to wait for a couple of hours to get a response to his/her email. However, even a 5-minute response delay in chats might seem like an eternity. If you do not take this point into account and treat cases from emails and chats equally, some customers will get an unpleasant experience interacting with the company.
Group chat communication in Slack
We describe in detail the logic of working with group chats in this article.
In order for a Slack bot to receive messages from a channel, you simply need to add the bot to the channel as a member and mention the bot through "@" in the message text.