
Webhooks — a tool for notifying websites or services about certain events. They allow you to track changes in Deskie and send the necessary information to the URL you specify in order to perform actions on other services.
Use cases
There are two main schemes for using webhooks:
1. Making a direct request to the API of a particular service. Here are some of the tasks that can be accomplished:
a. You have VIP customers. When you receive a new case from them, in addition to email notifications, you would also like to receive SMS;
b. You want to receive notifications about the events in cases in your familiar messenger;
c. If the case has been marked with a certain label, set the task in Basecamp, JIRA or any other services automatically;
d. Transmit the required data to the user's personal profile on your website;
e. It is also possible to make a request addressed to Deskie itself. For example, a webhook can be used to create a new case, set a language in user data or perform another action available in the API.
2. Sending data to your script. The script receives the data, processes it, and then performs the actions you need, either in third-party services or in Deskie. To write the script you will need to involve your developers. They will also need to prepare the content of the request, which will pass the webhook to the script.
Setup
Sending a webhook is one of the possible actions in rules. This action is available in all rule types — for new, updated and existing cases.
1. When adding the "Send webhook" action, the first step is to choose the method of sending the request:

- POST allows you to add data via a third-party service API;
- GET — checks status or retrieves data;
- PUT — updates data;
- DELETE — deletes data.
2. Next, you specify the URL the request will be sent to. This link is usually generated on the receiving end — either in the settings of your chosen service or by your developers who wrote the script.
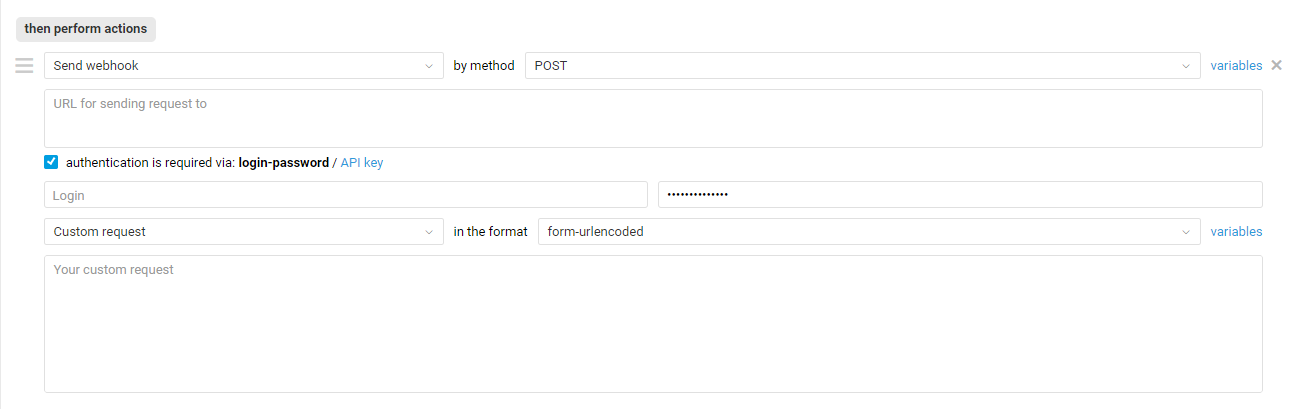
3. If authentication is required to accept the request, just tick the checkbox and select the authentication method:

4. When selecting the POST and PUT methods, additional fields appear to specify the request itself and its format:
- If you create your own script, you can make it so it accepts requests with any structure, therefore it's easiest to send a standard request in such cases;
- If you are sending a request to a service, its API will accept it in a certain format, hence a custom request has to be sent. Usually the structure and syntax of such a request is described in the API documentation of the service itself.
Available variables are added via the link to the right above the field.
Example of notification in Slack
To make it clearer what it looks like in real life, here's the rule we use to get notifications about new cases in Slack:
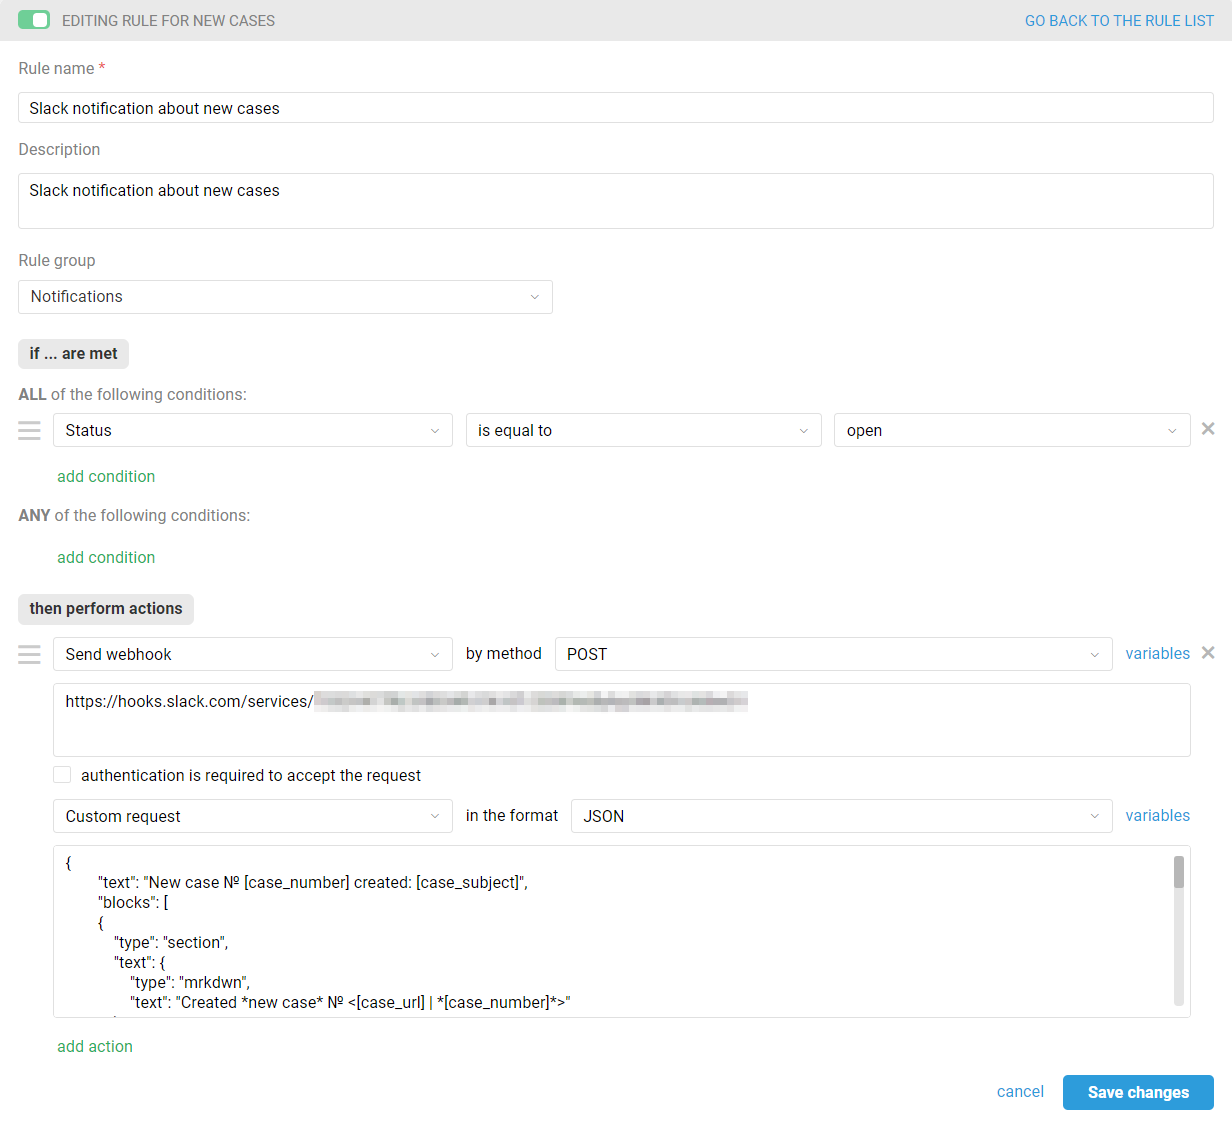
Just copy the text of our custom request and save time :)
{
        "text": "New case № [case_number] created: [case_subject]",
        "blocks": [
        {
            "type": "section",
            "text": {
                "type": "mrkdwn",
                "text": "Created *new case* № <[case_url] | *[case_number]*>"
            }
        },
        {
            "type": "section",
            "fields": [
                {
                    "type": "mrkdwn",
                    "text": "*Sender*\n[user_full_name] \n [user_email]"
                },
                {
                    "type": "mrkdwn",
                    "text": "*Group*\n[case_group]"
                }
            ]
        },
        {
            "type": "section",
            "text": {
                "type": "mrkdwn",
                "text": "*[case_subject]:*\n\n[case_description|text]"
            }
        },
        {
            "type": "divider"
        }
    ]
}
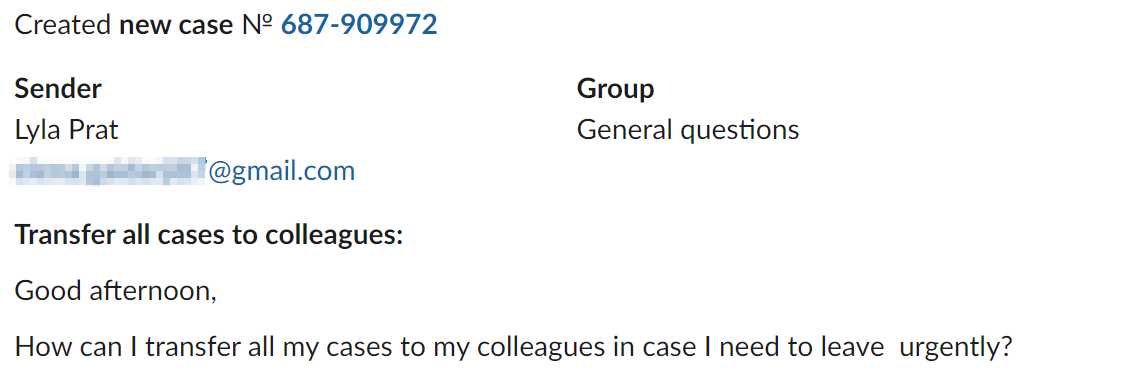
A Slack notification set up in this way looks like this:
Limitations, response codes, and retry attempts
1. You can perform up to 3600 webhooks per hour. The limit applies to the entire account, so webhooks set up in all rules are counted.
2. If the limit is exceeded, the request is postponed and executed immediately after the limit is reset.
3. A status of 2xx indicates successful execution of the webhook. A status of 3xx indicates a redirect. If the status is not 2xx or 3xx, there is a problem:
- 4xx means the error is permanent, so we don't try to send the webhook again;
- 5xx means the error is temporary, and we repeat the request every 30 minutes until it's successful, but make no more than 24 attempts.
4. If your Webhook URL doesn't respond within 5 seconds, a timeout occurs, and the action history log shows "http code #0". We use a timeout because we can't wait too long for a response from the Webhook URL — otherwise it would create a large queue, and all webhooks would start being sent with a significant delay.
If a timeout occurs, we resend the webhook every 30 minutes, but make no more than 3 attempts.
It's possible that when your script receives our request, it performs some additional requests on its own side (a request to another service, a database write, etc.) before responding that it successfully received the request. If that's the case, you'll need to change the logic so that your script responds with a 2xx code as soon as it receives the webhook, and only then performs the other actions on its side.
5. If we receive an empty response, the action history log shows "http code #0". This usually means something on your end hasn't been accounted for. The cause could also be an incorrectly configured request — for example, an extra space or line break in the "URL to send request" field.
In that case, we retry sending the webhook every 30 minutes until it succeeds, but make no more than 24 attempts.