When you sign up for the service, you get a help center. It lets your customers reach out for support, view previous requests, browse knowledge base articles, and submit ideas for improving your products or services.
By default, users register separately in the help center, and their accounts on your service and in Deskie are not linked. But this doesn't work if, for example, your knowledge base is intended only for customers with an active subscription, or if you don't want users to log in twice.
For these scenarios, remote authentication — or Single Sign-On (SSO) — is used. It lets you link help center login to authentication on your side: the customer enters their credentials on your service and then gets access to the help center without having to go through a separate authentication process in Deskie. The functionality is available through the following path: admin account — section "Help center" — subsection "Authentication".
Below we'll cover how standard authentication differs from remote authentication and how to configure Single Sign-On (SSO).
1. Standard authentication by Deskie
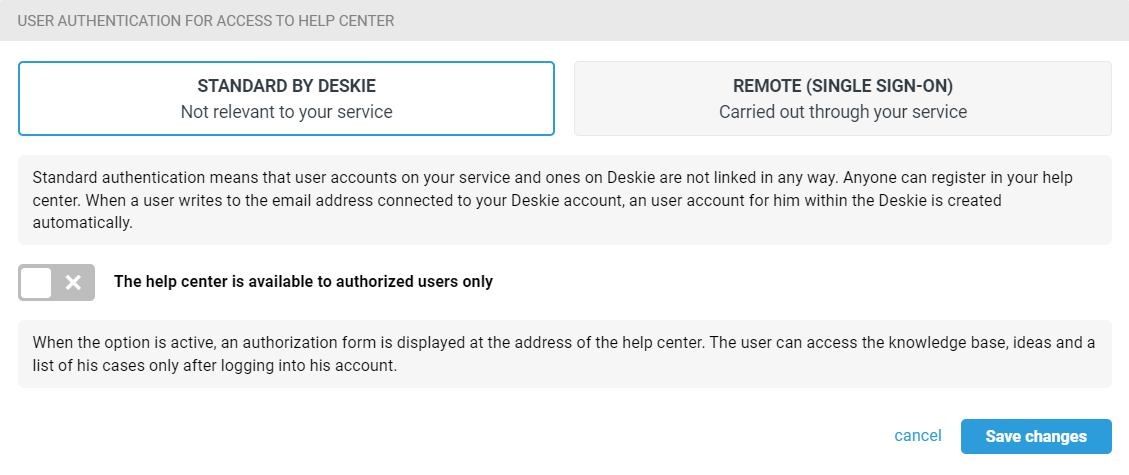
This type of authentication is active by default. When it is used, customer accounts on your service and on Deskie are not linked. You need to register separately in the help center, and anyone can do it. It is not possible to prohibit registration.
As a bonus, we have added the option of displaying the help center to authorized users only. In this case, when you click on the help center link, an authorization form will be displayed:
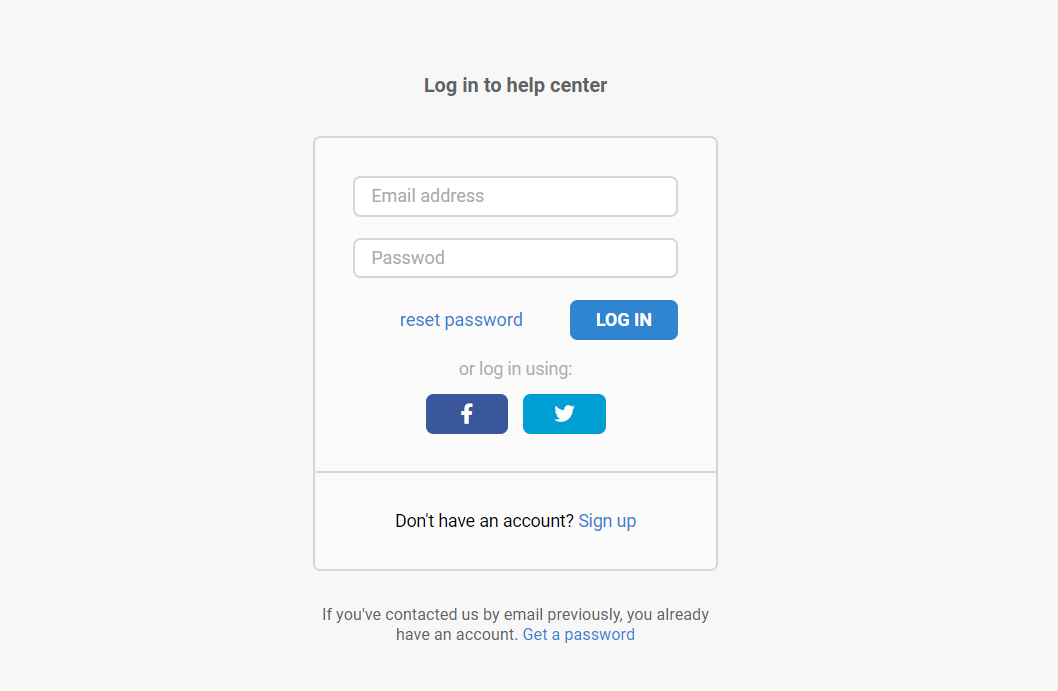
This option should not be considered as limiting access to the help center. It scares away "lazy" users, but the form has both registration and login via social networks. To a greater extent, this option is designed to collect basic user data. Plus, you make it easier for customers to work with the help center — sign-in is already done, and they can perform any actions.
2. Remote authentication
This type of authentication is more difficult to set up, but it is more convenient in many ways. It has two main purposes: limiting access to the help center and eliminating double authentication for customers.
For example, you want to make a private knowledge base and place materials there only for paying customers. To solve this problem, you need to set up Single Sign-On and hide the help center from prying eyes with the "The help center is available to authorized users only" option.
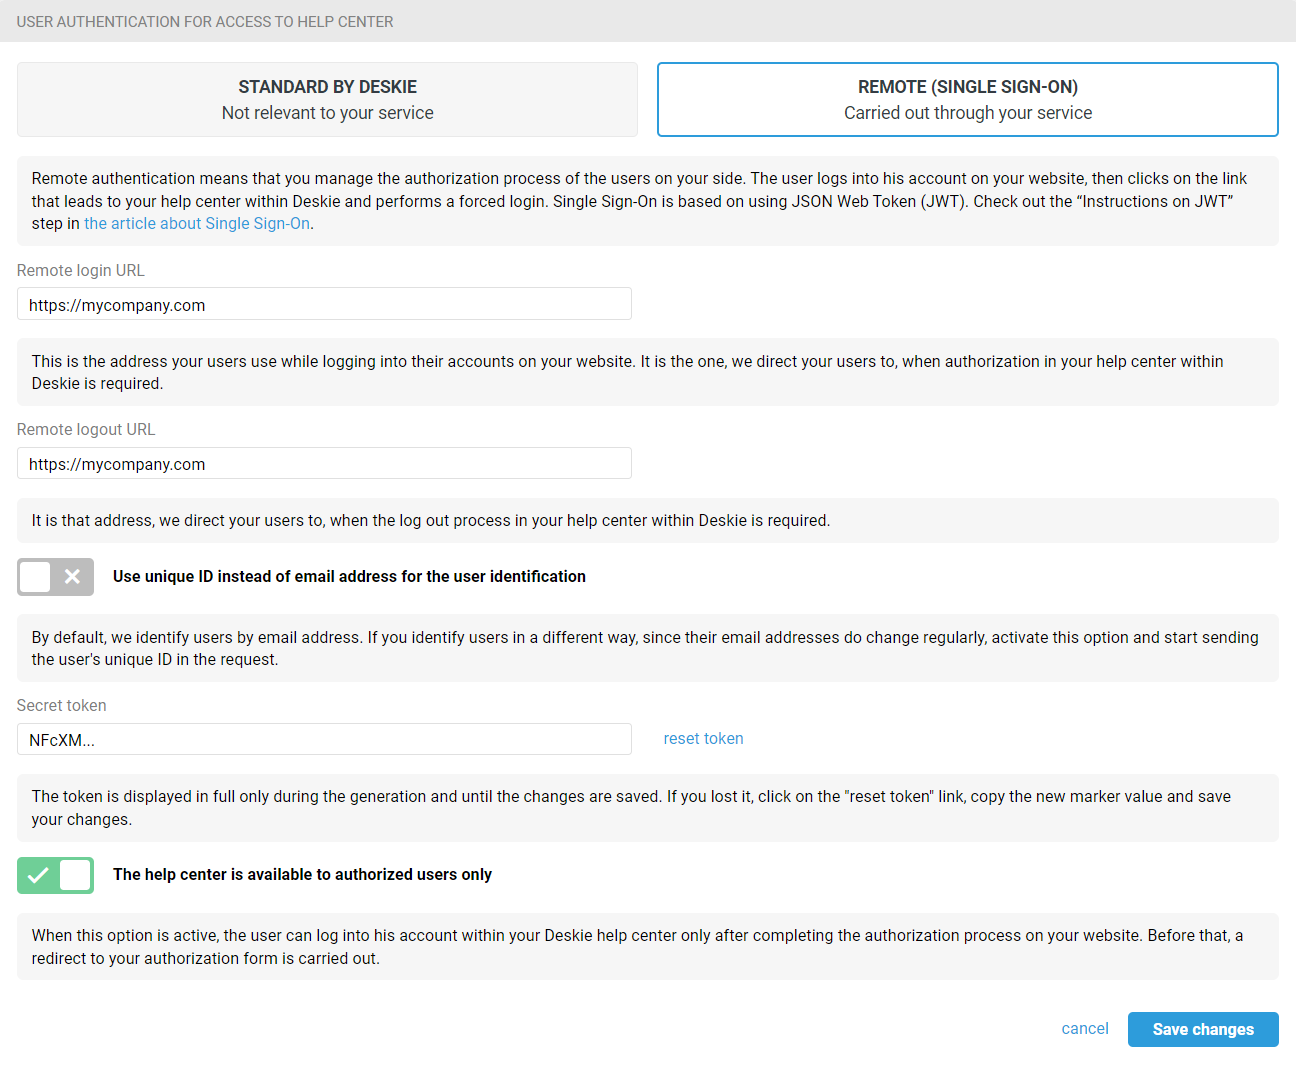
As a result, customers can only access the help center after logging into a personal account on your service. Therefore, it's up to you to decide which of them can see the knowledge base and which cannot.
When the "The help center is available to authorized users only" option is inactive, everyone has access to the knowledge base and ideas, but only your customers are able to access it. In this case, clicking on the "Login" link (in the upper right corner of the help center) redirects to the page specified in the "Remote login URL" field.
Customer personal account on your side
If the customer doesn't have a personal account on your service, that's okay. You can create a standard authorization form to check the data entered by the user and then log in to the help center (if he/she is a customer).
Instruction for JWT
1. Information on JWT + example of using JWT.
2. The fields we accept via JWT:
iat (mandatory) — Issued At (the time the token was generated);
email (mandatory) — the user's email address;
name (optional) — user name;
external_id (optional) — external id of the user;
company_name (optional) — user's company name;
company_position (optional) — position of the user;
remote_photo_url (optional) — URL of the avatar;
exp (optional) — time during which the request is valid.
3. Customer data must be sent via a JWT request to: [yourcompany].deskie.io/access/jwt?jwt=[jwt_payload], replacing «jwt_payload» with the JWT generated on your side.
⚠️ If you use your own subdomain, replace the first part of the address (https://[yourcompany].deskie.io) with it.
4. A successful JWT request returns a "forced login" URL with a 200 status code. If an error occurs, the response returns a 401 status code with an error description.
Link lifetime
The forced login link you receive cannot be used as a permanent link to the help center. It is valid for 1 minute from the time it's received and is intended for a single login only.
The flow works as follows:
- The user clicks the button or link to go to the help center on your side →
- You send a JWT request to Deskie →
- Deskie returns a temporary forced login link →
- You redirect the user to this link →
- The user reaches the help center already logged in.
The next time the user goes to the help center, you need to send a new JWT request and get a new login link.
Other details
1. Regardless of the type of authentication, if the "The help center is available to authorized users only" option is enabled, the help center indexing is disabled.
2. If SSO is selected, and this is the first time the customer writes to the support email address, the password is not included in the notification email. The link to the case remains, but when clicking on it the customer is forwarded to your authorization page (if the customer is not yet logged in).
3. The user data you pass through JWT (JSON Web Token, JSON web marker) overwrites the data we hold. So if you don't want to change user data, you should pass only the email address in the JWT request.
4. If you use a unique ID to identify the customer, we update/indicate it when we don't find the ID from the query, but find the email address. In this situation, external_id from your request is written for the found address.
5. If you set up remote authentication, then when the customer is authorized, the "Full Name" and "Email Address" fields are hidden in the case submission form when creating the case. In the user profile, the password change block is also hidden.