During the day, in addition to processing cases, agents often do other tasks: prepare articles or screencasts for frequently asked questions, engage in self-study, bring new colleagues up to date, perform demonstrations to customers, assign tasks to agents of other departments, etc.
In such cases, setting the "offline" status is not entirely correct, since the agent, although they cannot process cases, are busy with other work. It is important for the manager to know exactly what and how long the agent has been doing. Custom statuses for agents with numerous settings just solve this problem.
Let's take a closer look at the new functionality.
Standard statuses
There are three standard statuses in Deskie:
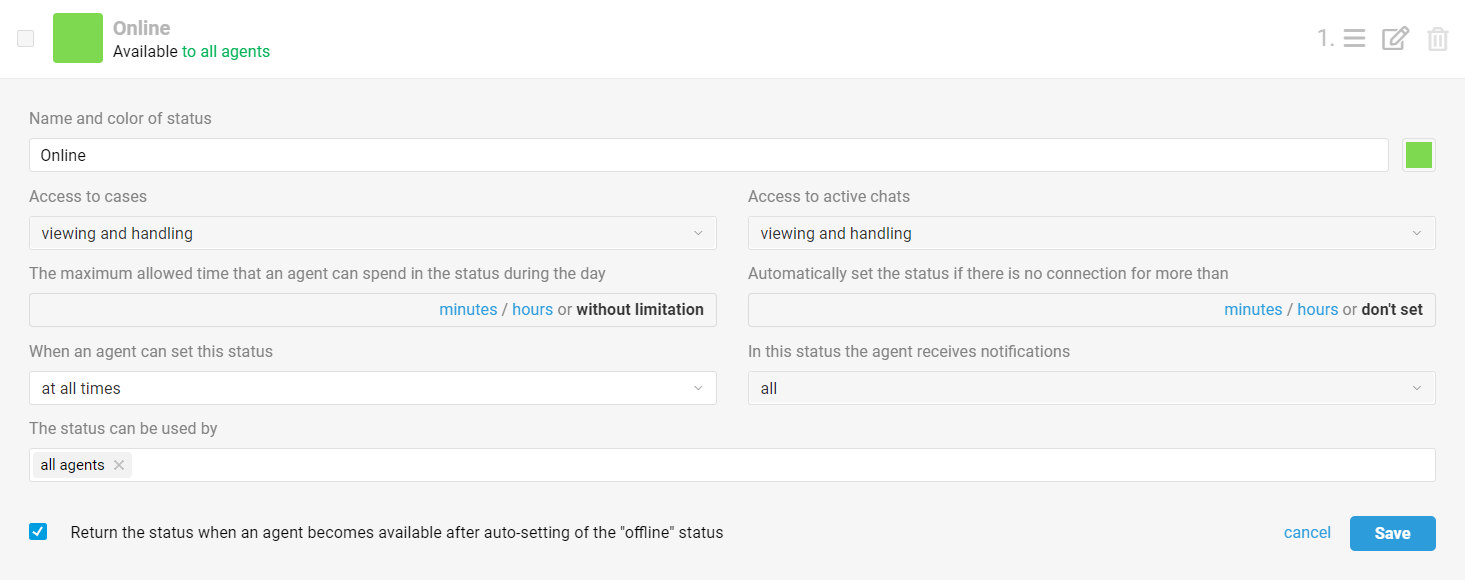
Online — means that the agent is active and available to work with chats;
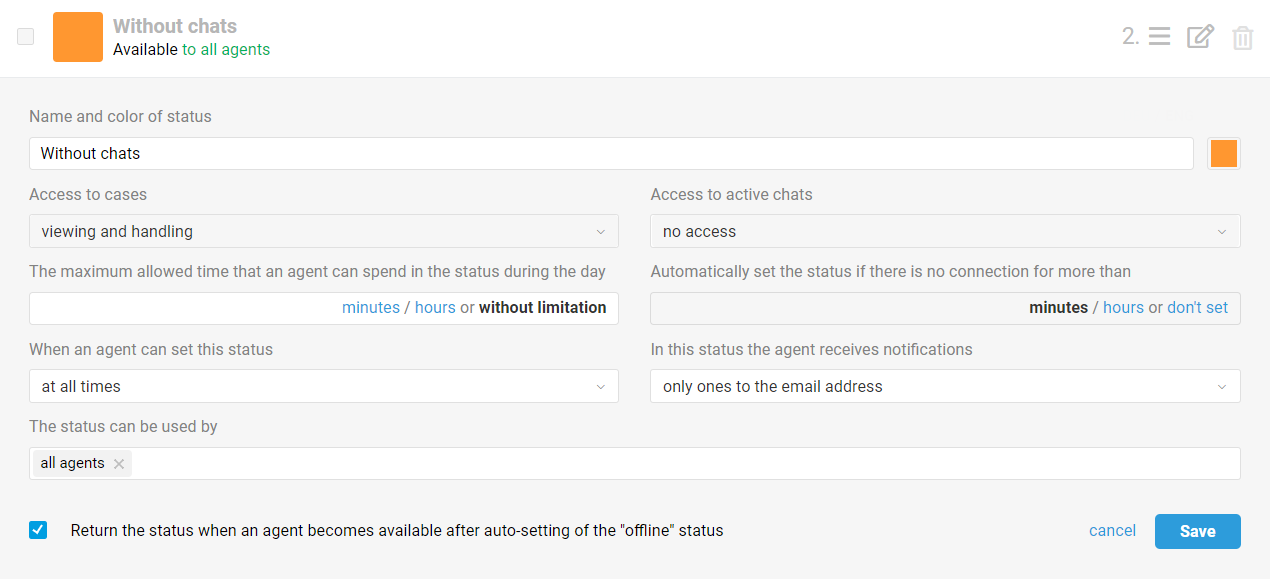
Without chats — in this status, agents can work with cases via asynchronous channels (email, posts, and comments from social networks, custom asynchronous channels), and leave notes in cases for completed chats. However, in this status, agents do NOT participate in the distribution of cases if there are rules for case distribution among online agents configured, do not receive browser and sound notifications (standard or configured through the rules), do NOT see active chats, and can NOT process them;
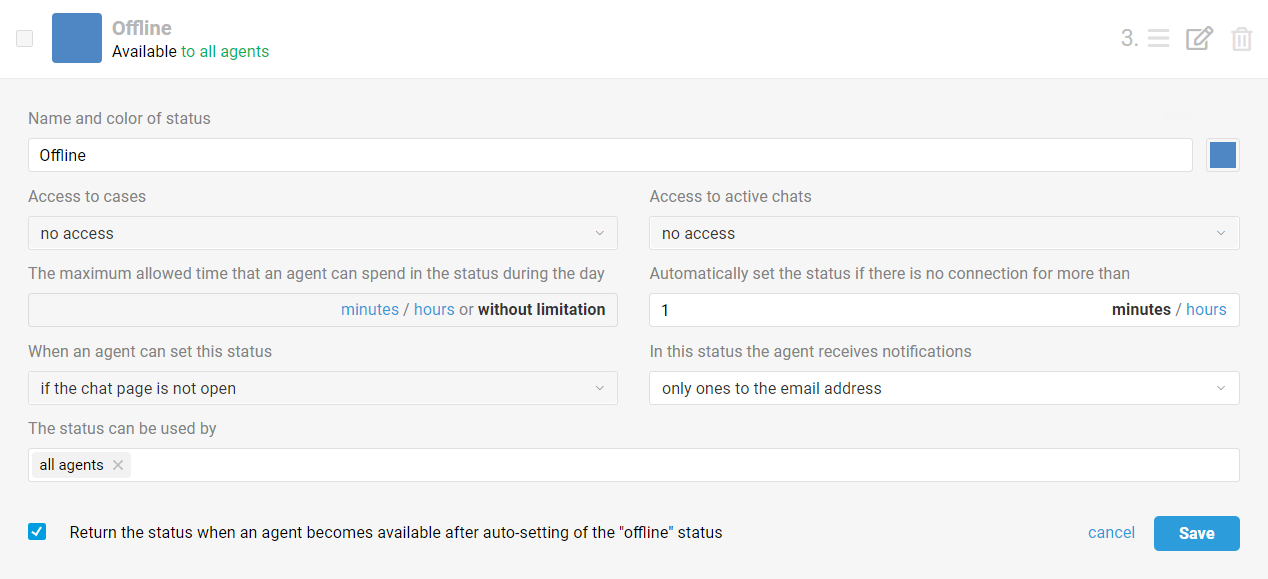
Offline — agents do not have any access to cases.
if they manually set themselves offline status;
if the maximum allowed time that an agent can spend in the status during the day has expired;
if an agent logs into Deskie after being in certain status with the return the status when an agent becomes available after auto-setting of the "offline" status option disabled and received the offline status automatically because they closed all tabs with Deskie or lost connection with the Internet for more than a minute.
Creating your own agent statuses
To create an additional status or edit an existing one, follow the path: administrator account — section "Team" — subsection "Agent statuses".
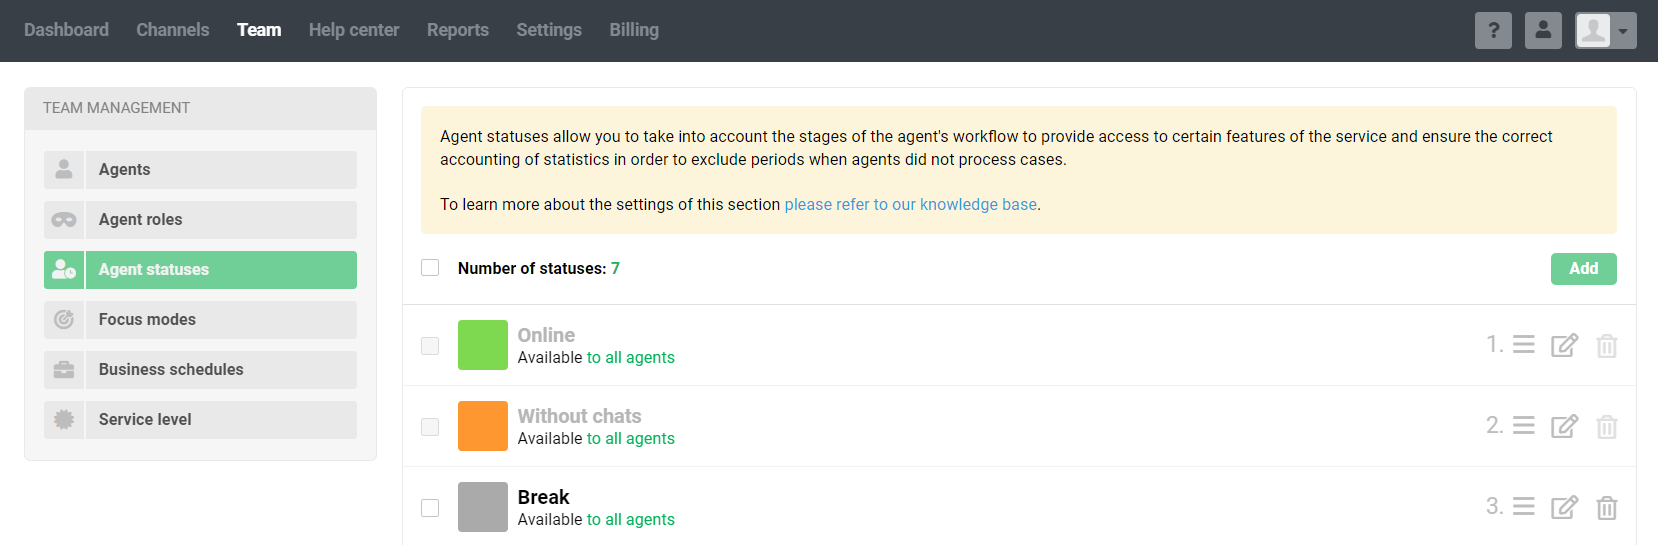
Statuses have several settings, let's take a closer look at them.
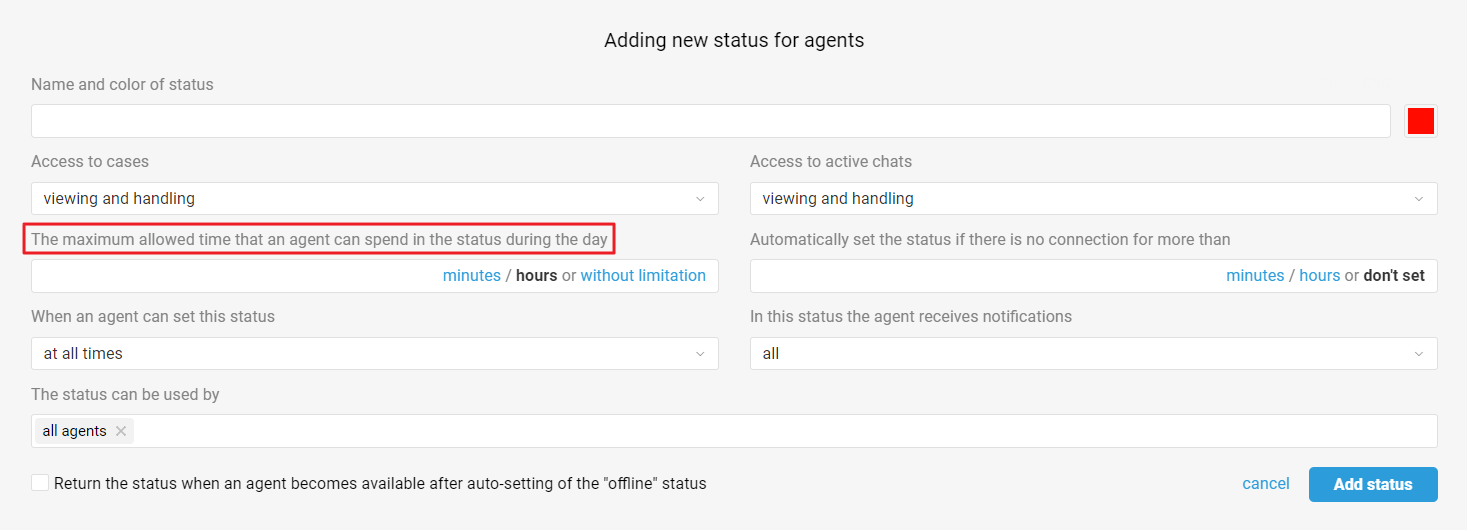
1. Name and color of the status
Here everything is pretty simple: these parameters will help agents choose the desired status and track the status that they have. Also, these parameters will be visible in the reports on statuses in the administrator account.
2. Access to cases

This setting applies to cases from asynchronous channels (email, posts, comments from social networks, custom asynchronous channels) AND cases from completed chats that are displayed in the all cases list.
More details about each available option:
"viewing and handling" — when this option is selected, the agent can perform any action in cases: change parameters, send responses, add notes;
"view-only" — when this option is selected, the agent can only leave notes in cases and can NOT send responses or change parameters;
"no access" — when this option is selected, the agent cannot do anything, even open any case.
The type of access is also taken into account when cases are distributed automatically through automation rules. If an agent has a status that has the "viewing and handling" option selected in the "Access to cases" field, that agent will be counted as available. If in the "Access to cases" field "view-only" or "no access" is selected, then the agent will be counted as unavailable and won't be assigned to cases.
Note
The standard status without chats has the "viewing and handling" option selected in this field, but agents in this status will still not fall under the conditions of the rules that distribute cases.
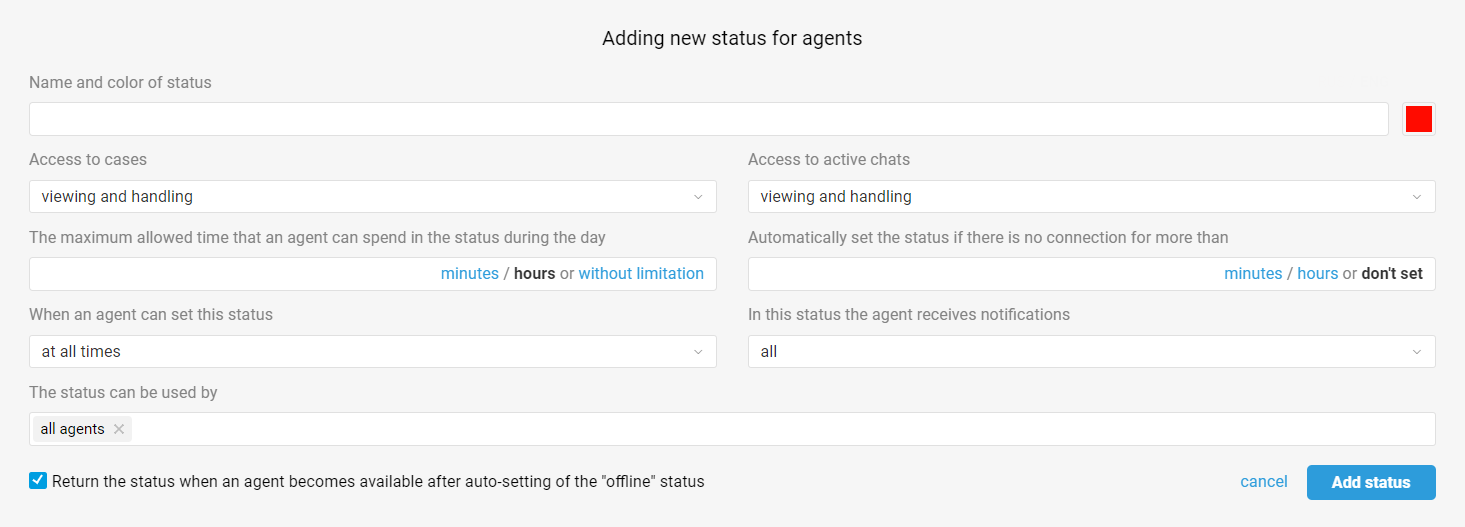
3. Access to active chats
This setting only applies to active chats, which are displayed in a separate interface for working with active chats. Completed chats that are displayed in the all cases list are subject to the settings in the "Access to cases" field, discussed above.
More details about each available option:
"viewing and handling" — when this option is selected, the agent can perform any action in chats: change parameters, send responses, add notes;
"view-only" — when this option is selected, the agent can only leave notes in active chats and can NOT send responses or change parameters;
"no access" — when this option is selected, the agent cannot see active chats and can't access them
The type of access is also taken into account when cases are distributed automatically through automation rules. If an agent has a status that has the "viewing and handling" option selected in the "Access to active chats" field, that agent will be counted as available. If in the "Access to active chats" field "view-only" or "no access" is selected, then the agent will be counted as unavailable and chats won't be assigned/fixated to such an agent.
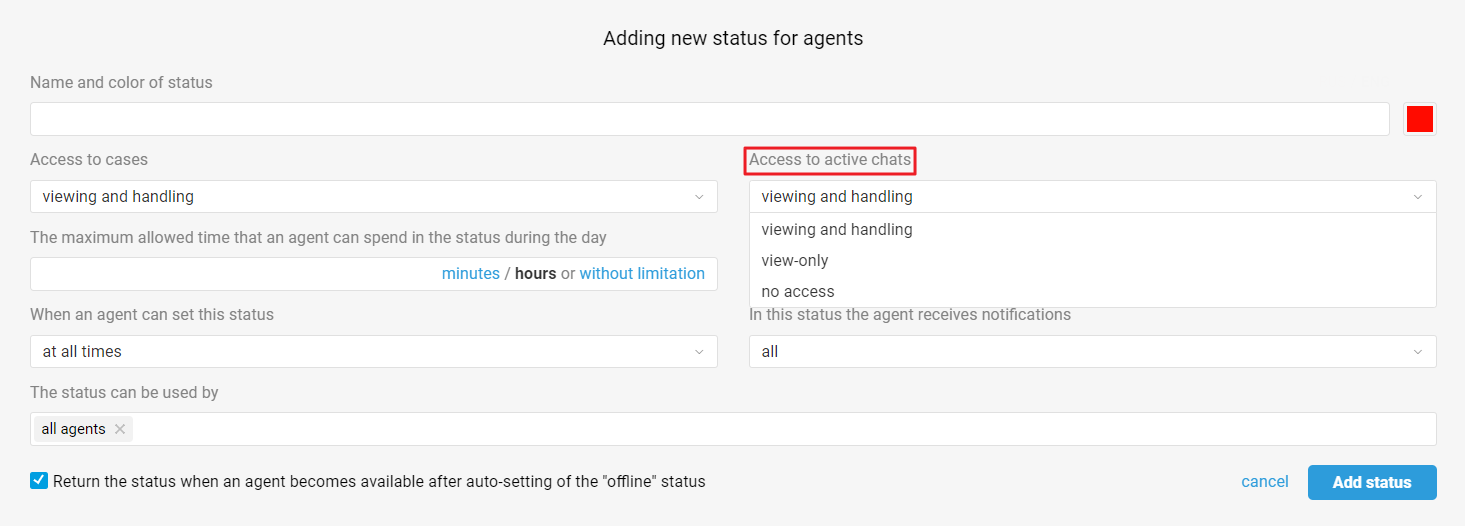
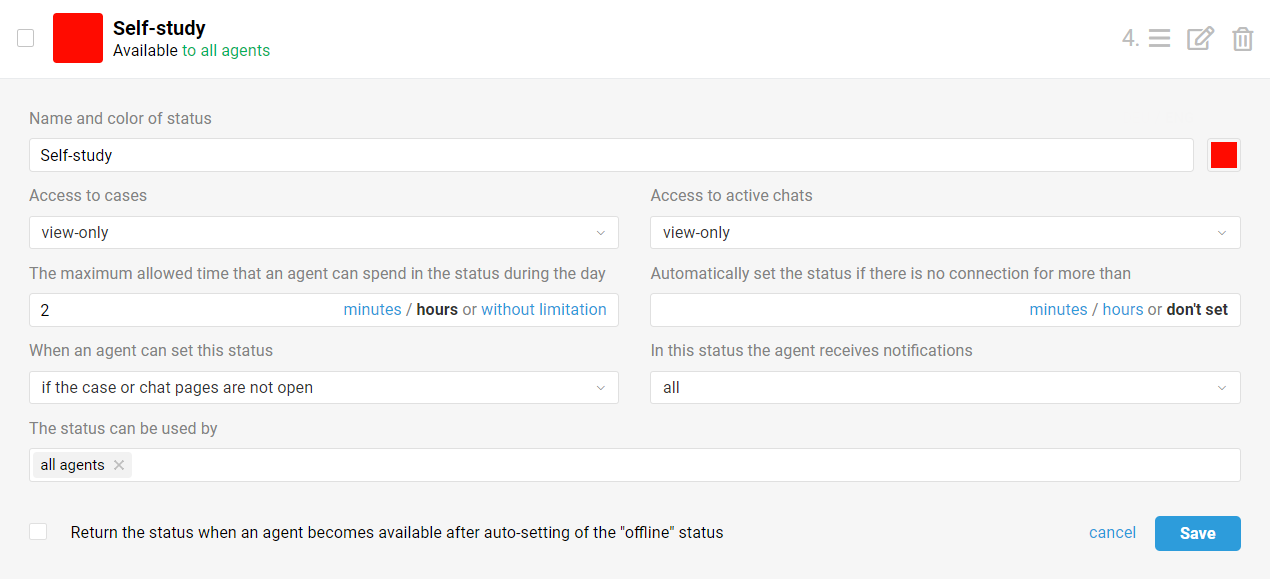
4. The maximum allowed time that an agent can spend in the status during the day
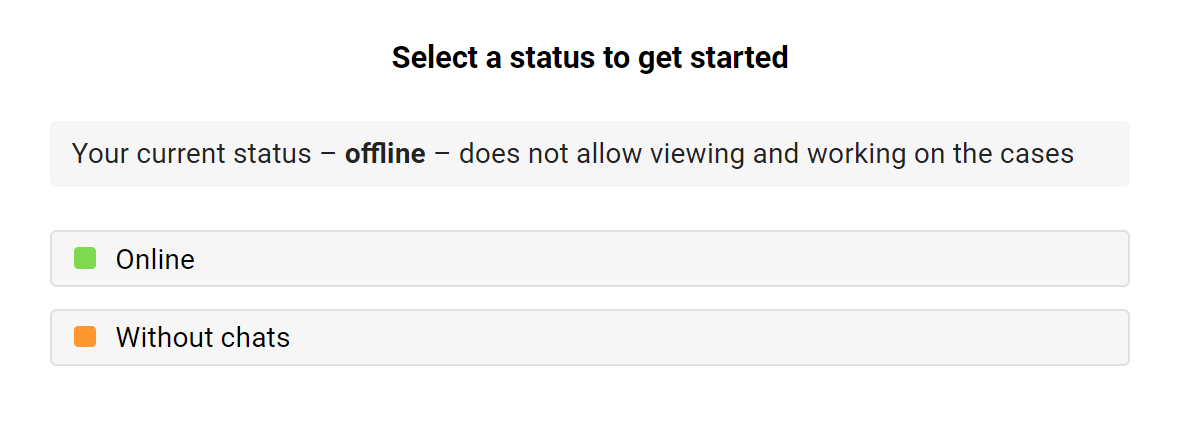
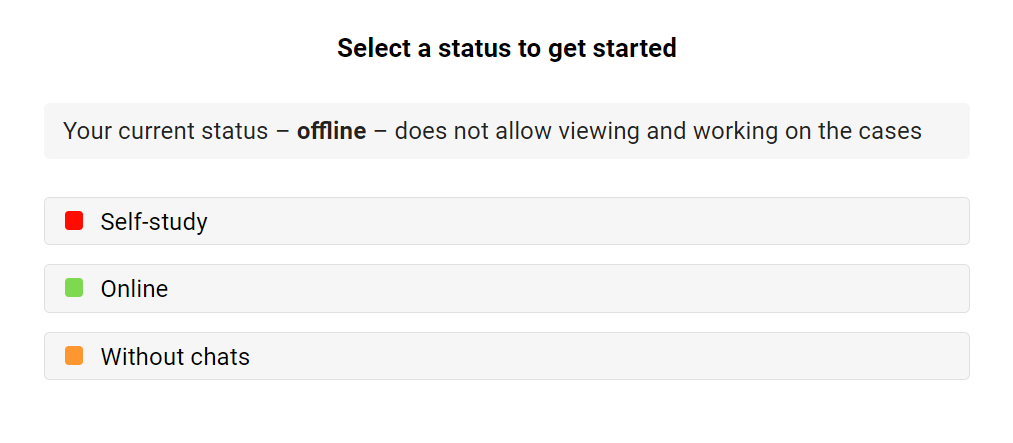
With this setting, you can limit the time during which agents can be in the selected status during the day. At the end of the specified time, the agent will be automatically transferred to the offline status and will see a modal window for selecting a new status in which they will continue working.
If an agent has a strictly limited time, for example, for a lunch break or self-study, create an appropriate status and indicate the time available to the agent in this field so that when it ends, the agent sees a window for choosing a status and moves on to other tasks.
5. Automatically set the status if there is no connection for more than
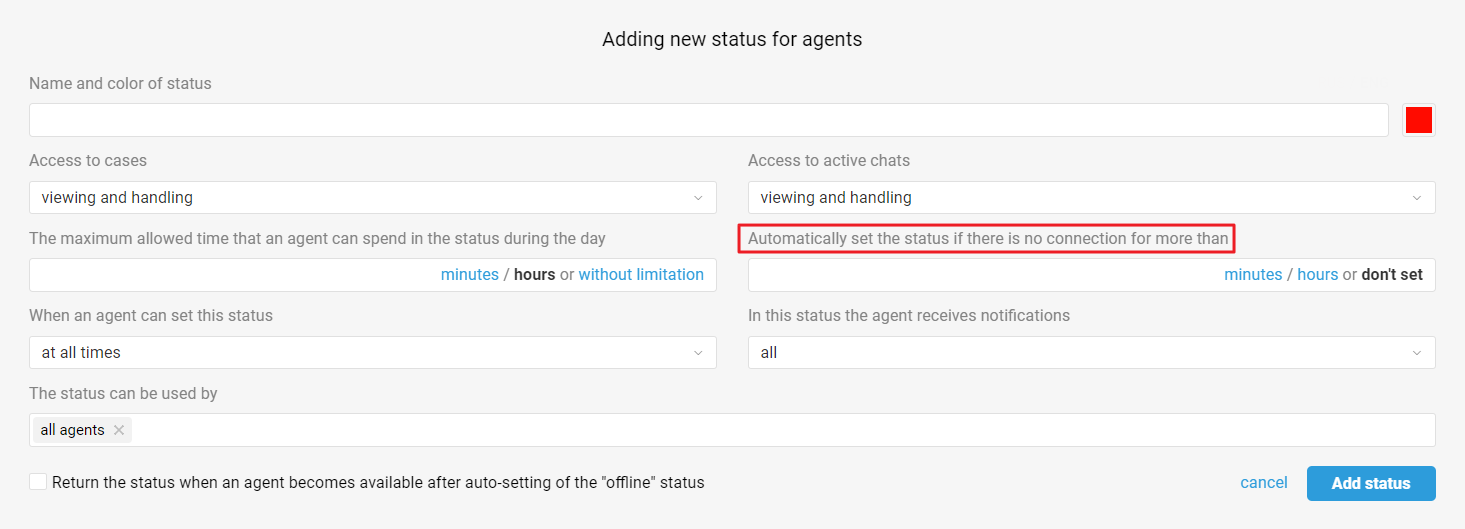
This setting is of key importance for the offline status since if there is no connection with the agent for more than 1 minute (by default), the agent will be transferred to the offline status so that cases will not be distributed to them if the appropriate rules are configured.
Note
If you create custom statuses and use this setting, keep in mind that the offline status should have the highest value in this field, since if there is no connection for a long time, the agent will receive the offline status anyway.
6. When an agent can set this status
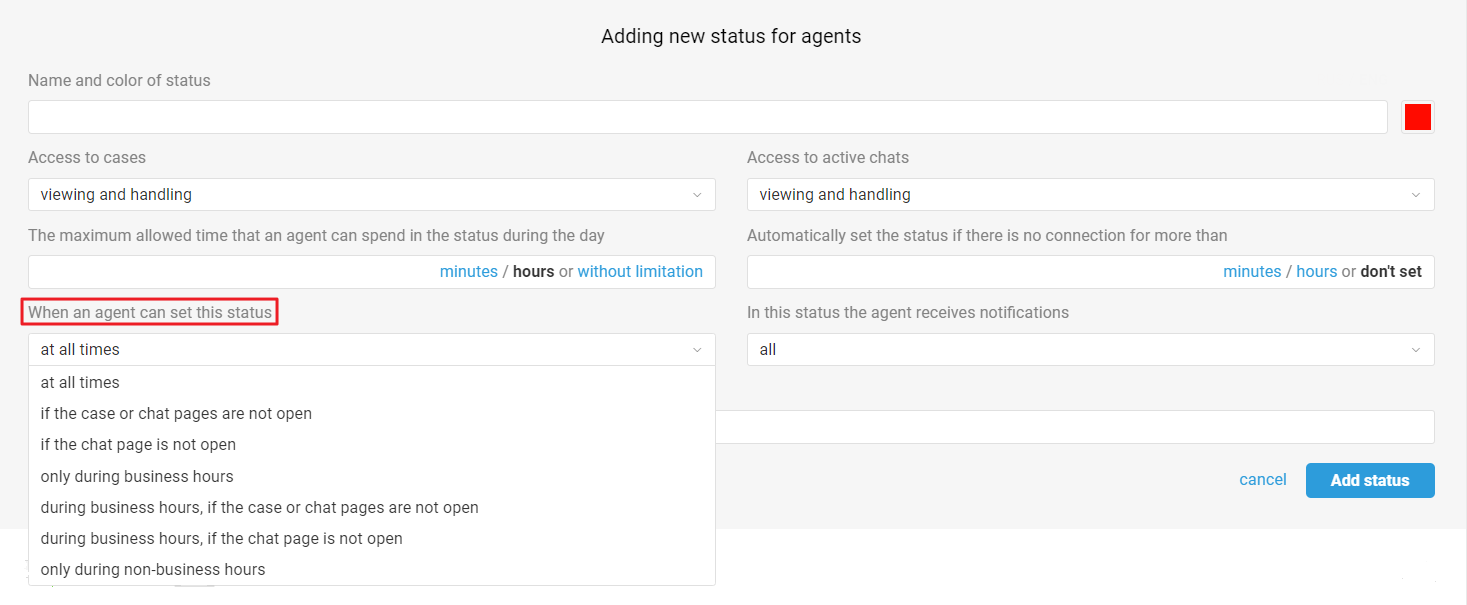
Thanks to this setting, you can limit the ability to select a particular status. The limit may depend both on working hours and the presence of open tabs with cases or chats in Deskie.
As a result, in the list of available statuses, the agent sees only those statuses that correspond to working hours and the presence of tabs with cases. For example, if the “if the case or chat pages are not open” option is selected in the status settings, and the agent goes to any case, when they click on their profile picture in the upper right corner of the account, this status simply will not be in the list.
7. In this status the agent receives notifications

Thanks to this setting, you can control the types of notifications that an agent receives while in a certain status.
For example, if an agent conducts demonstrations or negotiations with customers during the day, it makes sense to create a status for them in which they won't receive browser or sound notifications but will receive notifications by email only to check them after returning to work with cases.
By default, agents only receive browser notifications for new or newly activated chats. Other notifications are configured through automation rules.
8. The status can be used by
This setting will help not to inflate the general list of statuses if different departments or agents need different statuses. List in this field only those agents who need the status so that only they can select it.
9. Return the status when an agent becomes available after auto-setting the "offline" status
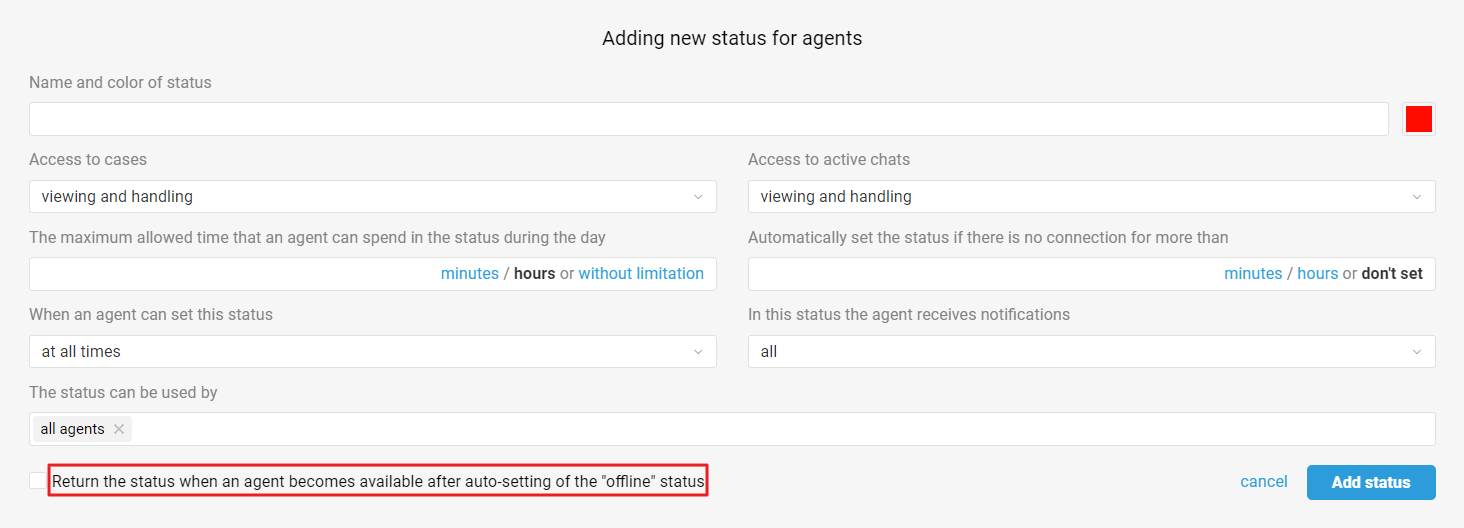
Thanks to this setting, you can choose what happens to an agent when they return to Deskie after being automatically taken offline.
By default, if an agent closes all Deskie tabs, or if an agent has problems with the Internet for more than a minute, the agent will automatically be taken offline. When the agent opens Deskie again, we will check what status the agent was in before they got the offline status, and if they were in a status that had this checkbox checked, the agent will automatically get the previous status and will not see the modal window for choosing the status. If the agent was in a status for which this checkbox was NOT checked, they will see a window for self-selecting the status.
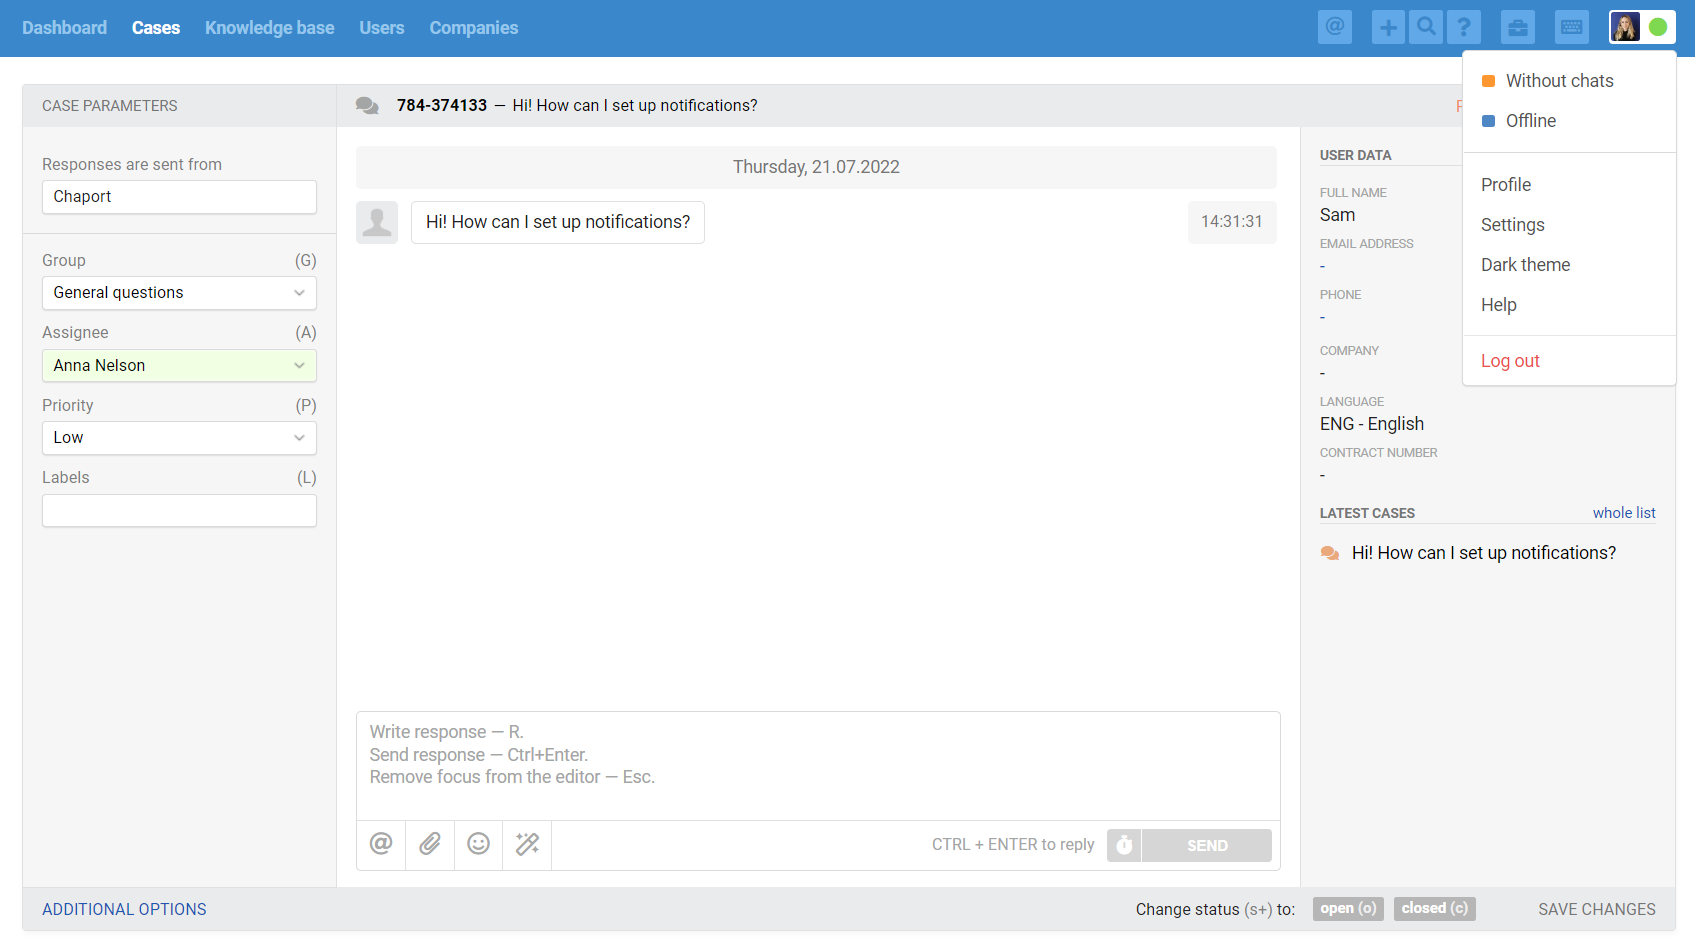
Statuses in the agent's account
Agents see available statuses in the drop-down menu in the upper right corner of the agent's account.
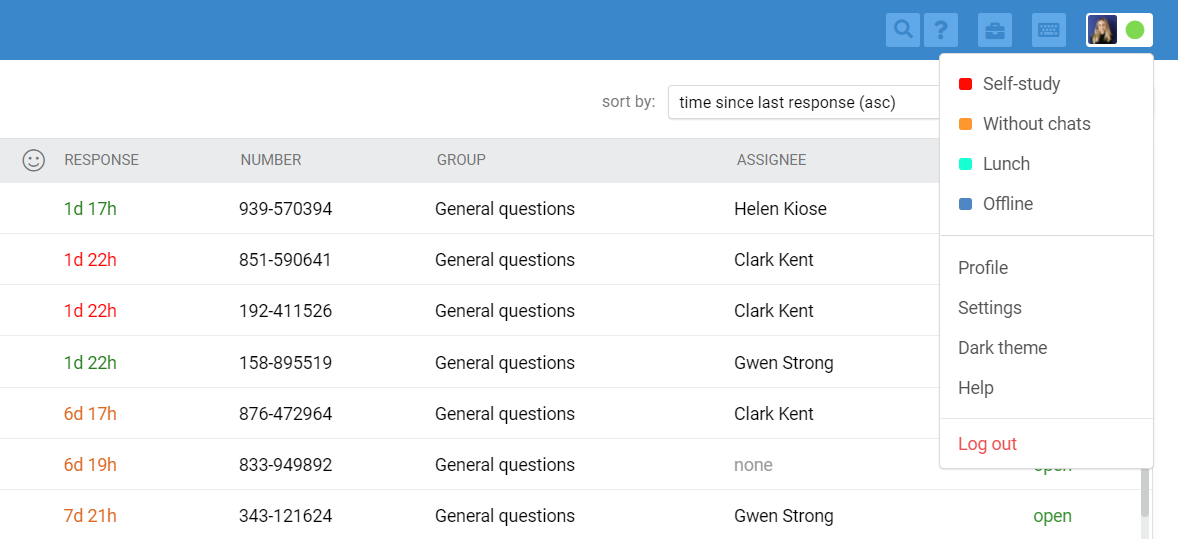
If an agent forgets what status they are in, they can always hover over the status circle to see the name in a tooltip.
In the working process, an agent may also need information about the status of their colleagues. There are several places where this can be checked:
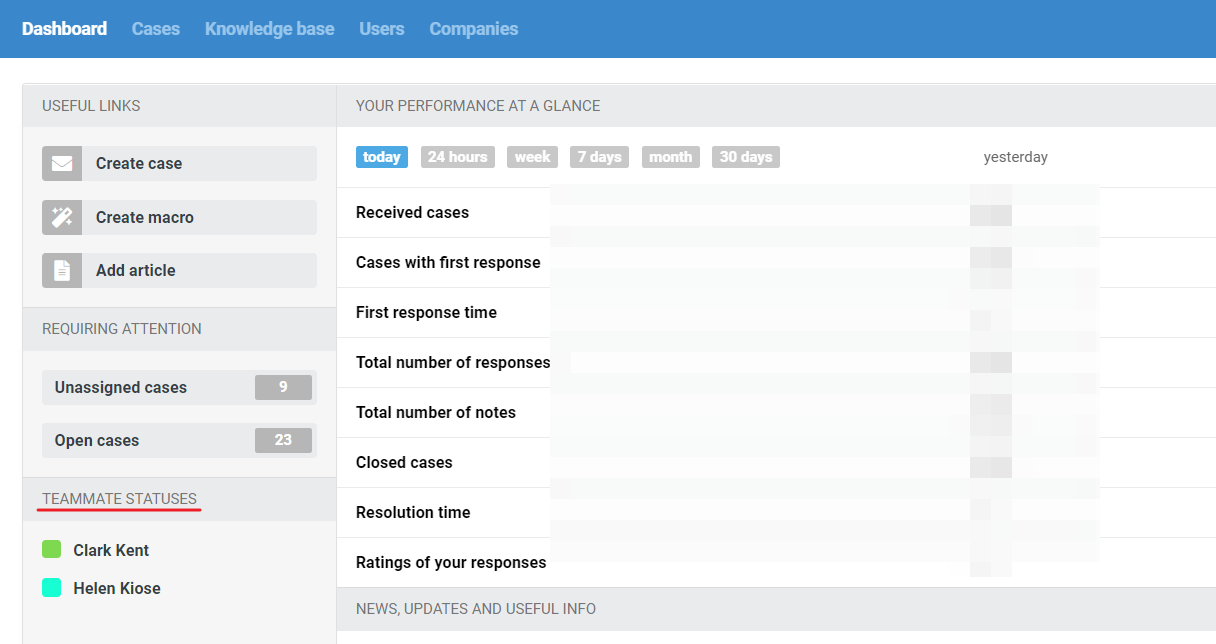
a) section "Dashboard" — "Teammate statuses" block
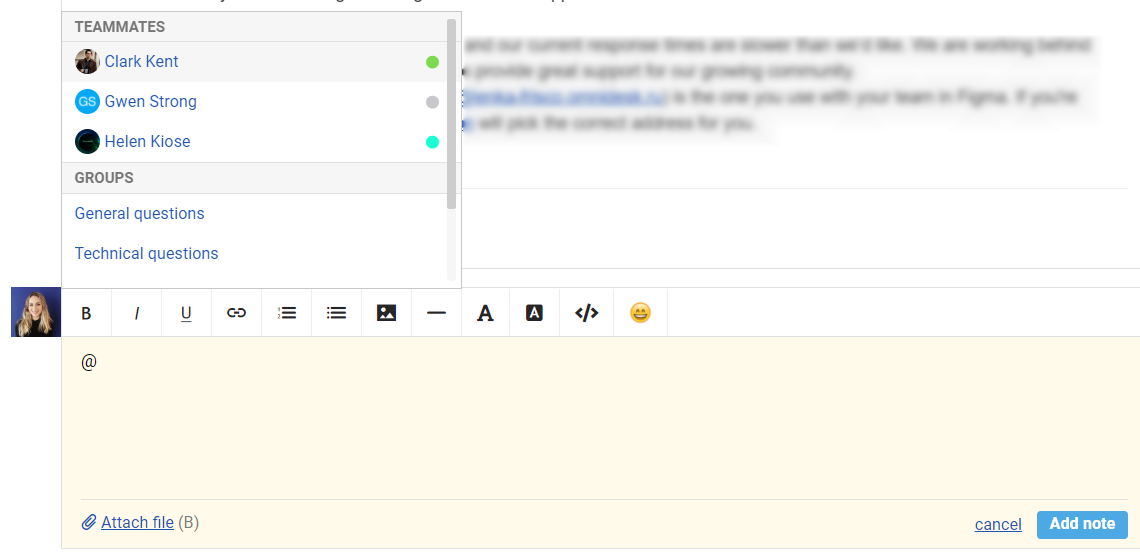
b) when mentioning agents in a note
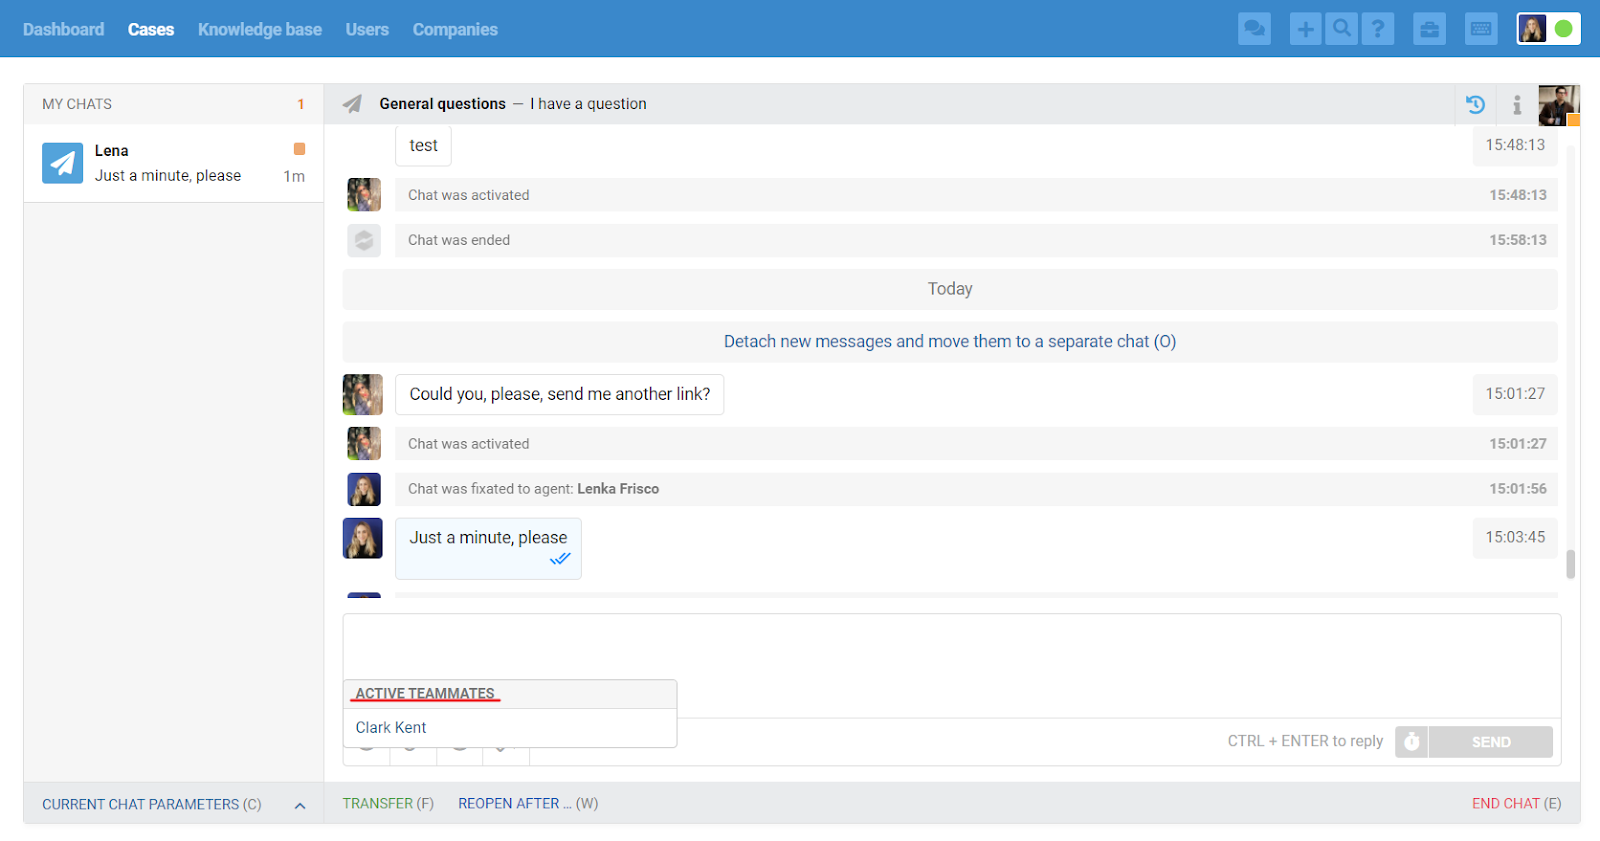
c) in the chat transfer window
Here the agent will only see colleagues who are in status with "viewing and handling" access to active chats, as agents in other statuses will still not be able to reply to anything in the chat.
Reports based on agents' statuses
In addition to understanding what status agents are currently in, it is also important to consider how much time agents spent in a particular status over a certain period of time. To get these numbers, a new subsection "Agent statuses" appeared in the reports in the administrator's account, in which you can see when and for how long agents set a particular status for themselves, as well as estimate the total time of agent’s activity.
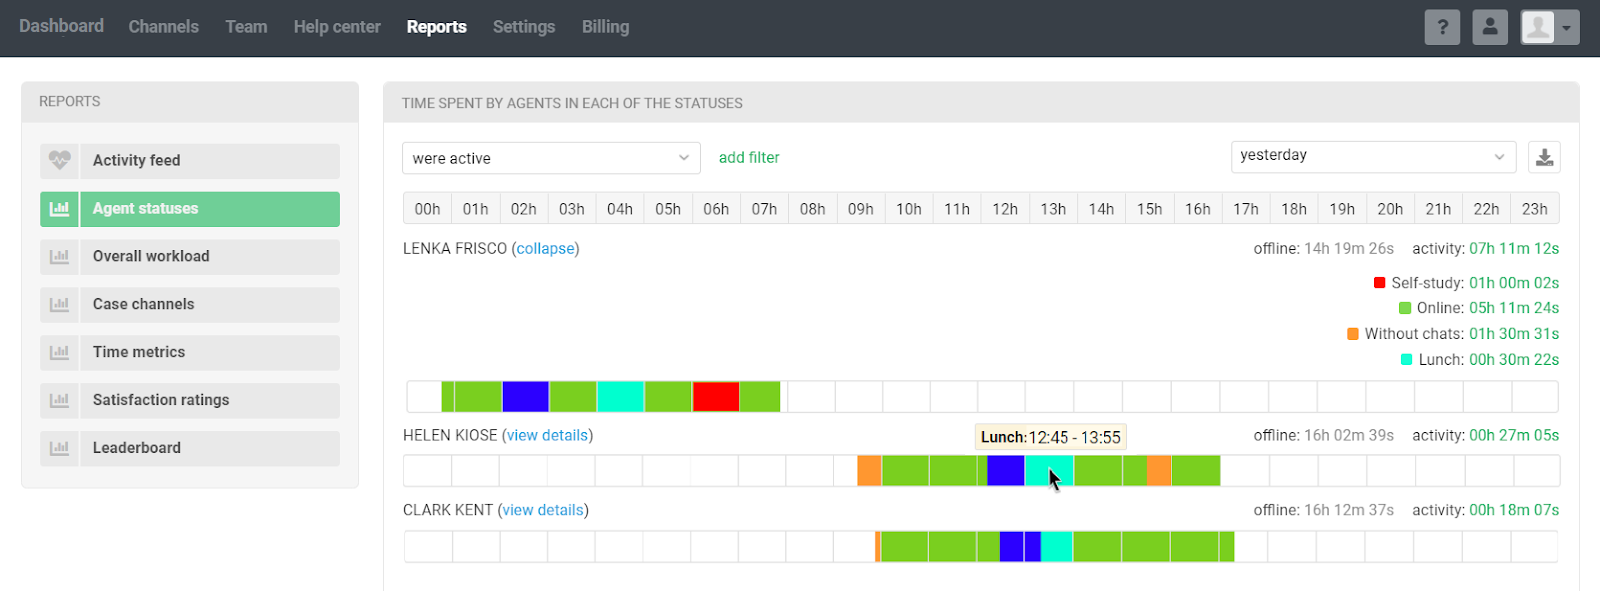
There are filters in this subsection so that you can view reports not only for all agents but for particular ones as well. By default, three standard filters are available, which are selected in the drop-down list in the upper left corner:
were active (Agent status — was not — offline);
regular agents (Access level — not equal — view-only);
light agents (Access level — equal — view-only).
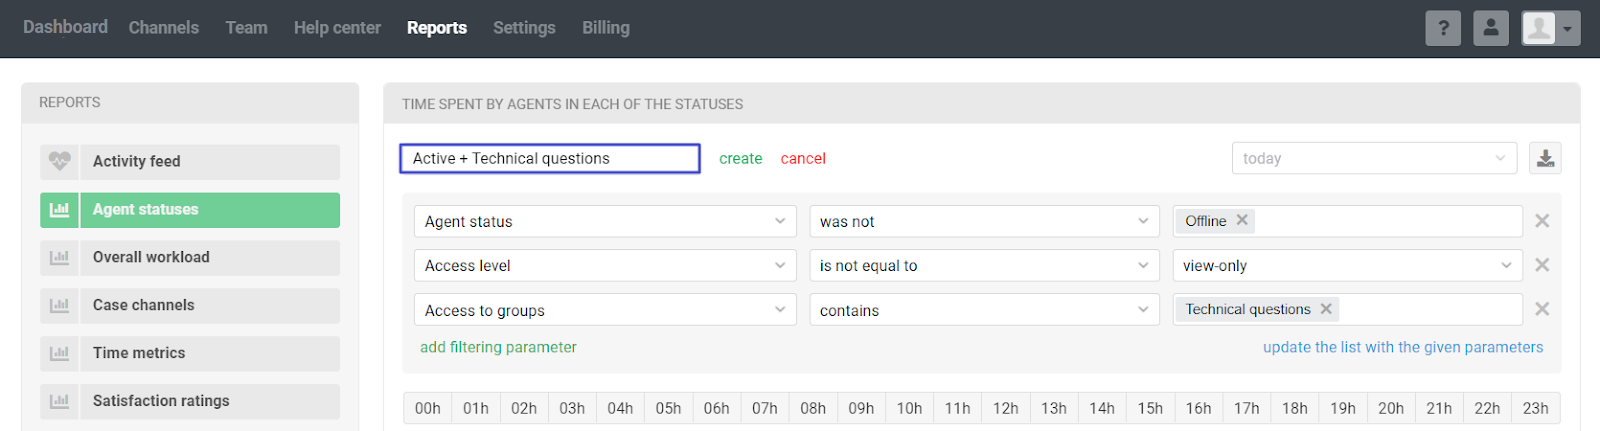
At the same time, you can create and save your own filters to get the data you need faster when you need it. To create a new filter, click on the "add filter" link next to the list of filters, select the desired filter options and click on the "create new filter" link to specify the name of the filter.
Status reports can be uploaded to CSV for further analysis in a spreadsheet editor. The file will display the time spent by the agent in each status.
