In our knowledge base article editor, we used to rely on an older Imperavi HTML editor. Over time, this editor became outdated and unsupported, which led to a lot of bugs and and in general, the editor has become obsolete.
Now, we’ve upgraded to the latest version from the same developer. This new editor was built from the ground up in pure JavaScript and should offer a much smoother, more reliable performance. The interface remains straightforward and user-friendly, so you’ll have no trouble getting used to it. Here, we highlight some handy features that make creating and editing articles faster and more visually appealing.
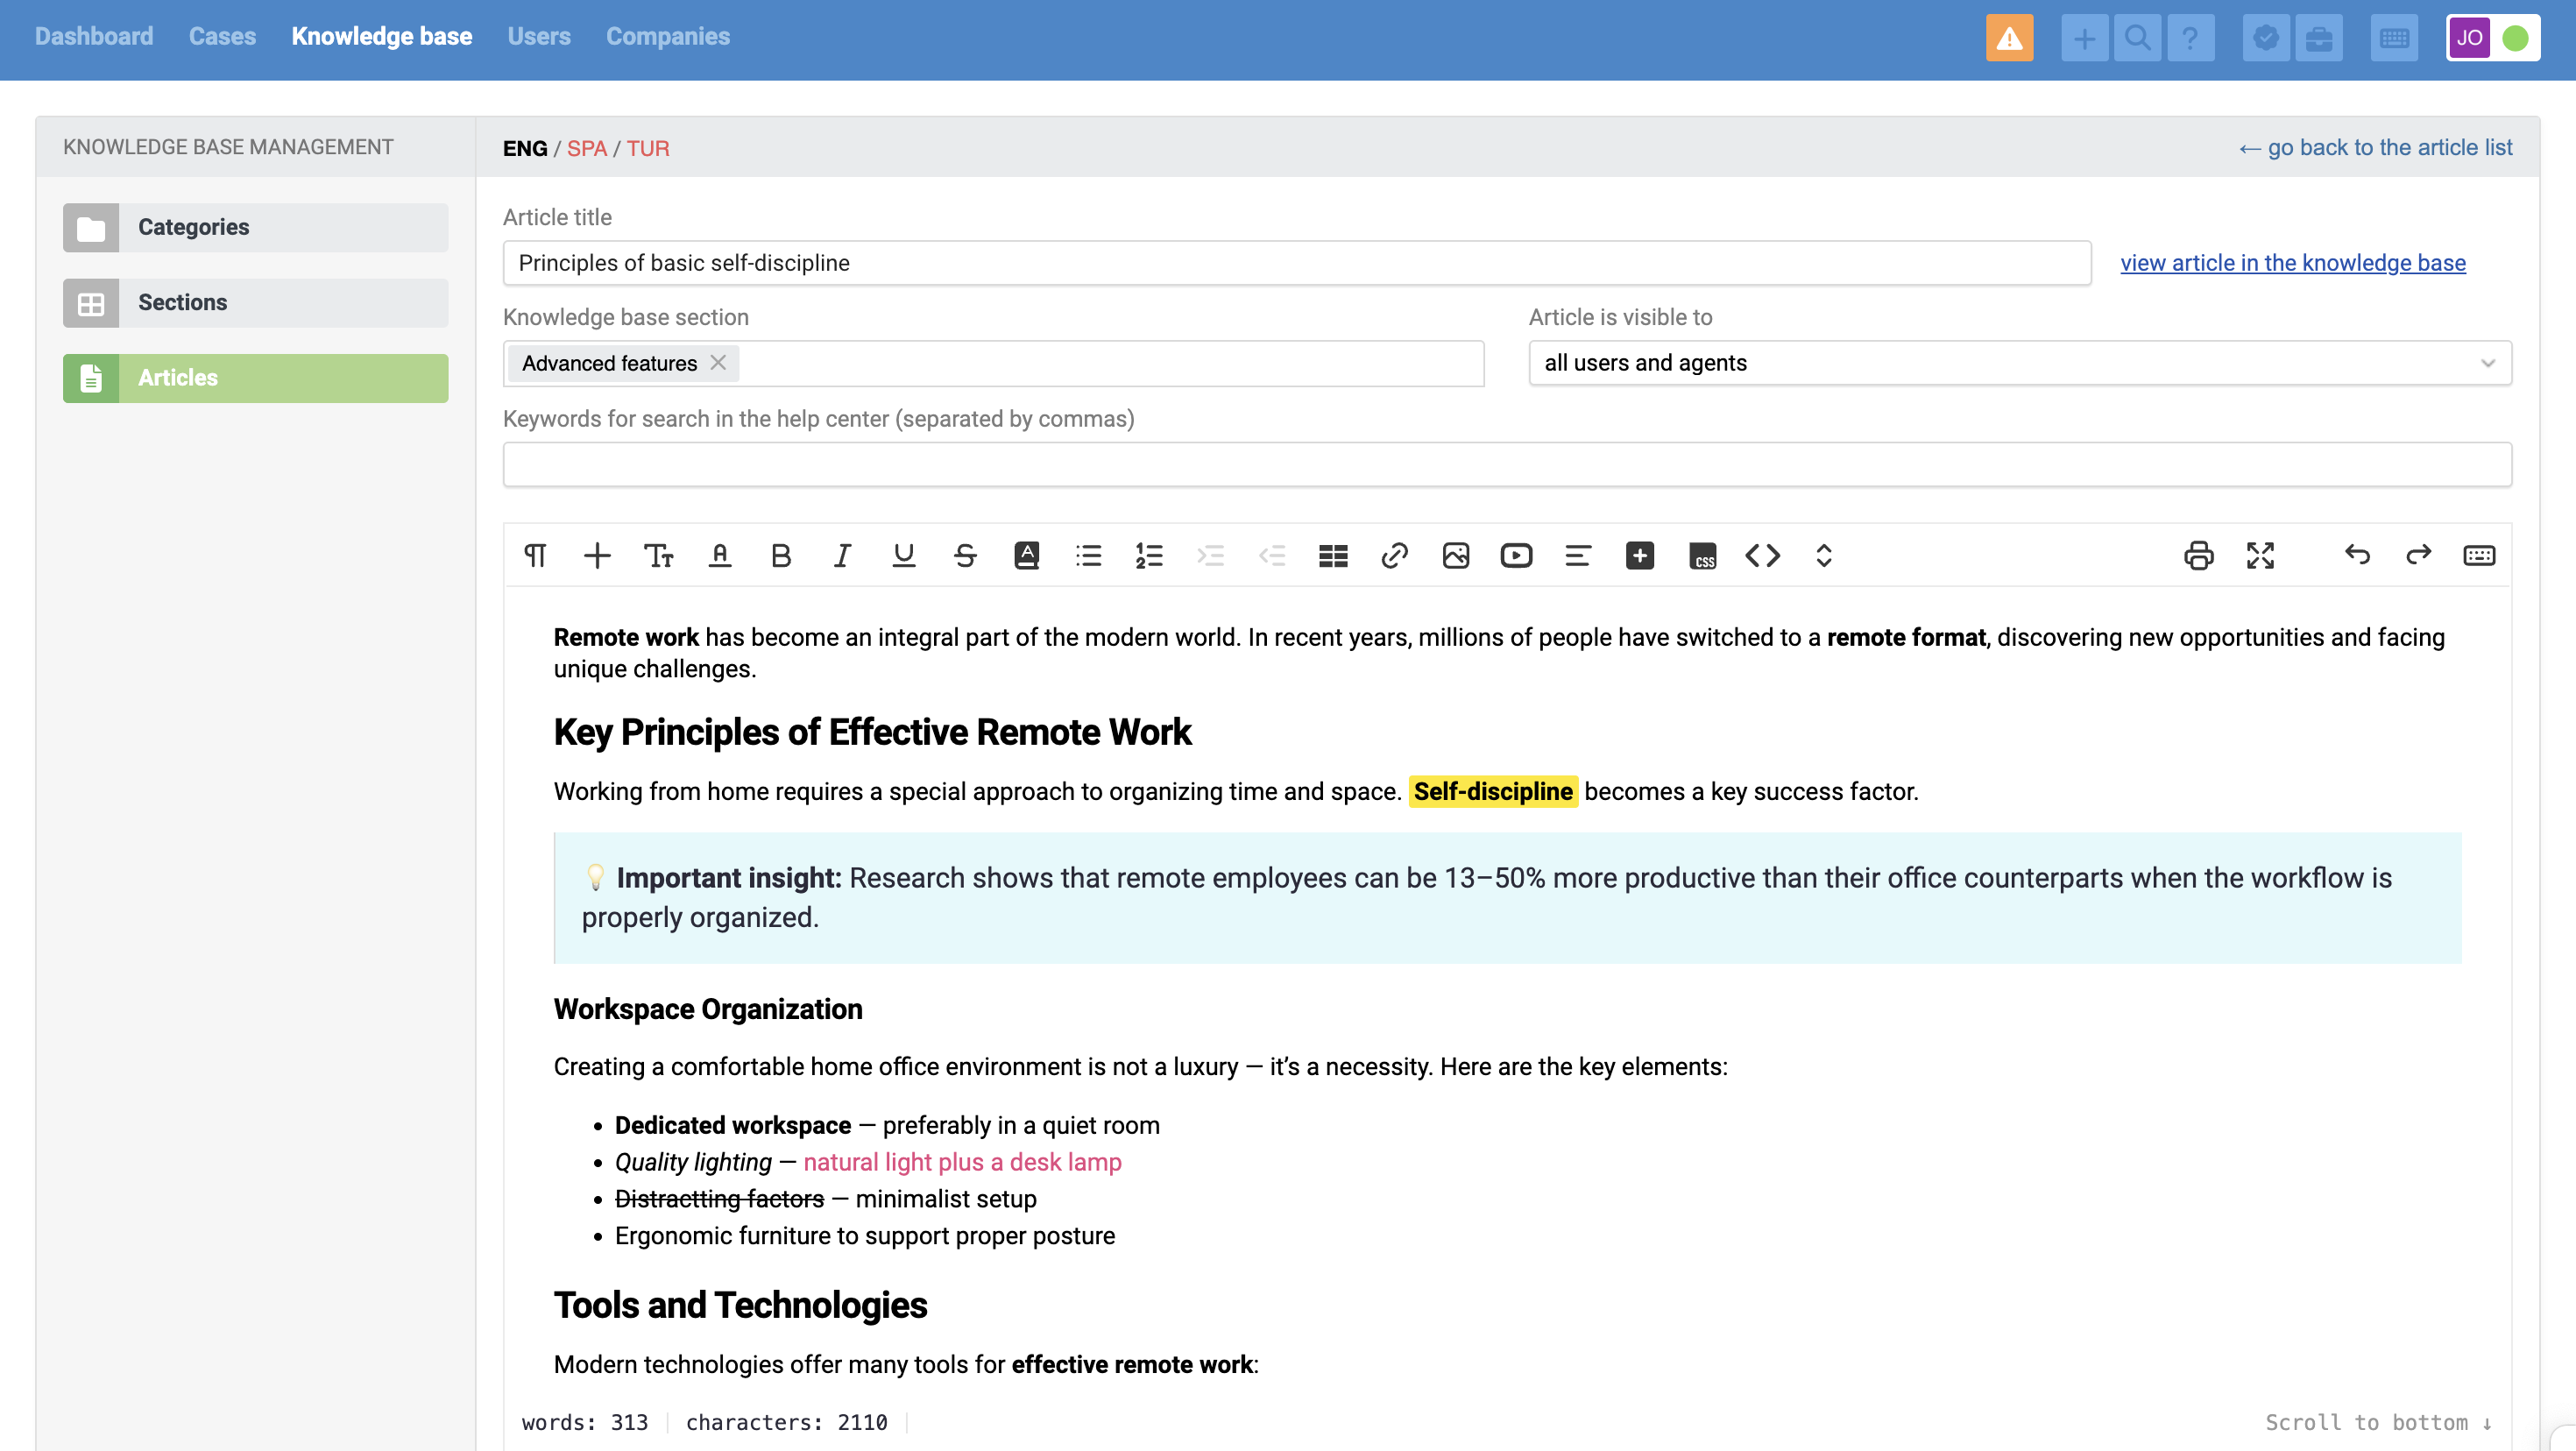
The editor toolbar gathers all the essential tools you need for working with text and inserting elements. Most of the features are familiar – allowing you to format text, add hyperlinks, switch to source code view, and more.
Key changes include block-based layout, quick addition of ready-to-use info blocks and creation of custom ones, direct access to the CSS editor right from the article page, and the ability to set styles for a specific publication.
We’ll take a closer look at these changes and highlight some new useful tools separately.
1. Working with blocks
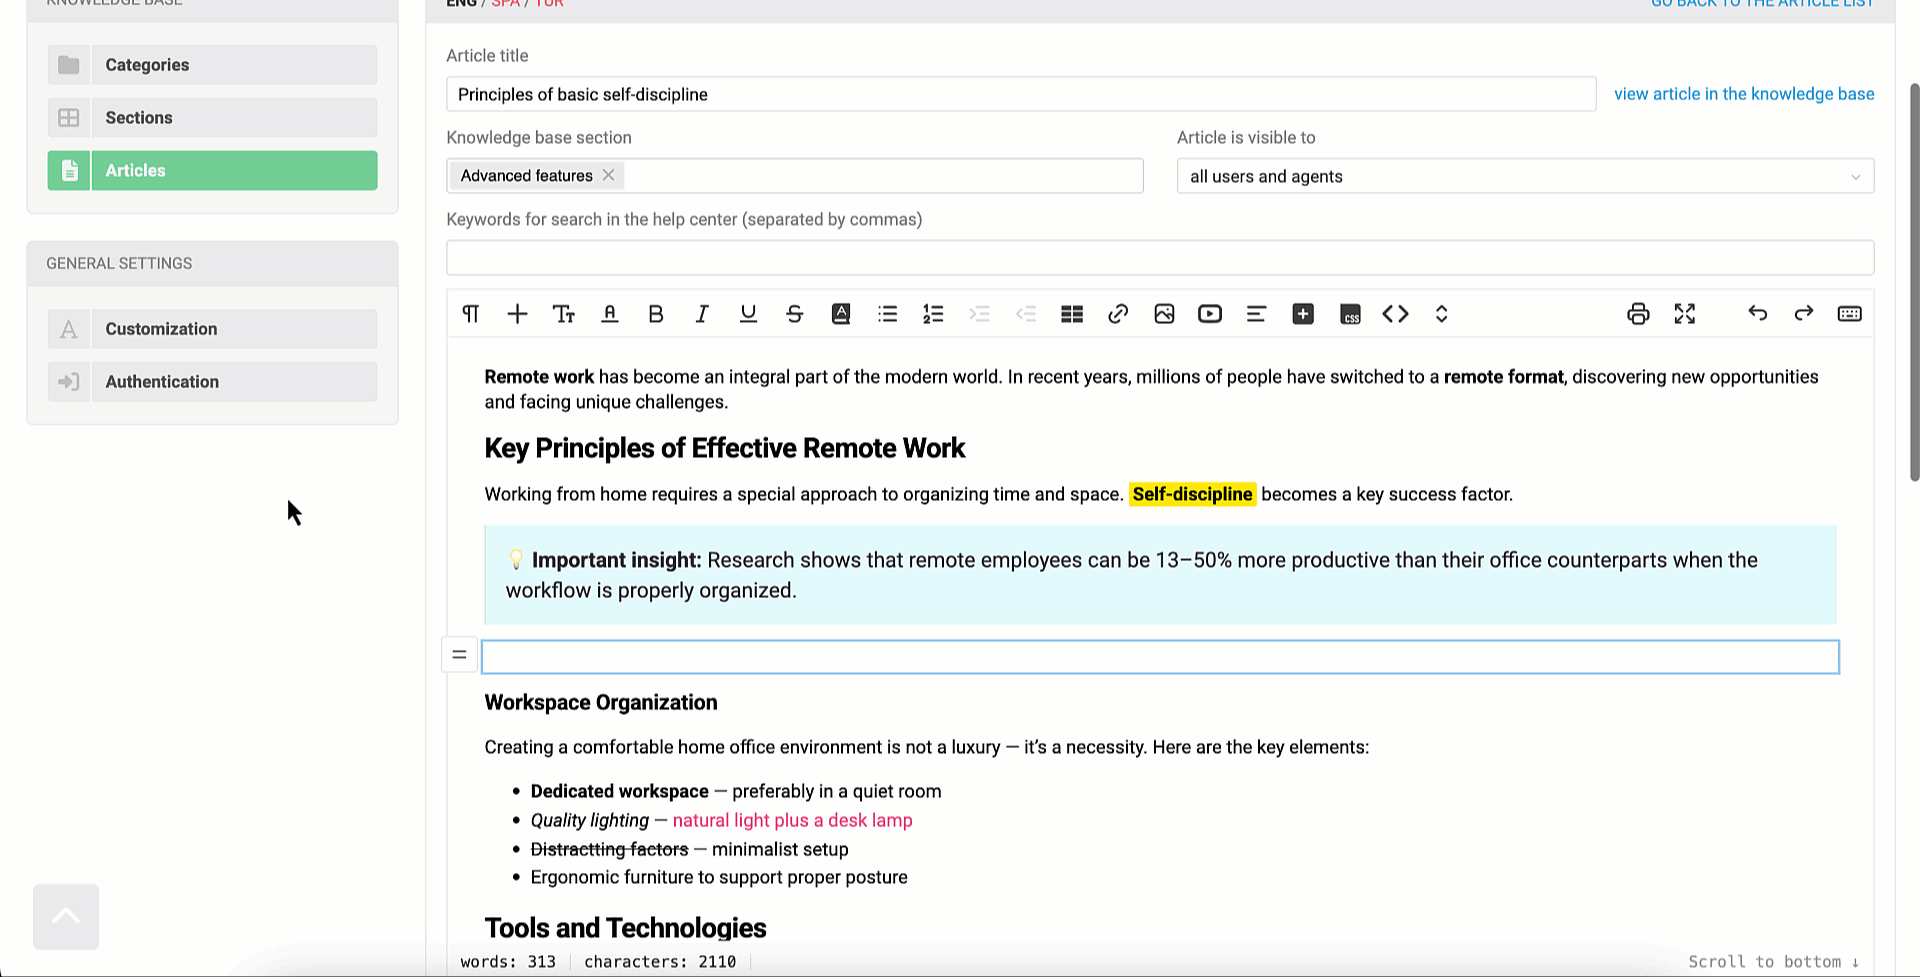
In the editor, a block-based layout is used: every element of an article – whether it’s a heading, paragraph, image, table, or something else – is treated as a separate block. You can add, move, duplicate, style, and group these blocks independently of one another.
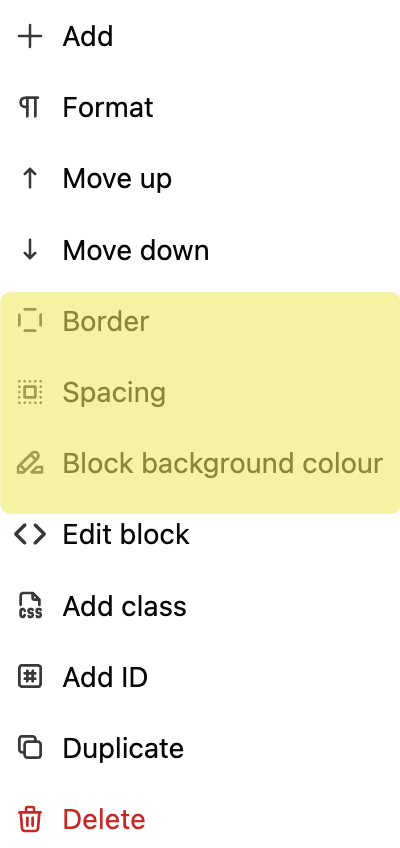
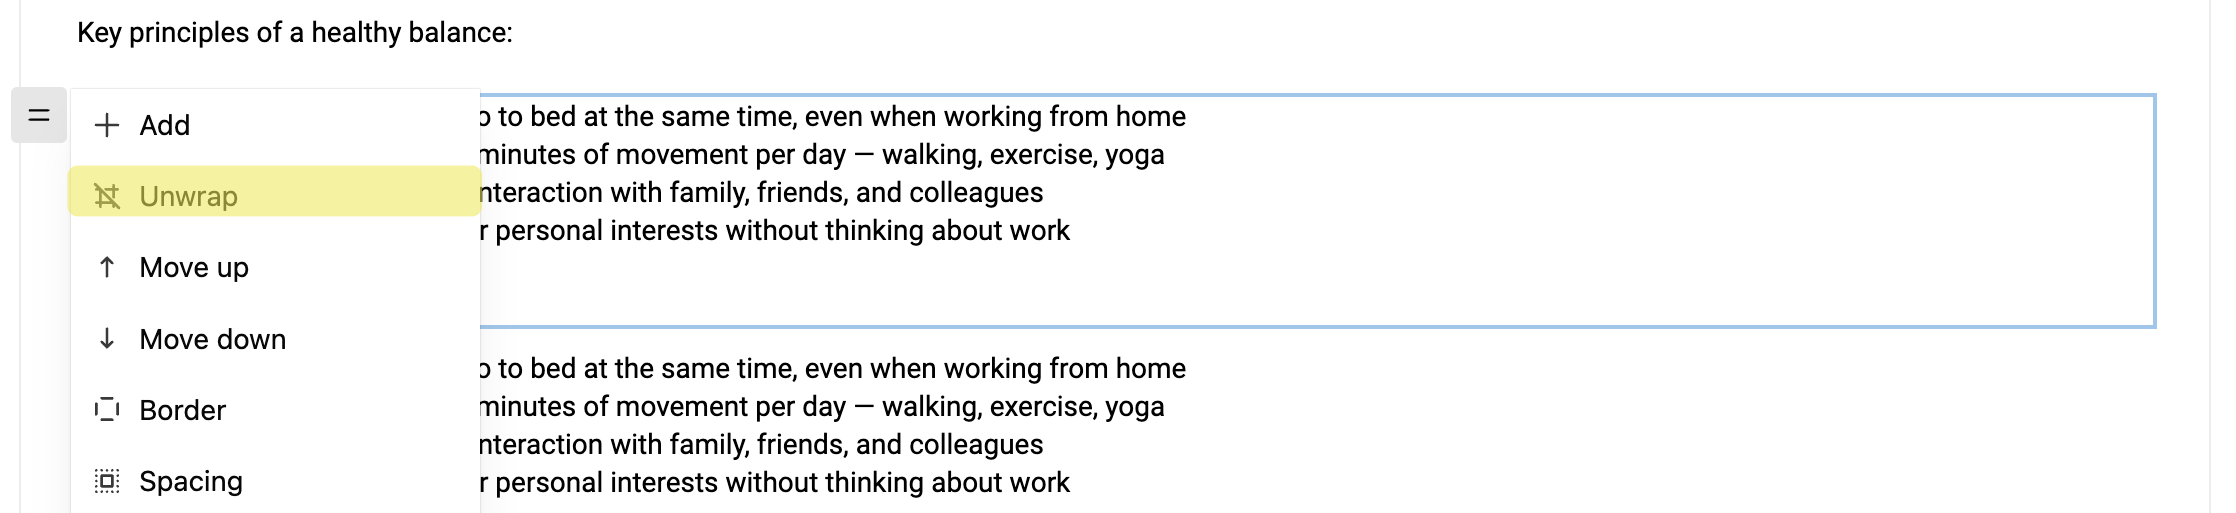
a) Managing blocks
– When you select a block, a slider menu appears – use it to move the block up or down.
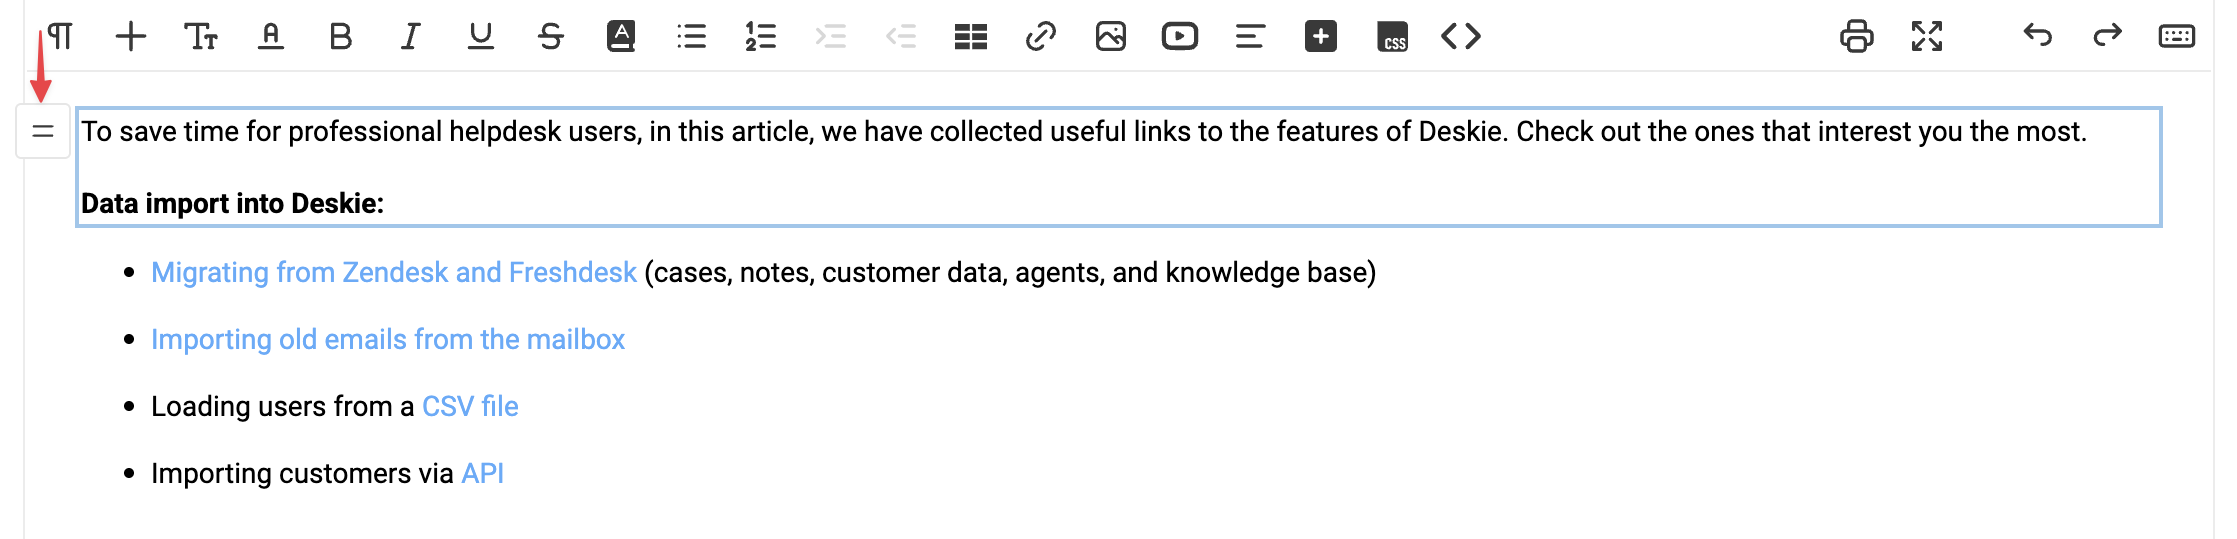
This works not only for regular elements like text, lists, images, and table cells, but also for "parent" blocks – such as wrappers, layouts, tables, or ranked lists.
– Clicking the slider menu opens a dropdown menu:
The options available depend on the type of element. For example:
- lists have the options "Increase indent" and "Decrease indent";
- table cells, list items, and layouts columns include a quick way to jump to their parent block.
This makes it easier to manage complex article structures without getting lost in the nesting.
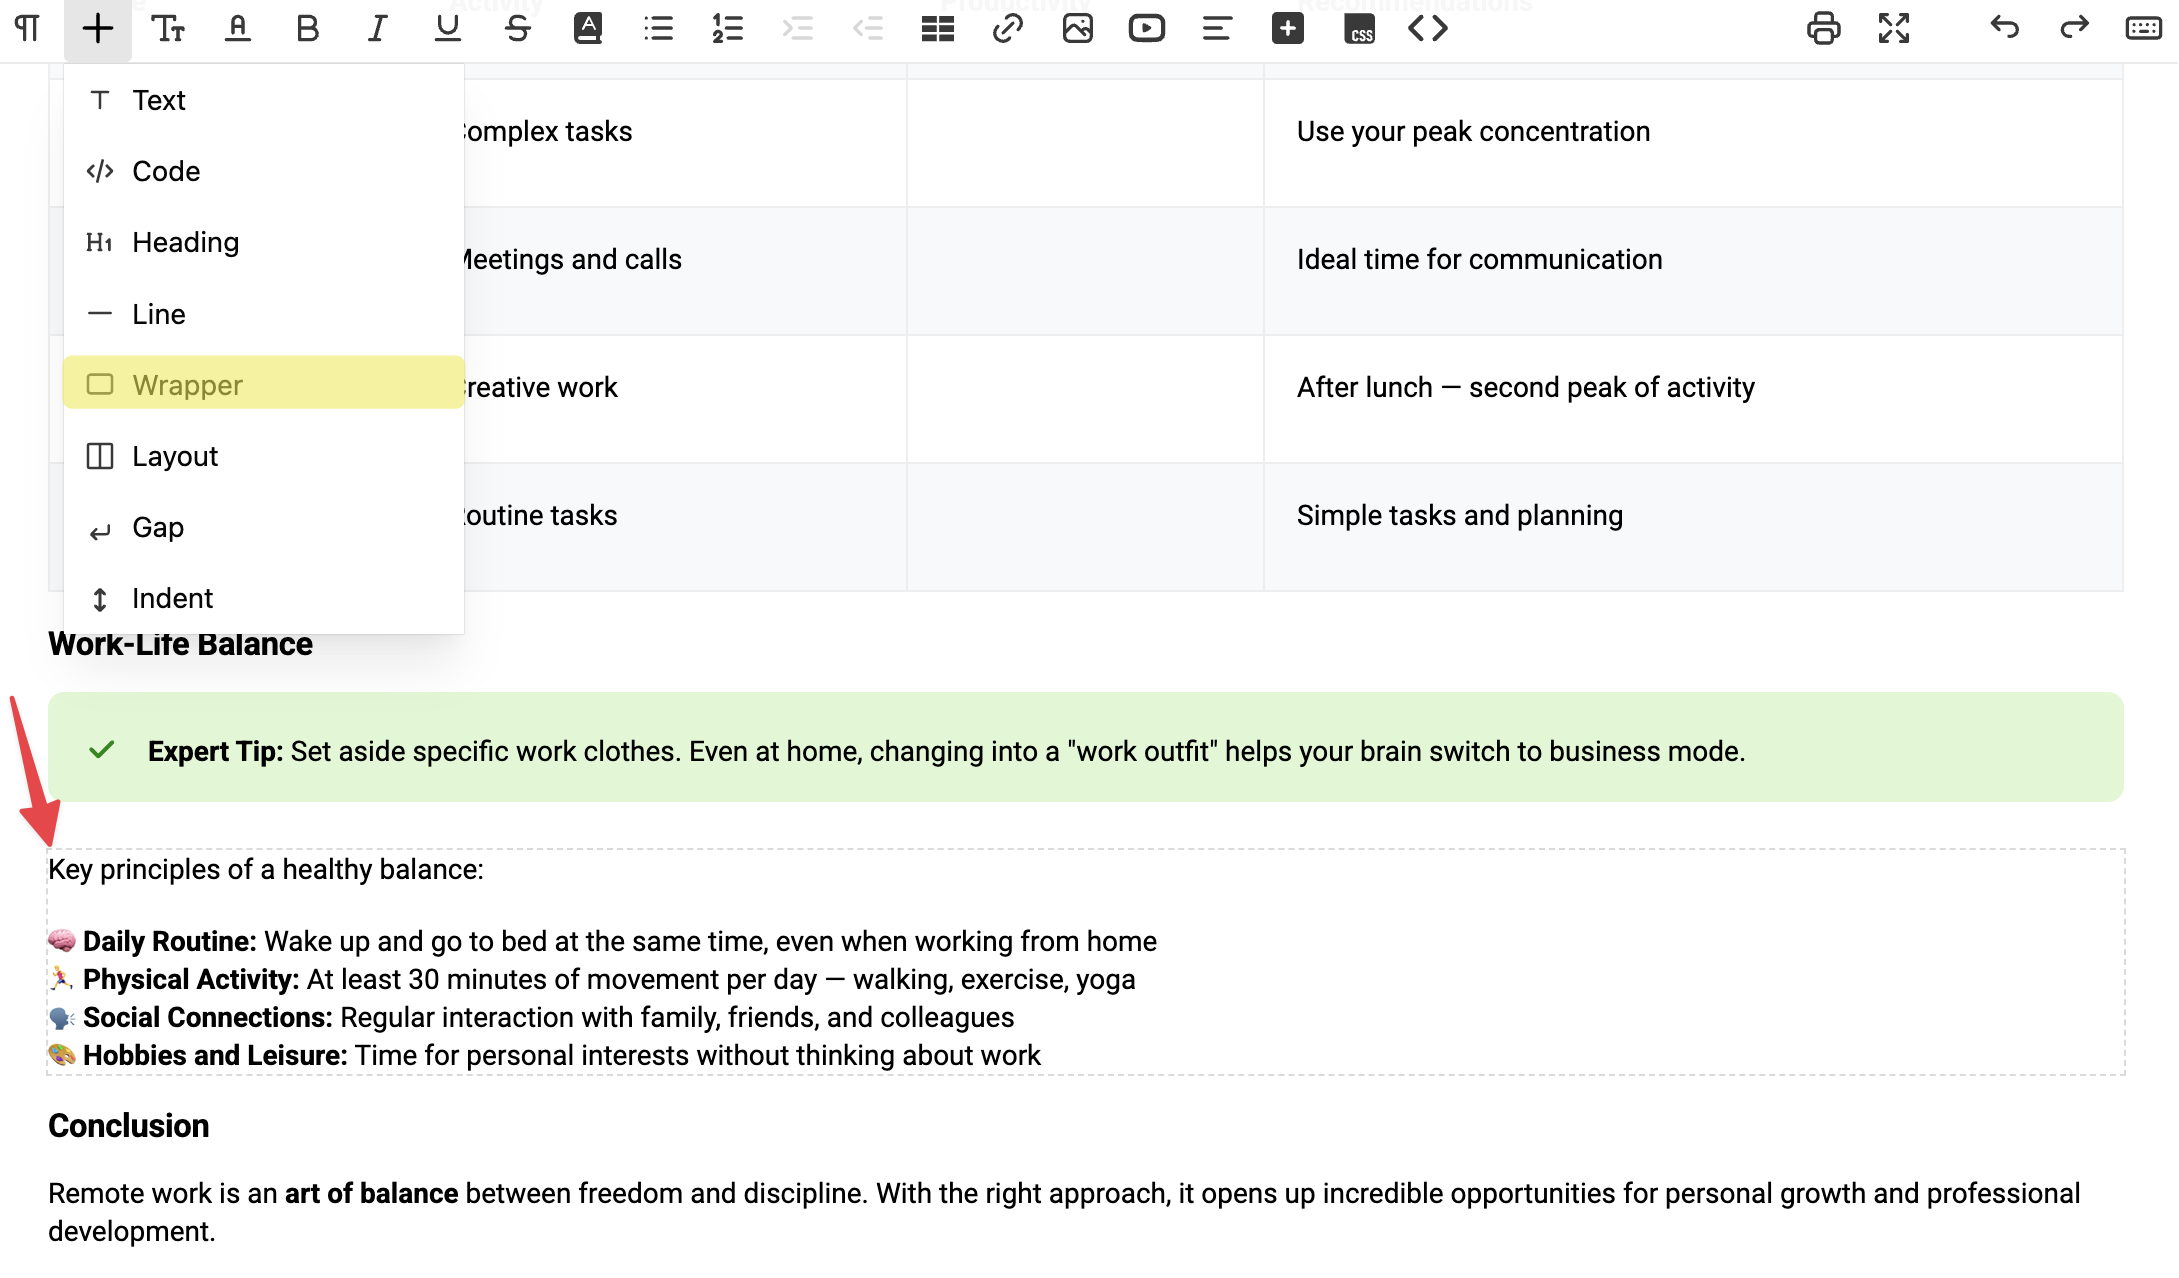
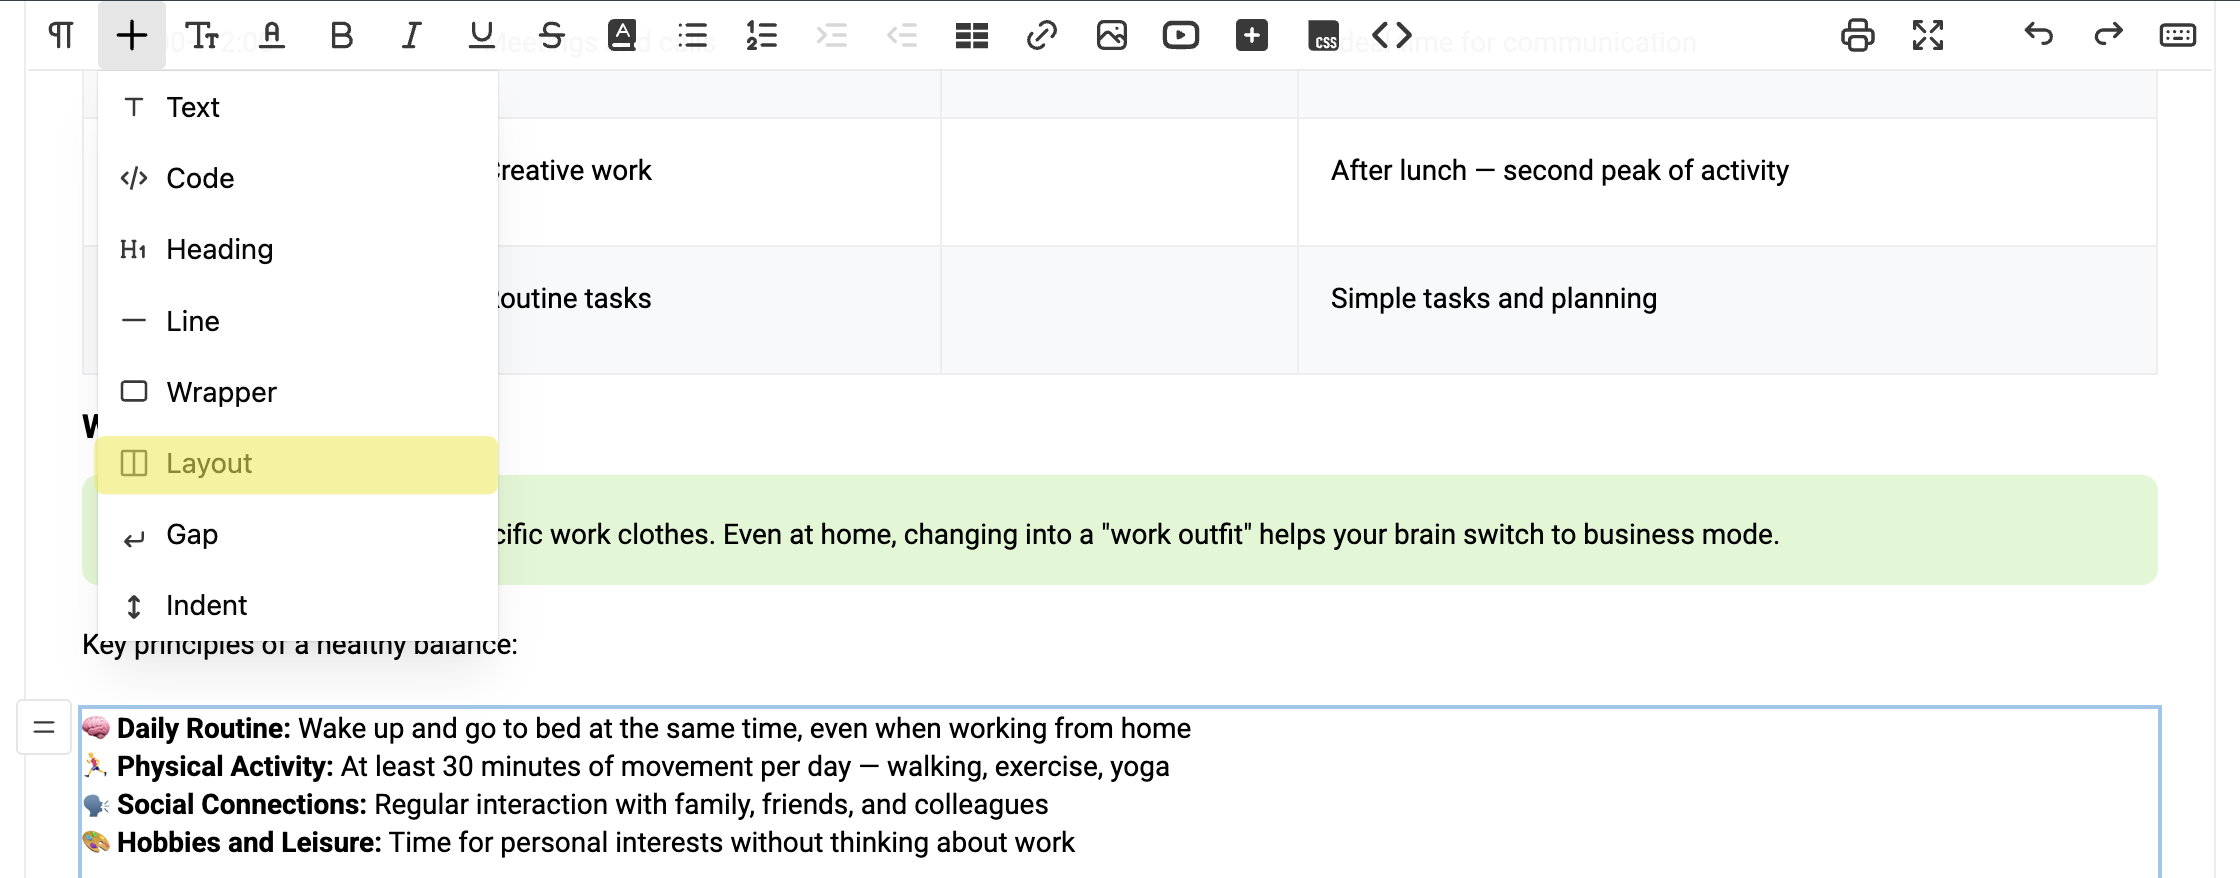
b) Adding ready-to-use blocks
Click the plus icon in the panel to quickly add a ready-to-use block.
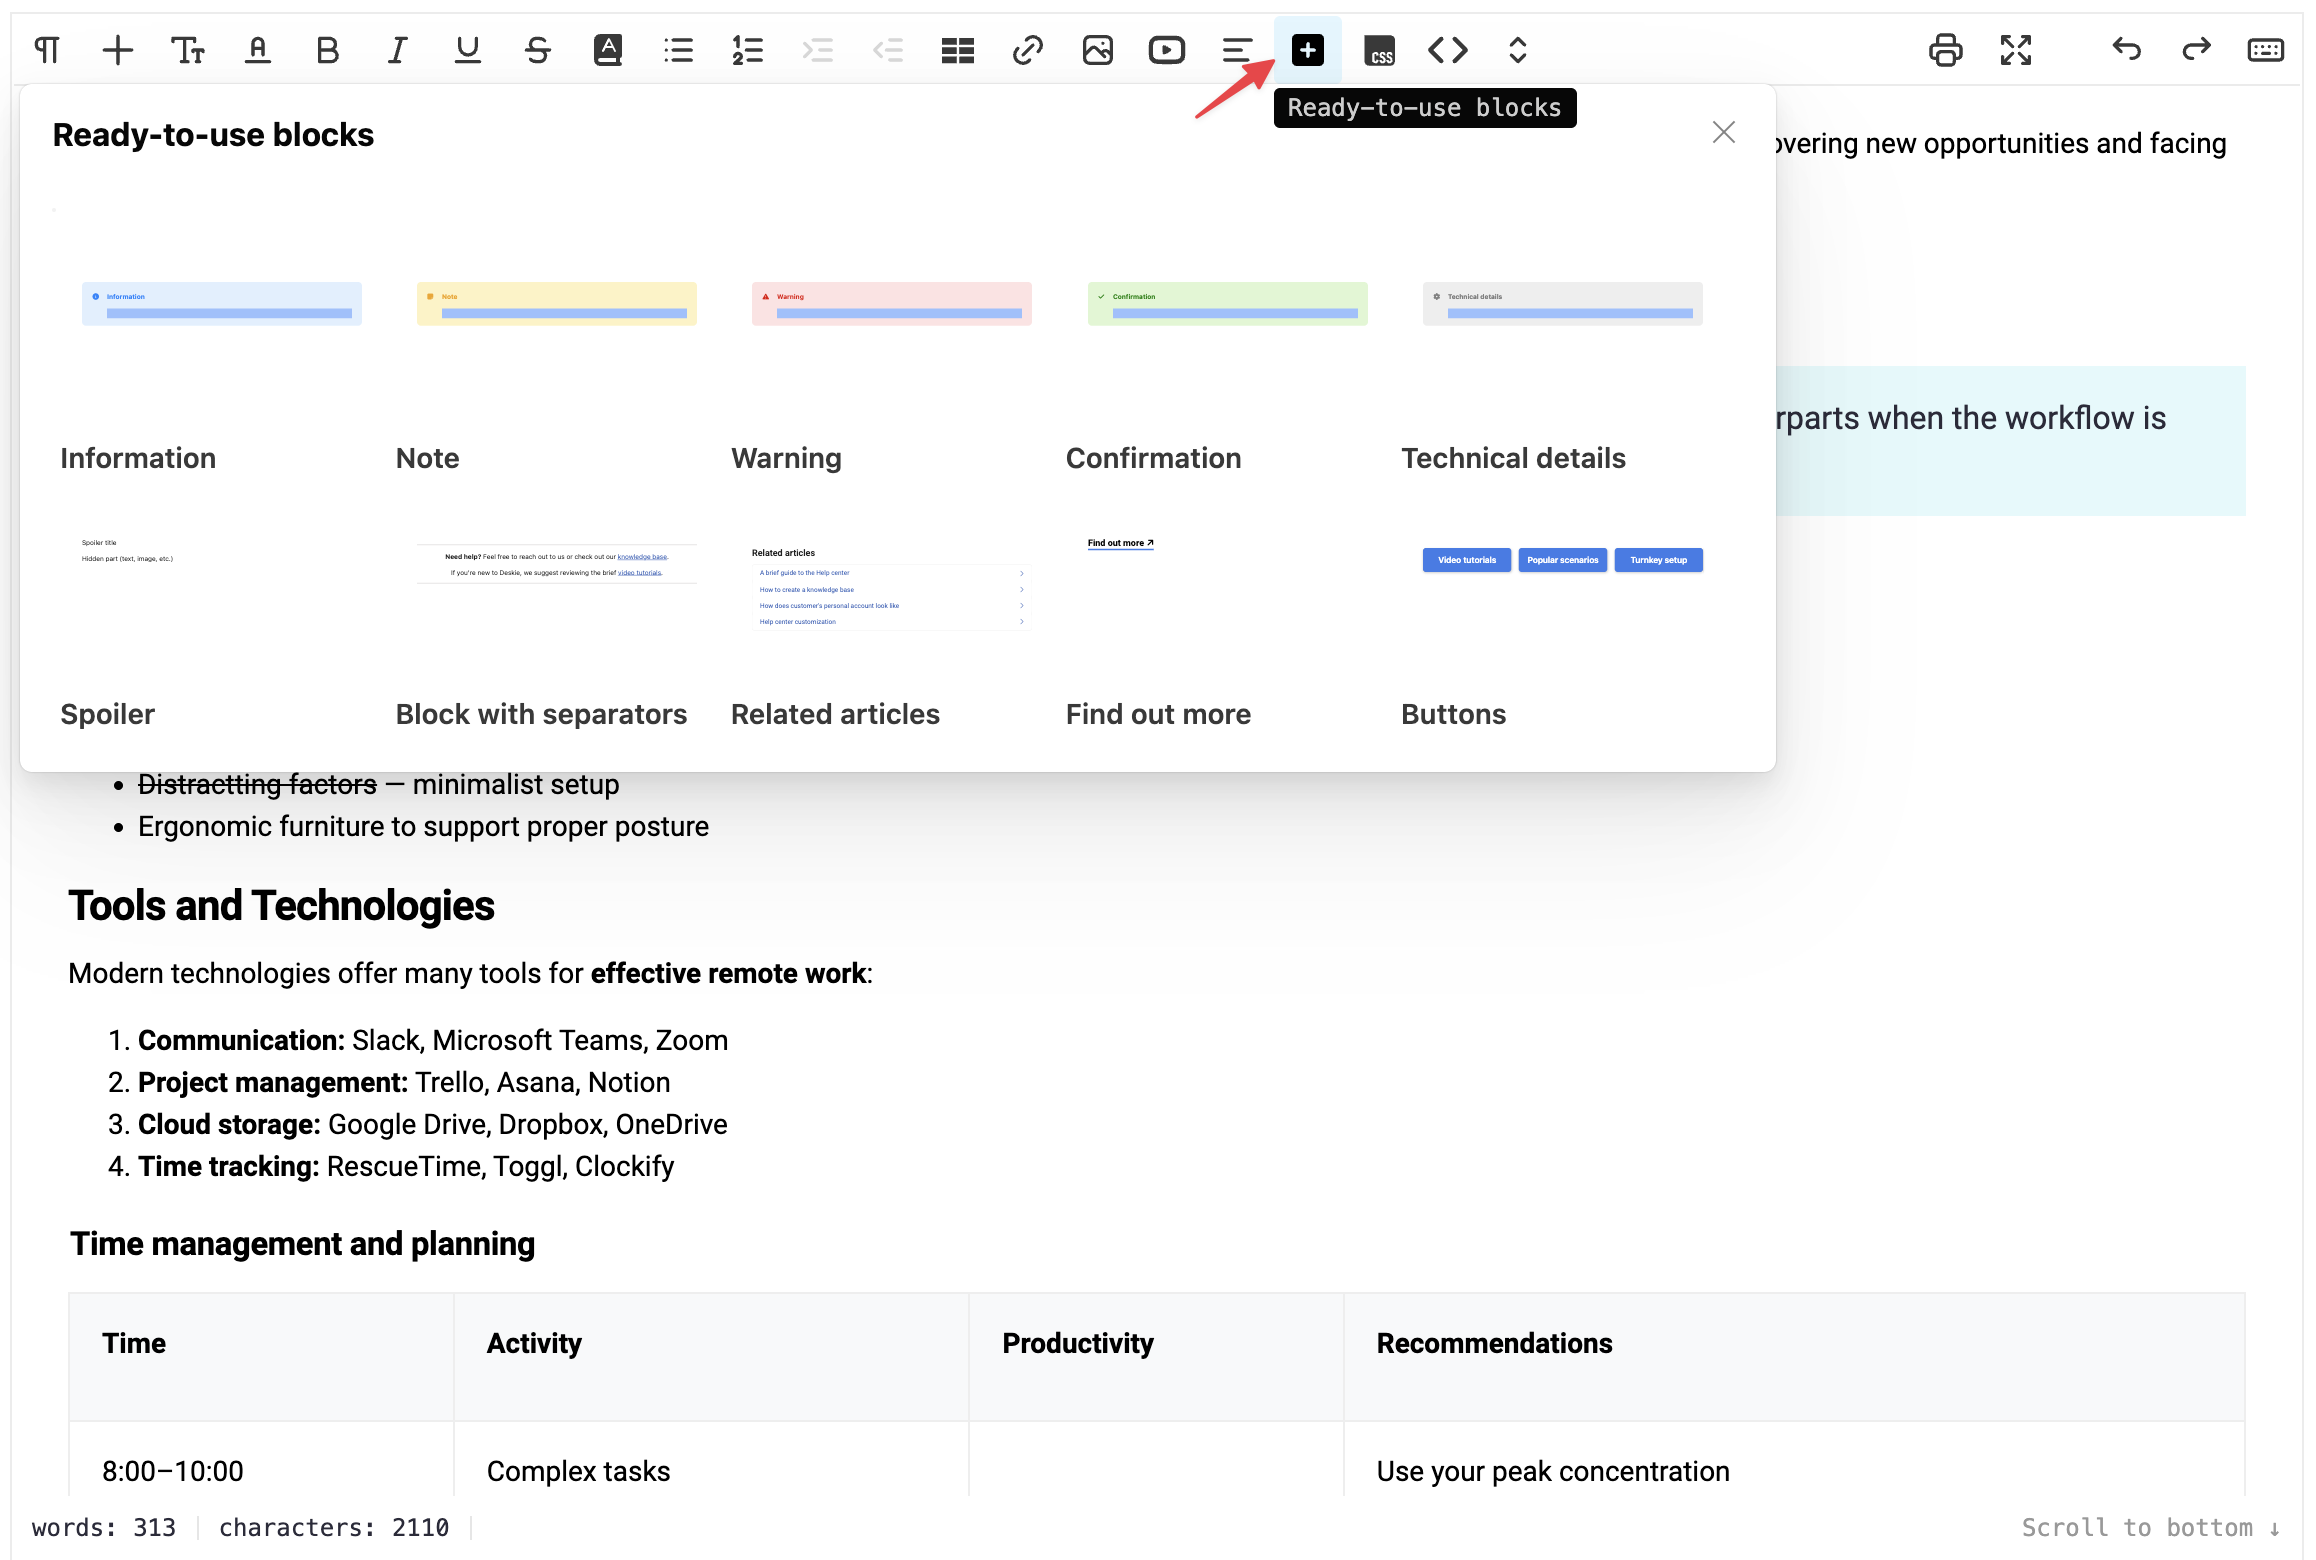
There are five available ready-to-use Deskie info blocks:
- spoiler block
- block with separators
- "Related articles" block
- "Find out more" button-link
- block with multiple buttons
Previously, you could add these blocks only via HTML code. Learn more
When you insert a block, it already contains placeholder text — you need to replace it with your own. For info blocks, you can delete the heading if it’s not needed.


c) Adding a custom block
You can create a custom block by adding spacing, a border, and changing the background color — perfect for highlighting important sections, examples, or visually separating parts of an article.

If you want to style several blocks at once (for example, by setting a background, border, or spacing), place them inside a wrapper (a div).
You can do this in two ways: add a wrapper via the panel and move the desired blocks inside it, or wrap the blocks with div tags in source code mode. This lets you apply styles to the entire group of blocks at once.

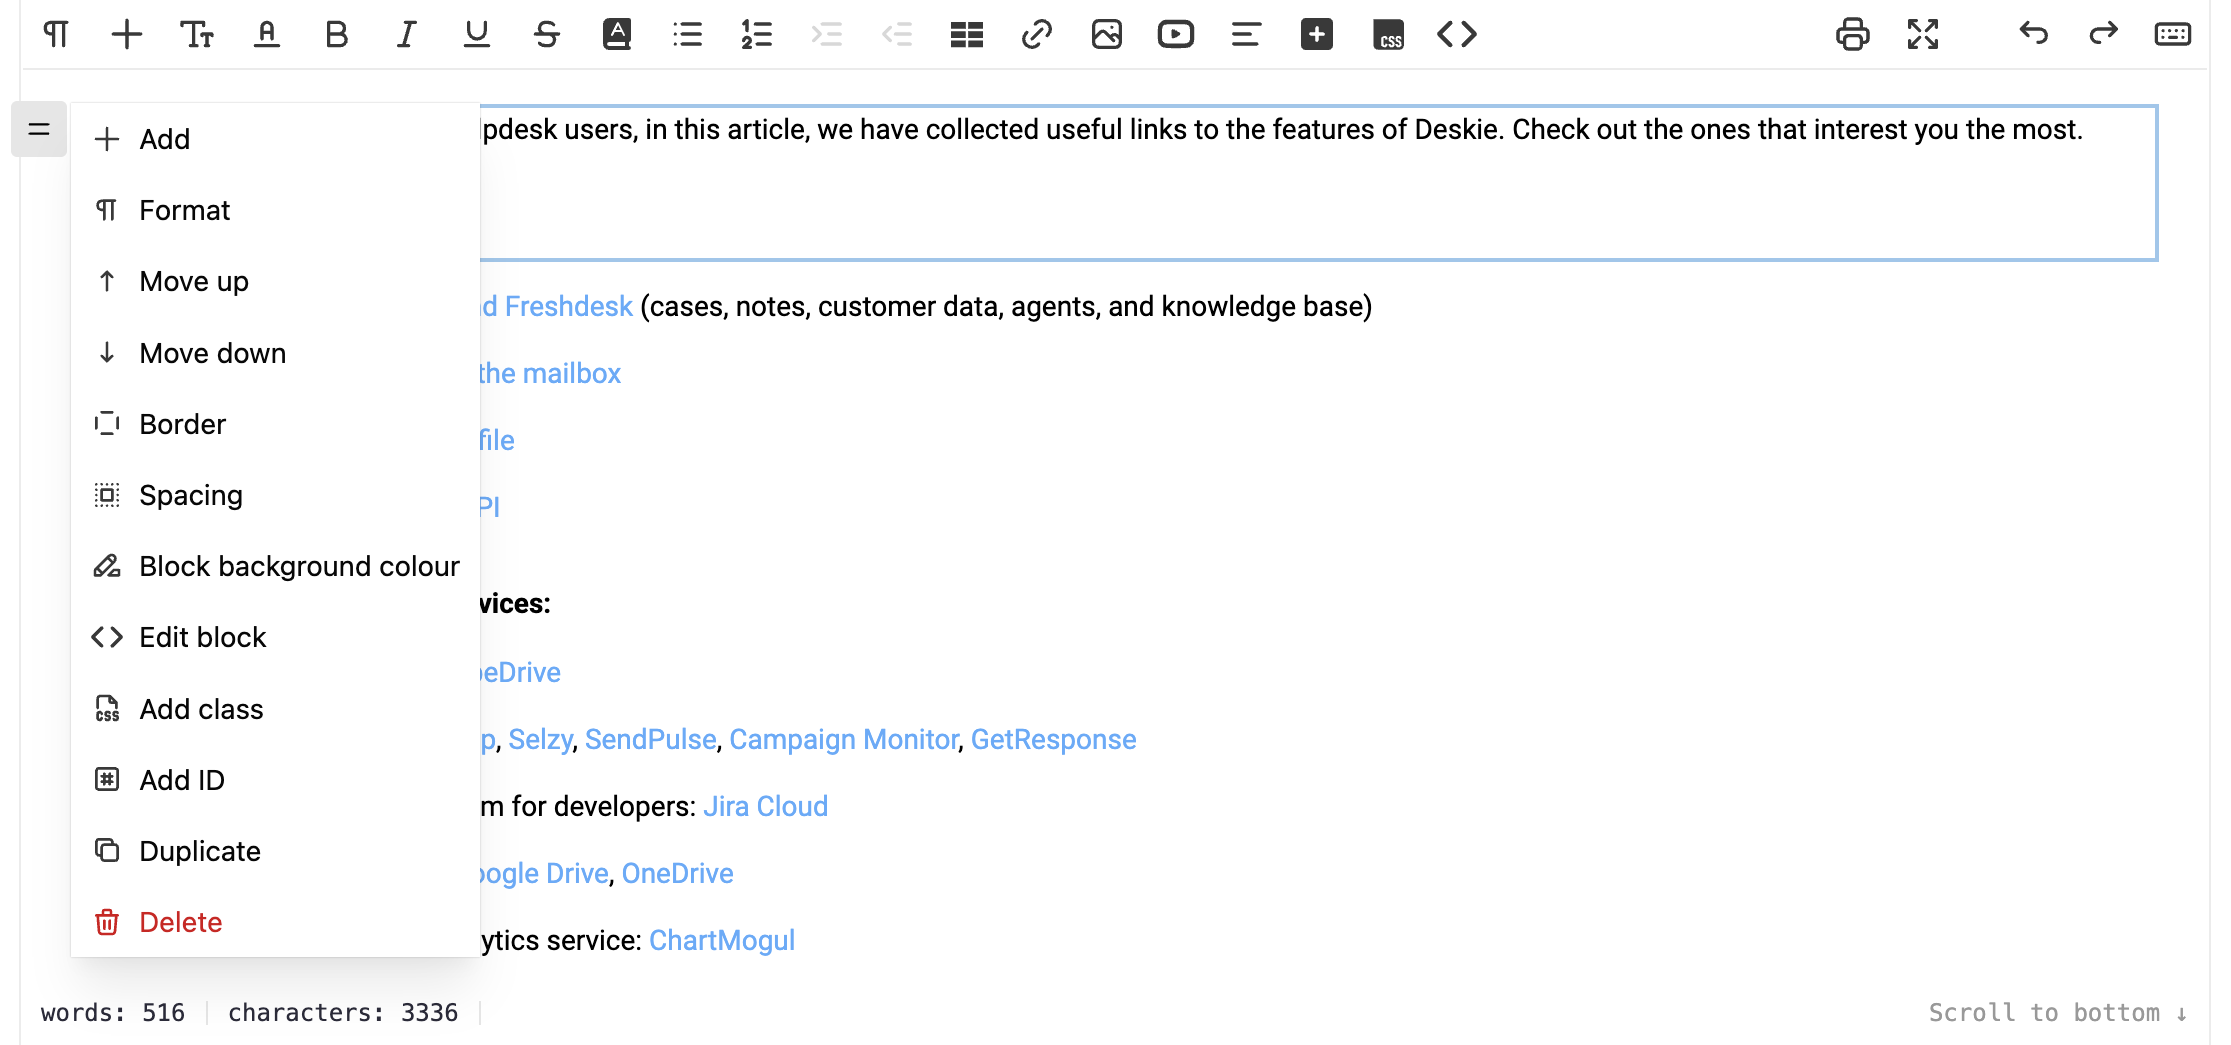
d) Editing block HTML code
To avoid switching to the source code of the entire page and searching for the desired section, you can quickly access the code of individual blocks. To do this:
- select the block you want,
- click the slider menu,
- choose "Edit block" from the menu.
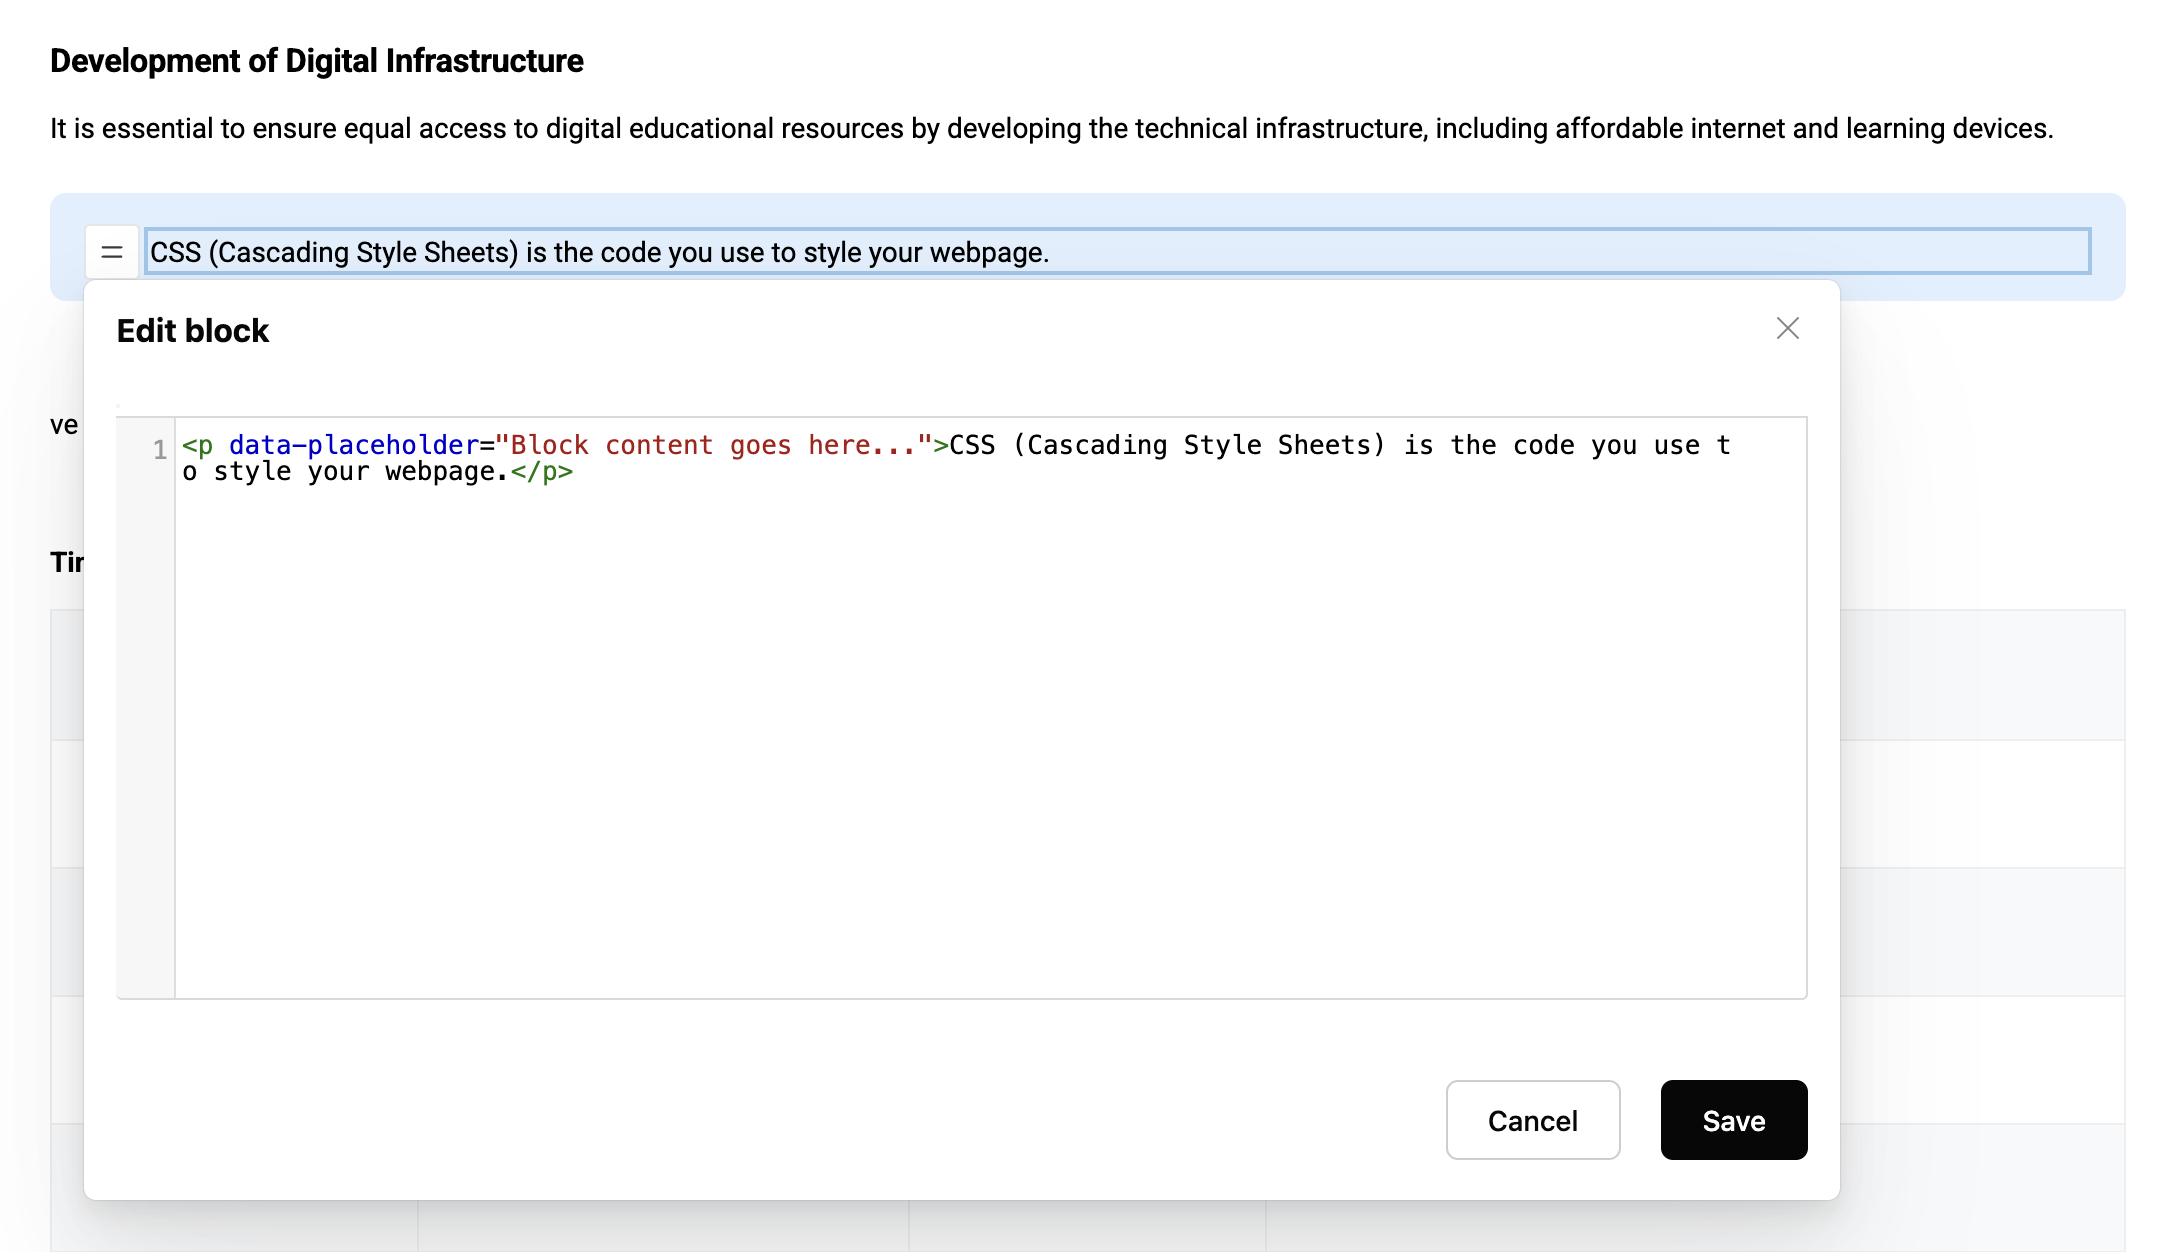
When editing the HTML code of an individual block, you cannot add elements that extend beyond the boundaries of the current block — this will break the page structure.
What is allowed:
- adding attributes (for example, style);
- inserting nested tags inside a paragraph (for example, span);
- adding nested tags inside parent blocks (for example, li within ul or ol).
e) Adding CSS classes to blocks
If you have added custom CSS styles, you can apply them to any block. To do this:
- select the desired block,
- click the slider menu,
- choose "Add class".
In the window that appears, enter one or more CSS classes — they will be applied to the selected block. If your knowledge base includes special styles for certain elements, you’ll be able to apply them more quickly.

2. Styles and layout
a) Custom styles for articles
You can customize the appearance of a specific article without affecting the other materials in the knowledge base.
Custom styles are set for the entire article, regardless of the language. This means that one set of CSS rules applies to all language versions of the article simultaneously.
Click the custom CSS icon in the main panel — a window will open where you can add the necessary styles.

After specifying the styles, you need to save the article itself; after that, the styles will be applied to the publication.
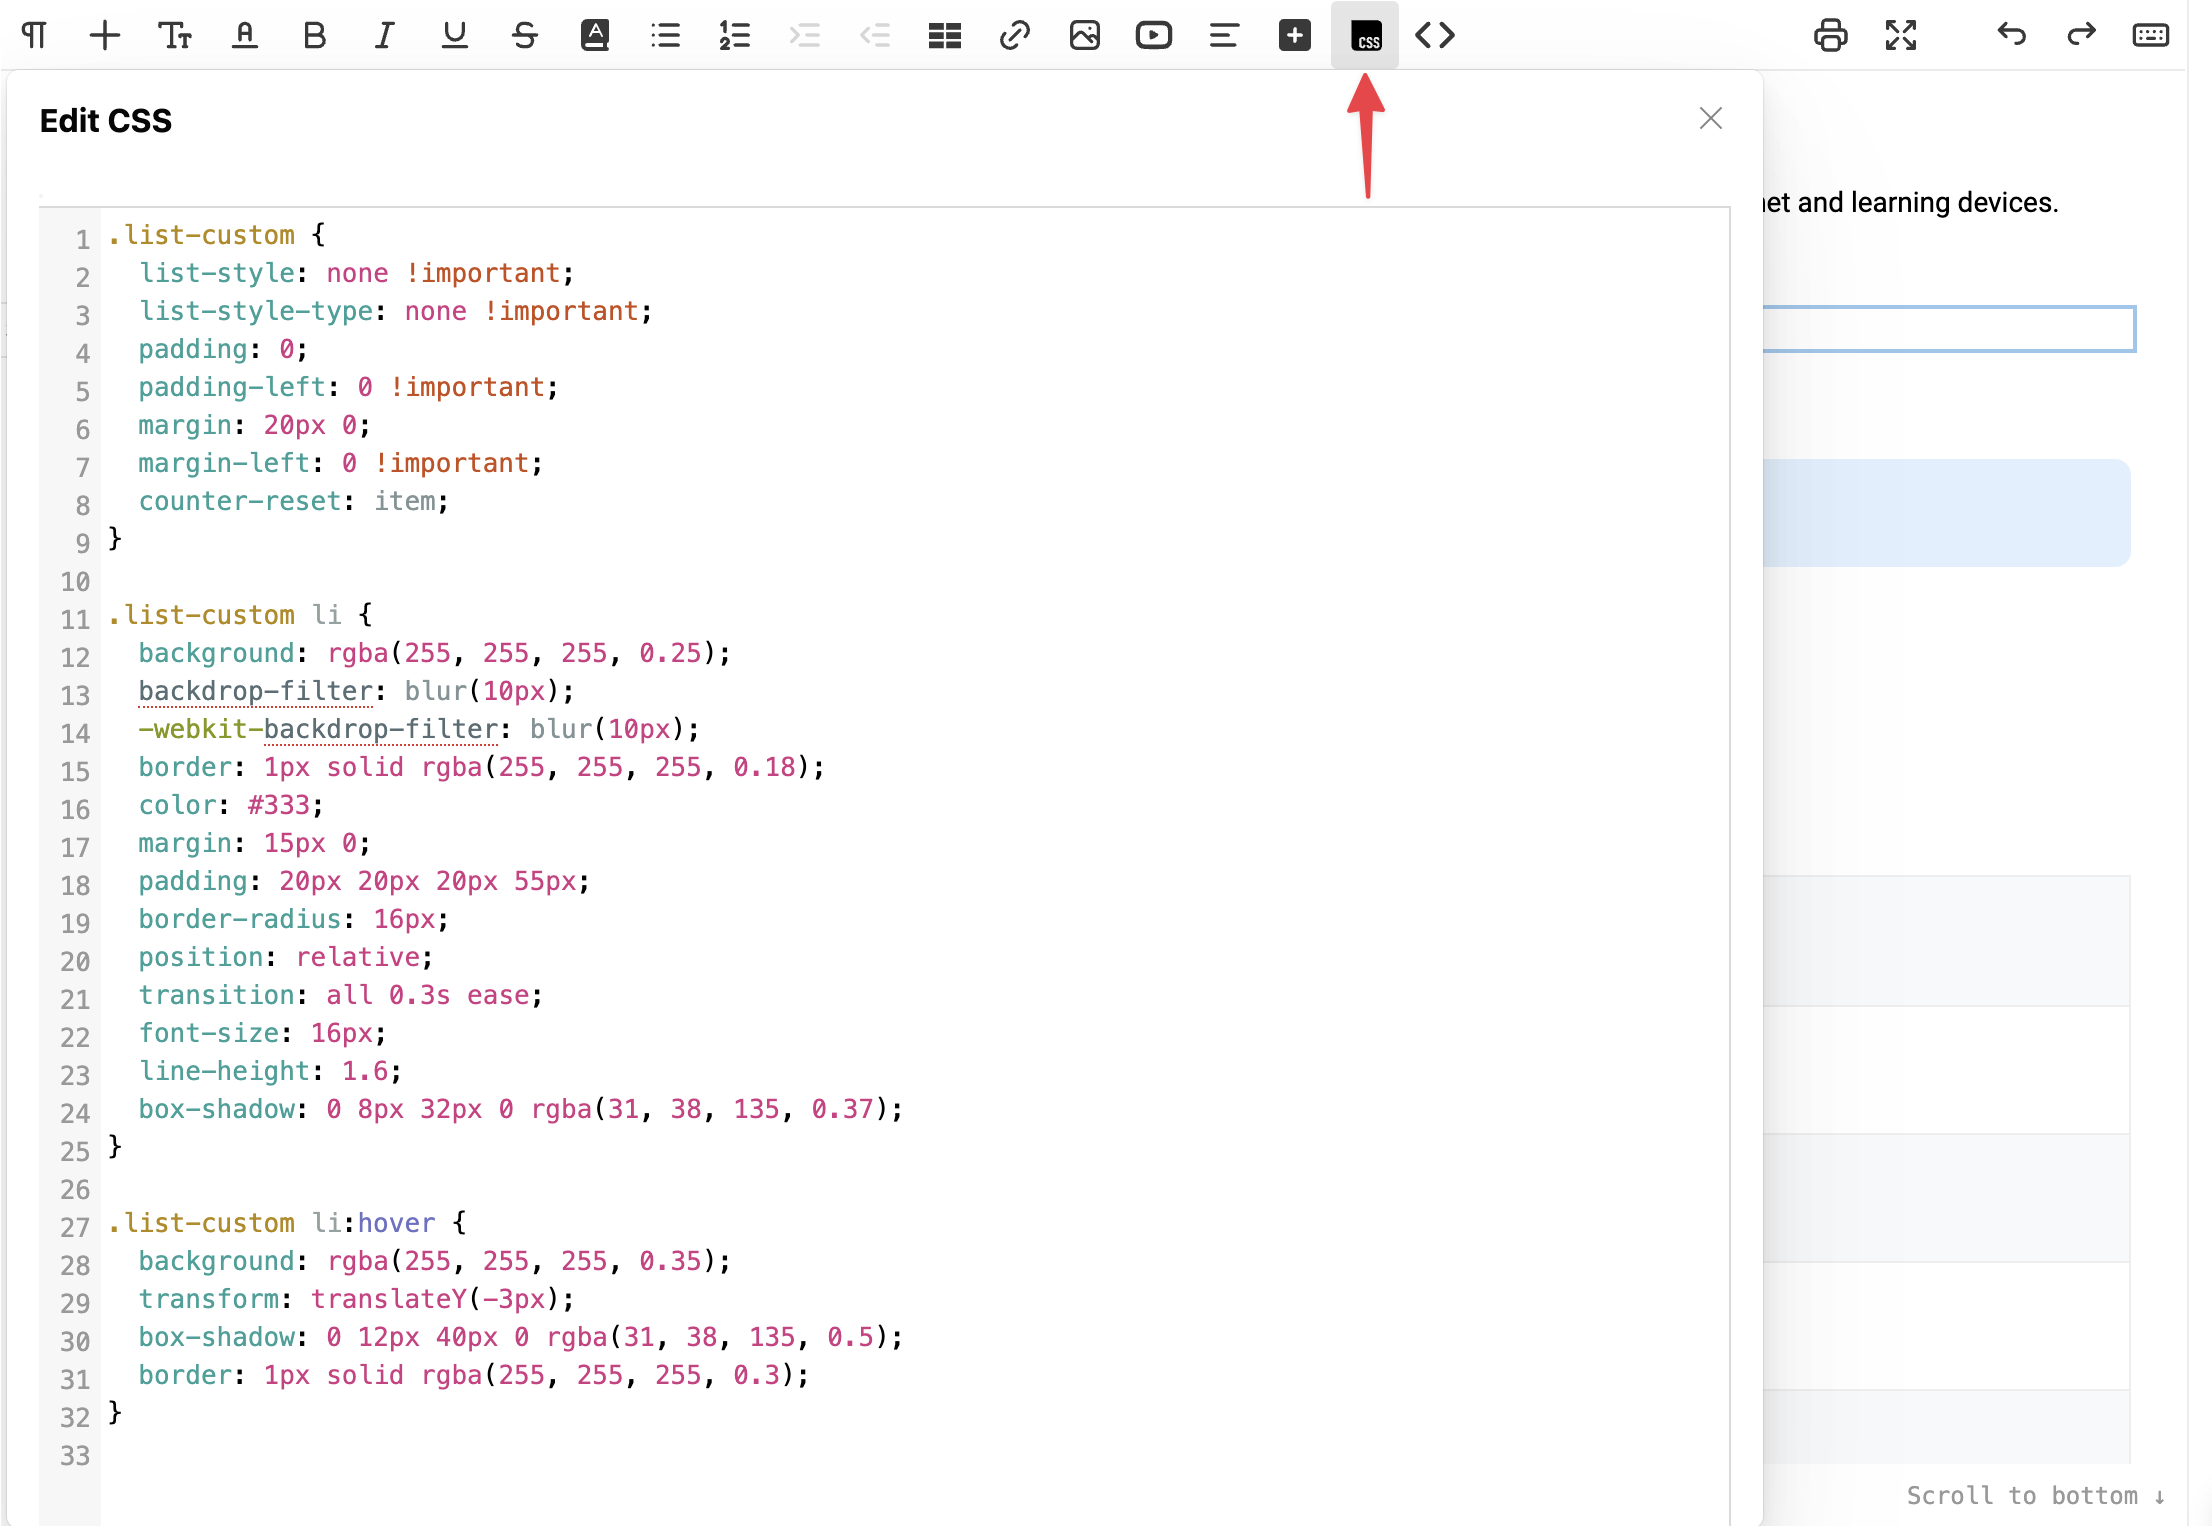
If you add styles using ‹style› tags in the source code, they will automatically appear in the CSS text field when switching to the editor interface.
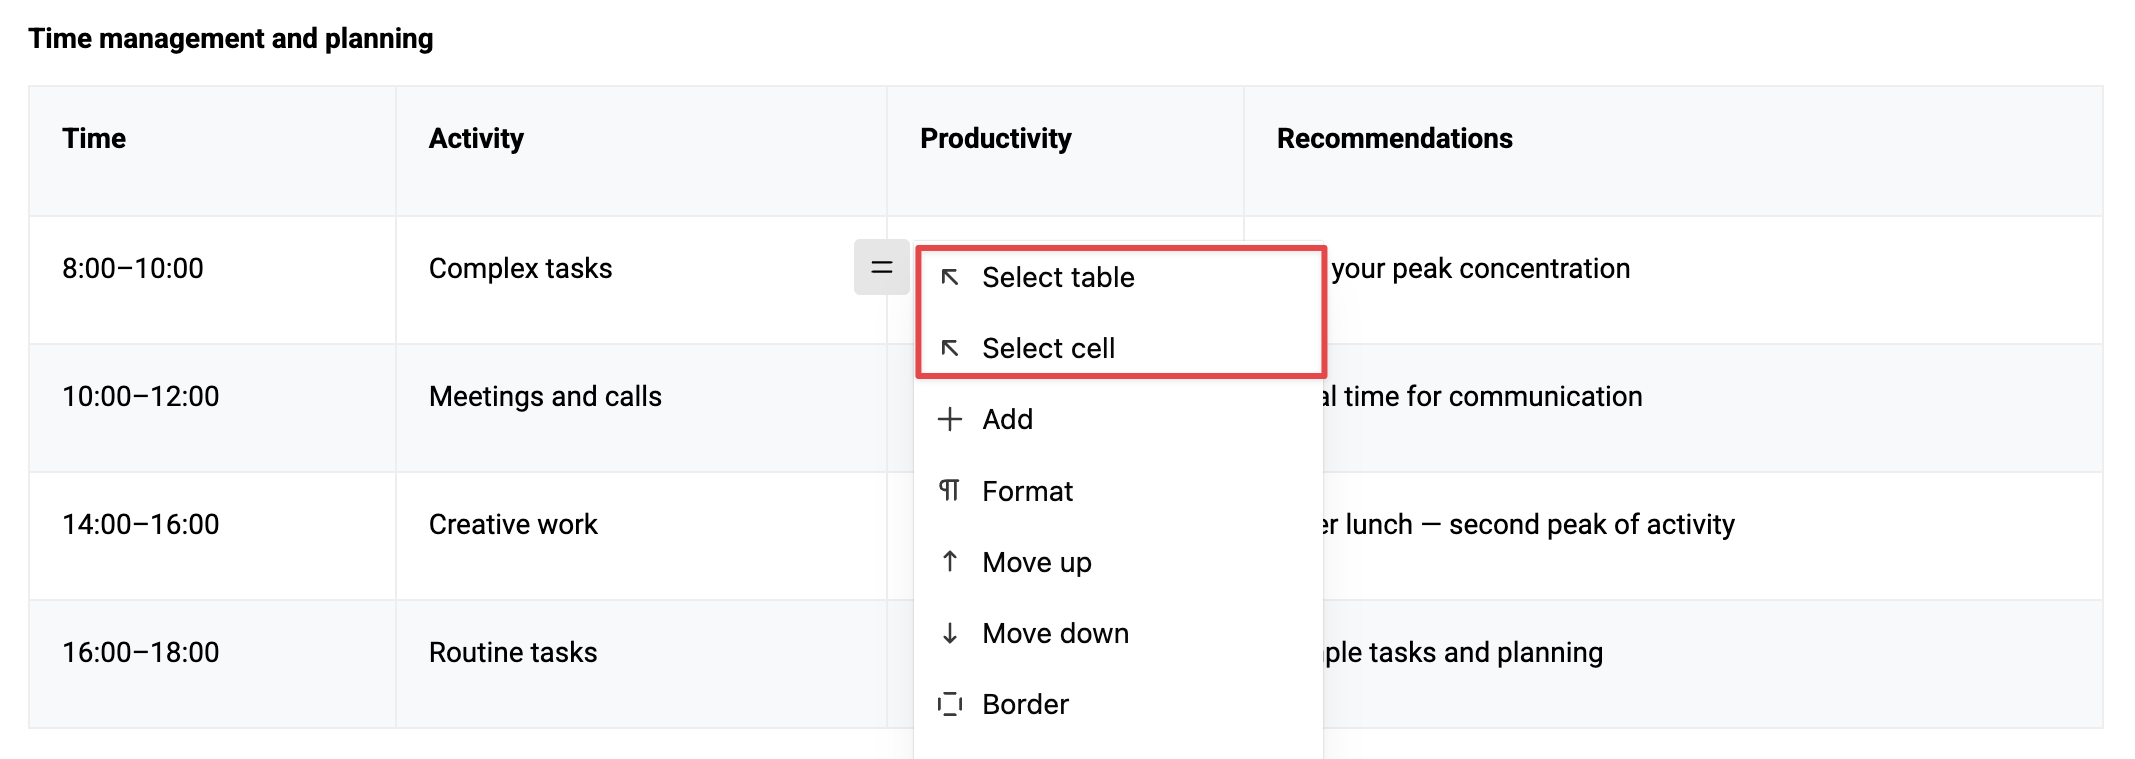
b) Working with wrappers
A wrapper is suitable if you want to style several related parts of the text.
- In the editor, we display borders for standard div blocks with the "my-container-block" class for your convenience; after publishing, these borders will not be visible;
- If a child element is selected, the slider menu allows you to choose the parent element:

– If a parent element is selected, the slider menu menu provides the option to separate the child elements:
c) Using layouts
After publishing, the borders will not be visible.
d) Empty lines
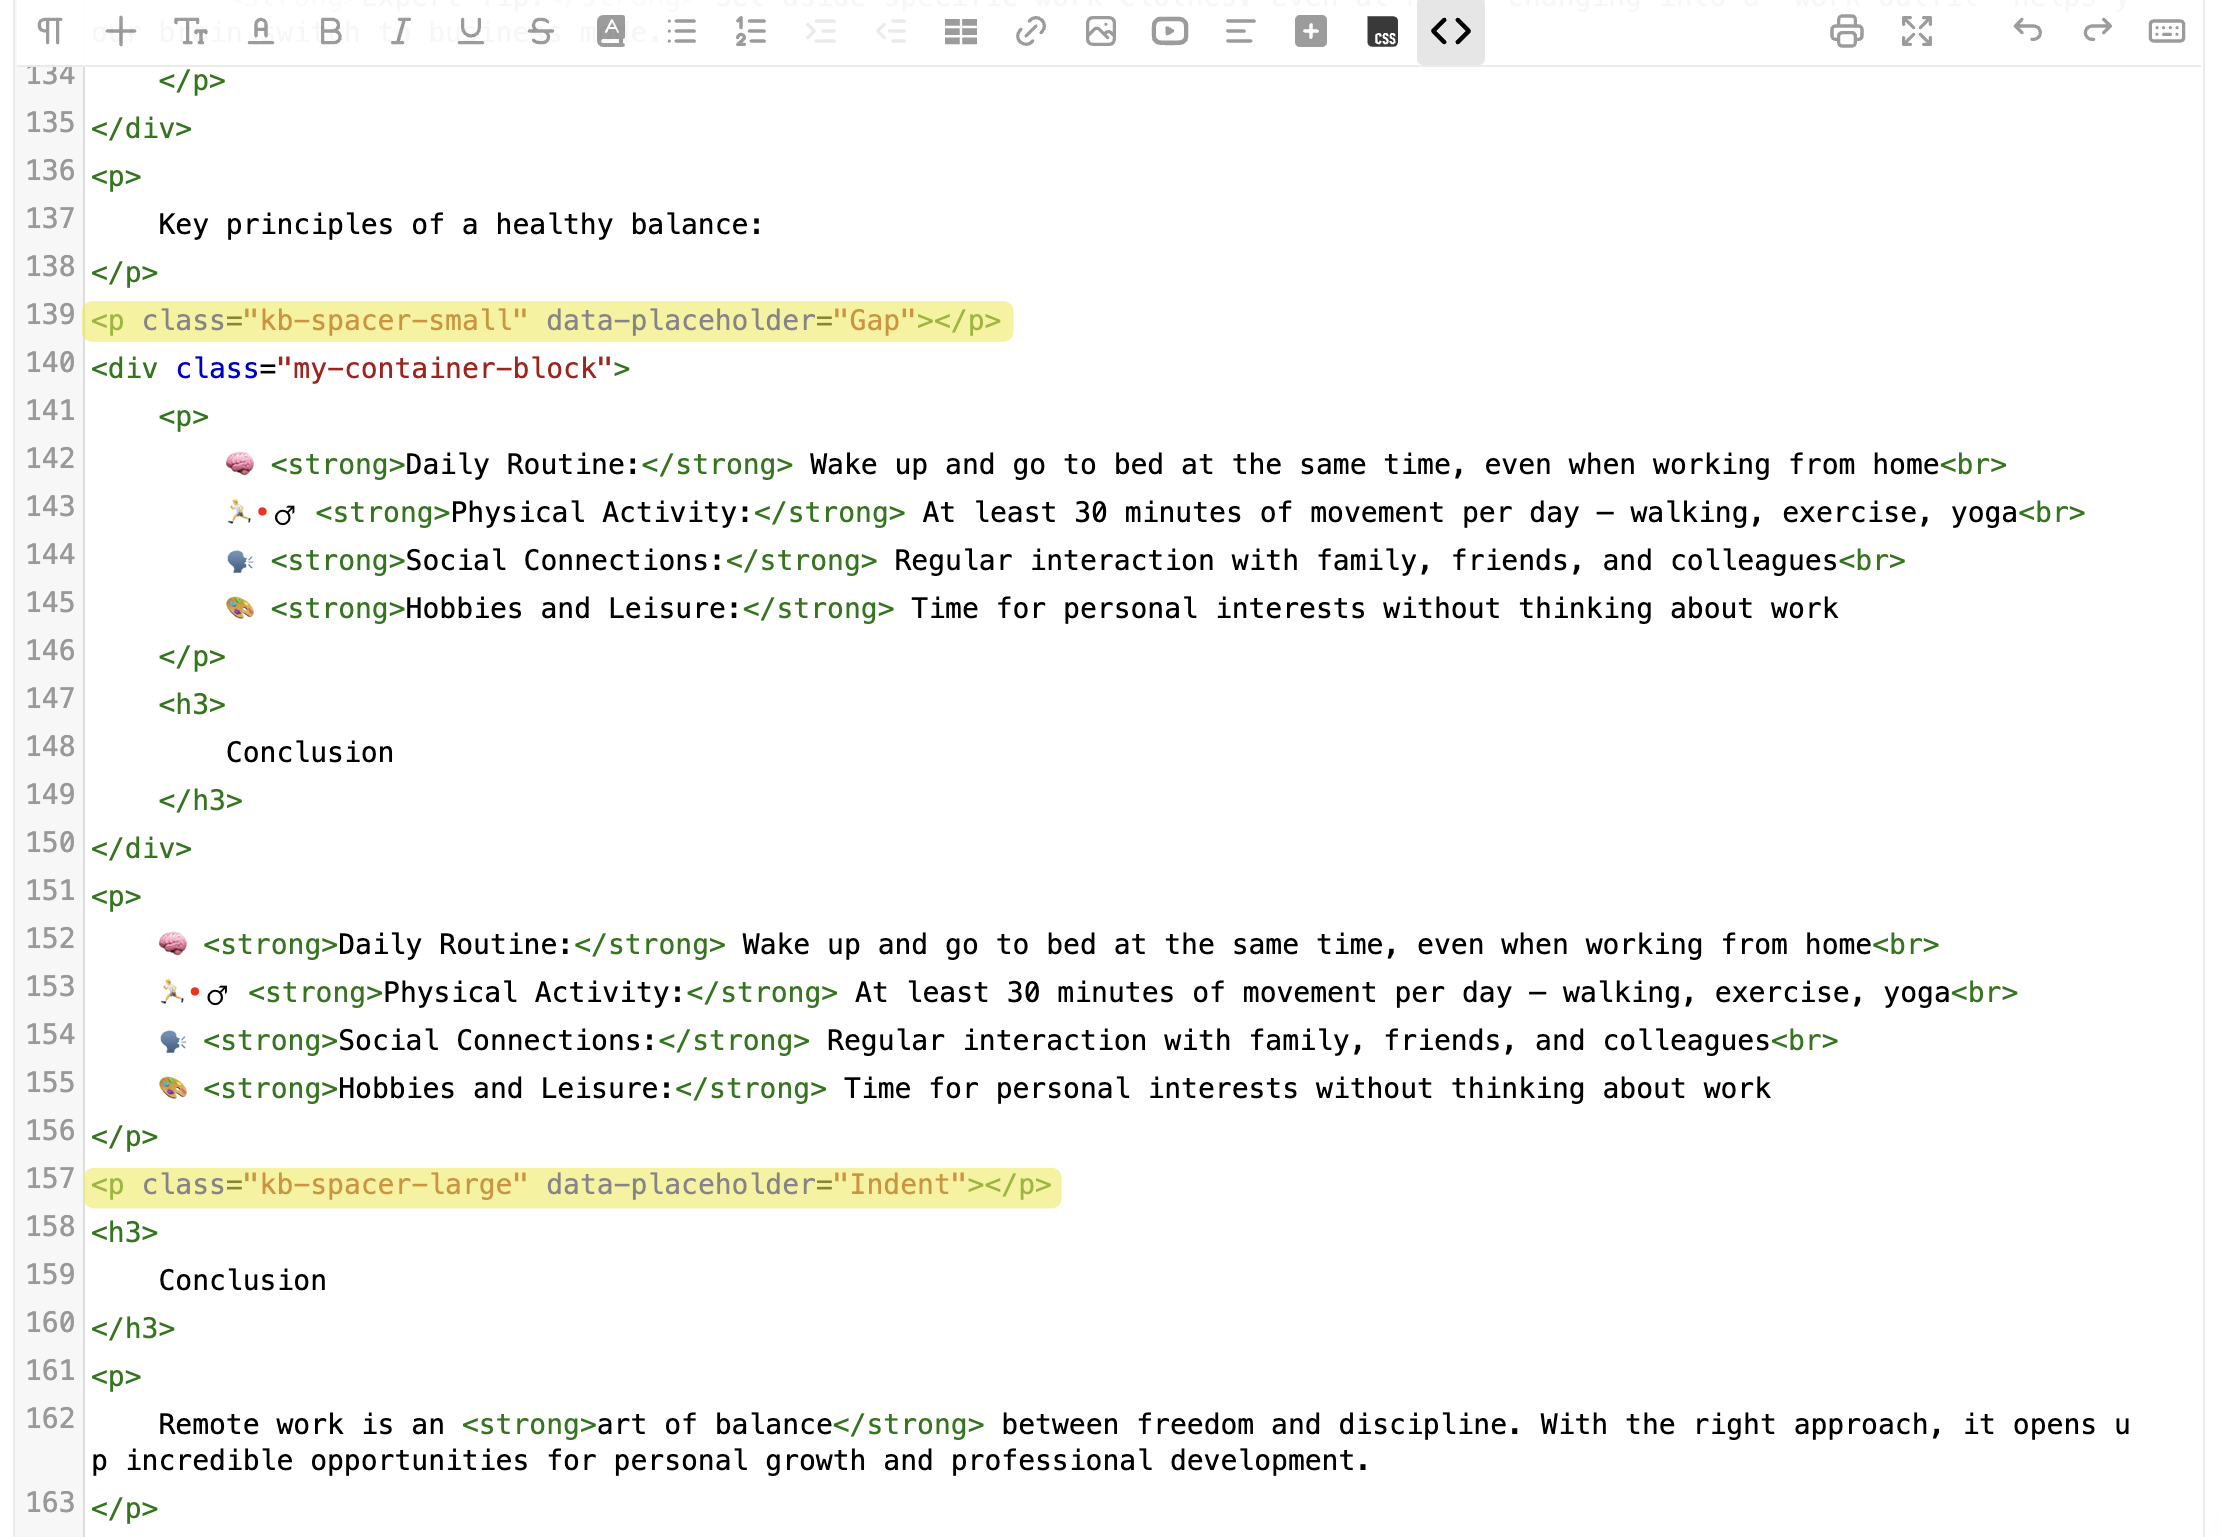
In the "Add" list, you have two options for visually separating text:
- "Gap" — inserts an empty paragraph with a fixed height (about one line). While editing, it’s shown with a gray border and the label "Gap". This label won’t appear in the published article.
- "Indent" — adds an empty paragraph with a line break and appears slightly taller (around one and a half lines).
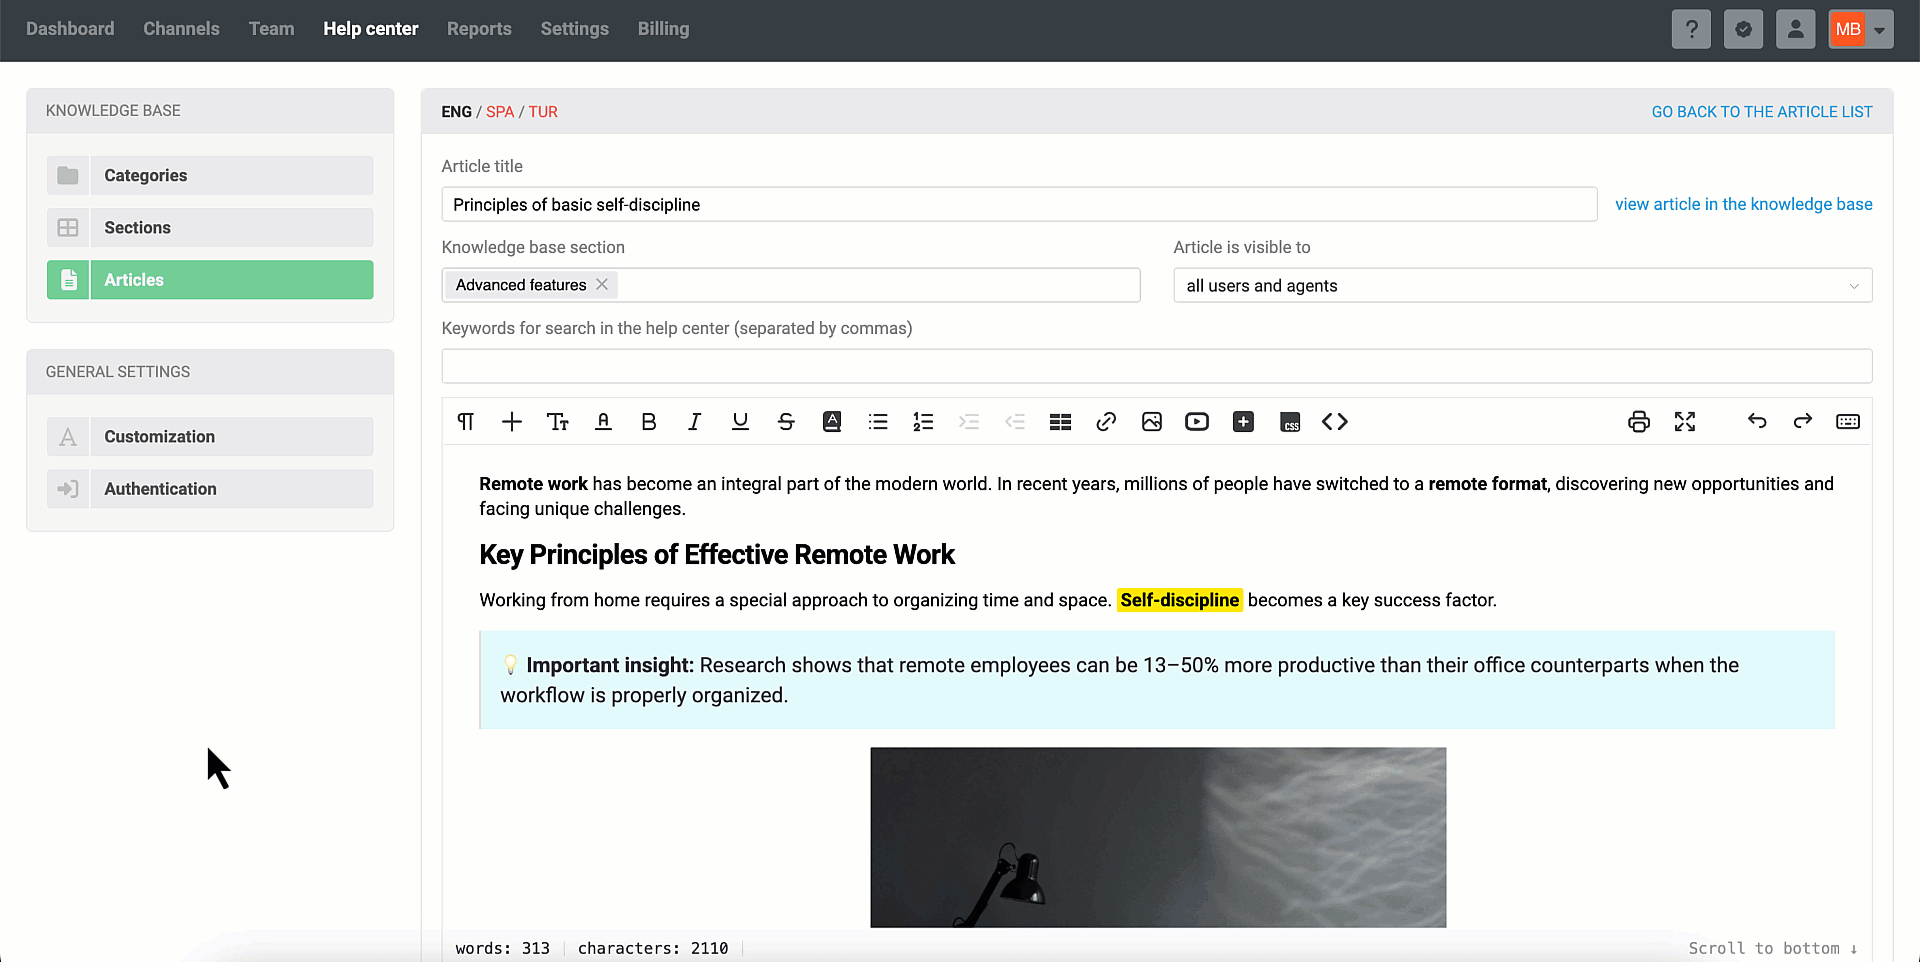
e) Adjusting images and animations
An image or animation can now be resized (reduced or enlarged), have text wrapping added, or be aligned as needed.
3. Usefull tools
a) Context bar

The context works regardless of the block — the necessary styles will be applied to any selected fragment.

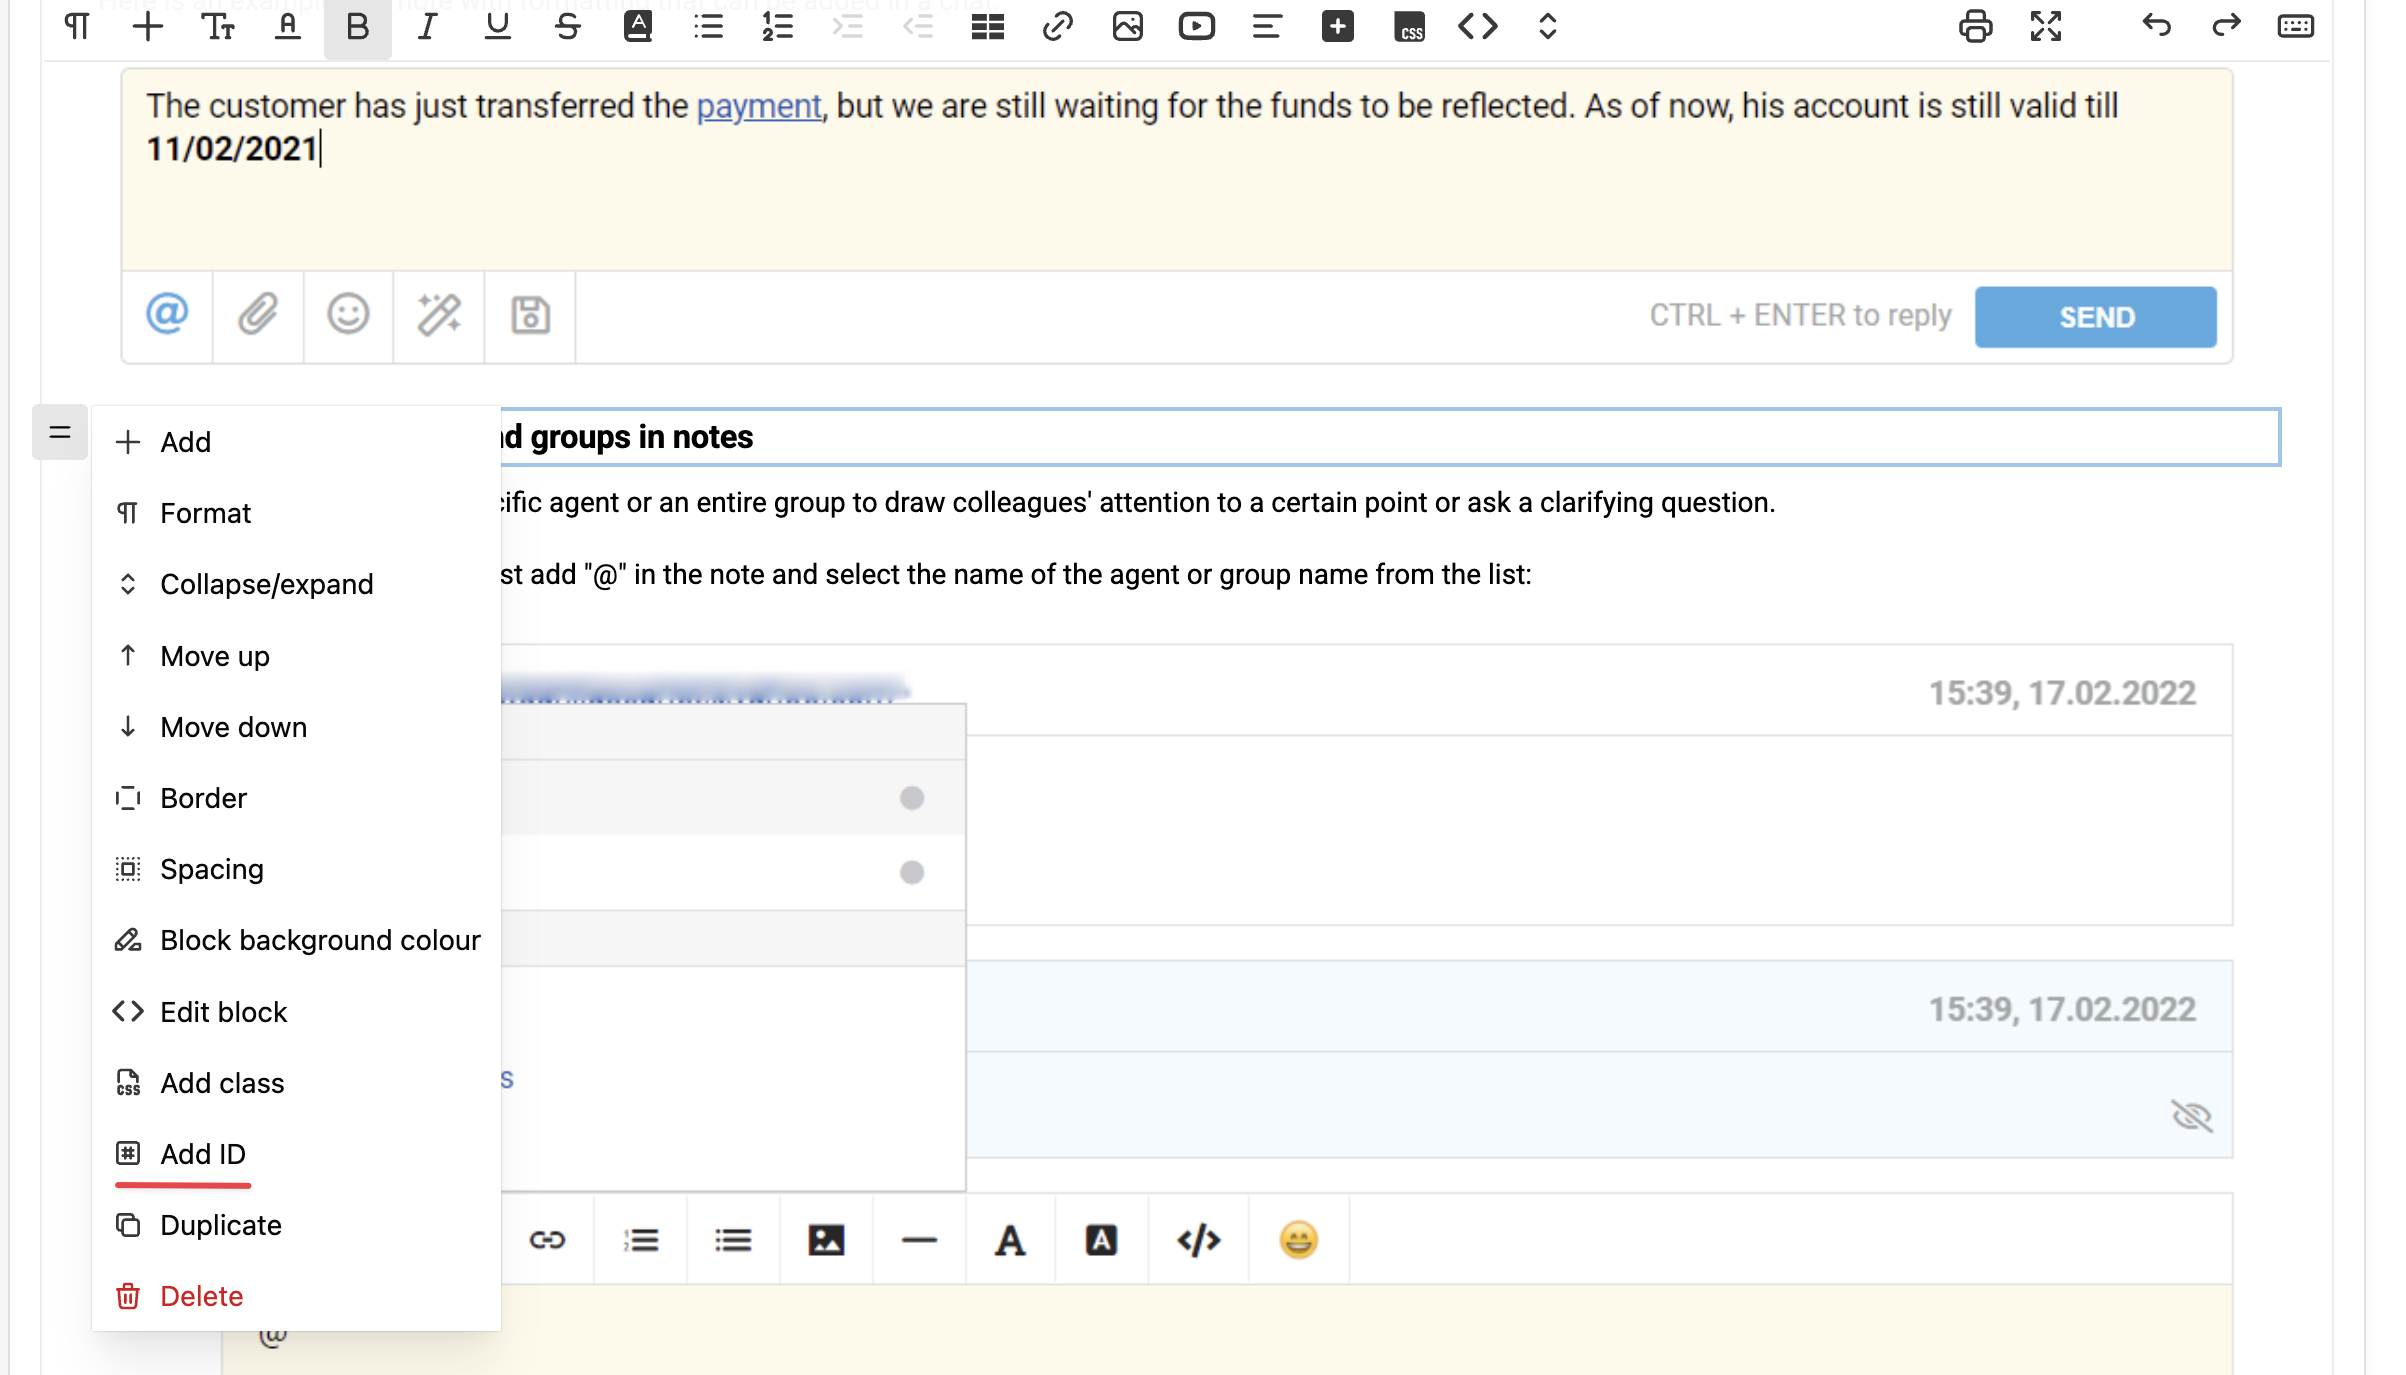
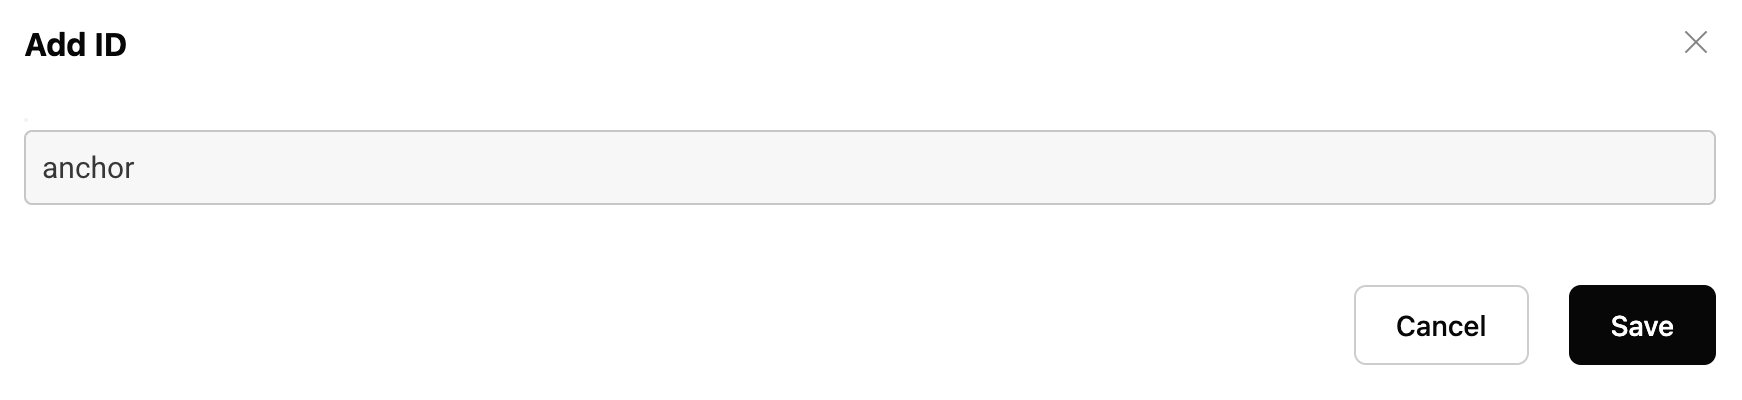
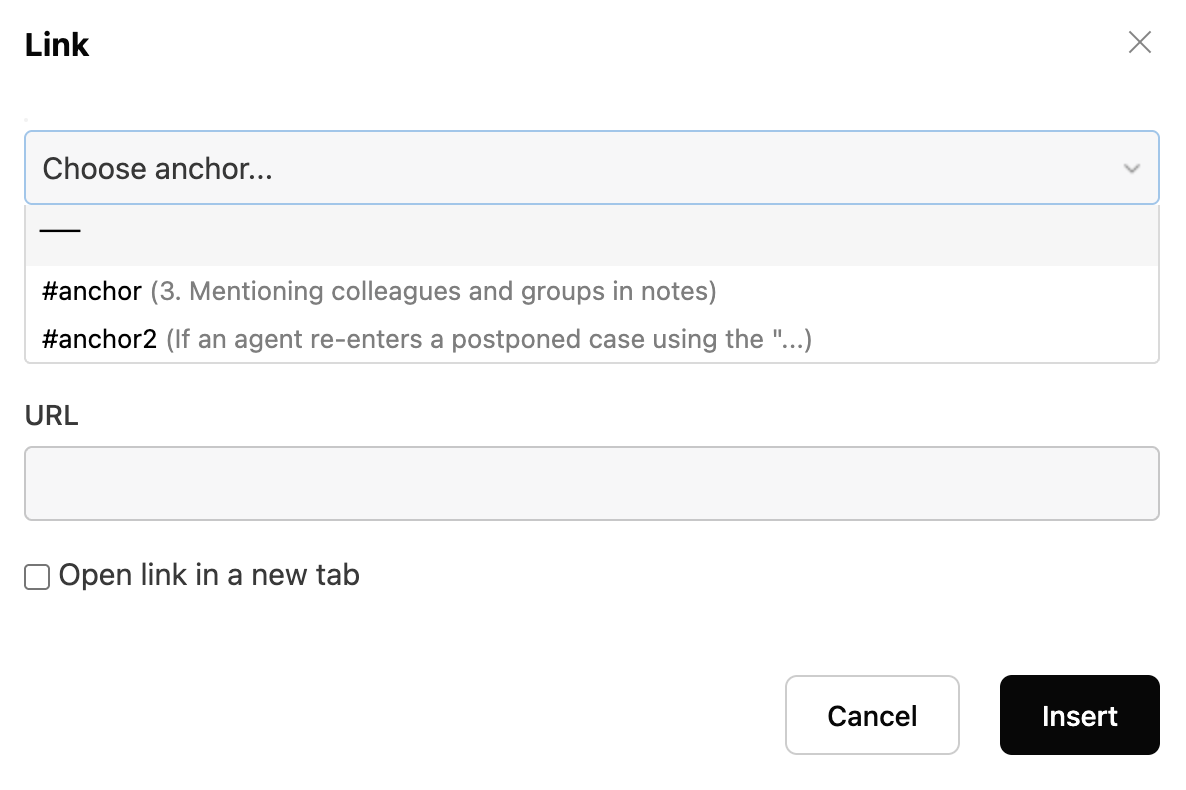
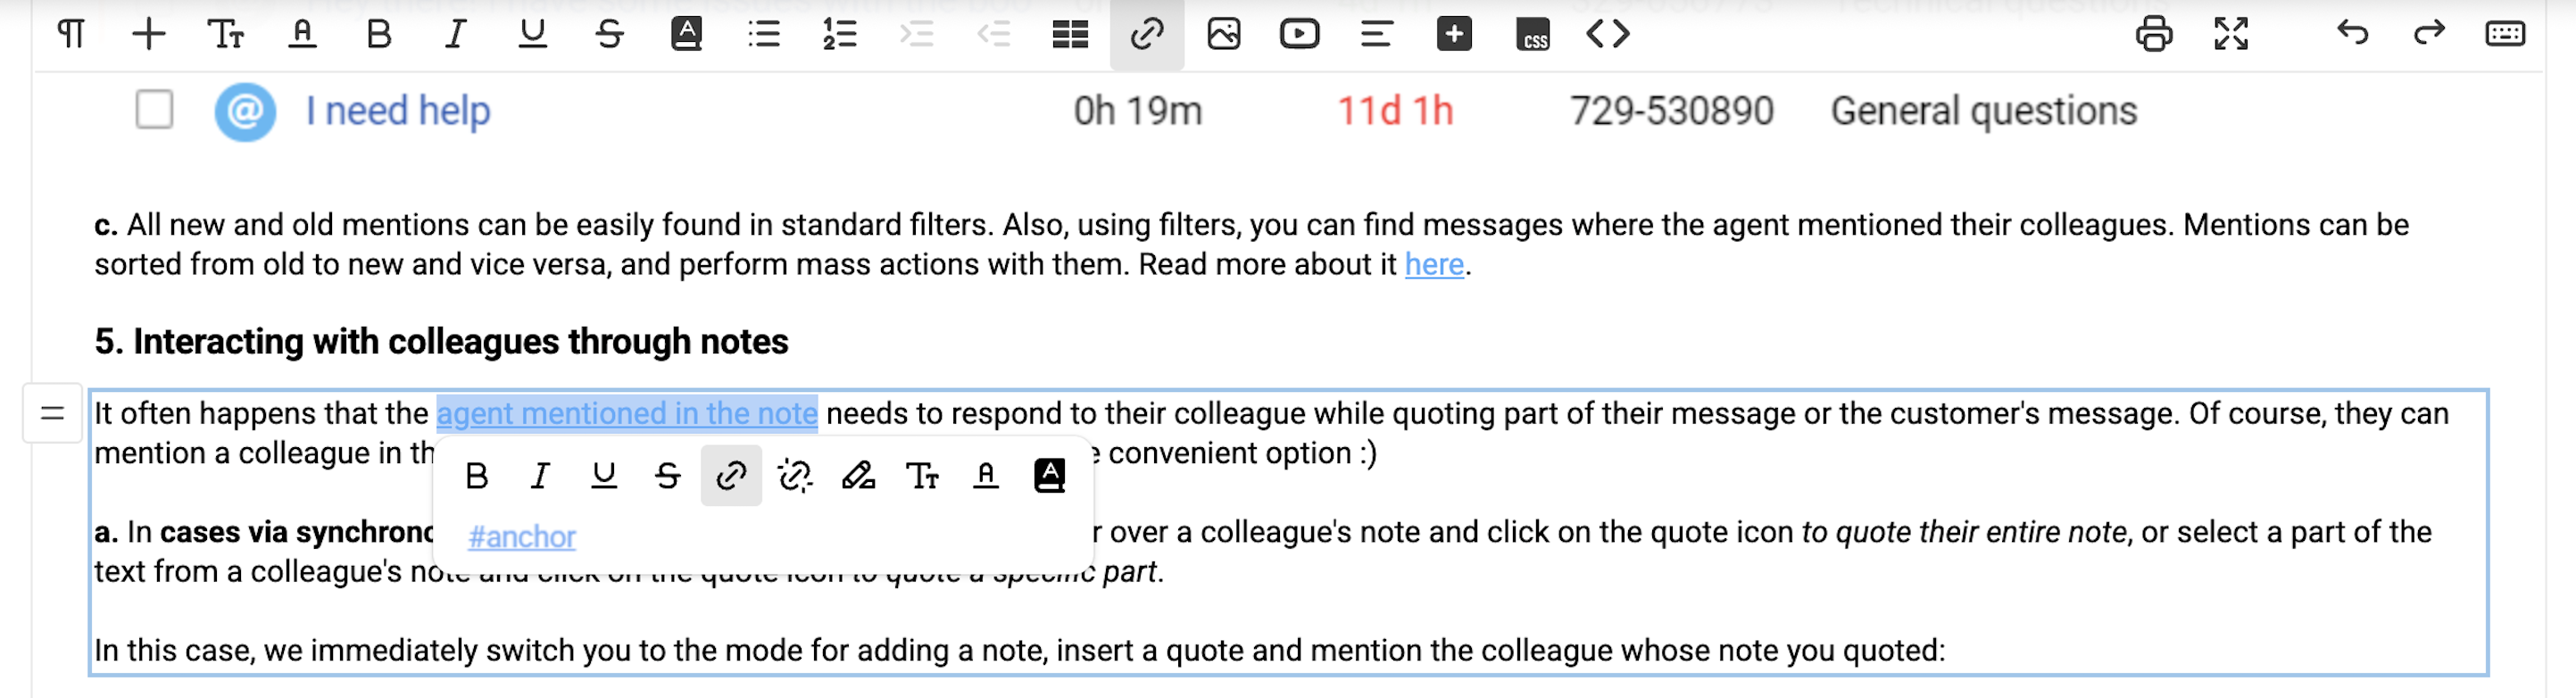
b) Adding an anchor
It is no longer necessary to switch to source code mode to add an anchor. Here’s how it works:
— Select the block → in the slider menu, click the "Add ID" button → enter the anchor name.
— To create a link to an anchor:
- select the text that the anchor should point to → click "add link";
- paste the previously specified ID or choose the anchor from the list.
If an anchor was added using an ‹a› tag, it will also work, but the text the anchor refers to will not be displayed next to the #ID.
— After specifying the link, you can see which anchor is set using the context menu.
c) Collapsing and expanding content
When clicking on a subheading – in the editor panel or in the slider panel menu – the option to collapse or expand its content appears.
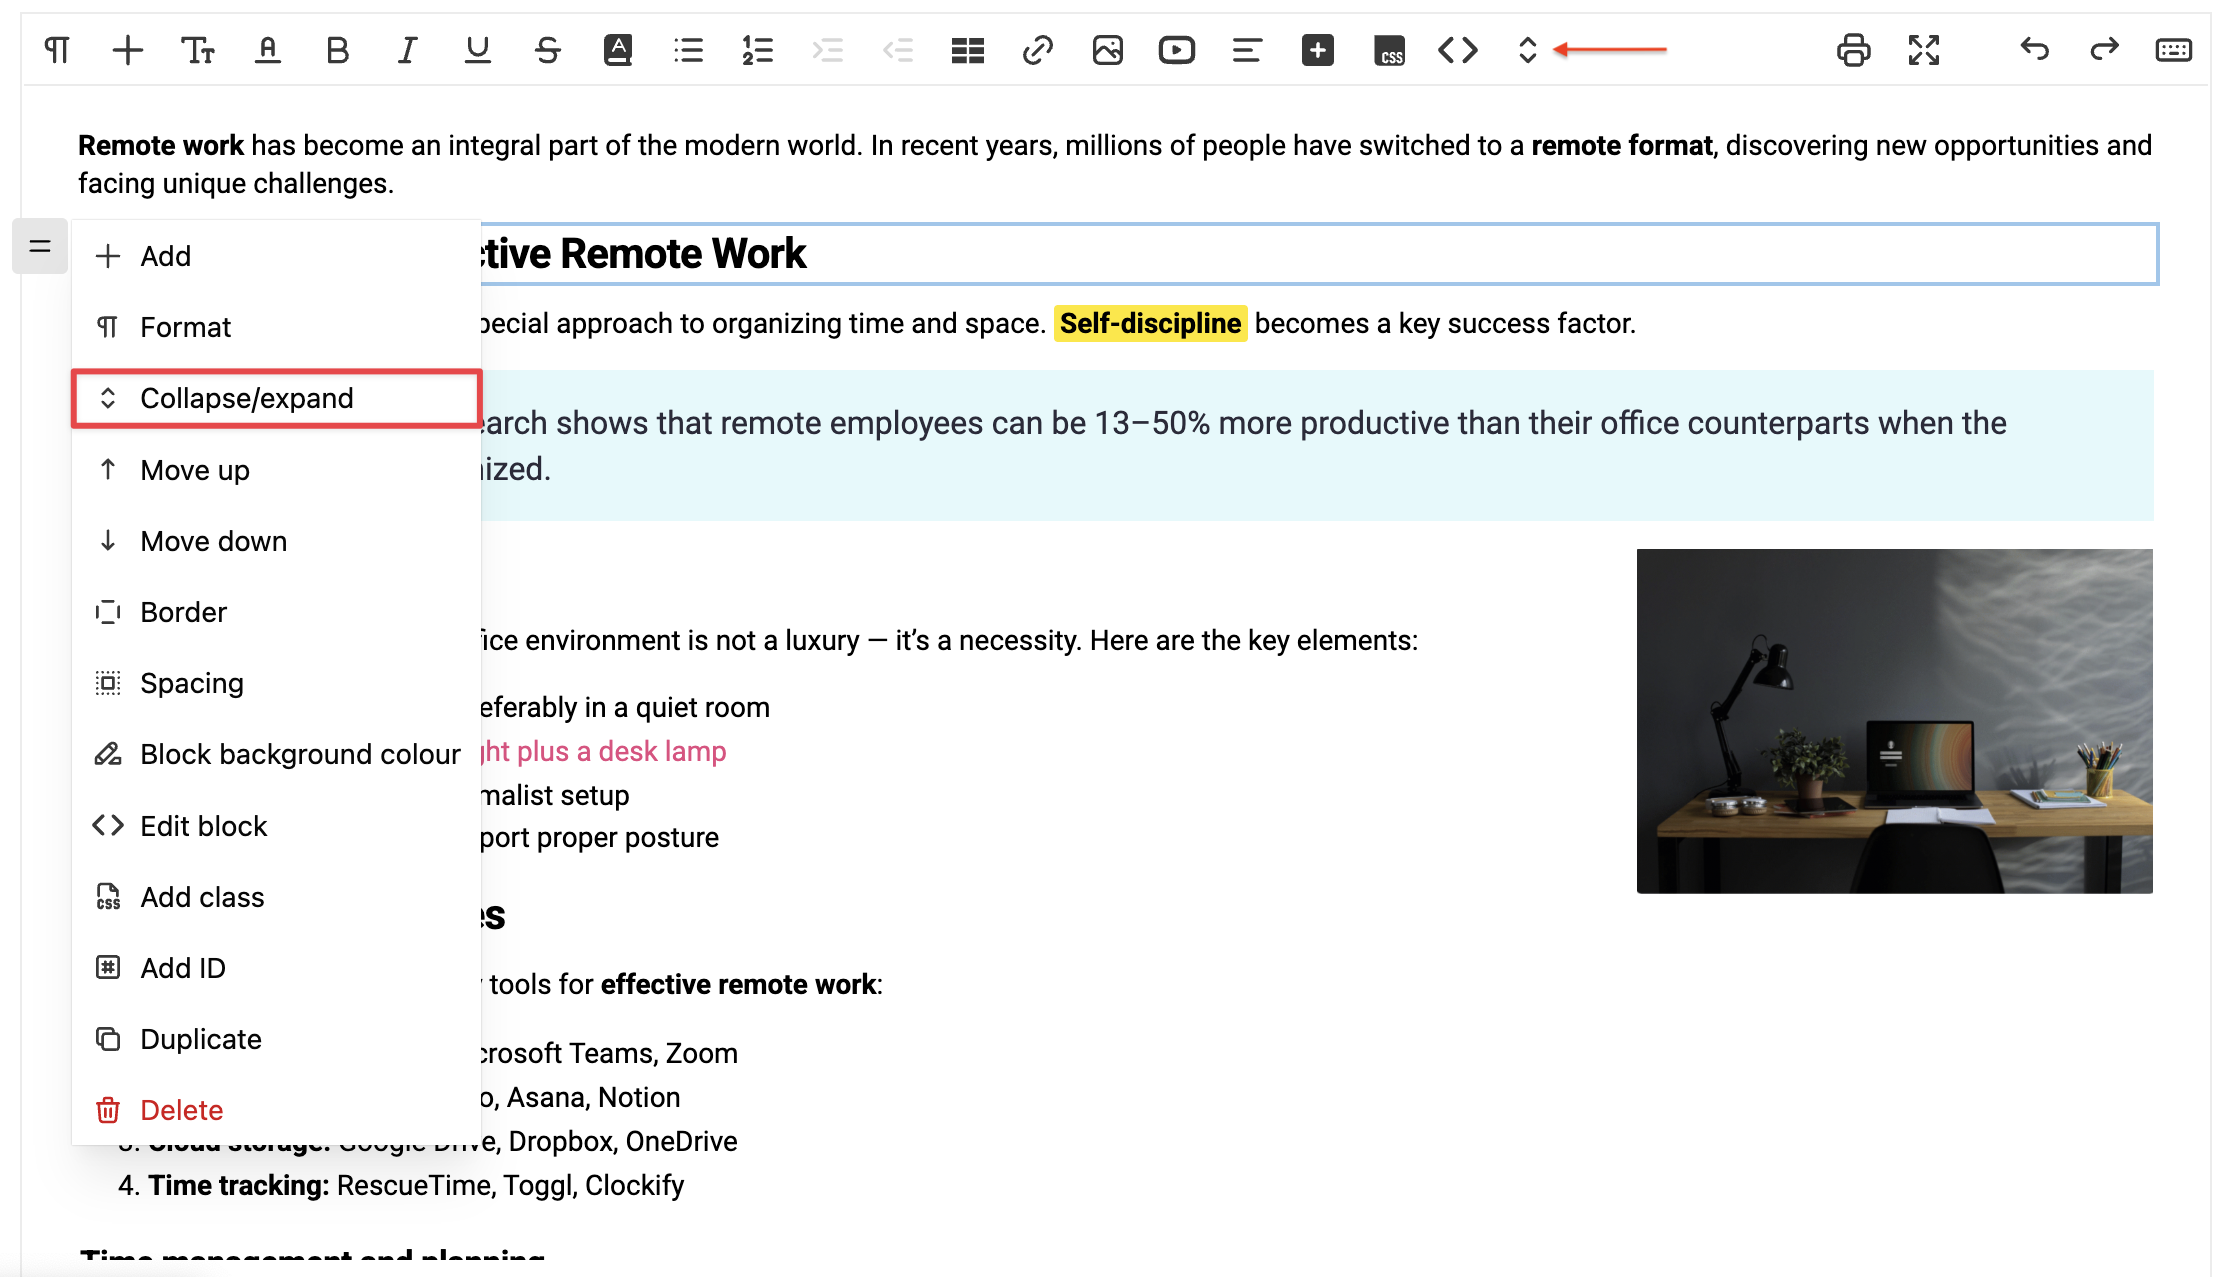
This only affects the display in the editor and does not impact the published version of the article. The feature helps to hide already formatted sections, making it easier to navigate the structure and quickly find the desired part.
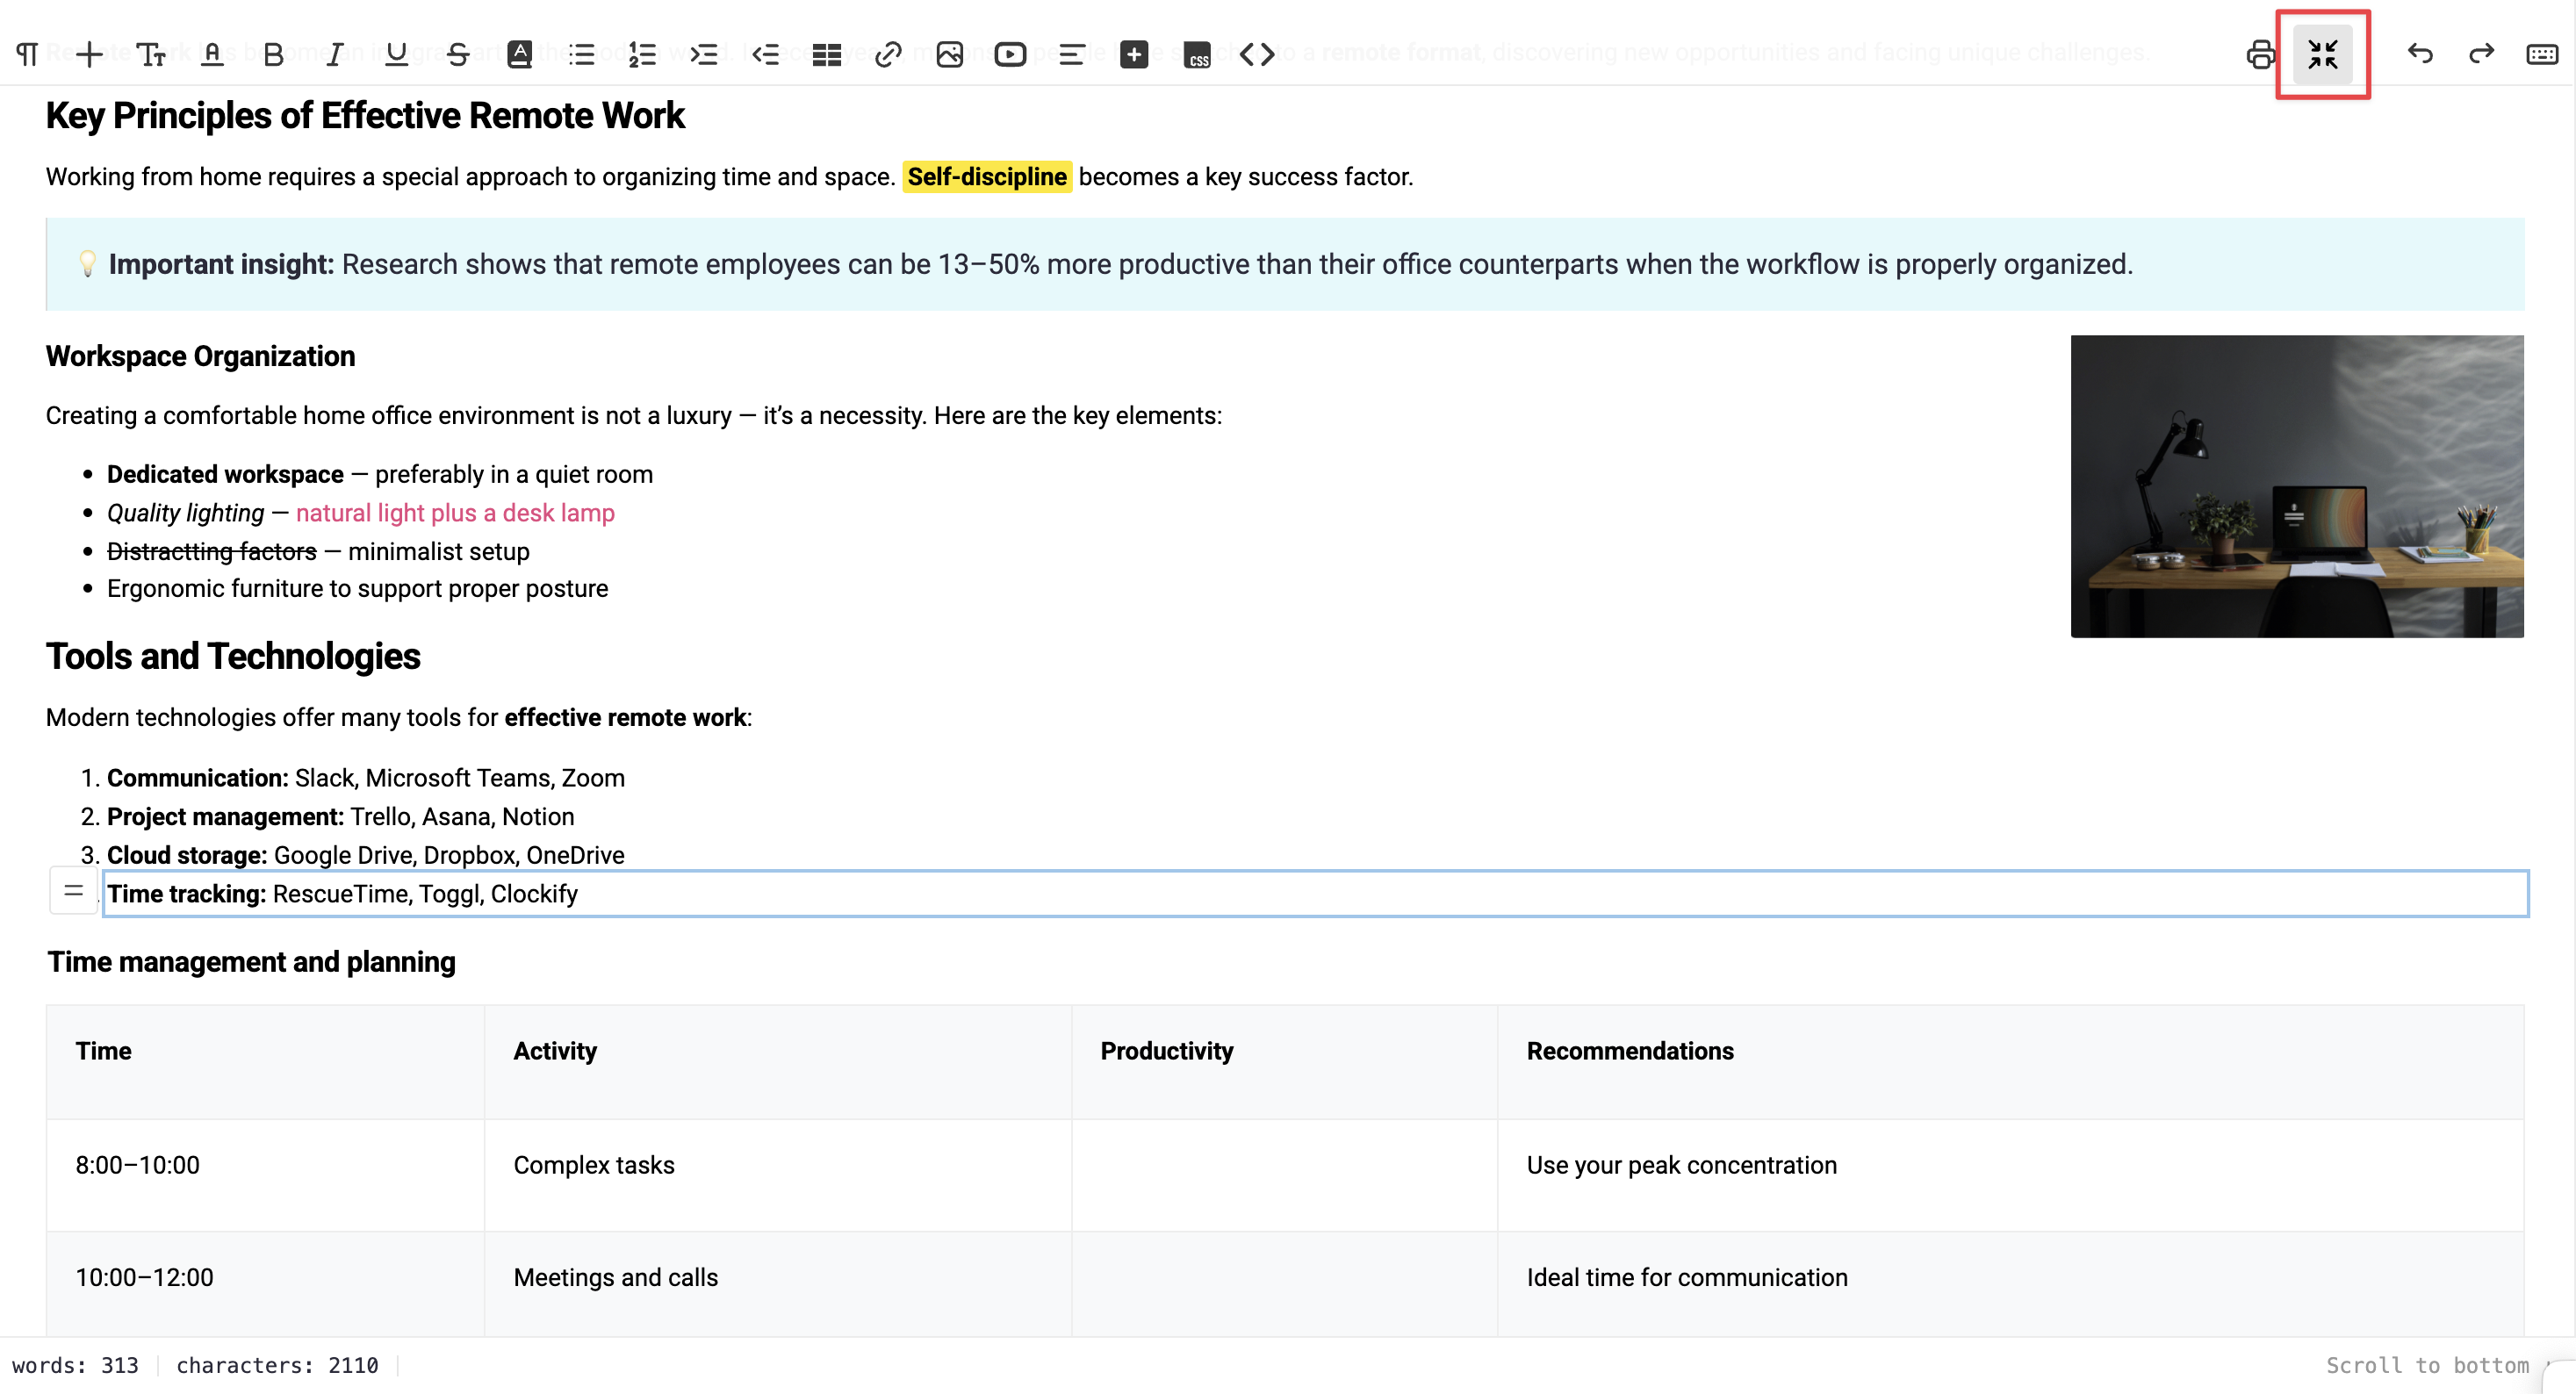
d) Fullscreen mode
You can open the editor to full width and height of the web browser page with a single click.
e) Saving an article as a PDF
The print icon allows you to save the article in PDF format. The file automatically includes:
- the export date,
- the article title,
- the article language,
- a link to the article in the knowledge base.

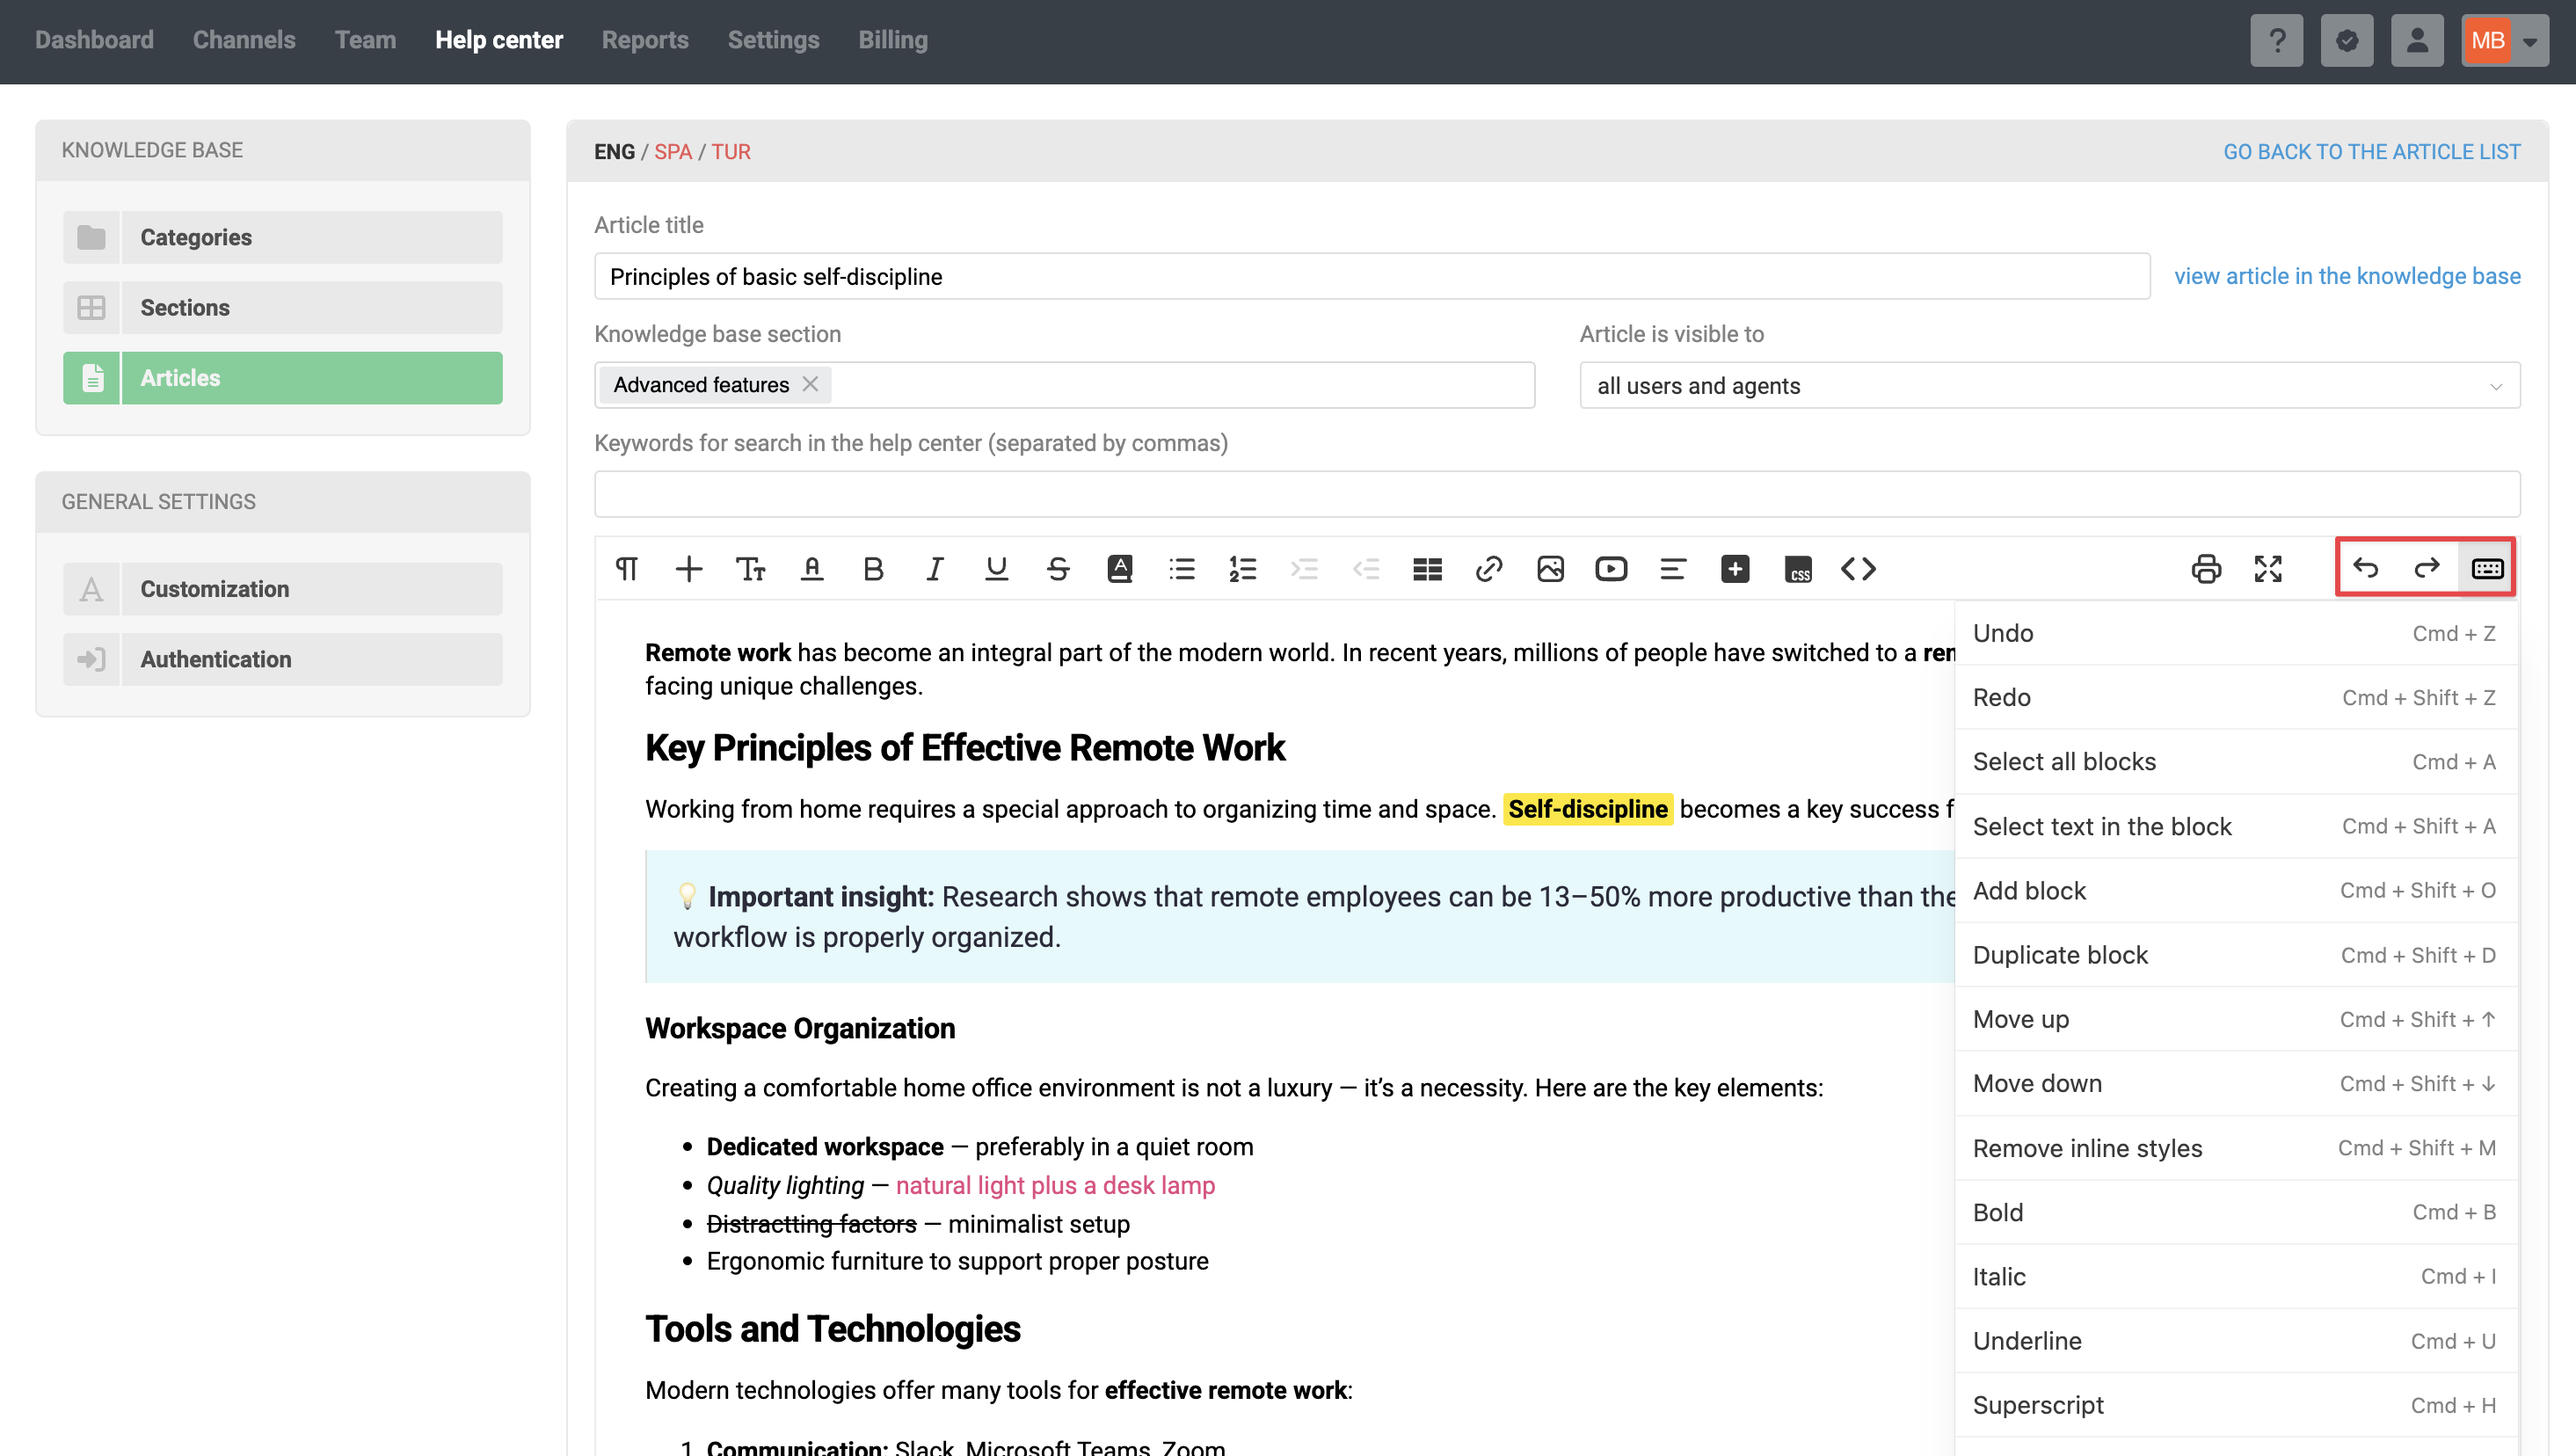
f) Keyboard shortcuts
In the upper right corner of the editor, the Undo (Ctrl+Z) and Redo (Ctrl+Y) buttons are available. Next to them is a keyboard icon — by clicking it, you can view the full list of keyboard shortcuts that will help speed up your work with the editor.
g) Autosave
We cache the latest version of your unsaved article. If you close the page, navigate away from the article, or refresh the page, the next time you open the article, your most recent edits will be restored. This does not affect the published version of the article in any way.
To discard your edits and revert to the published version of the article, click the "cancel" link.
