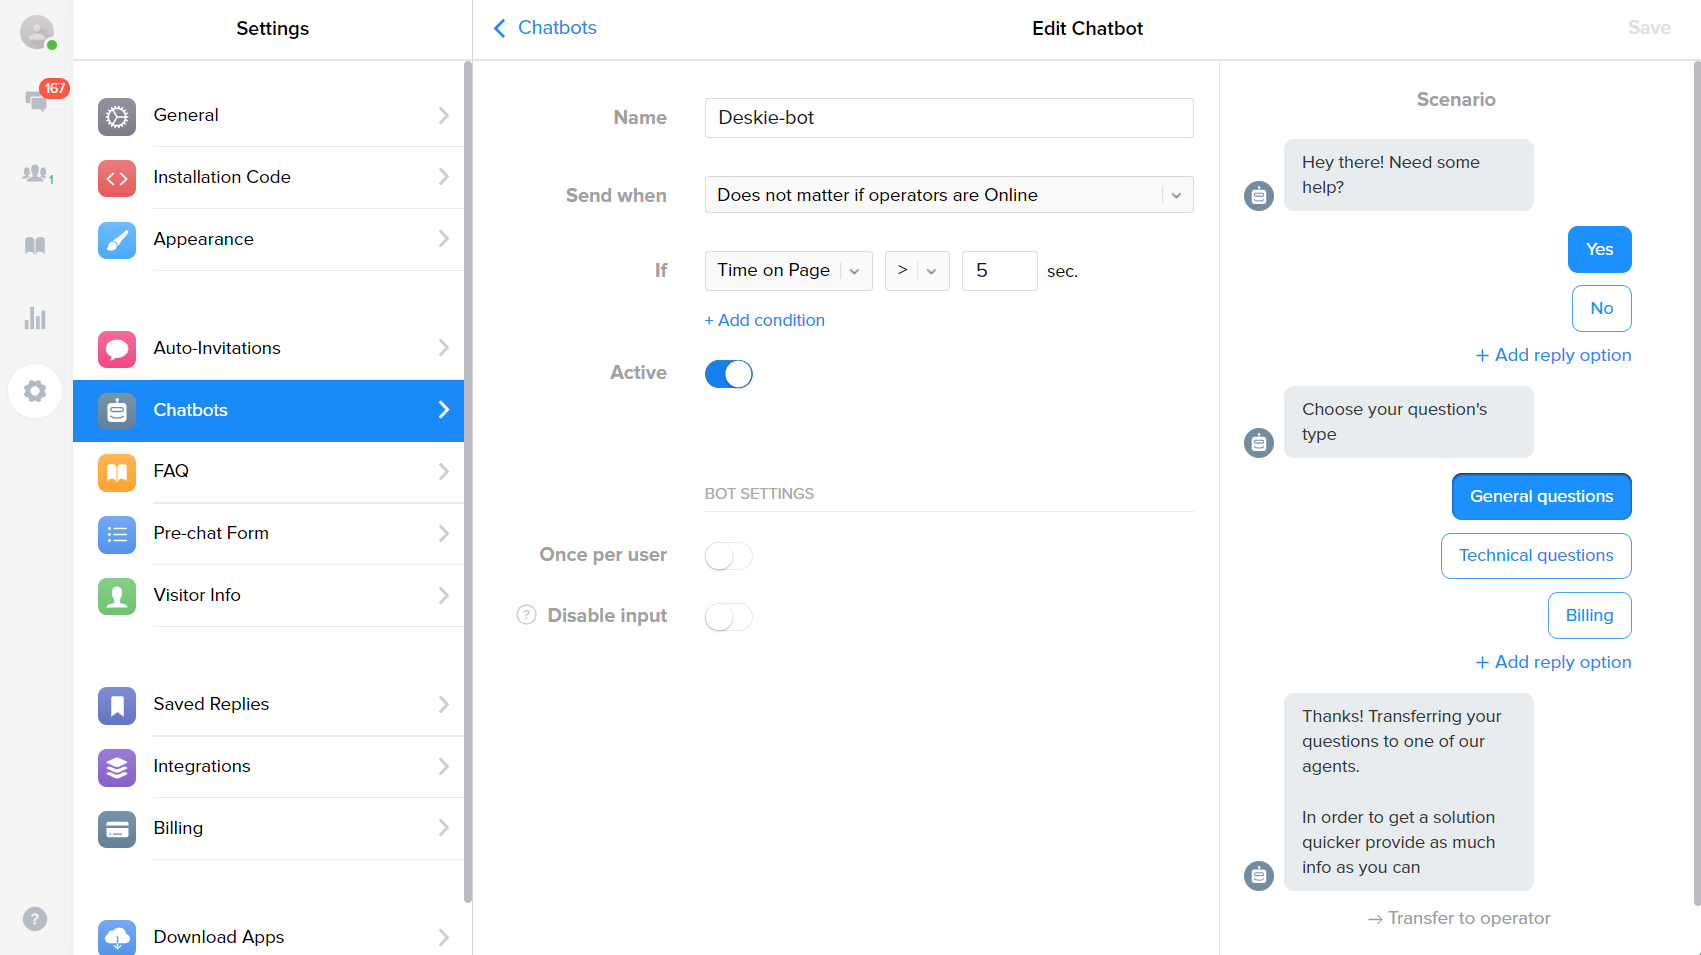
Live chat is connected through integration with Chatra or Chaport. So your agents will be able to chat with customers directly from Deskie, similar to other channels for real-time communication (instant messengers, social networks) — without switching to third-party applications.
Are there any other options?
Most live chats (Jivosite, etc.) do not allow real-time chats through third-party services but only allow you to receive completed chats via the API. In this case, agents will have to work with chats in a separate service, so the integration makes sense is lost.
If you have a live chat of your design or have found a live chat that, by analogy with Chatra, allows you to correspond through third-party services, you can connect it to Deskie through custom channels.
Let's take a closer look at the integration with each service:
— integration with Chatra;
— integration with Chaport.
Integration with Chatra
Chatra is a live chat with tons of features.
Connecting Chatra
1. If you don't have a Chatra account yet, register one.
2. Go along the path of the administrator account — the "Settings" section — the "Integration" subsection — the "Add integration" button — the "Chatra" card in the "Other integrations" block.
3. In the integration settings form, select the default group that will receive cases from Chatra, as well as the panel for displaying data.
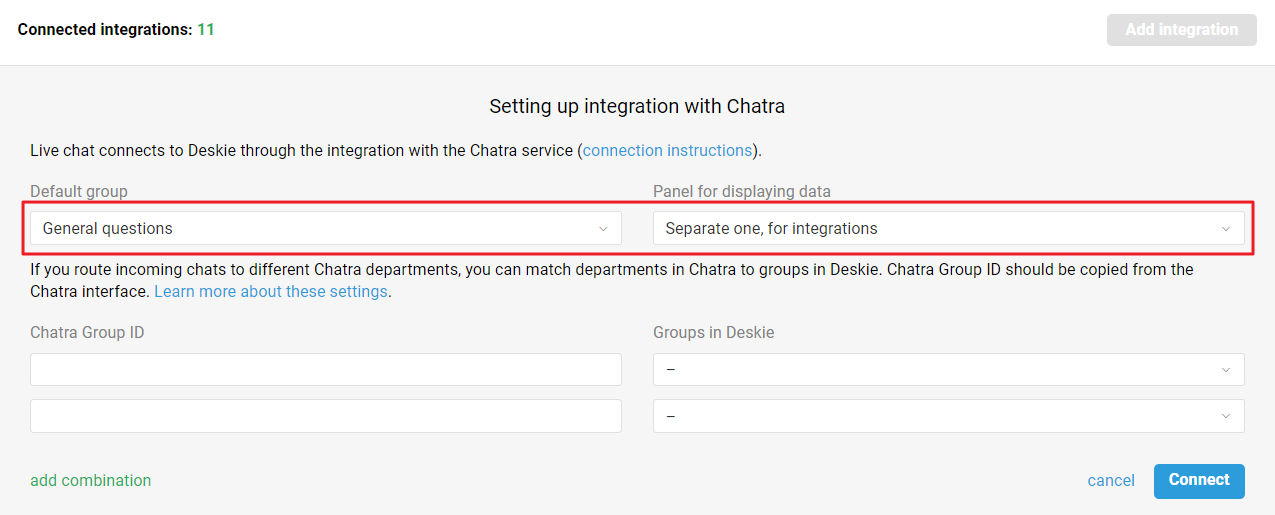
When you select the "Separate one, for integrations" option, an additional icon appears in the upper right corner of the case (next to the "User data" icon) to activate the integrations panel.
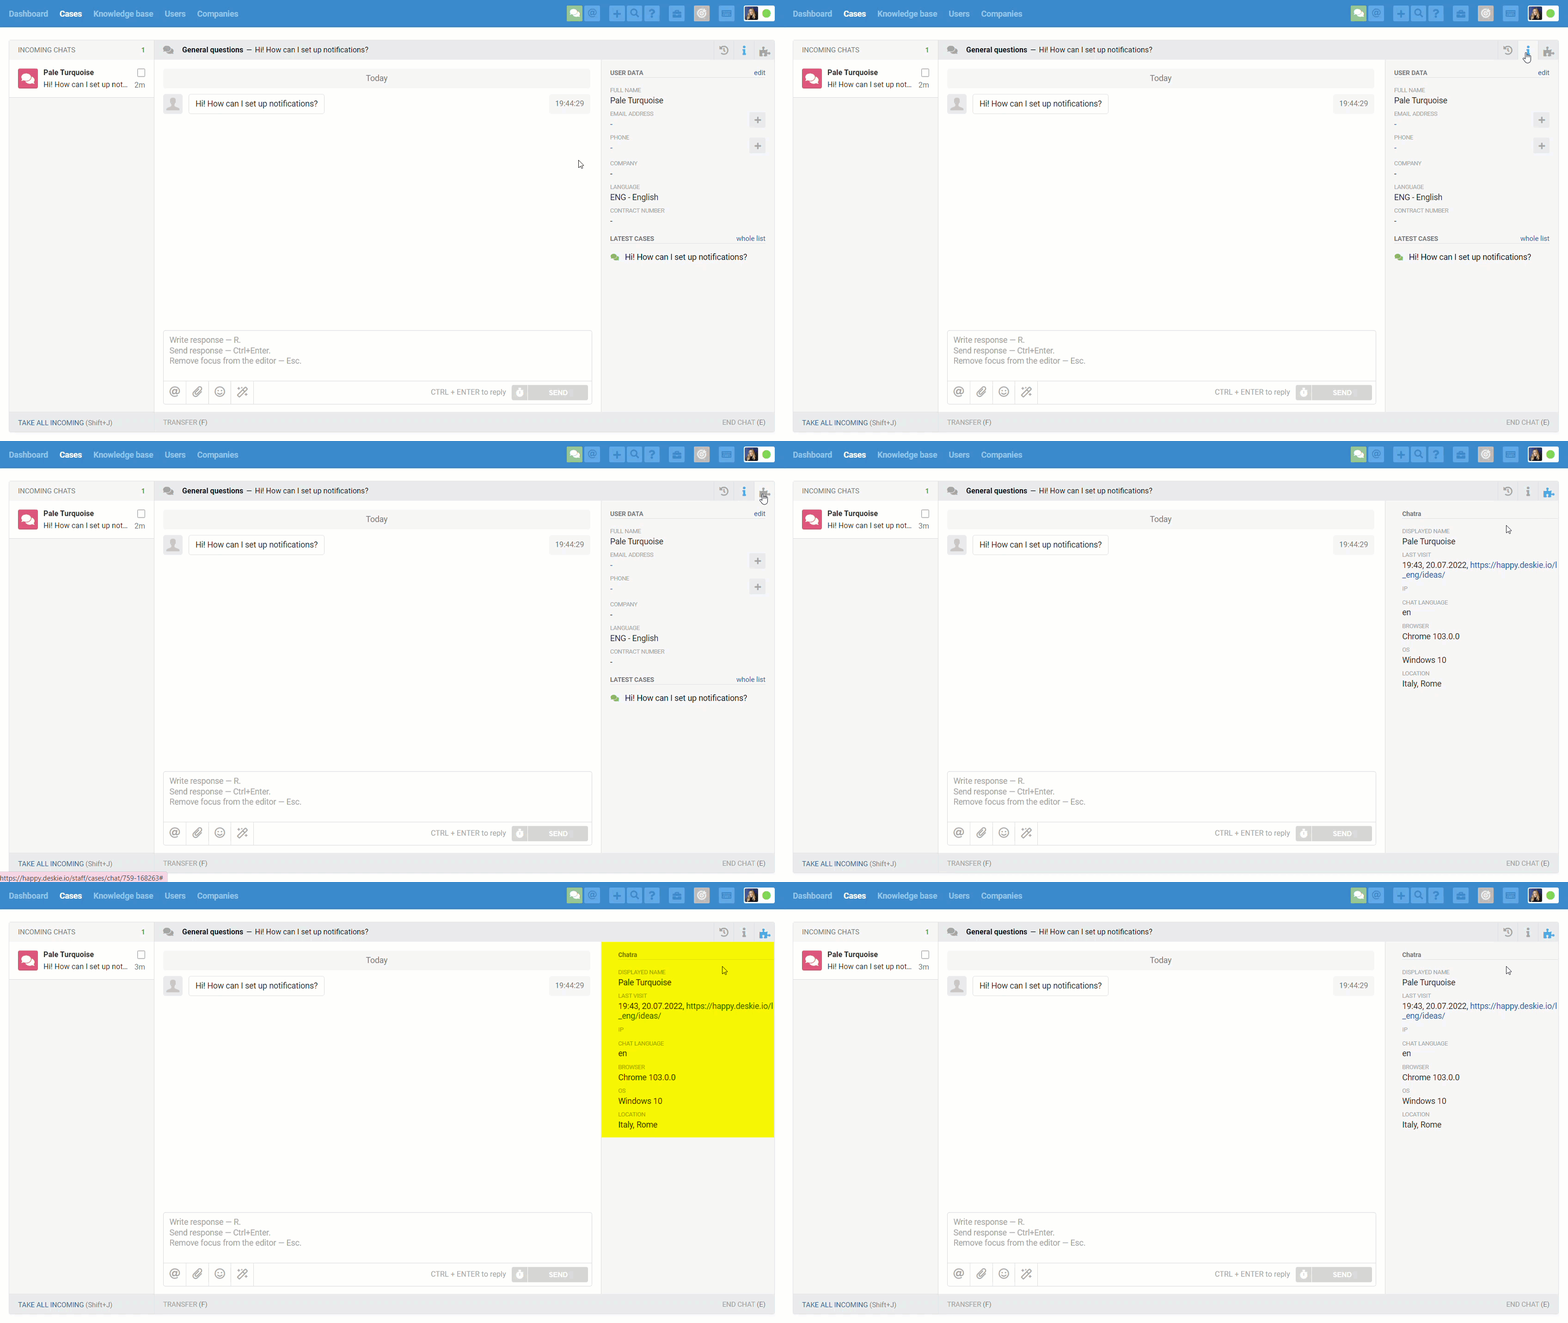
If you select "Informational one, along with user data", then the data from Chatra will be placed at the bottom of the information panel, below the "Latest cases" block.
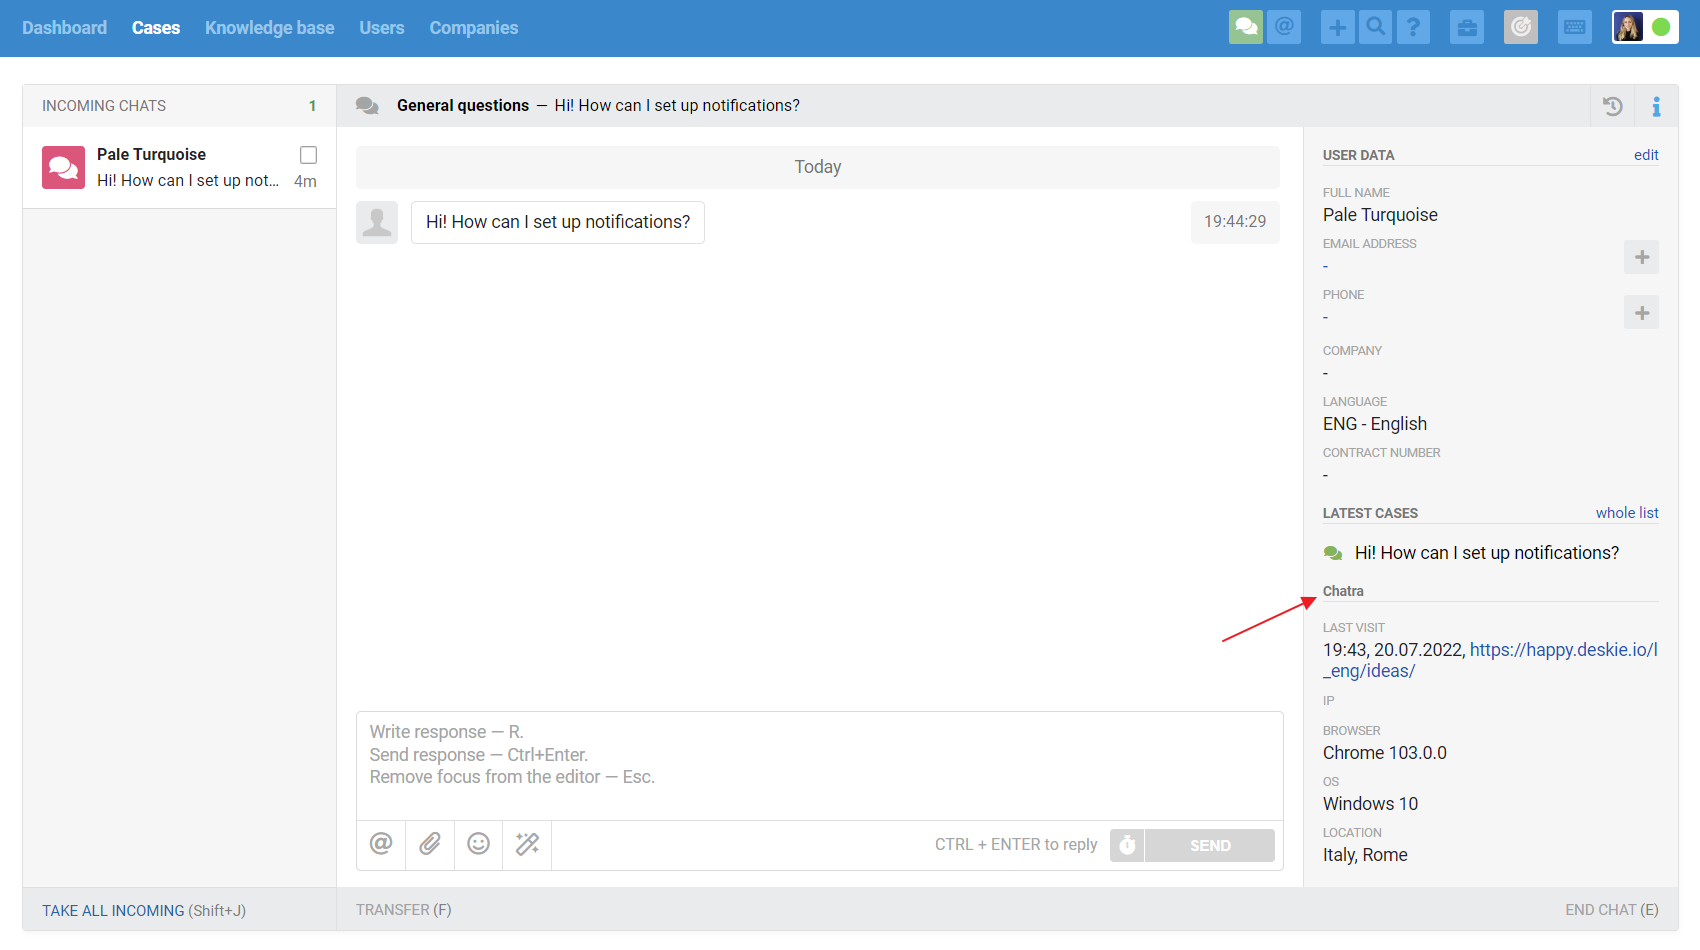
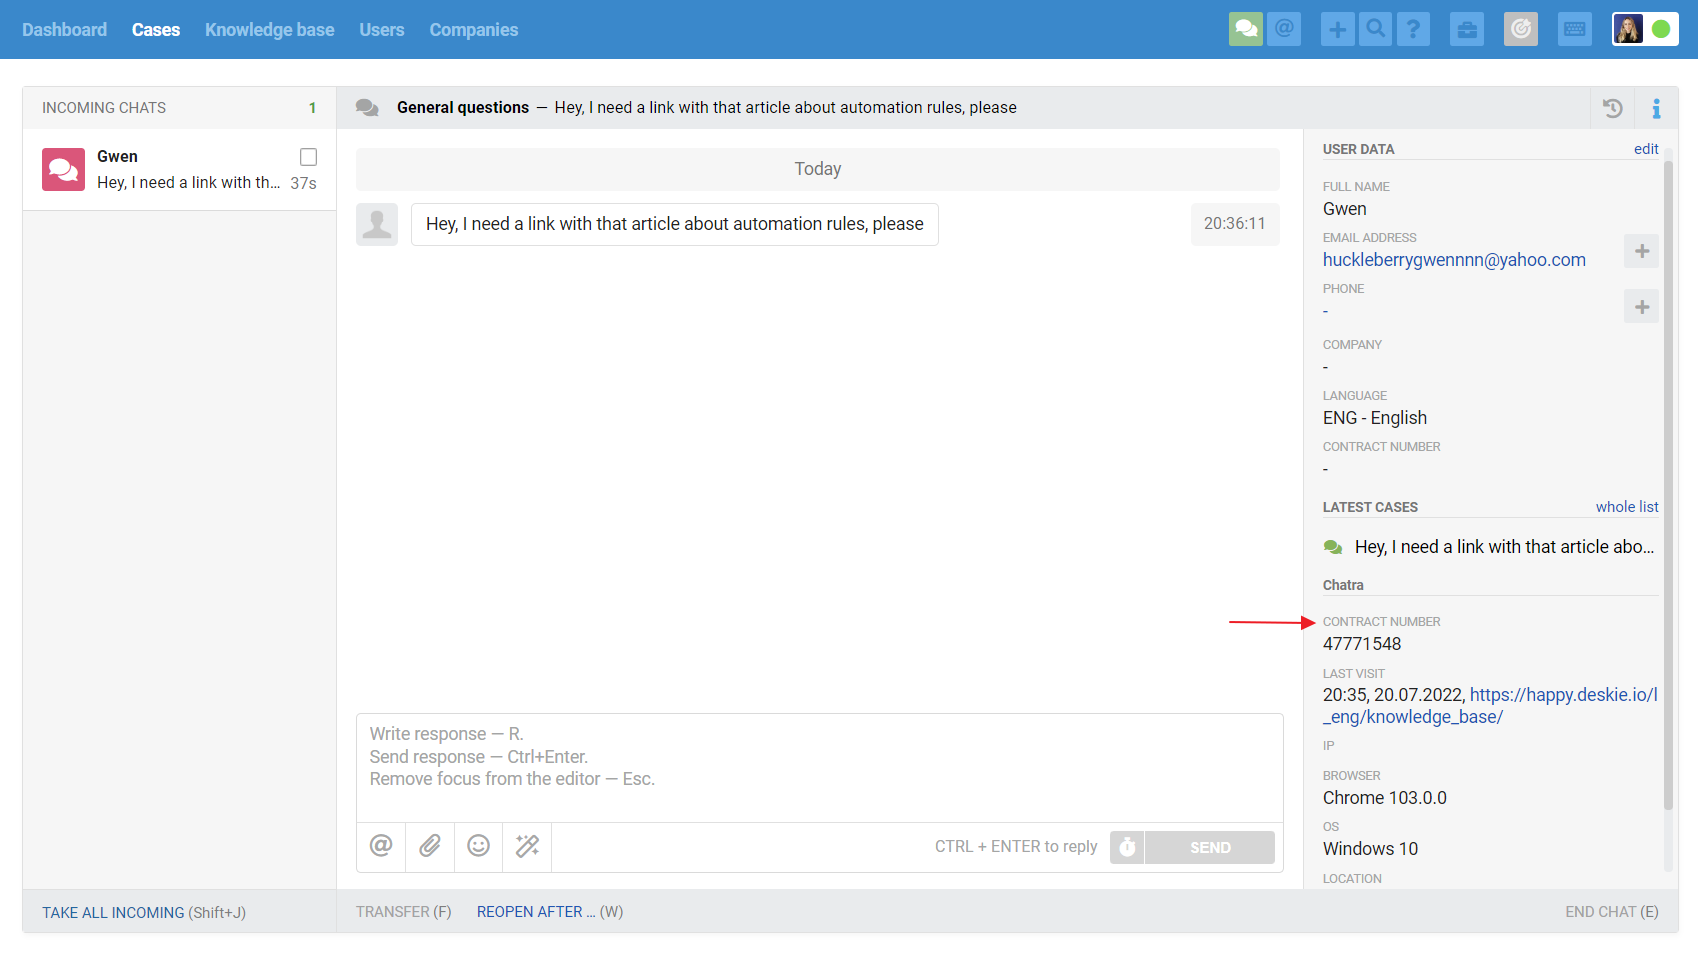
By default, the following data is being pulled from Chatra: user name, email address, phone number, last visit, IP address, chat language, browser, operating system version, and customer's location.
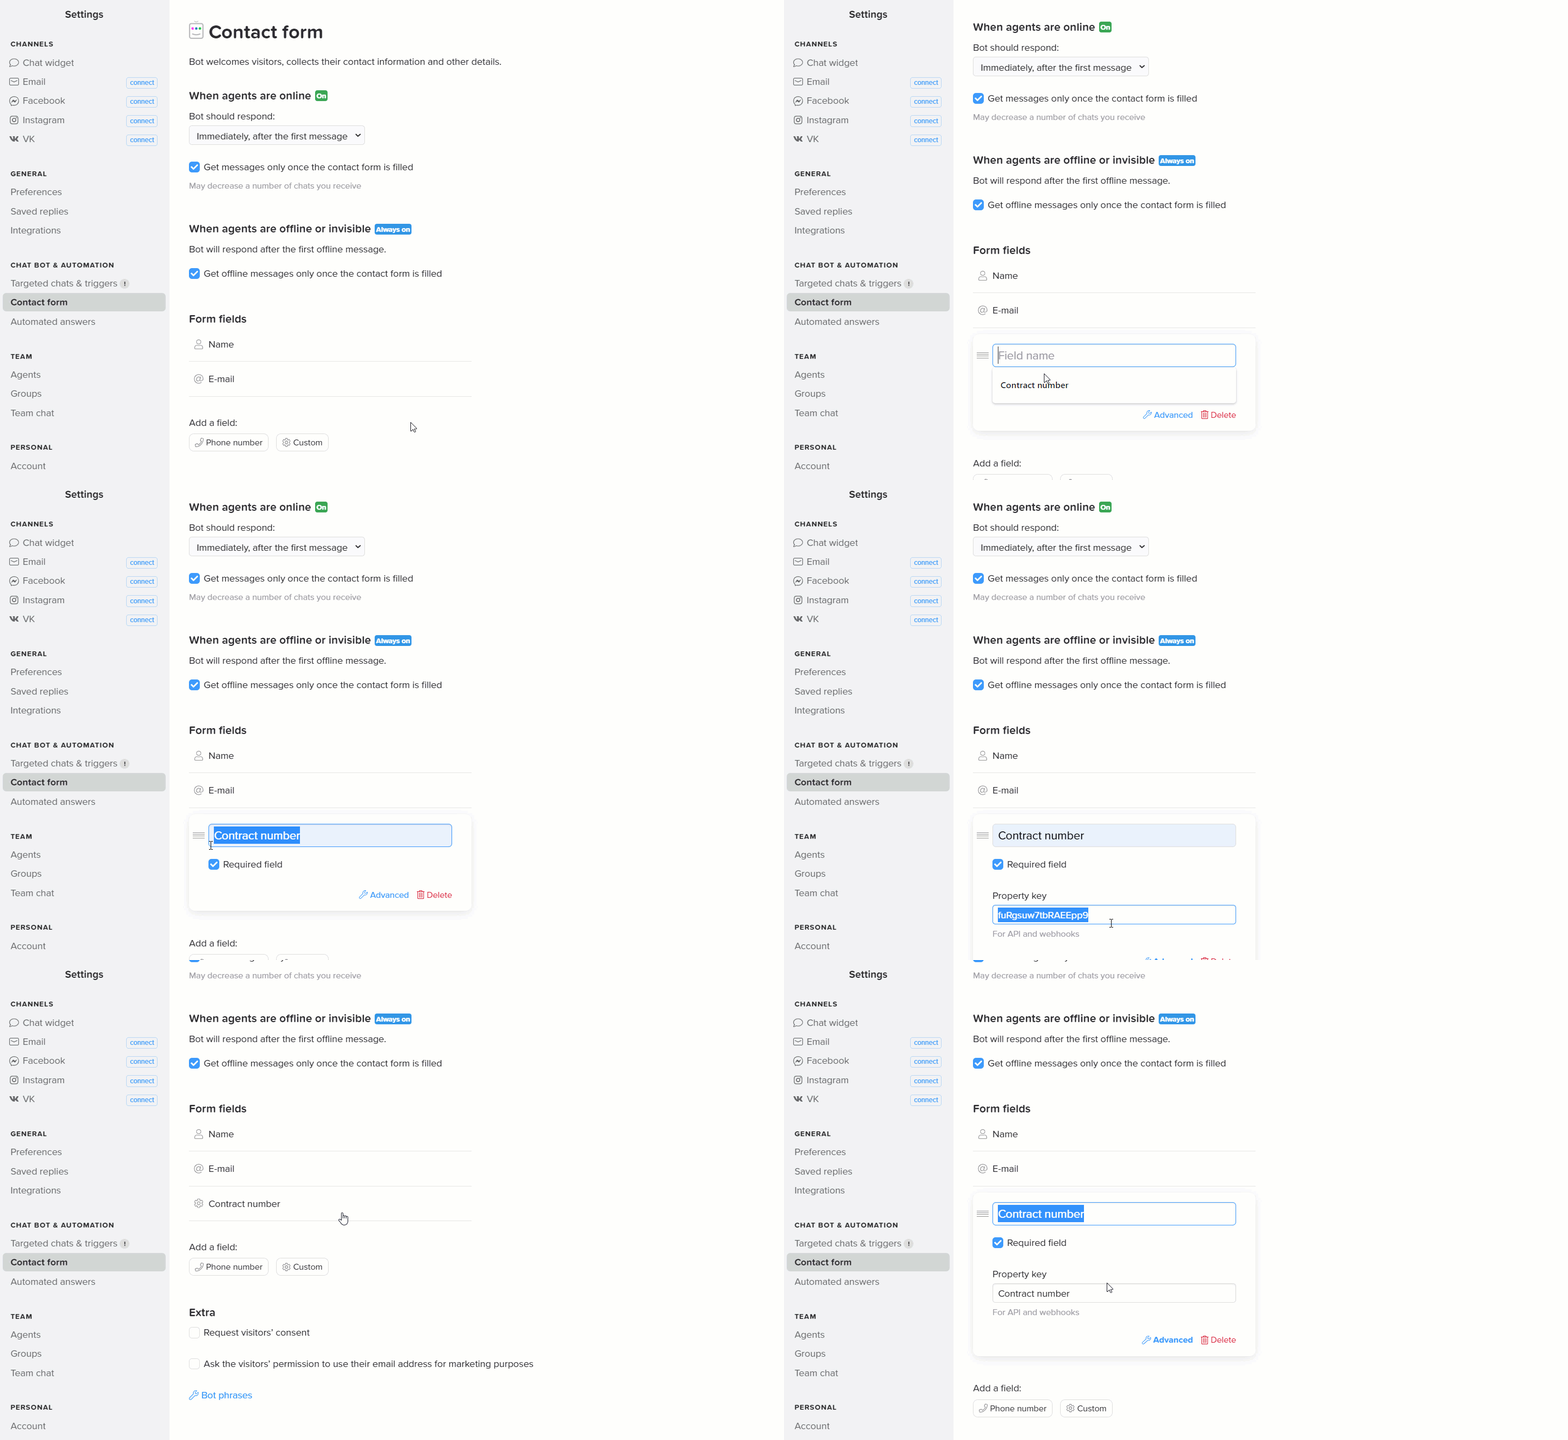
If you add your fields to the contact form in Chatra, they will be displayed in Chatra widget along with other user data. Most importantly, specify the field's name in the "Property key" field so that agents in Deskie see it instead of the character set that is added by default.
4. If you separate chats into different departments in Chatra, for example, to distribute cases from different pages or websites among competent agents, you can correlate the departments in Chatra with the corresponding groups in Deskie straight away. To do this, in the Chatra interface, copy the "Chatra Group ID" and paste it into the appropriate field in Deskie:
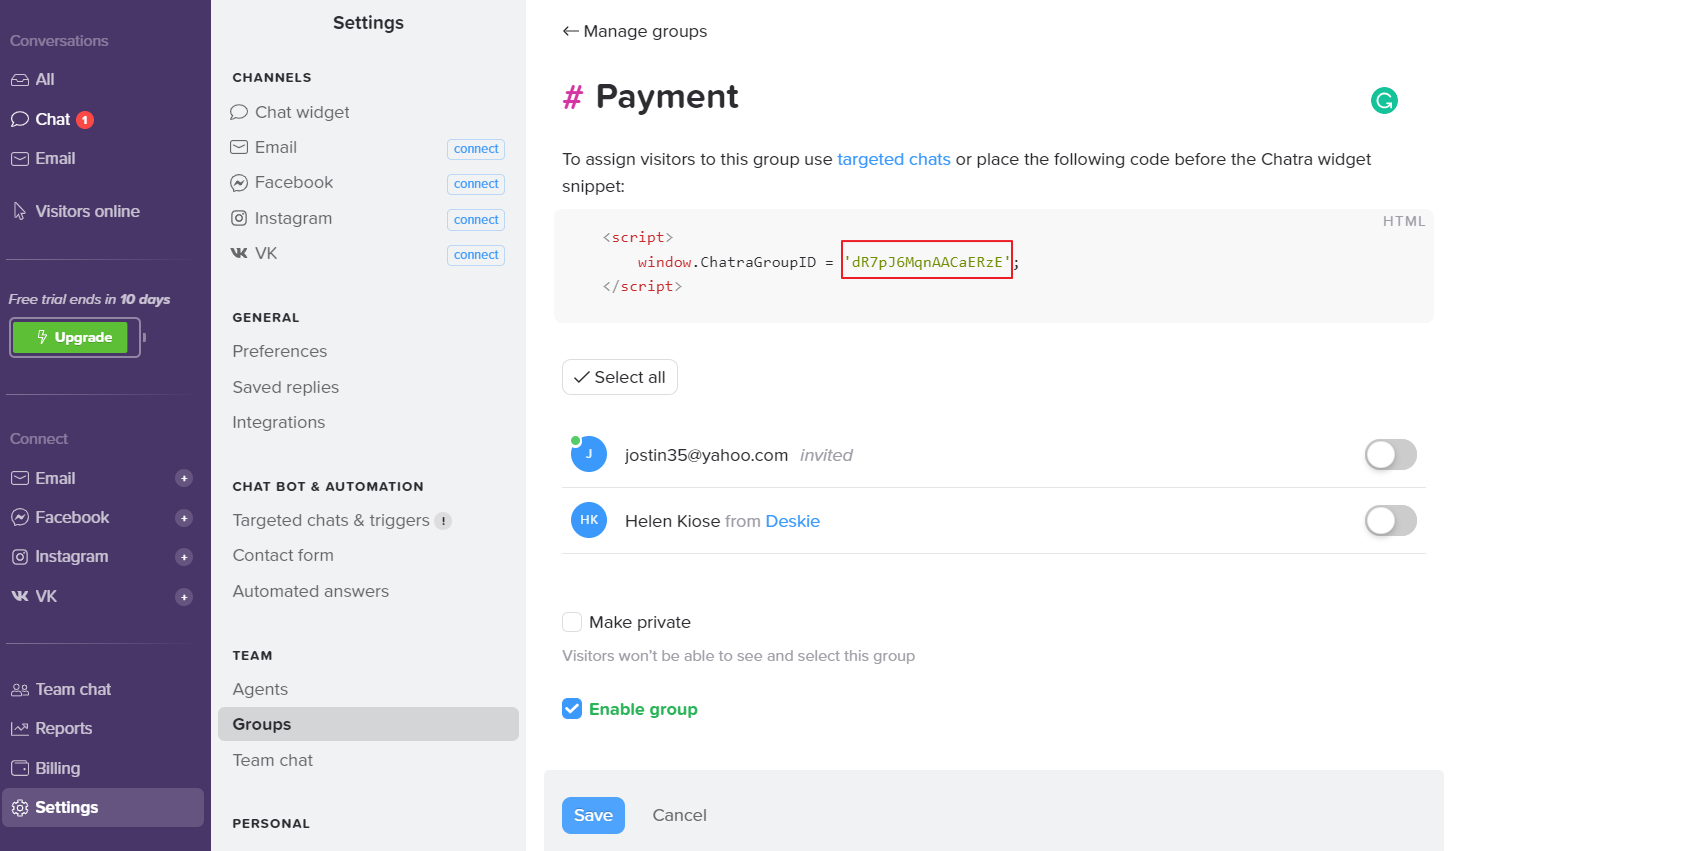

After that, cases coming through the widget that Chatra Group ID is defined for will automatically fall into the desired group.
5. Click on the "Connect" button and confirm the integration in the pop-up window from Chatra.
Widget
You can use both the standard Chatra widget and our widget.
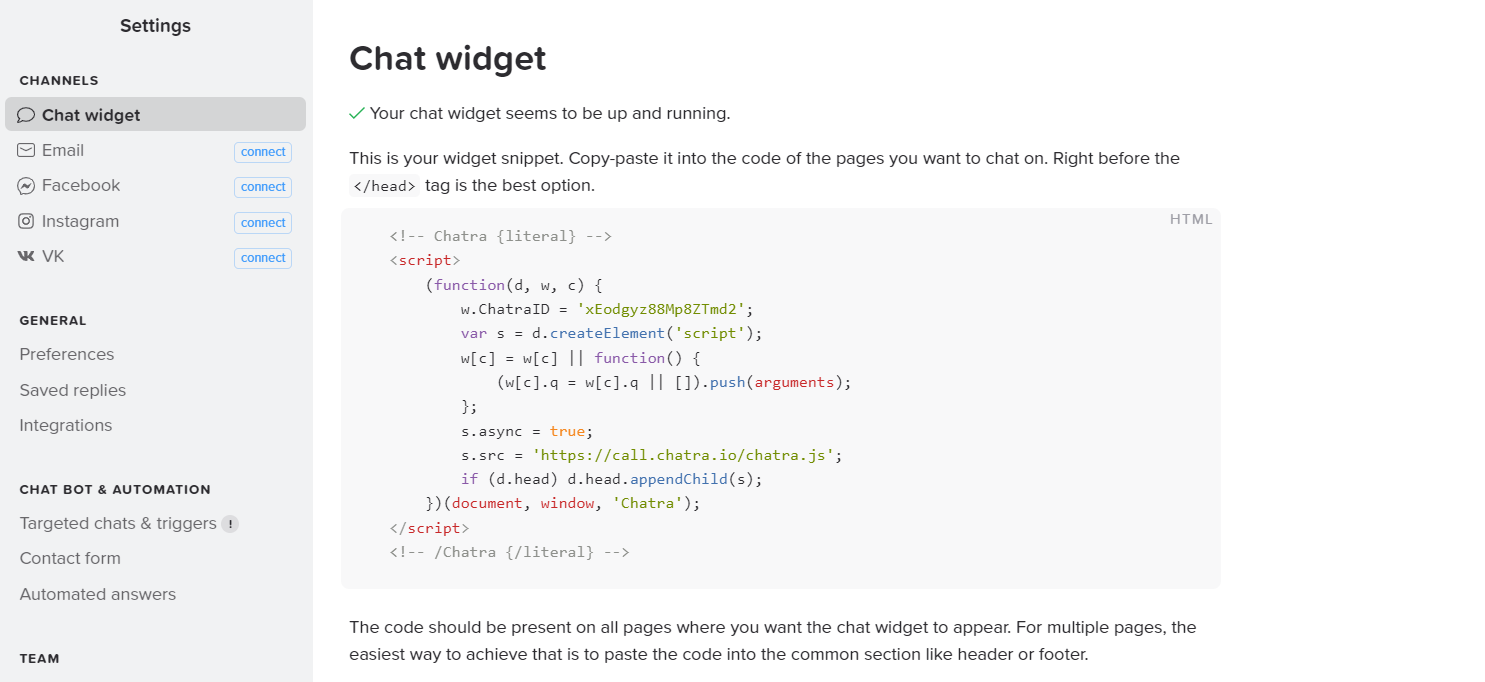
6. If you only need live chat on your website, use the original Chatra widget.
7. If you want to give an option for your customers, on how they can contact you, add Chatra as one of the channels in the widget settings in Deskie.
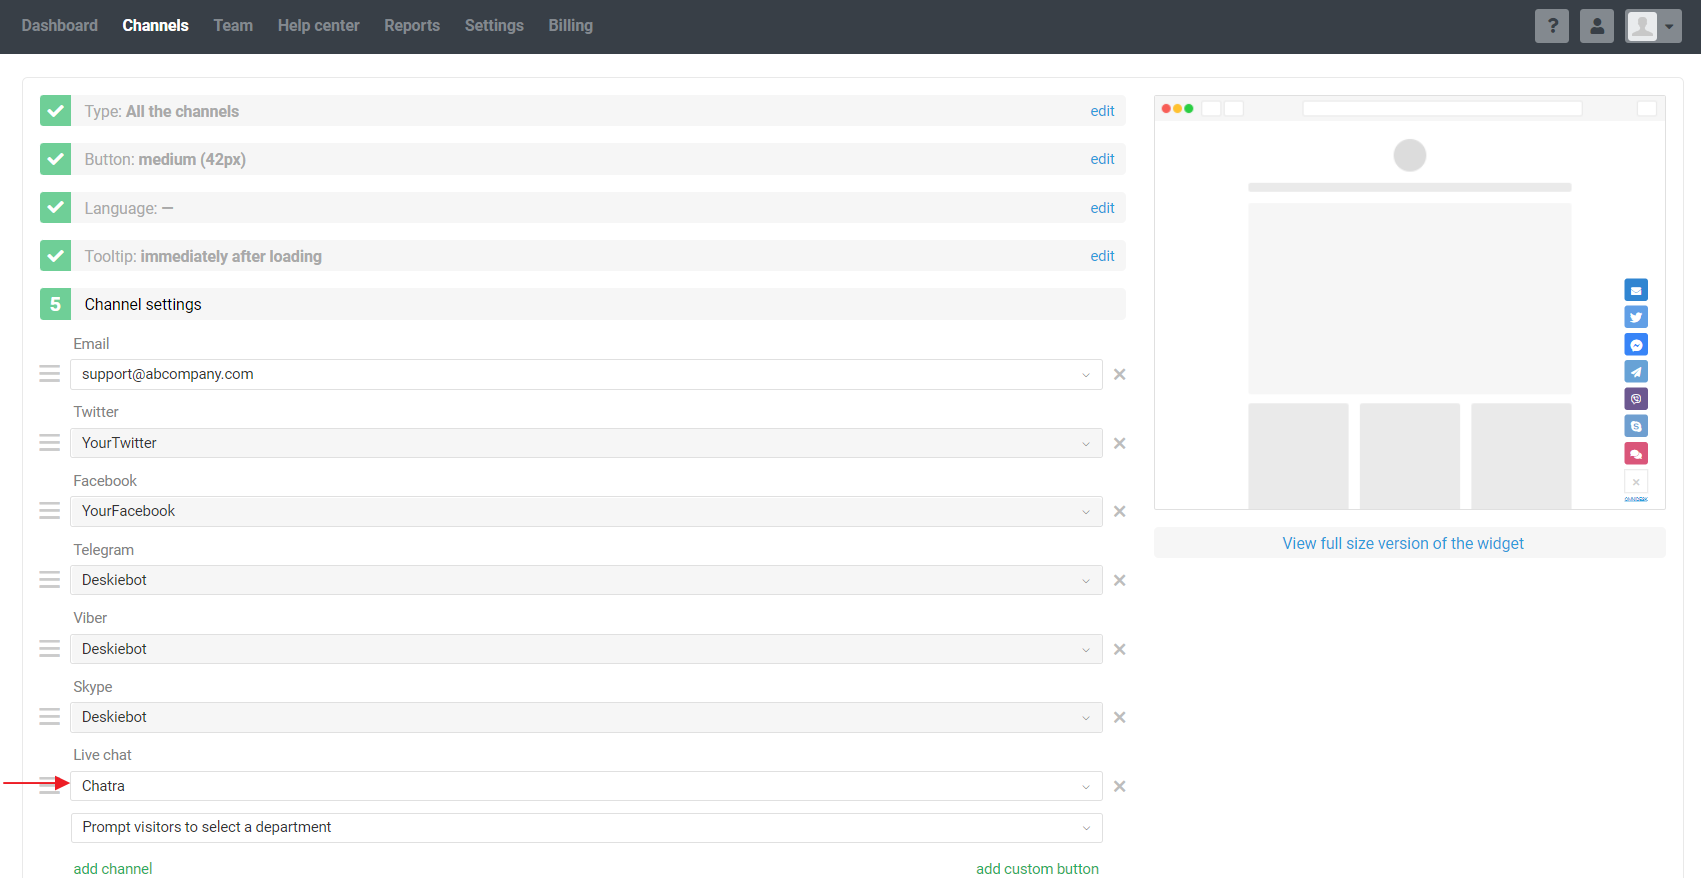
An obvious advantage of using our widget is that the customer himself can choose a convenient channel (email, social network, instant messenger, or a live chat).
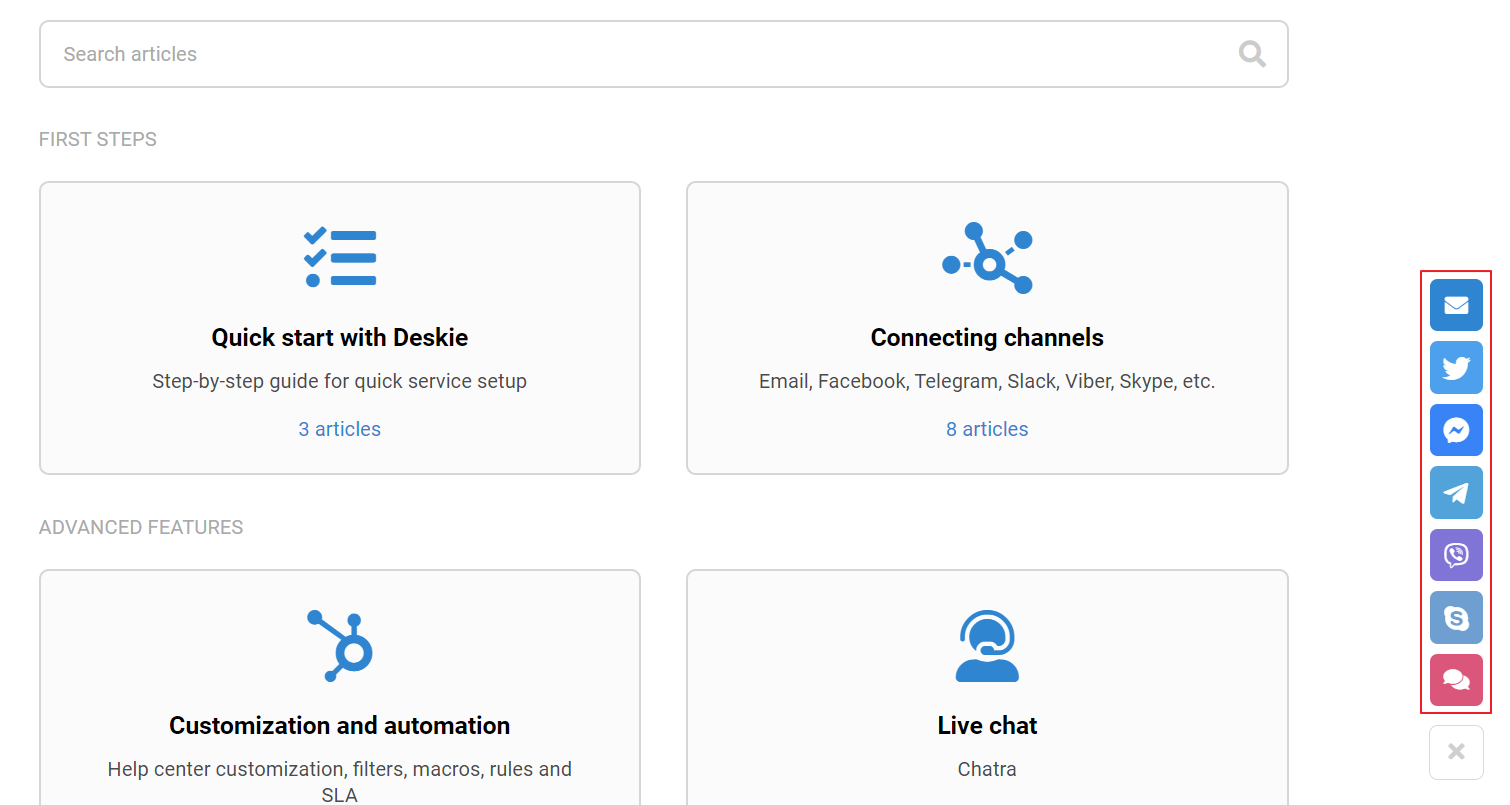
And one more perk: if the user closes the chat that works through our widget, he/she still will not miss the agent's answer because, in this case, we automatically open the chat widget again. When a Chatra widget is used, this is an apparent behavior built into the logic of the widget itself, but we have a widget with different channels though :)
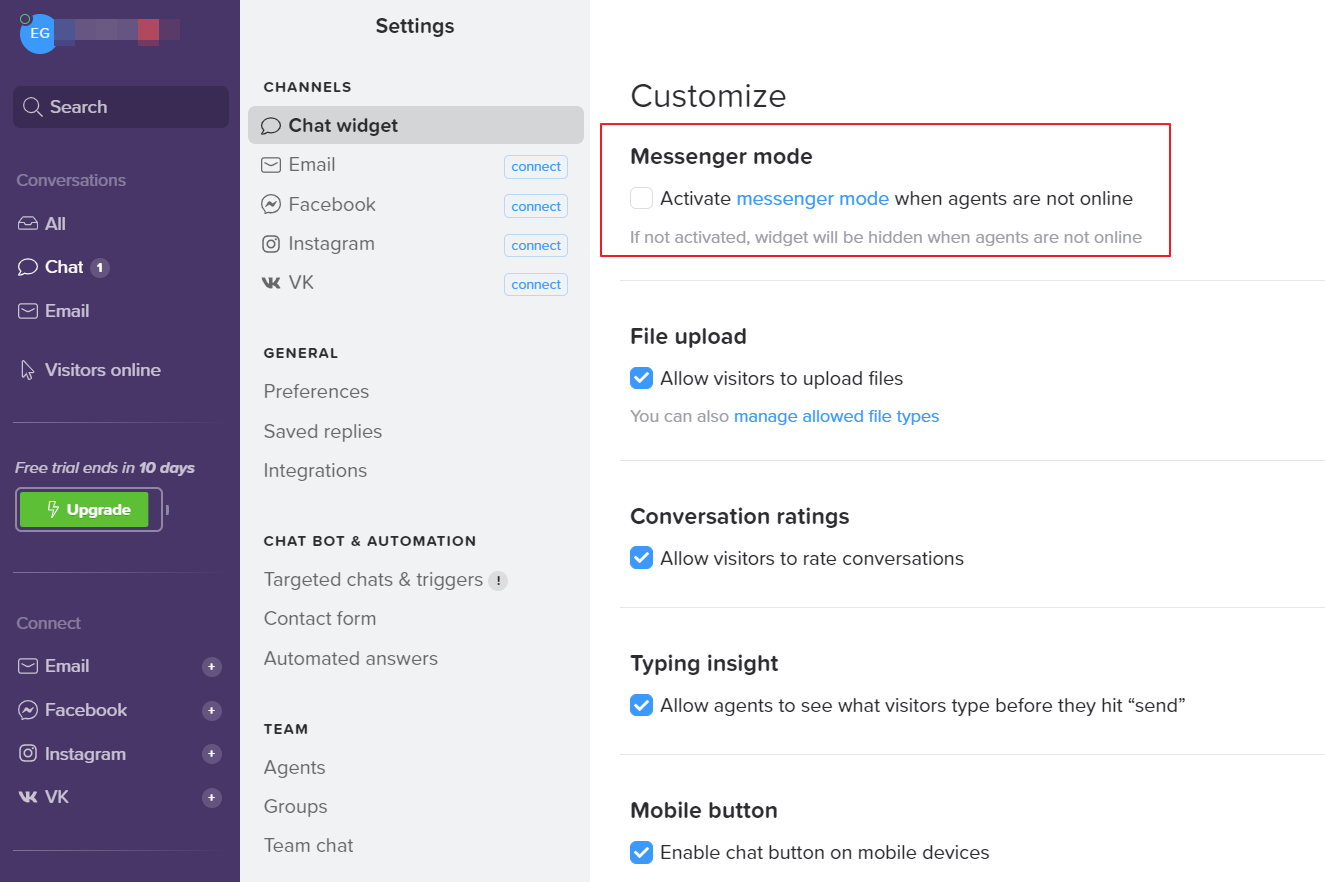
8. Since we transfer agents' statuses to Chatra, in the Chatra settings, you can deactivate the messenger mode to hide the live chat from the channel list if all agents are offline and there is no one to answer.
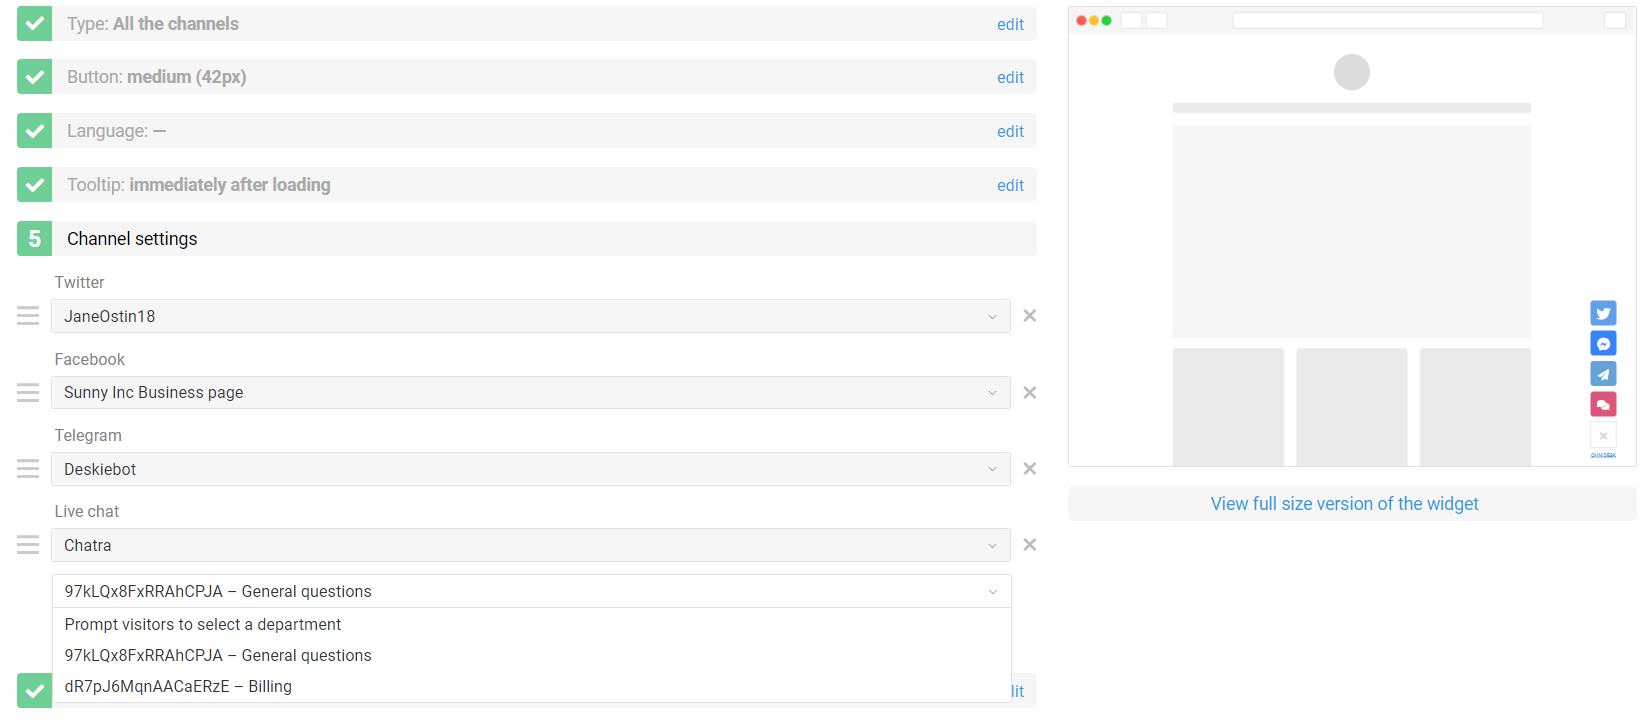
9. If you correlated departments in Chatra with groups in Deskie, when setting up the integration, you would be able to select one of the connections while creating a widget for the Live Chat channel.
Considering Chatra integration in channels.
Integration with Chatra in all sections and settings is recognized as "Live Chat".
10. In the agent access level settings, the Live Chat channel has a corresponding icon.

It is convenient that when making the integration, you don't need to correlate the agents that are in Deskie and Chatra. It is enough to ensure that agents have the same logins (email addresses) in both services. If the responding Deskie agent is not in Chatra, he/she will be automatically added when sending the first response.
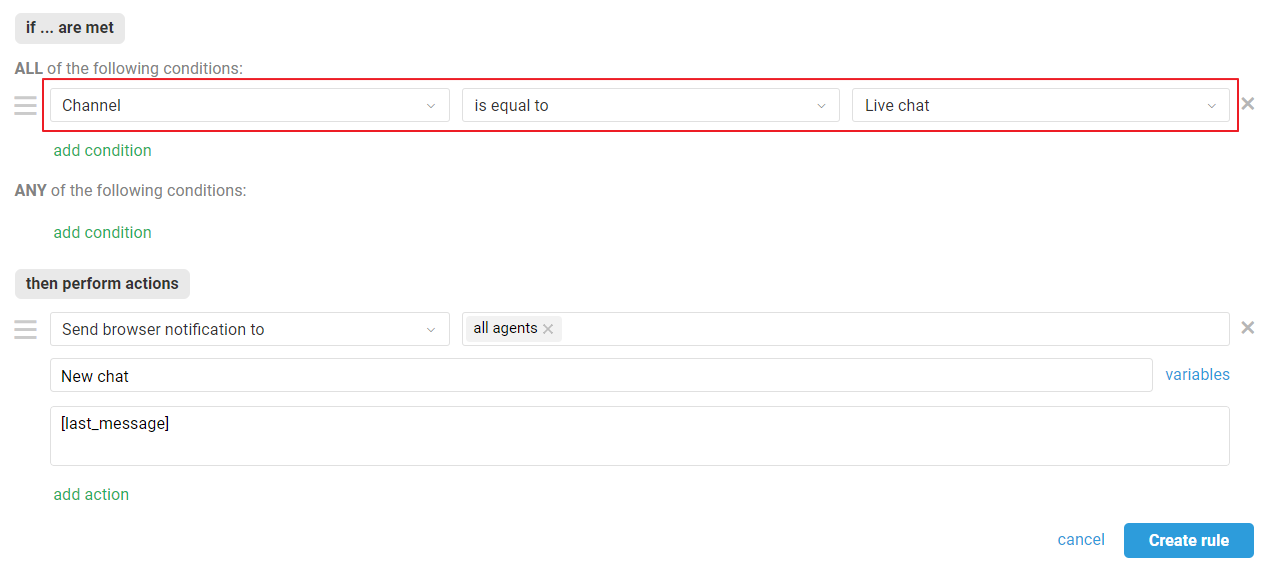
11. If you want to create automation rules specifically for cases from Chatra, use the "Channel — is equal — Live chat" condition.
12. In the agent's account, chats from Chatra can also be found through the filter on the "Live Chats" channel.

Payment
13. In Deskie, you pay only for agents who work with cases. You don't need to pay extra for integrations, but Chatra is a separate service, and its services are paid separately.
Chatra has three paid plans, but integration with Deskie is only available on the professional plan. You can find Chatra tariffs here.
Chatra and Deskie have different billing schemes: in Chatra, you pay for the number of online operators, while in Deskie you pay for all connected agents.
Considering this, in Chatra, you can only pay for 1-2 operators, but from Deskie, all agents will still be able to answer, each on their behalf.
The number of paid licenses in Chatra will only affect the number of online operators displayed in Chatra.
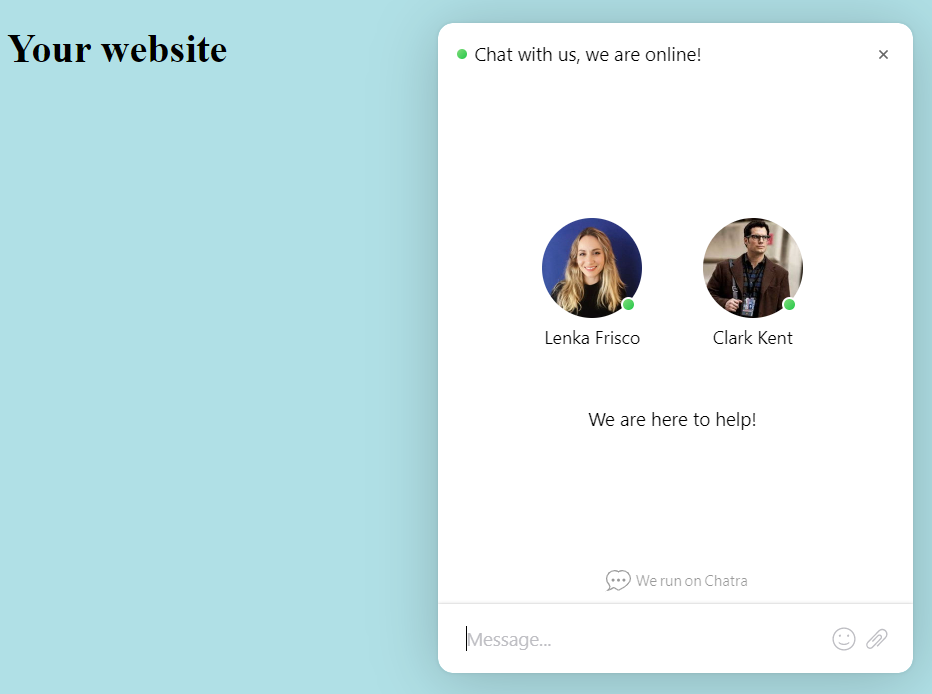
What do Chatra cases look like in Deskie?
14. All cases list displays only the cases coming from asynchronous channels — users on both sides reply when it’s convenient for them. As for real-time chats, they are displayed and processed in a separate interface.
When you get a new chat (Live chat, Slack, Telegram, FB messages, Whatsapp, Microsoft Teams, Viber), a green icon appears in the upper right corner of the agent’s account. It displays incoming chats and new chat responses:
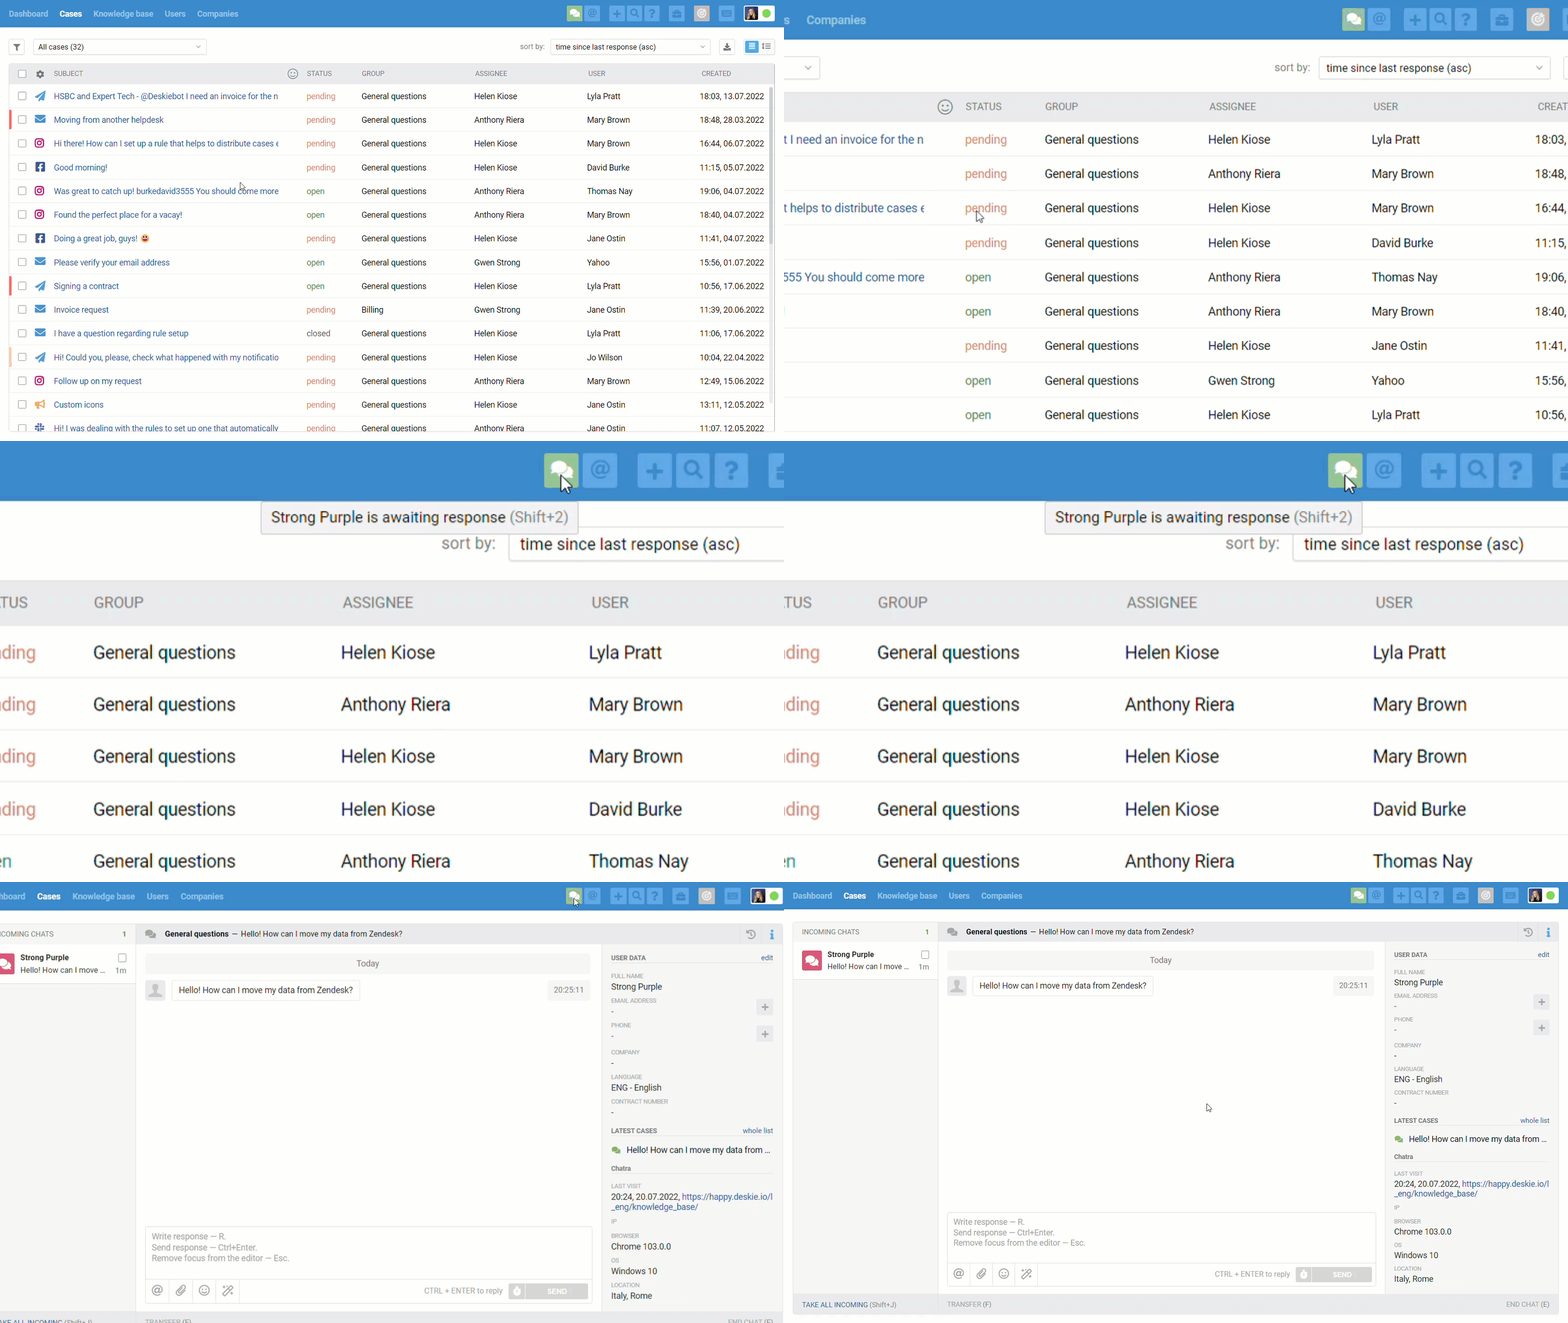
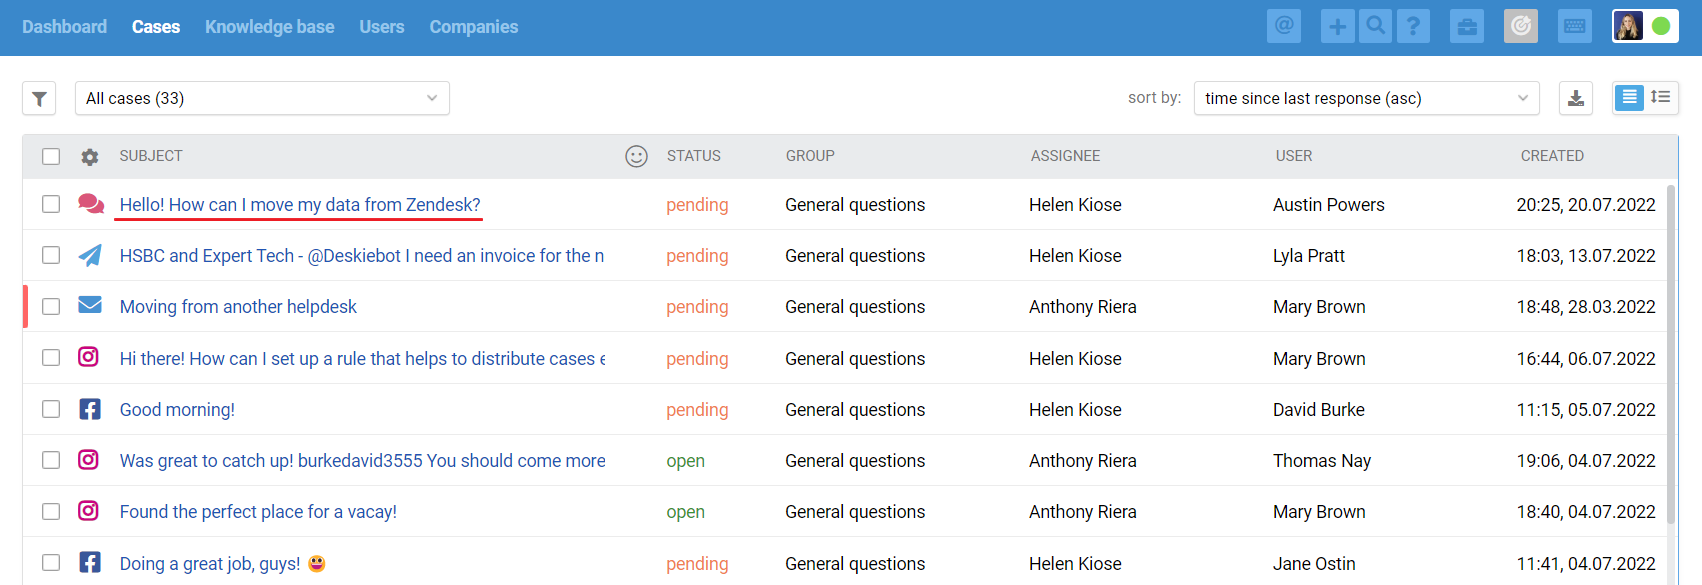
Chats are displayed in the all cases list too, but only after they were ended:
when an agent is ending the chat, clicking “end chat” in the lower right corner;
after 10 minutes (default value) of inactivity on both sides;
when one of the automated rules is applied, that has an “end chat and set status” action (for example, if you don’t plan to process chats and want to get them as cases in the all cases list):
We have separated synchronous and asynchronous communication on purpose because, if you want to provide first-class support, it is necessary to consider the specifics and expectations of customers, depending on the type of channel you use to carry out the communication.
For example, the customer is ok to wait for a couple of hours to get a response to his/her email. However, even a 5-minute response delay in chats might seem like an eternity. If you do not take this point into account and treat cases from email and chats equally, some customers will get an unpleasant experience interacting with the company.
Integration with Chaport
Chaport is a classic live chat for a website.
Connecting Chaport
1. If you don't have a Chaport account yet, register one.
2. Go along the path of the administrator account — the "Settings" section — the "Integration" subsection — the "Add integration" button — the "Chaport" card in the "Other integrations" block.
3. In the integration settings form, select the default group that will receive cases from Chaport, as well as the panel for displaying data.
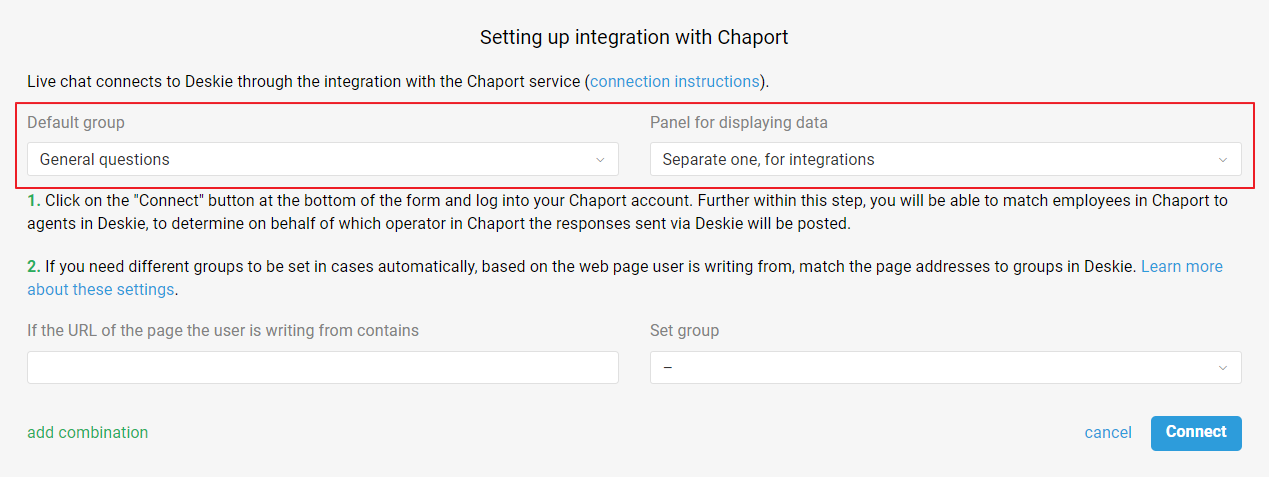
When you select “Separate one, for integrations” in the “Panel for displaying data” field, an additional icon appears in the upper right corner of the case page (next to the “User data” icon) to activate the integrations panel, where data from Chaport is displayed.
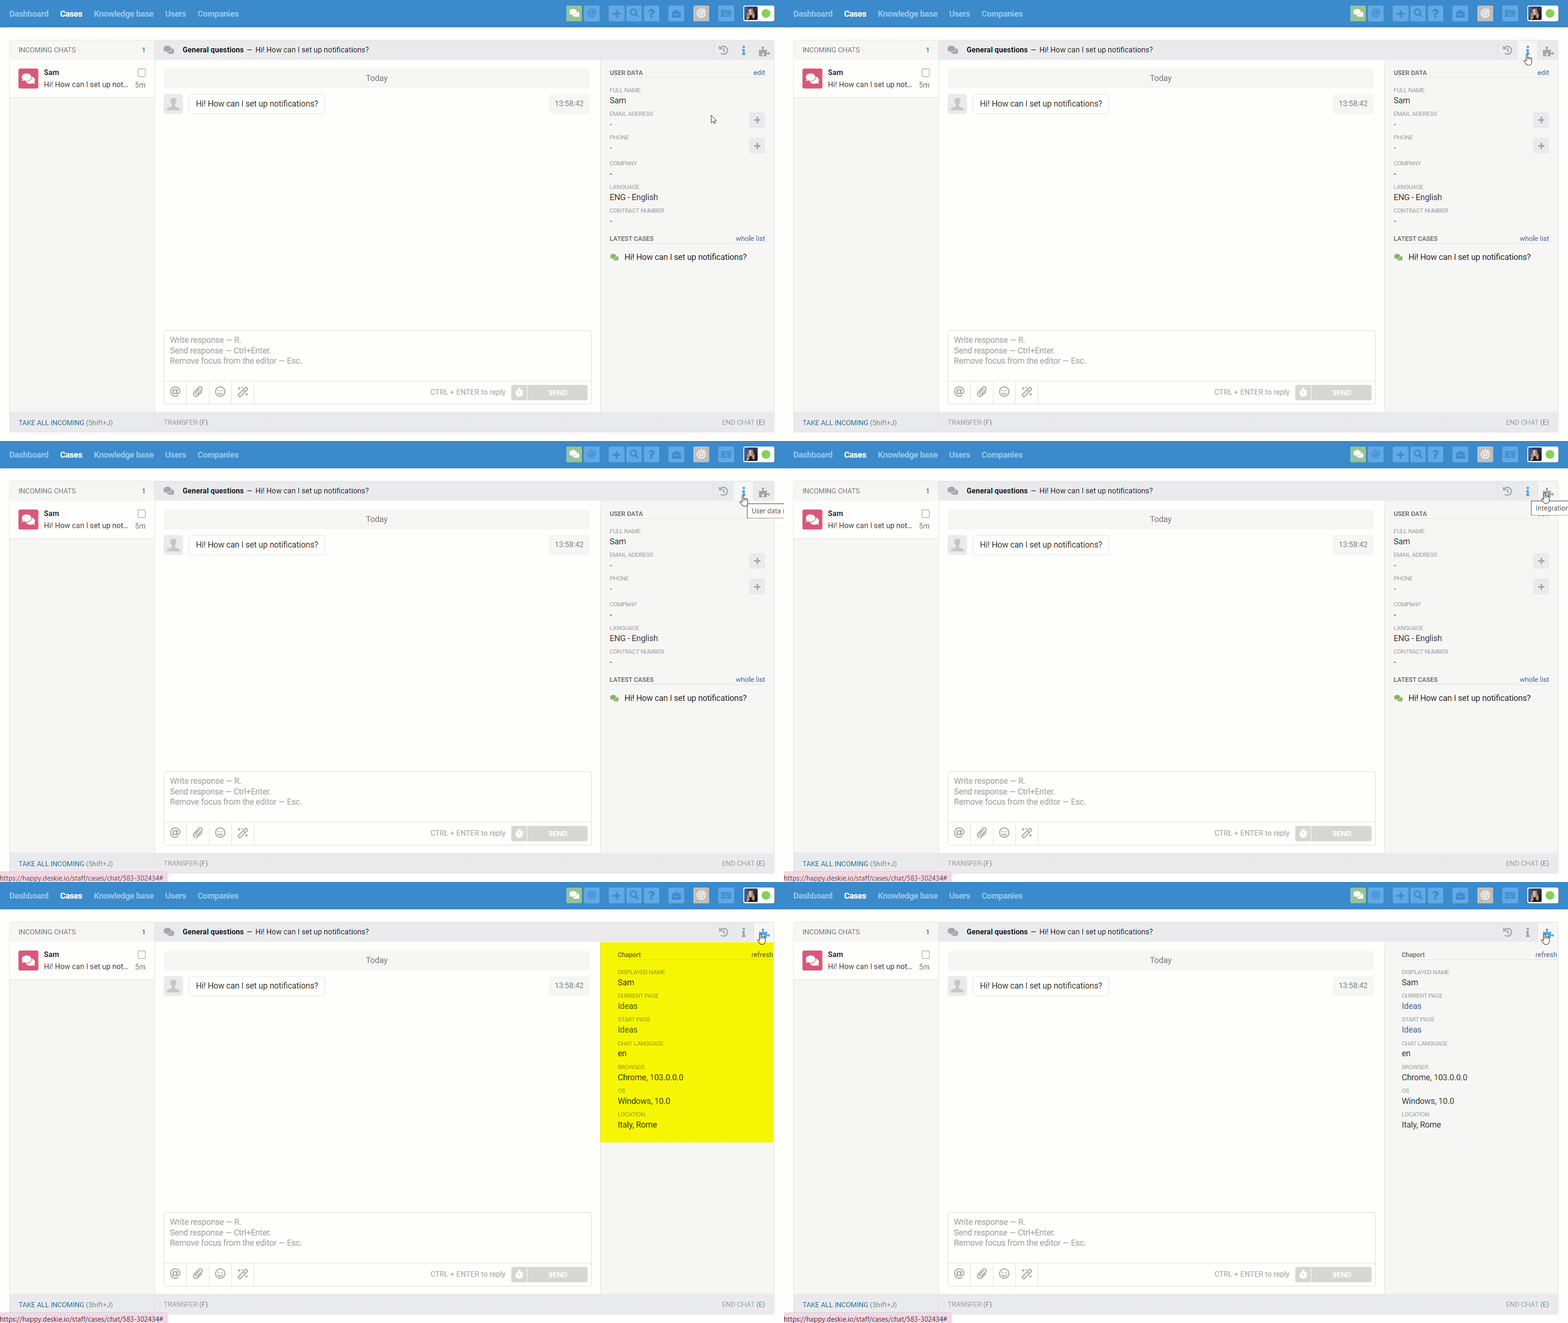
If you select "Informational one, along with user data", then the data from Chaport will be placed at the bottom of the information panel, below the "Latest cases" block.
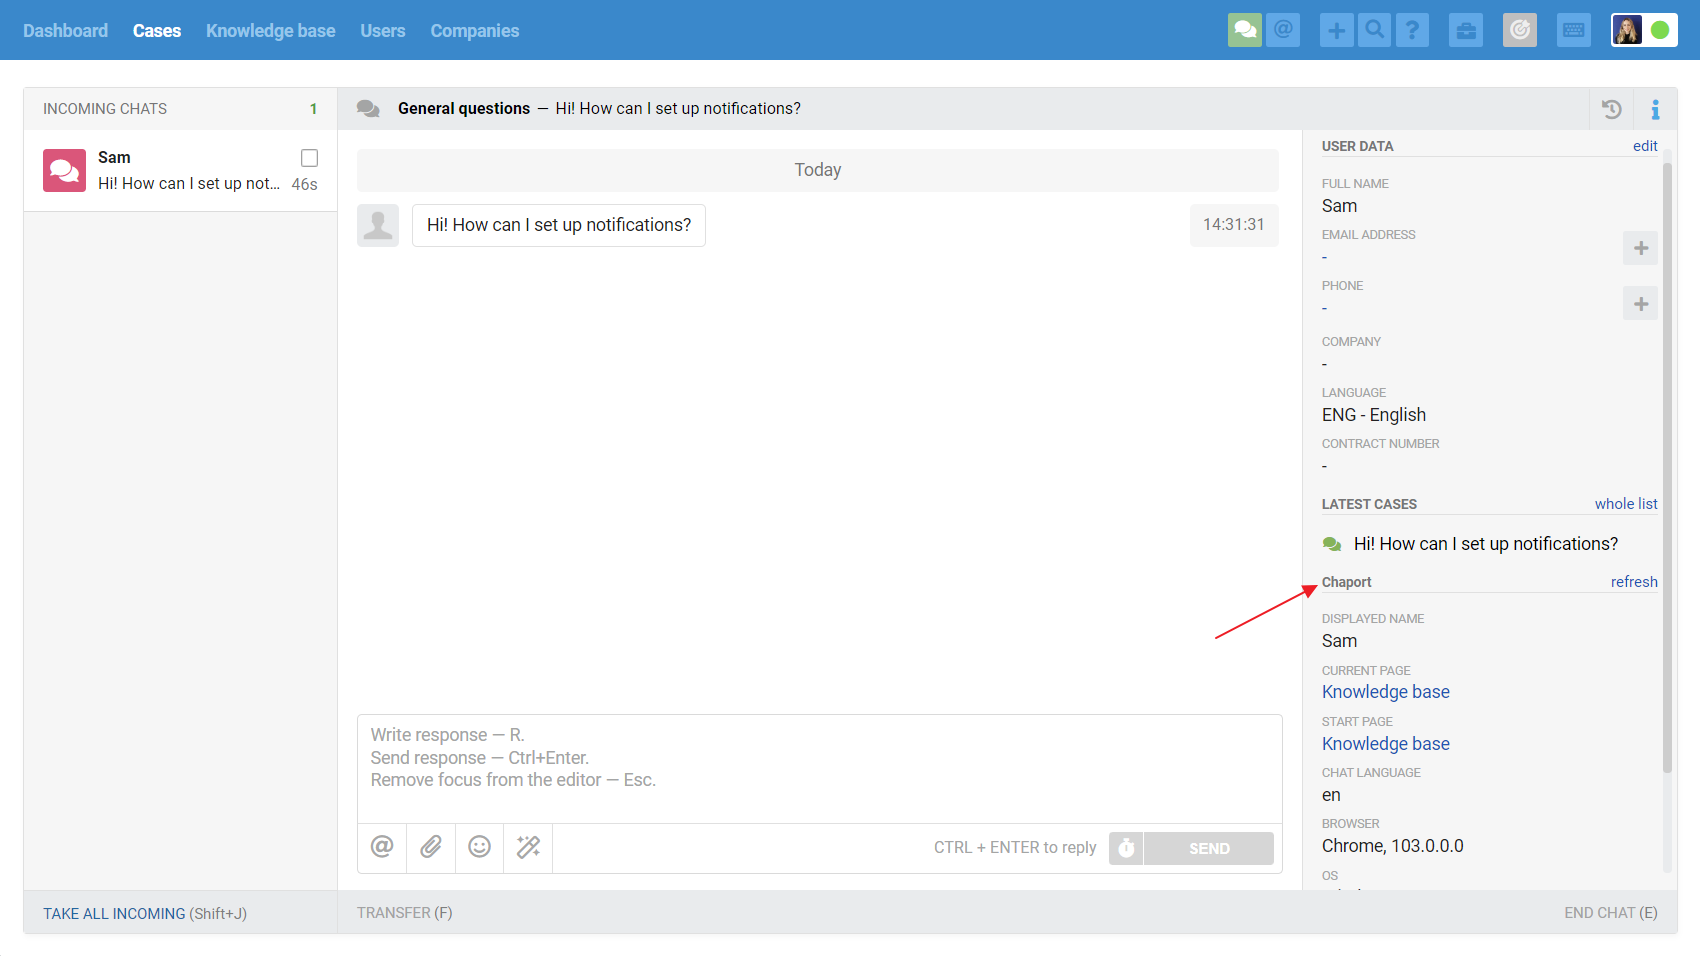
Data we pull from Chaport: user name, email address, phone number, last visit, current page, chat start page, browser, IP address, chat language, operating system version, customer location, and your custom fields from the Chaport preform.
You can also pass data through the Chaport JavaScript API. If you pass some information via JavaScript (e.g. email address), that field will be pre-filled in the prechat form. If you pass all data via JavaScript, and the user has nothing to fill in the prechat form, then it won't show up at all.
4. Click on the "Connect" button and in the pop-up window that appears, log in to your Chaport account. After that, in the first paragraph of the form, a list of active agents in Deskie who have access to the Live Chat channel will appear, and you can either match them with operators in Chaport or select the option “create operator when sending the first response”.
Note
Both agents in Deskie and operators in Chaport have nominal licenses, that is, you pay for all added agents/operators in each service. However, if you want to save money, you can create only two or three agents in Chaport and assign all the agents in Deskie to them. The disadvantage of this option is that the answers of different agents from Deskie in the online chat on the Chaport side will be displayed on behalf of one operator.
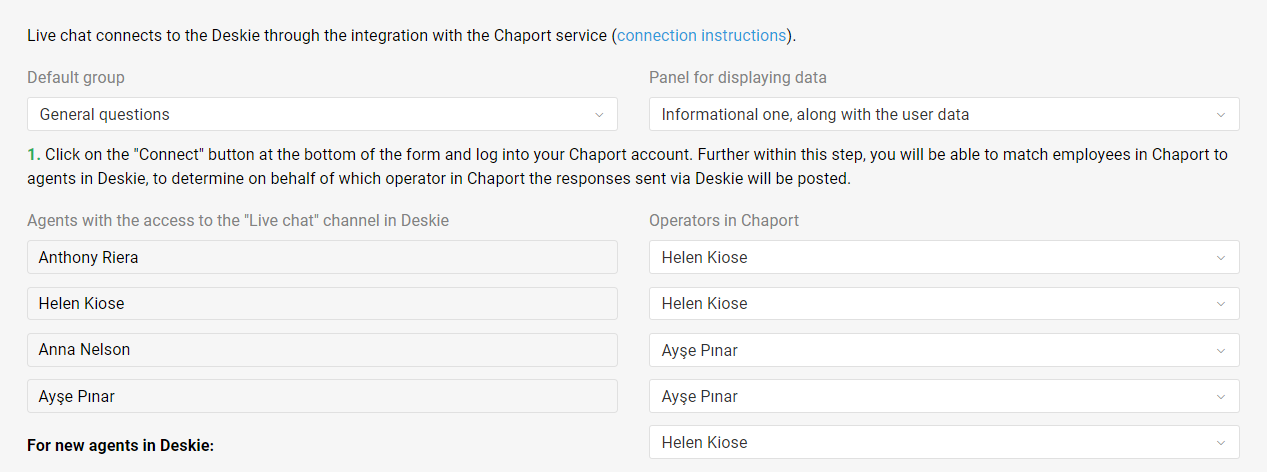
If it is important for you that each agent responds exactly on his own behalf, you can leave the option “create a new operator when sending the first response” in the integration settings. In this case, you don't have to manually create a separate Chaport operator for each agent in Deskie, but it will be created automatically when the agent sends the first response from Deskie.
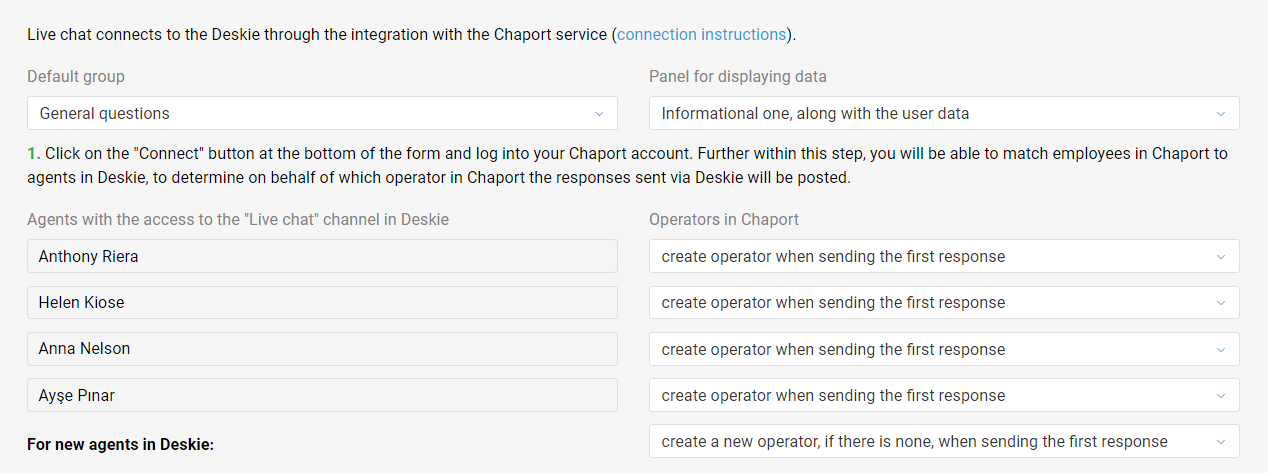
The only tricky part is that only the name of the agent is transmitted to Chaport. If you want to add avatars for operators, you will have to do it manually through their interface, since Chaport does not have the ability to add an avatar through the API.
5. In addition to choosing a link for current agents in Deskie, select the option for new agents so that after adding a new agent to Deskie, you don't have to worry about having to perform a separate link with an agent in the Chaport integration settings.
6. In the second paragraph of the form, you can set up different groups depending on the page the customer starts the chat from.
For example, if a customer writes from a page with prices, his/her request should immediately be sent to the "Billing" group, and if from the API documentation page, to the "Technical questions" group.

7. After completing all the settings, click the "Connect" button again to complete the connection of the integration.
Widget
You can use either the standard Chaport widget or our widget.
8. If you only need live chat on your website, use the original Chaport widget.
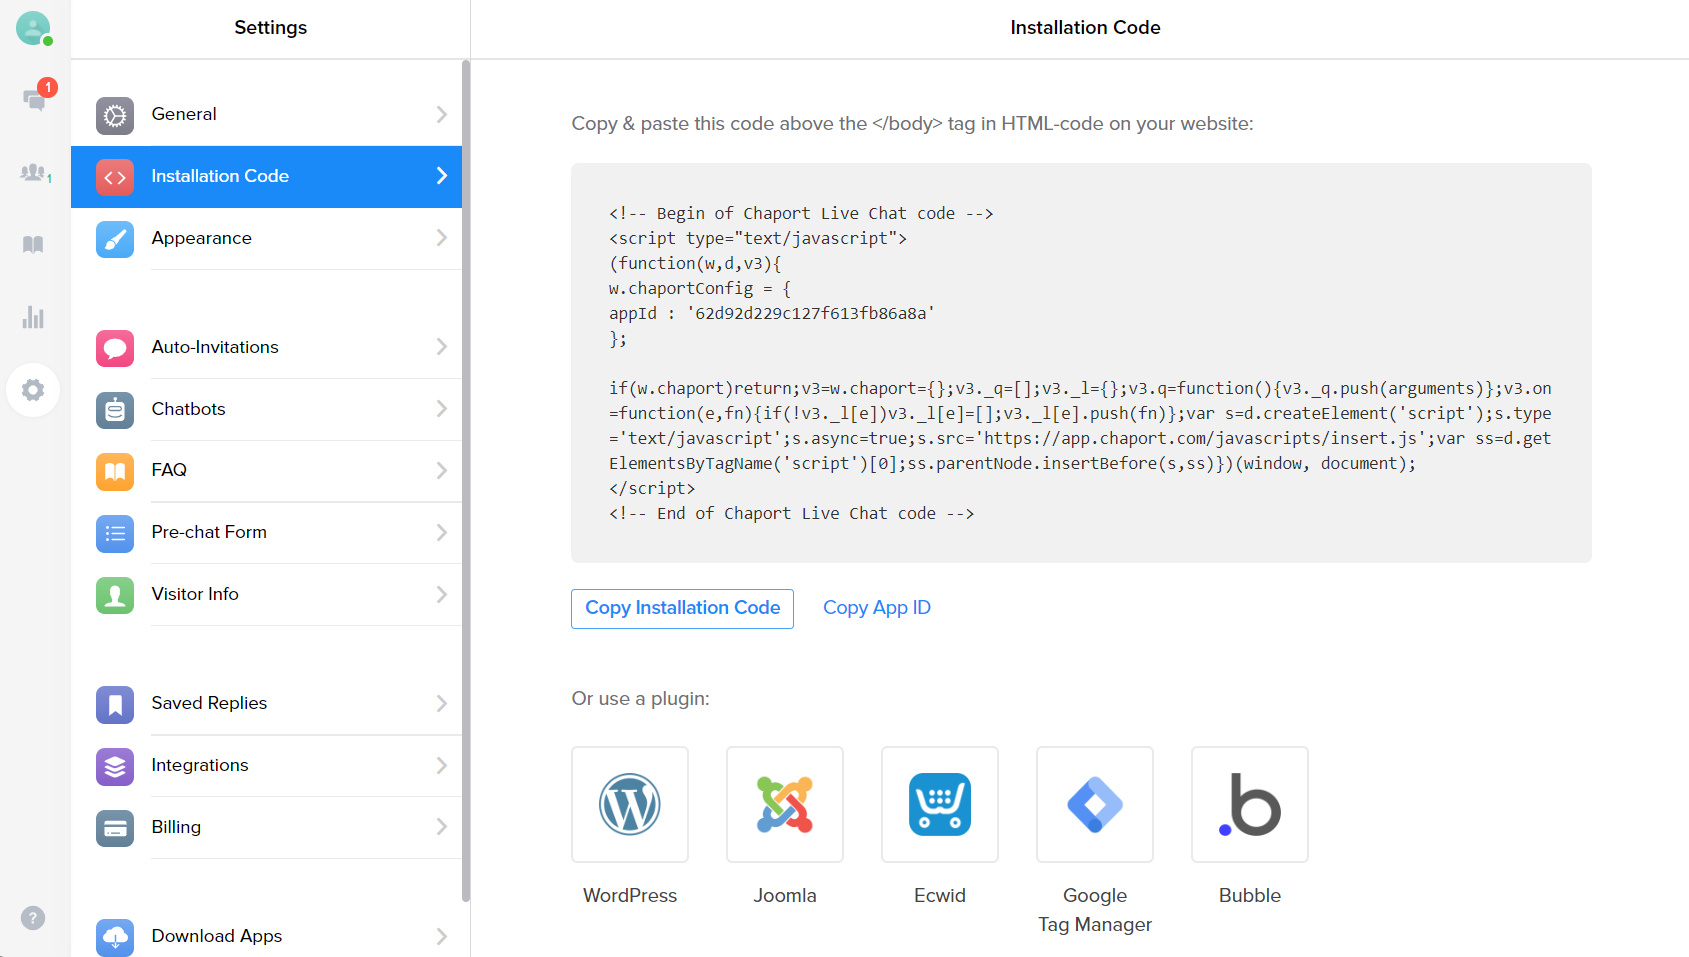
9. If you want your customers to be able to select the channel they want to contact you through, add Chaport as one of the channels in the widget settings in Deskie.
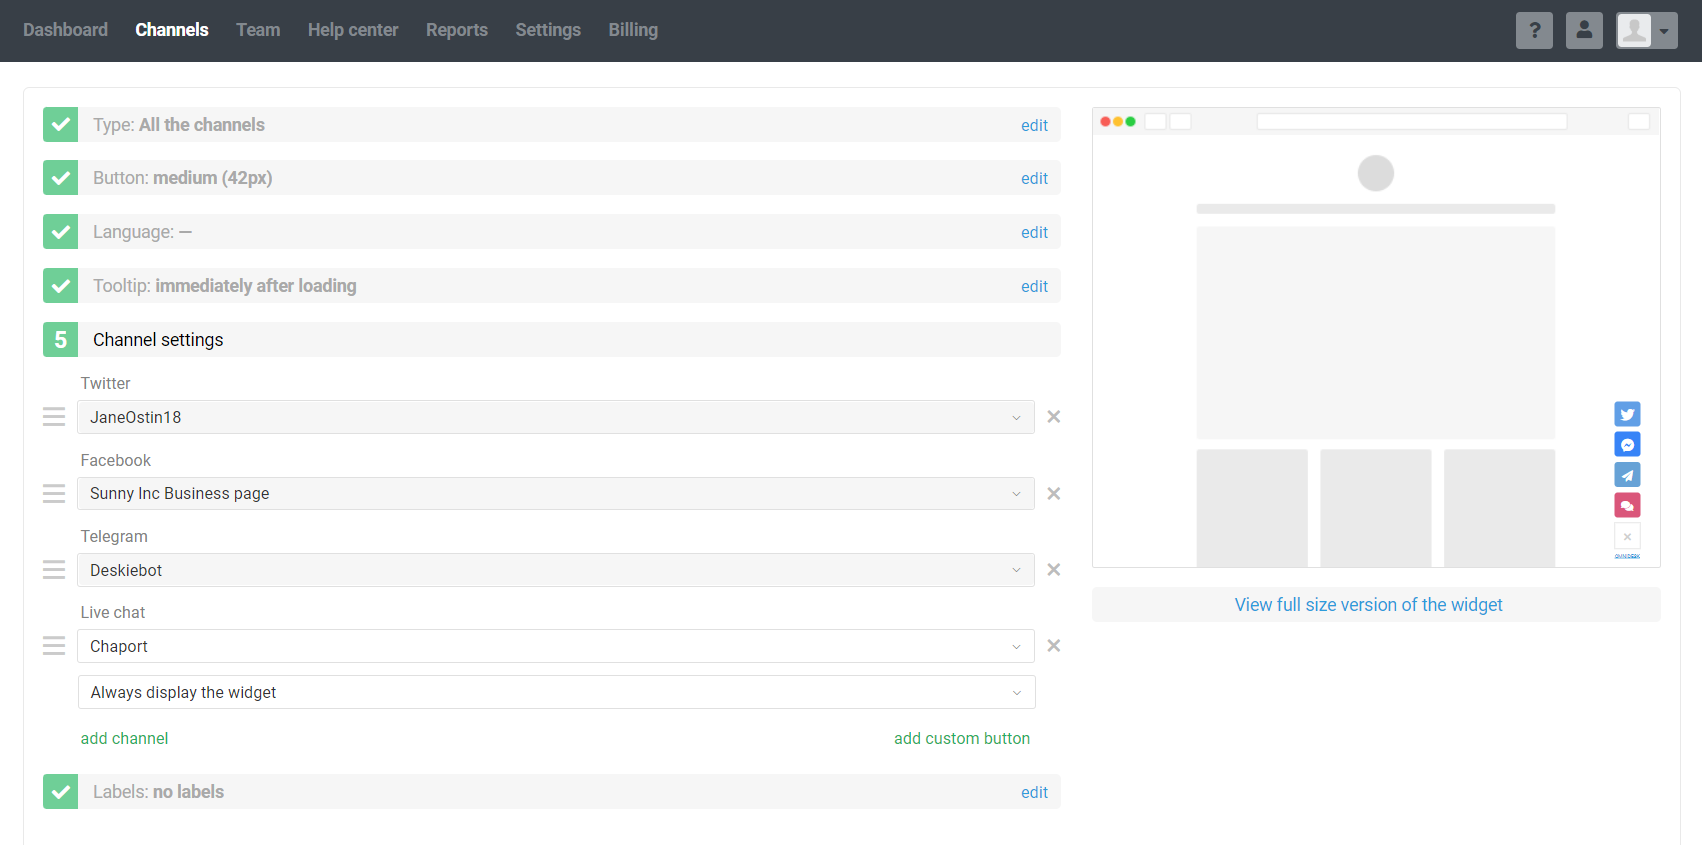
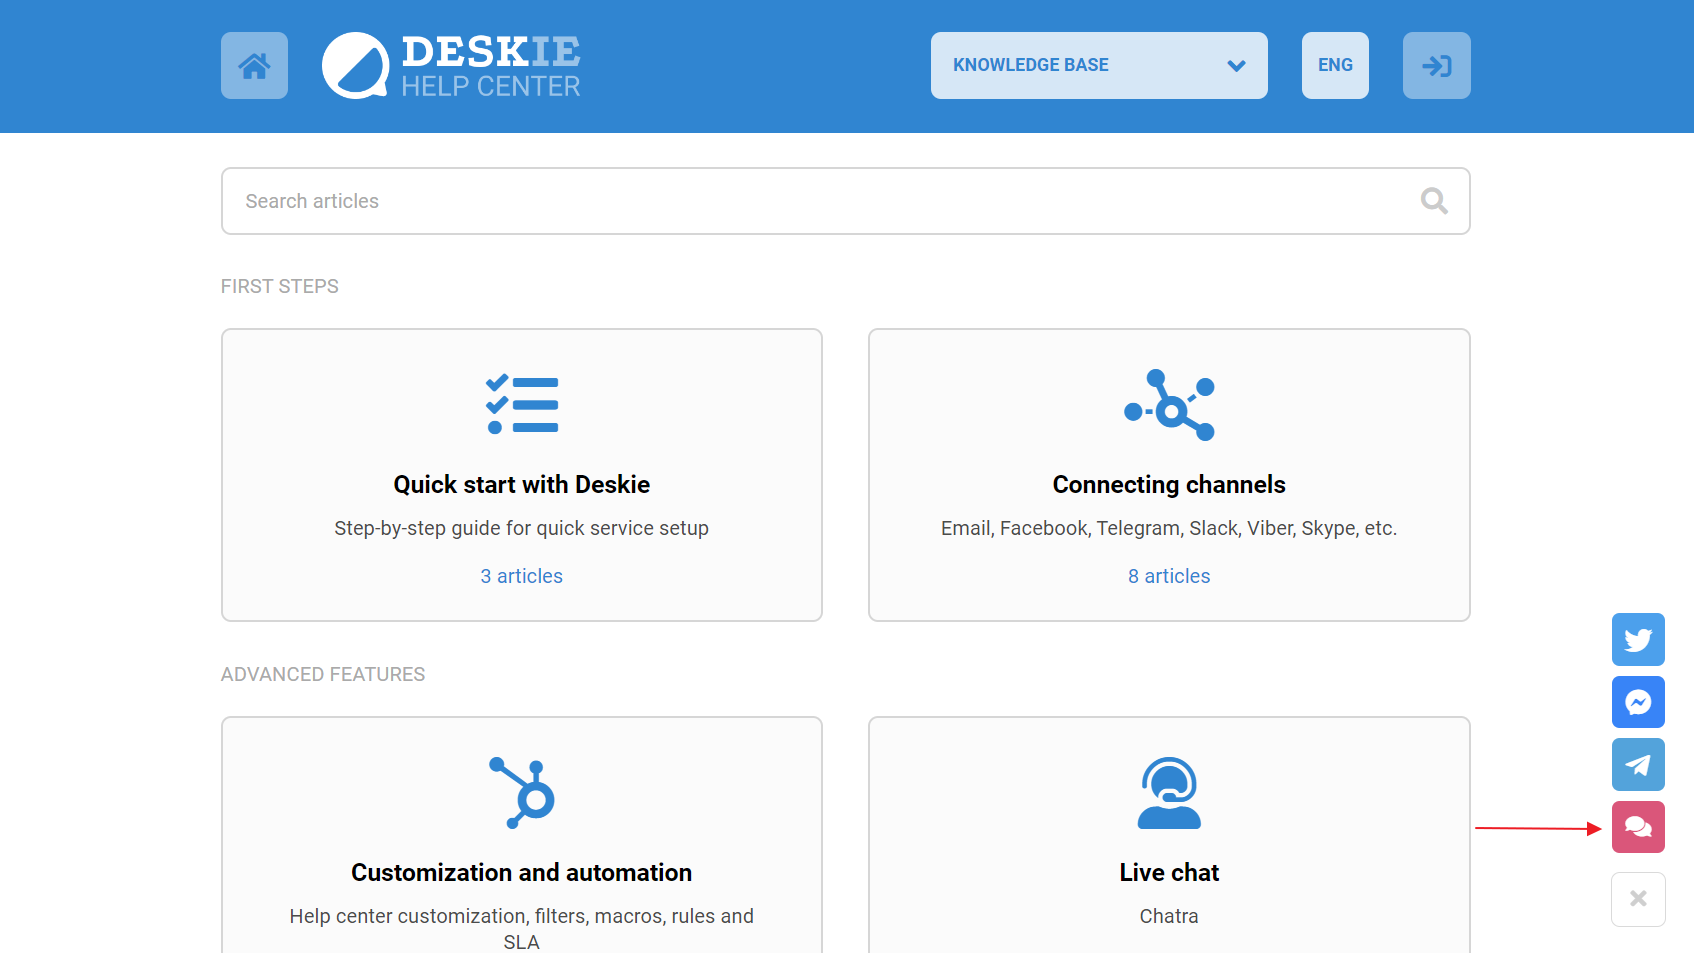
10. When adding the Live Chat channel from Chaport to the Deskie widget, you can choose one of the configuration options:
— always display the widget;
— hide the widget if all operators in Chaport are offline.

By default, the Live Chat channel from Chaport is always displayed and customers can send a message even if no operator is online. At the same time, customers can leave their email addresses in order to receive an answer to the email at the beginning of working hours.
If you want to hide the Live Chat channel from Chaport in the widget when none of the operators is online, select the second option, and also set up working hours and automatic change of employee statuses in Chaport. Then Chaport will appear in the Deskie widget at the beginning of working hours and disappear at the end of it.
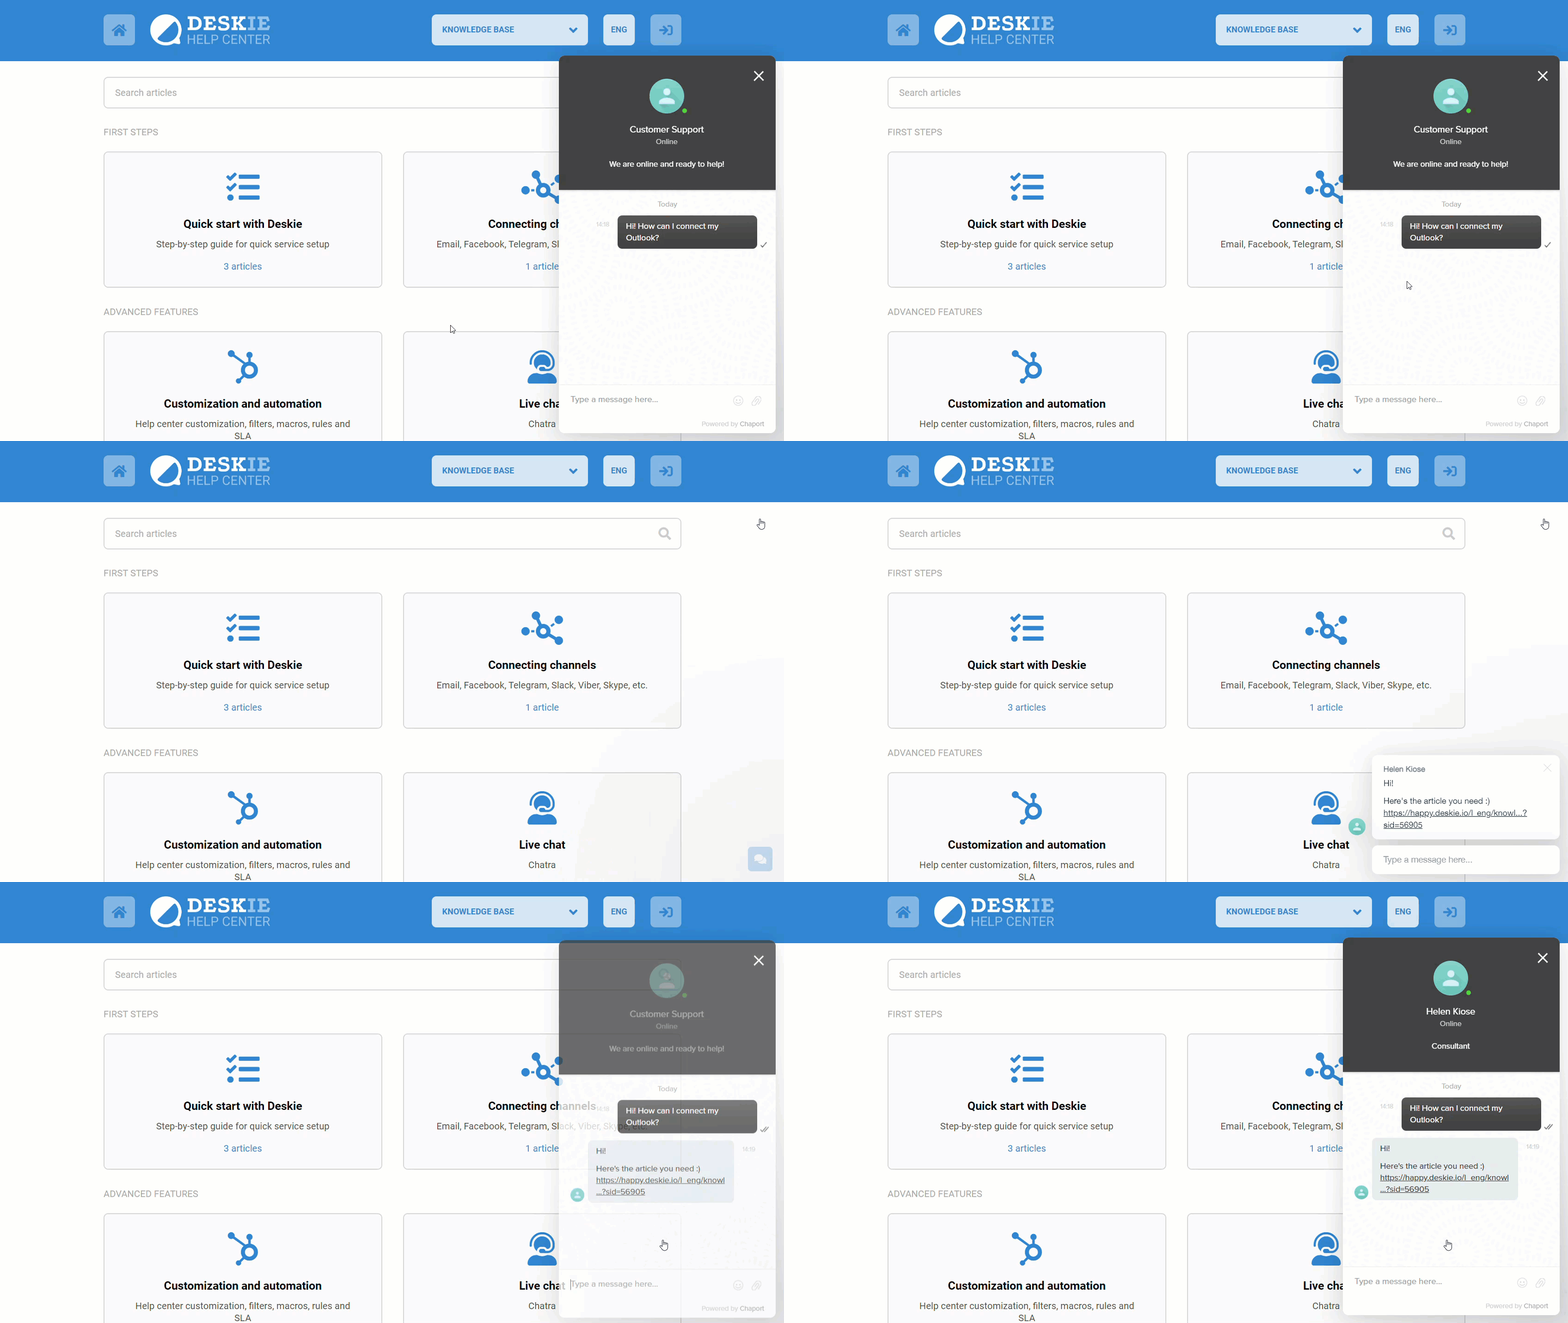
11. If the customer closed the chat working through our widget, he/she still won't miss the agent's response, because in this case we automatically expand the chat widget.
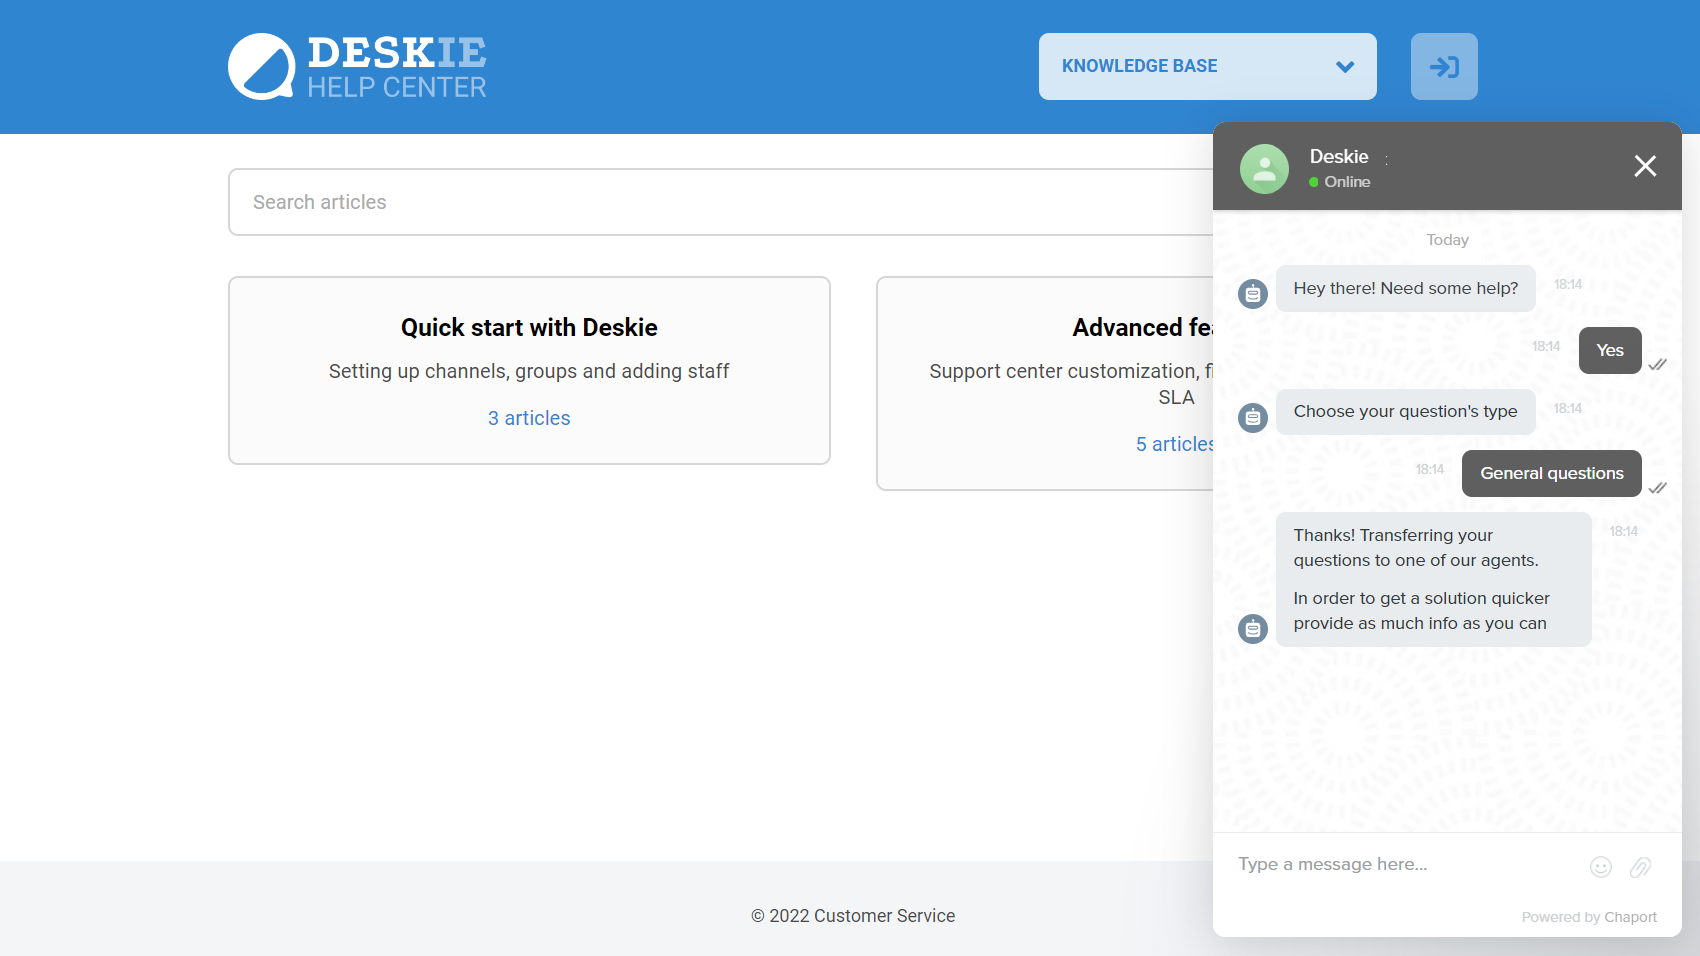
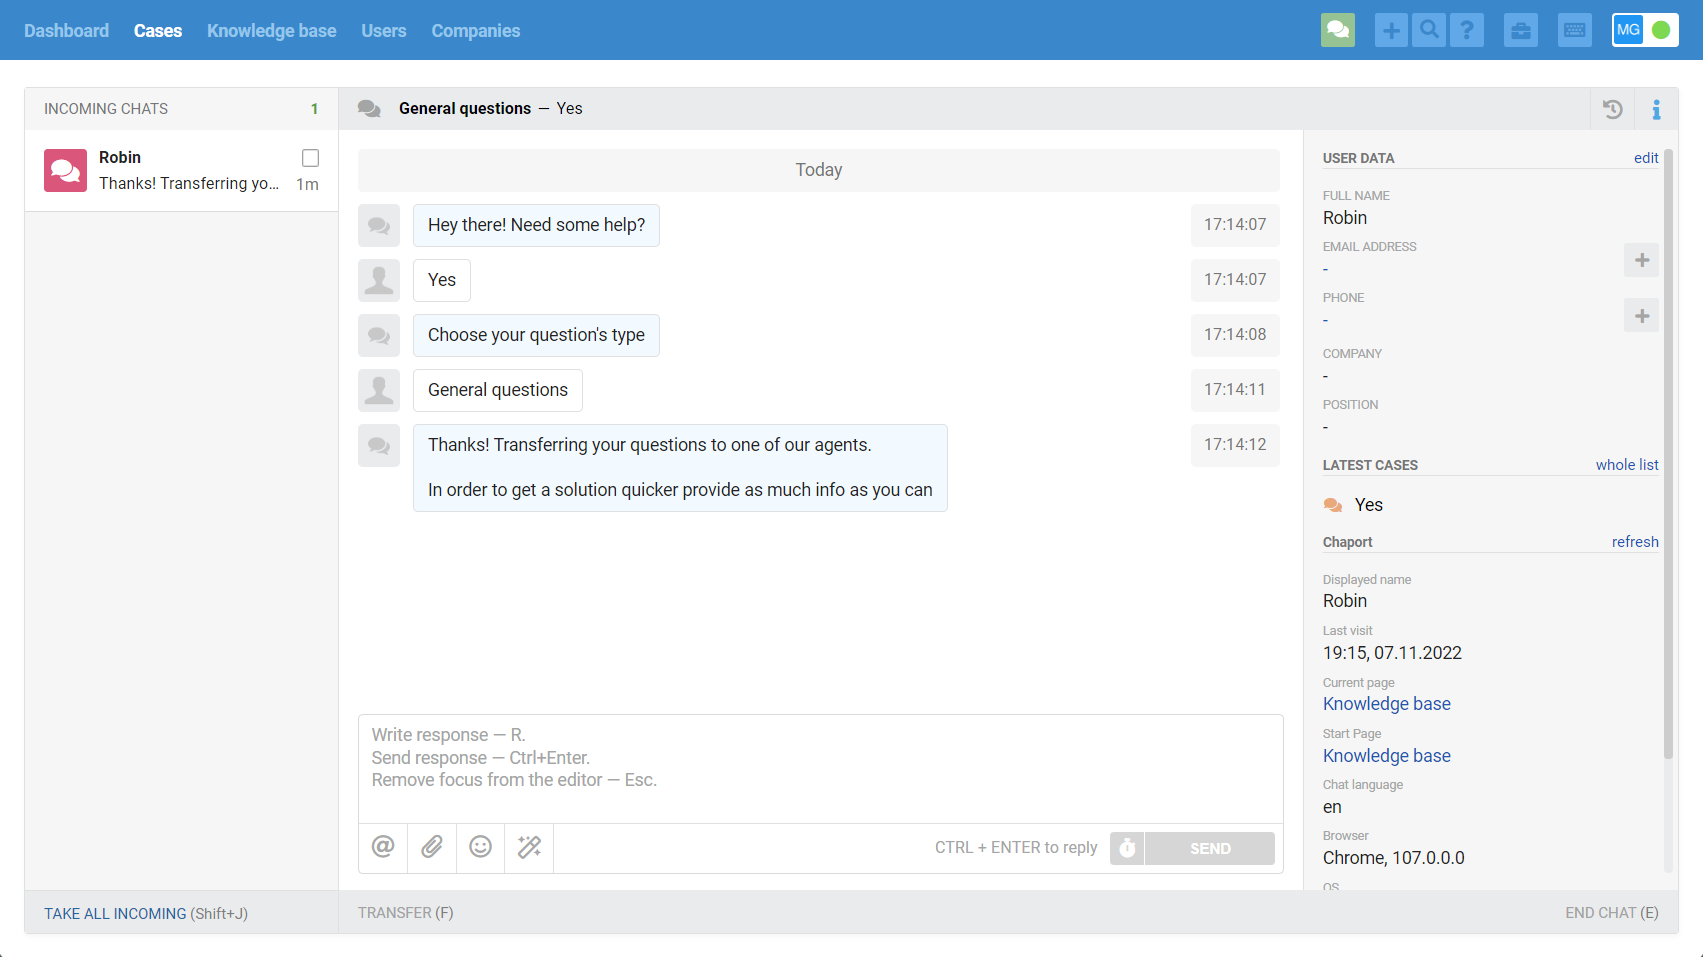
Chaport-bot messages in Deskie chats.
12. In Chaport, you can create chatbots that are useful for:
— answering simple questions;
— identifying the user before passing the chat to agents;
— clarifying details to direct the customer to the appropriate department or to a specific agent.
Given the ability to create different bots that are triggered by a certain page or some user action on the website, it's important for Deskie agents to see bot messages to understand the context of the question and what bot type the user was communicating with before the agent.
Previously, Chaport did not forward bot messages to external services, so Deskie agents had to either clarify something with the user or open the chat in Chaport to view the conversation with the bot's messages.
Now, bot messages are also displayed in Deskie.
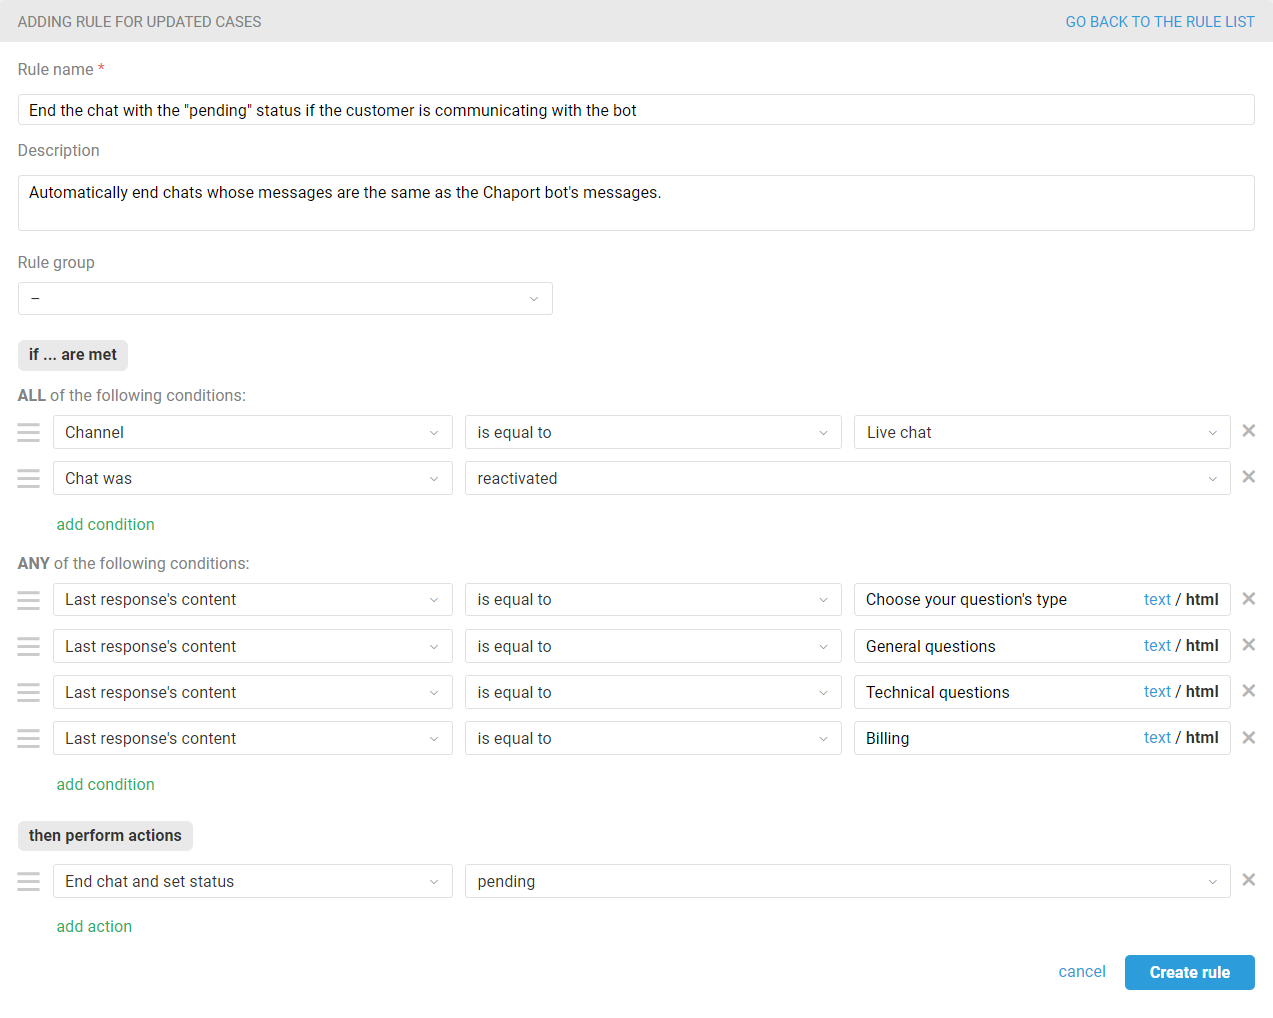
PRO tip: To prevent agents from being distracted by a customer's correspondence with a bot, create rules to automatically end such chats, setting the "pending" status for them.
a) Rule for new cases, which is triggered by the first customer response.
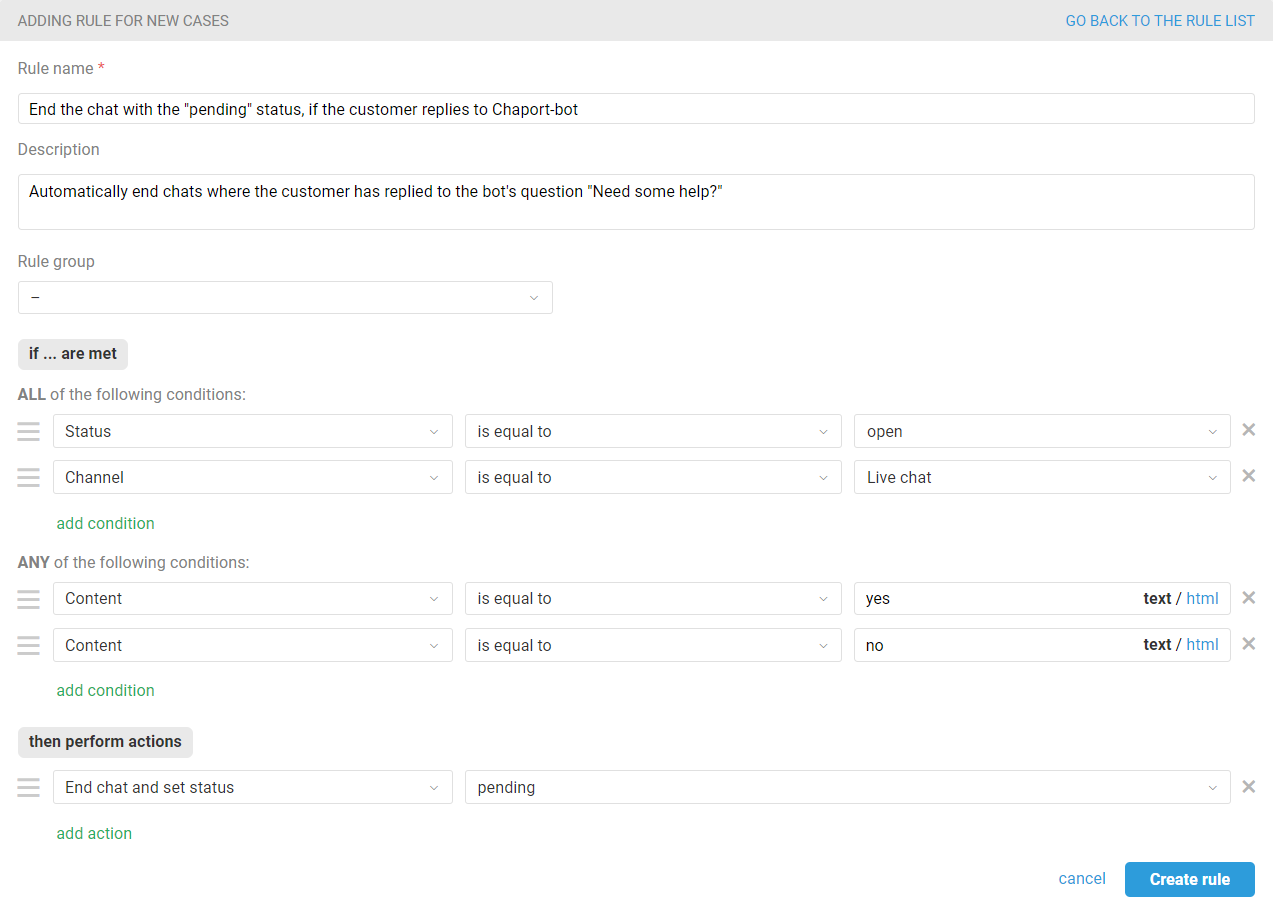
b) A rule for updated cases, which is triggered for all other bot messages and customer responses for the bot.
Considering Chaport integration in channels.
Integration with Chaport in all sections and settings is recognized as "Live Chat".
13. In the agent access level settings, the Live Chat channel has a corresponding icon.

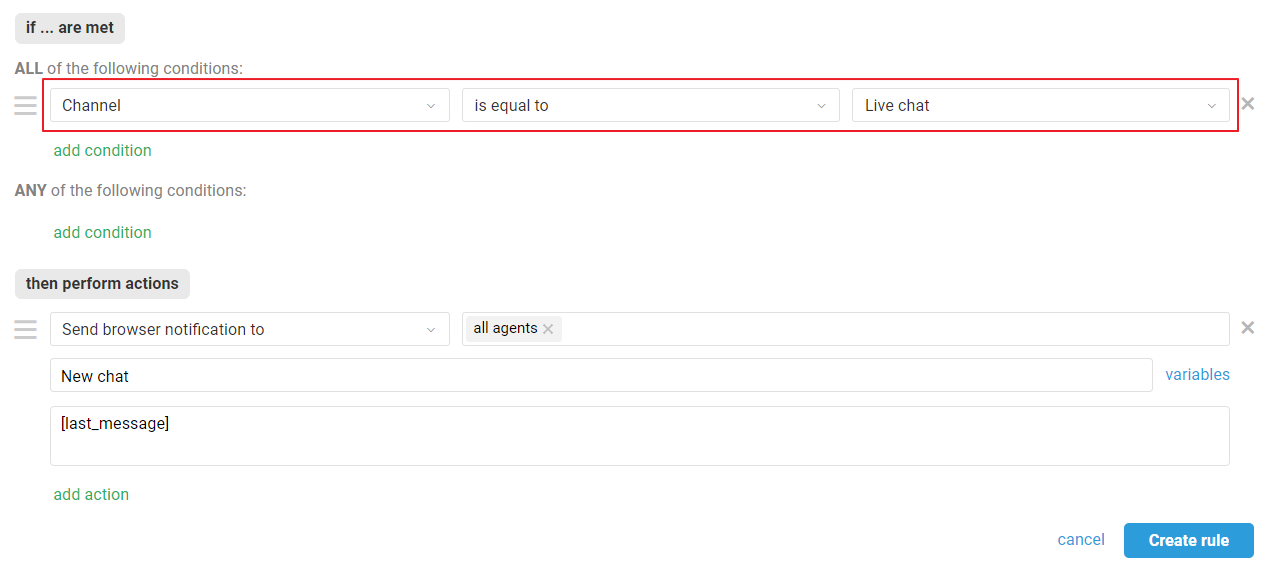
14. If you want to create automation rules specifically for cases from Chaport, use the "Channel — is equal — Live chat" condition.
15. In the agent's account, chats from Chaport can also be found through the filter on the "Live Chats" channel.

Considering different statuses
16. In Chaport, operators have only three statuses (online, offline and invisible), while in Deskie agents can have different statuses for different tasks. Therefore, the status transfer takes into account whether they have access to processing active chats.
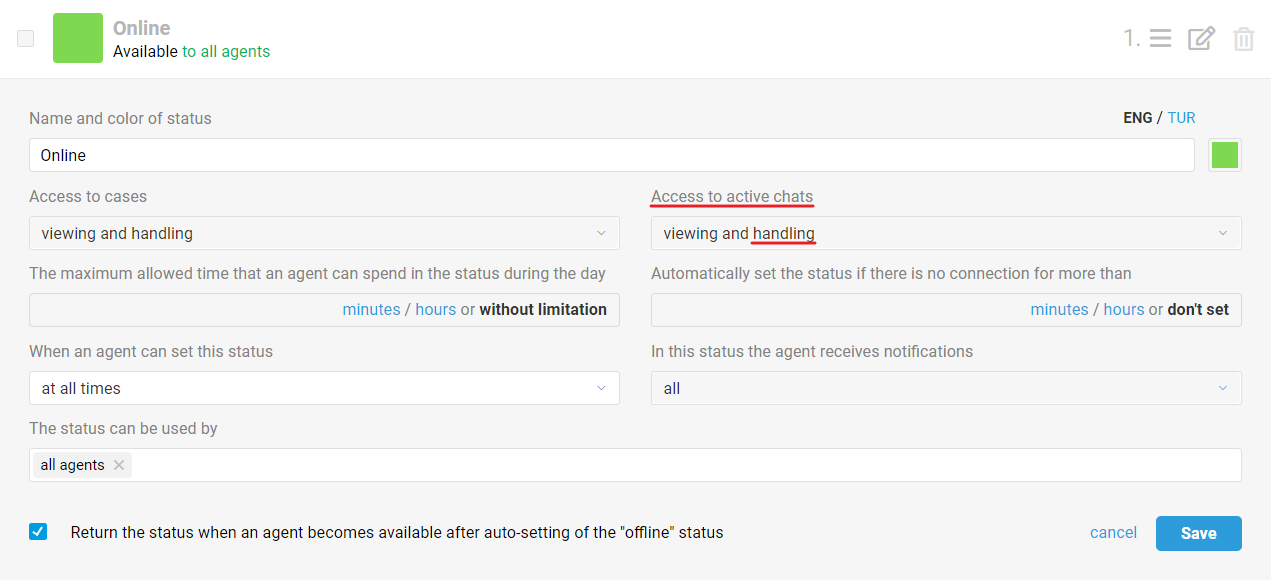
The following logic is used:
— if an agent has online status or any custom one, whose settings have access to the processing of active chats associated with the agent, the operator in Chaport will get online status;
— if an agent has an offline status, without chats, or any custom status that is not configured to handle active chats, the operator associated with the agent in Chaport will get offline status after a few minutes.
What do Chaport cases look like in Deskie?
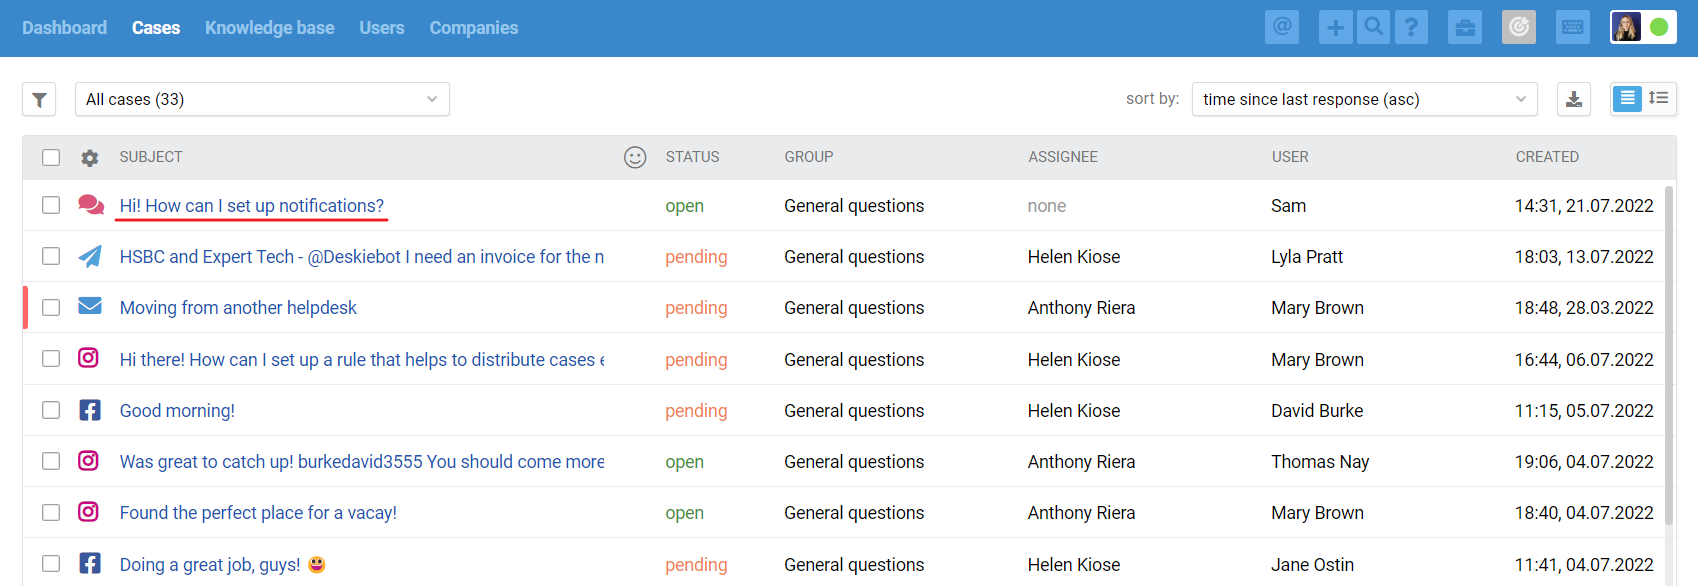
17. All cases list displays only the cases coming from asynchronous channels — users on both sides reply when it’s convenient for them. As for real-time chats, they are displayed and processed in a separate interface.
When you get a new chat (Live chat, Slack, Telegram, FB messages, Whatsapp, Microsoft Teams, Viber), a green icon appears in the upper right corner of the agent’s account. It displays incoming chats and new chat responses:
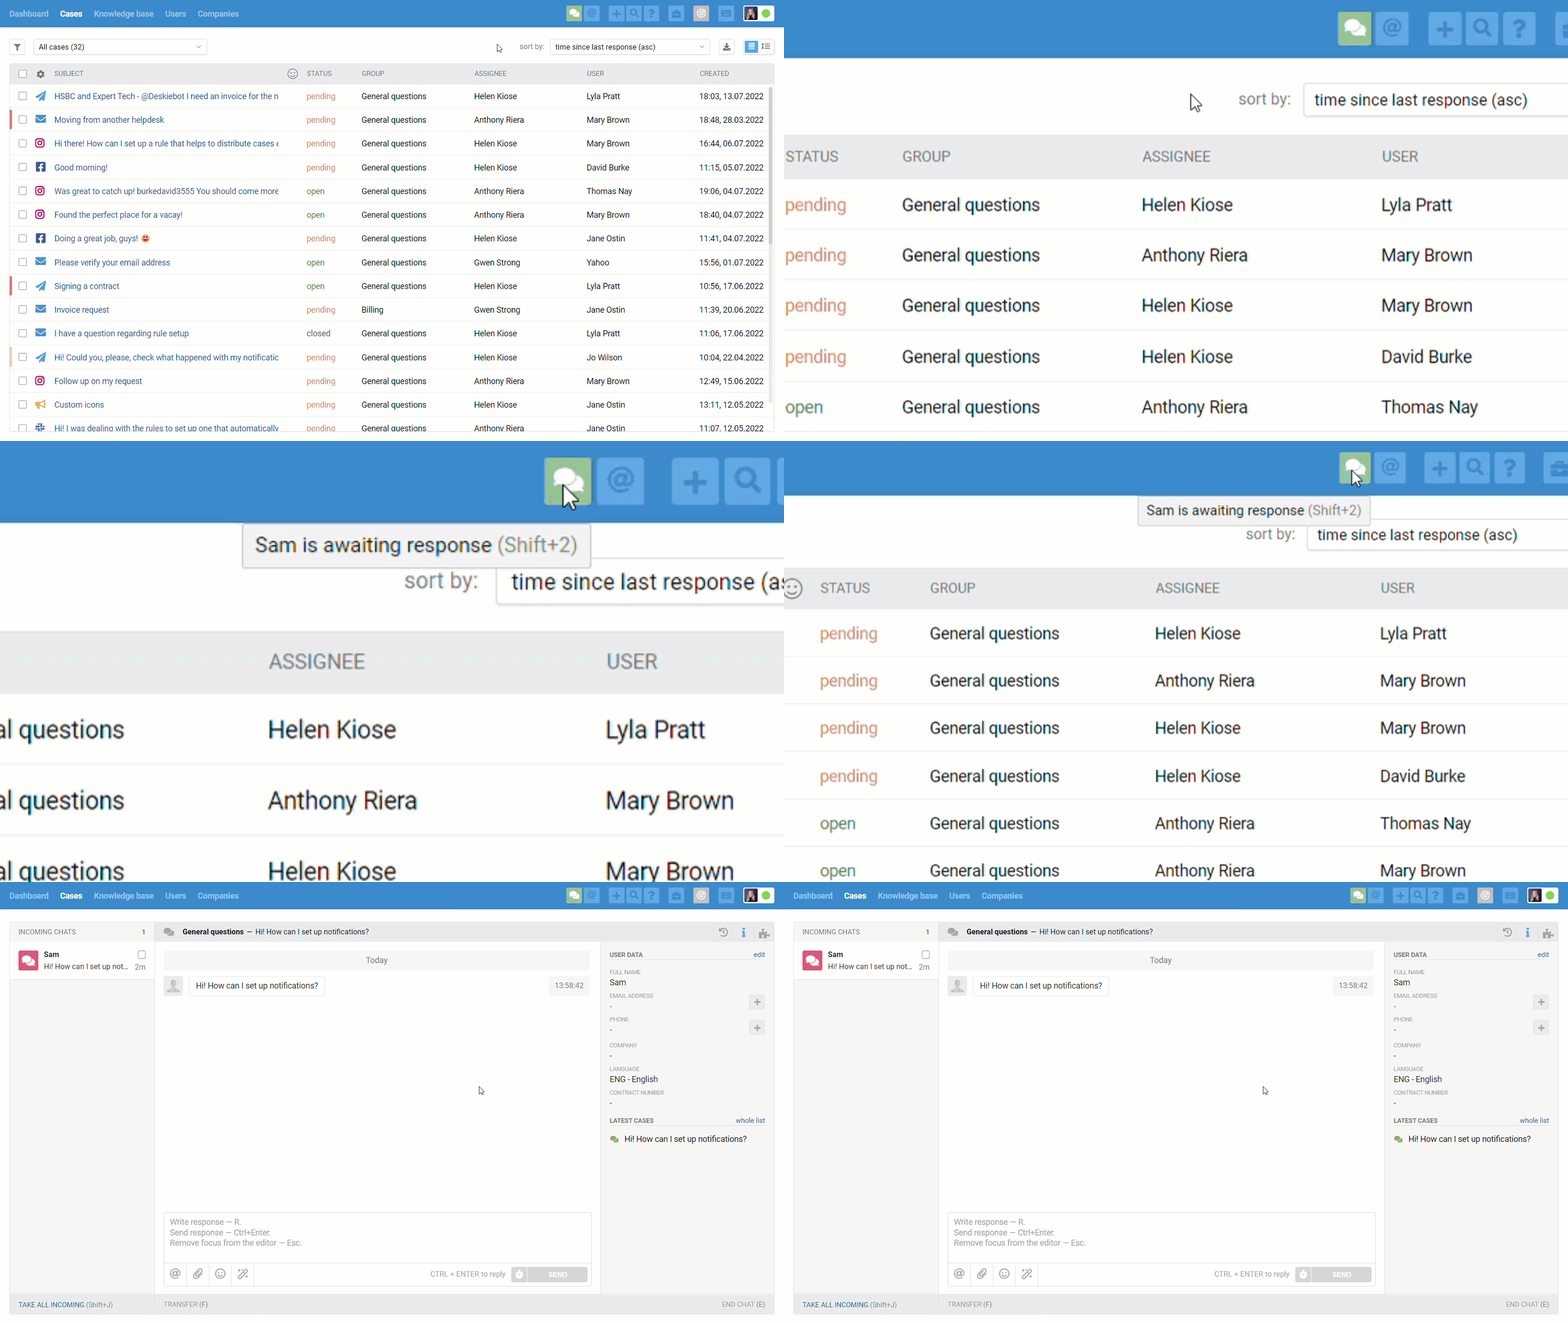
Chats are displayed in the all cases list too, but only after they were ended:
when an agent is ending the chat, clicking “end chat” in the lower right corner;
after 10 minutes (default value) of inactivity on both sides;
when one of the automated rules is applied, that has an “end chat and set status” action (for example, if you don’t plan to process chats and want to get them as cases in the all cases list):
We have separated synchronous and asynchronous communication on purpose because, if you want to provide first-class support, it is necessary to consider the specifics and expectations of customers, depending on the type of channel you use to carry out the communication.
For example, the customer is ok to wait for a couple of hours to get a response to his/her email. However, even a 5-minute response delay in chats might seem like an eternity. If you do not take this point into account and treat cases from email and chats equally, some customers will get an unpleasant experience interacting with the company.

