When your customers go to your Help Center, they need to understand where are they clearly. Customization of the Help Center makes this task much easier for you. When customers see your subdomain, company name, logo, and favicon, they have no problem understanding where they are.
Let's take a closer look at all the settings in the "Customization" subsection of the "Help Center" section of the administrator's account.
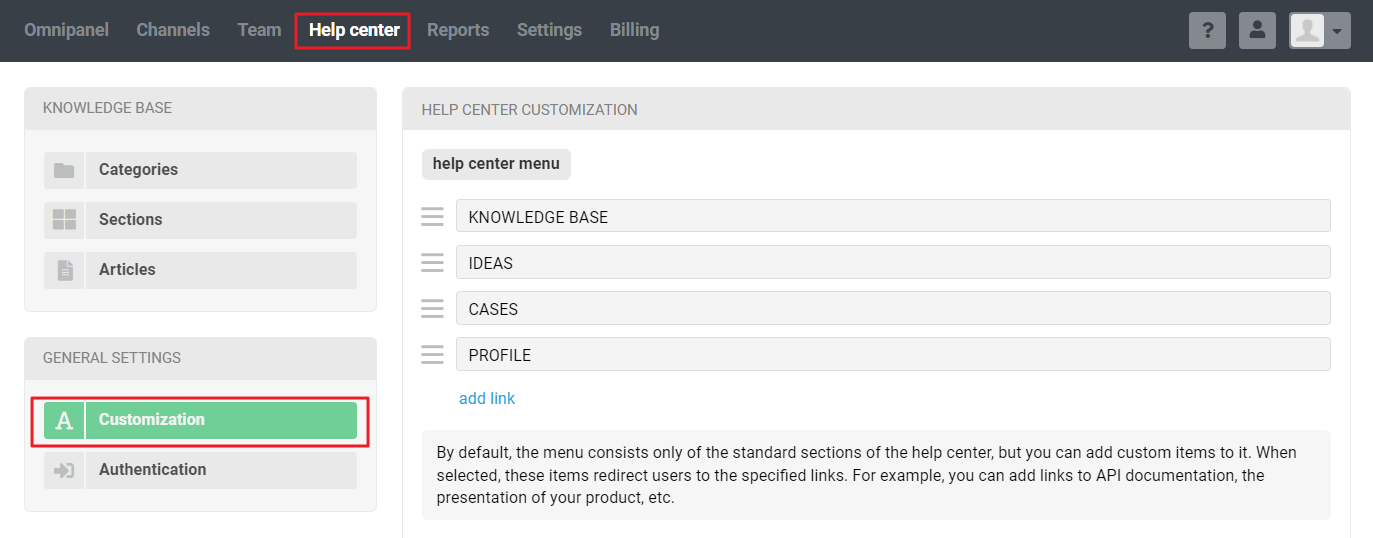
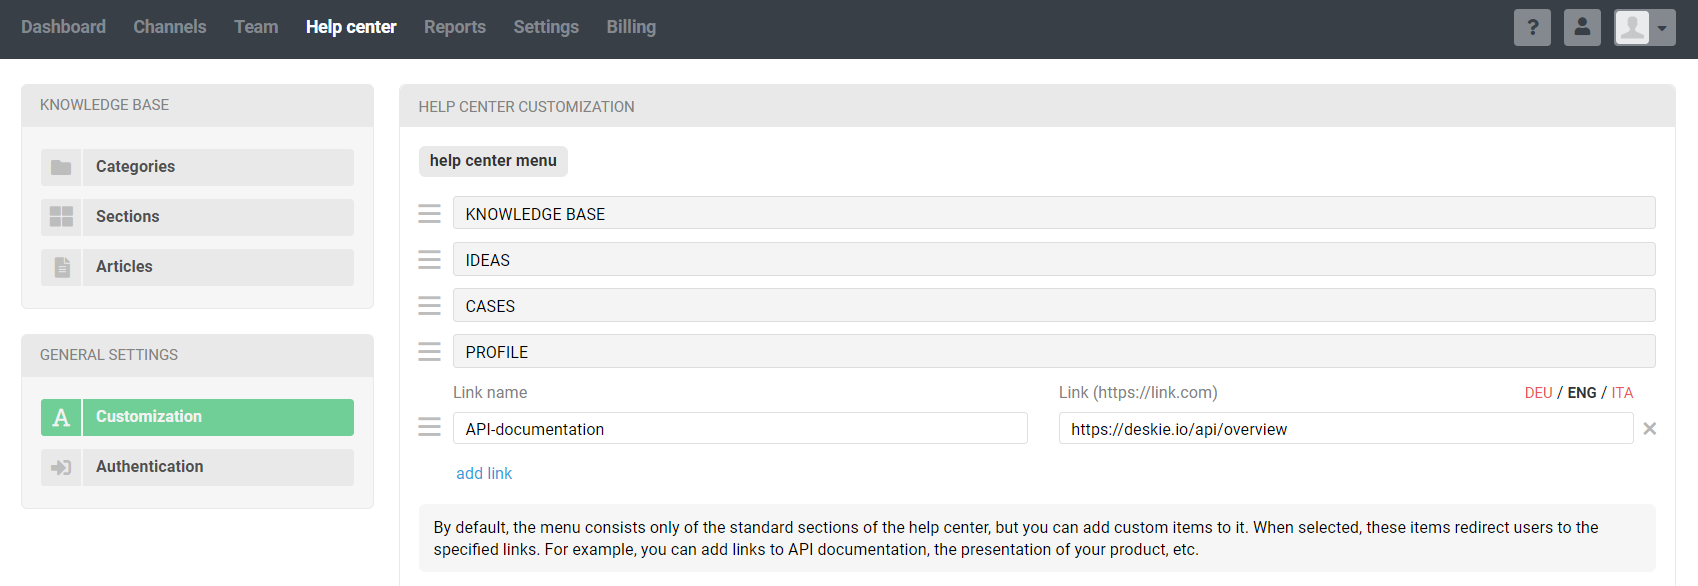
Help center menu
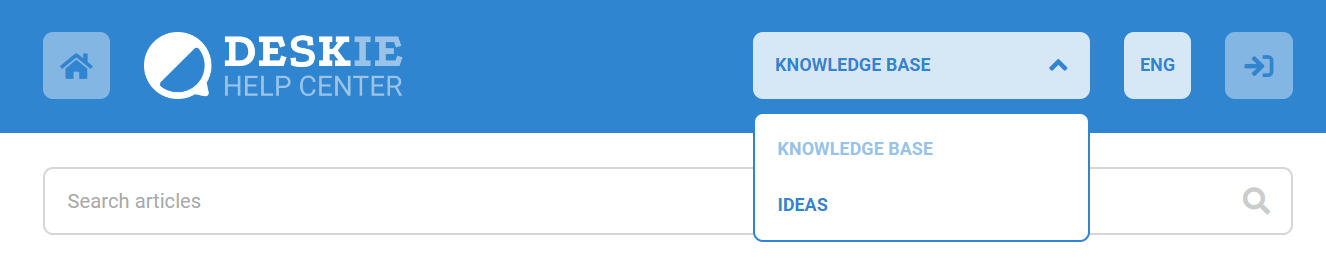
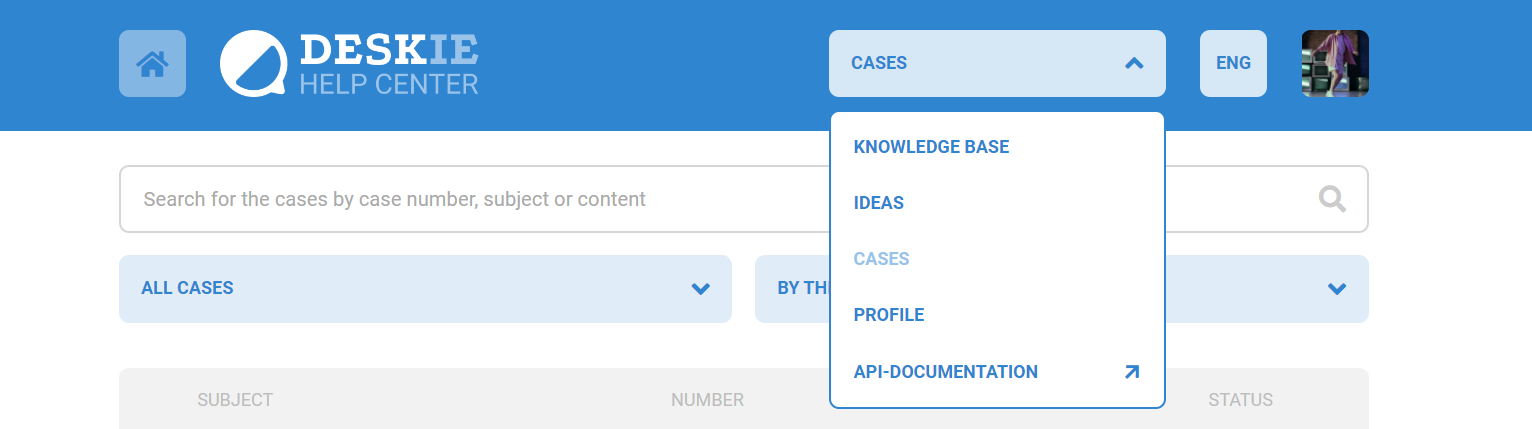
All sections of the Help Center are displayed in a dropdown menu.
If the customer logs in to their account, additional sections "Cases" and "Profile" will appear in the dropdown menu.
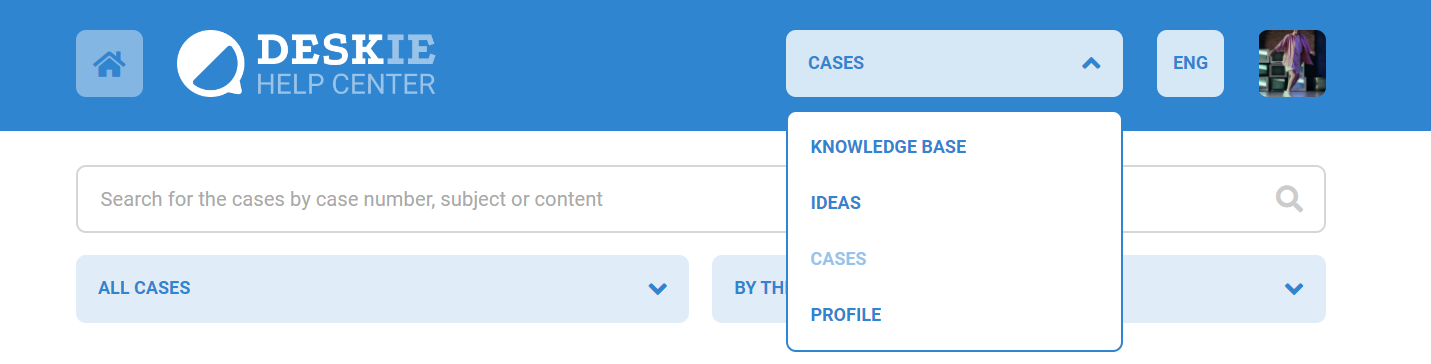
After authorization, the customer is immediately redirected to the "Cases" section to make it easier to navigate the interface.
In the Help Center personalization settings, you can simply drag and drop to rearrange menu items or add your links to third-party resources so that customers can easily find all helpful information. For example, you can place a link to the API documentation, as we did 🙂
Help Center design
You can choose from twenty-one color themes to best match your Help Center with your company's brand colors.


You can also set the page width and scale here for the desktop version of the Help Center. Both settings look equally good on all screen sizes, so choose the one that works best with the style of the main website, or if you just like it better.
Standard ←→ Large scale
Standard ←→ Increased width

If the standard customization options are not enough, you can change the appearance of the Help Center using custom CSS. Learn more about working with CSS.
Using your own subdomain
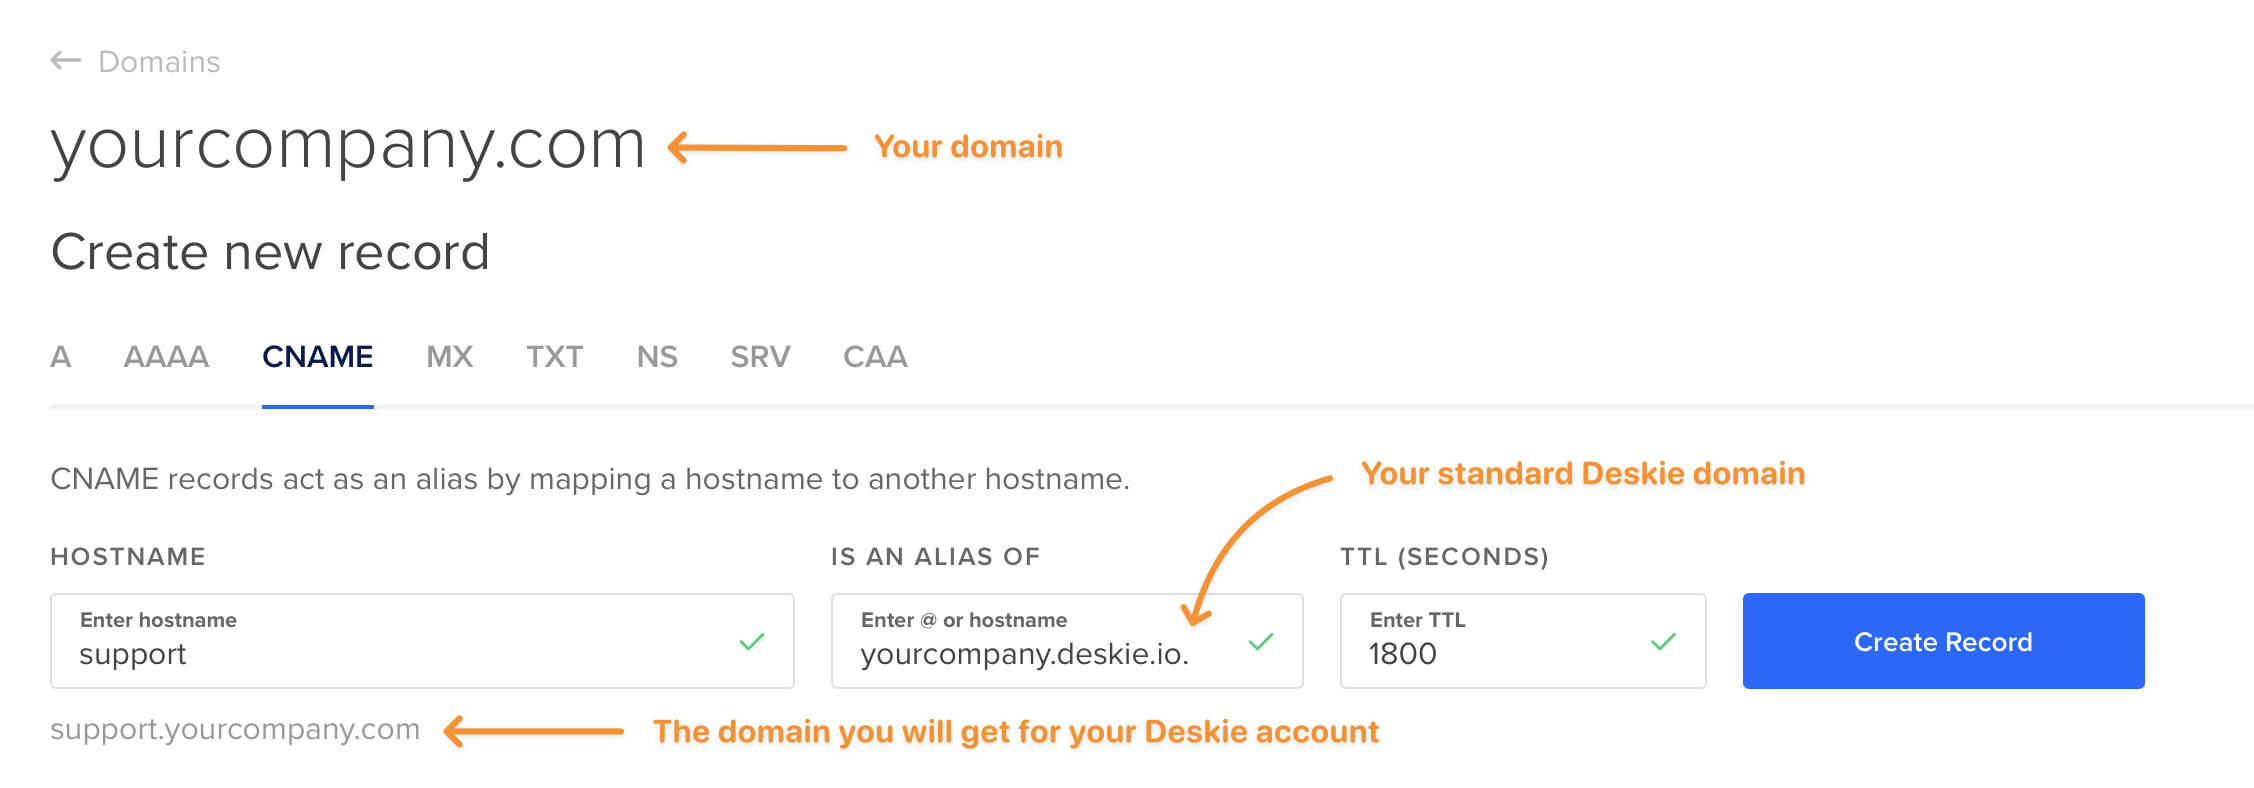
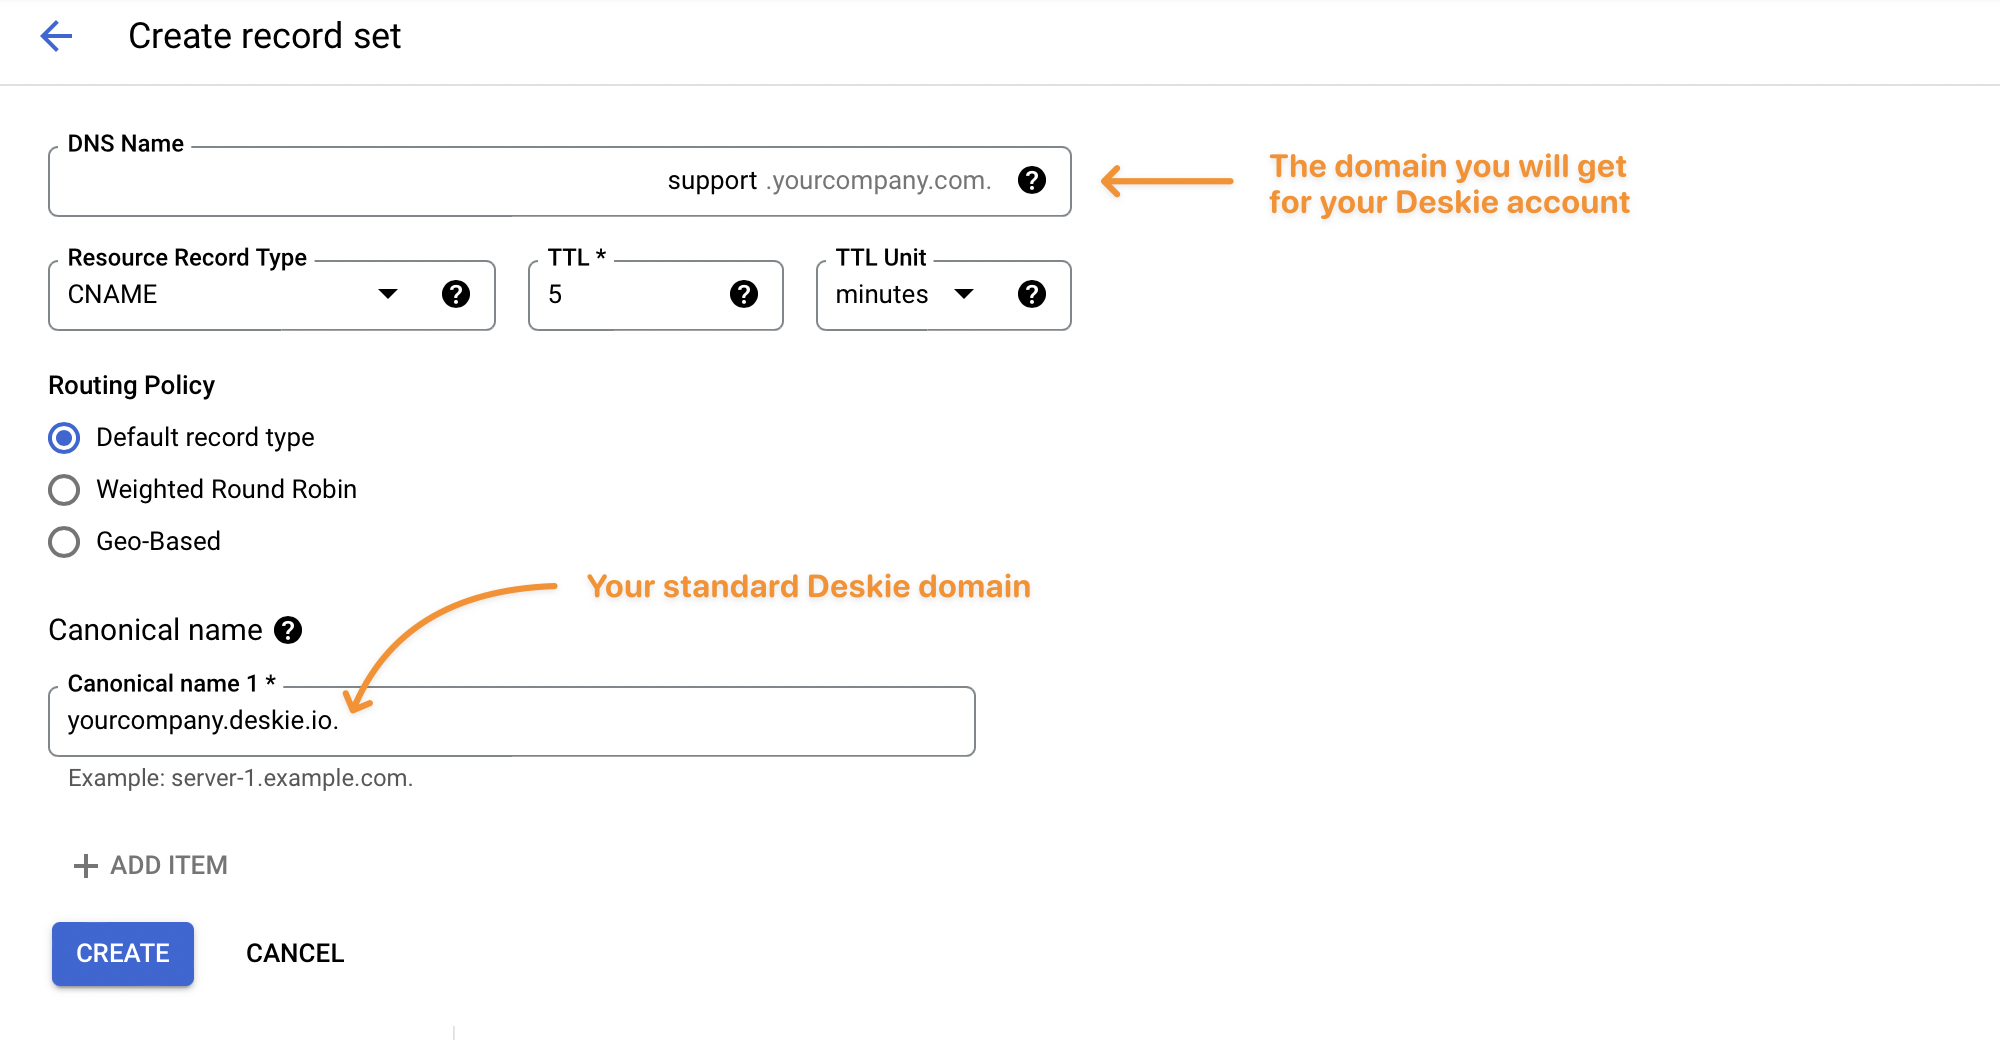
You can configure the display of your own subdomain instead of the standard one — yourcompany.deskie.io.

As you understand, simply specifying your subdomain in this field will not give you anything. First, you need to create a CNAME record that will direct your subdomain (for example, support.yourcompany.com) to ours — yourcompany.deskie.io. You can do it in your hosting provider or domain name registrar account.
Please note that we are talking about a subdomain. You cannot connect your own domain (yourcompany.com) to the Help Center.
Adding a CNAME record looks different for all hosting providers. Therefore, we suggest that you familiarize yourself with these options for creating a CNAME record for the support.yourcompany.com subdomain:
1. Digital Ocean
After creating a CNAME record and specifying a subdomain, your Help Center will become available both at the standard address (yourcompany.deskie.io) and at the one you specified.
You can also log in to the admin or agent account from your subdomain. To do this, just add "/admin" or "/staff" to the end of the URL.
Please, note that when connecting our own subdomain, we automatically generate an SSL certificate for it (via Let's Encrypt) — this allows you to continue working through an encrypted connection (https://). However, generating an SSL certificate can take up to an hour since this process is carried out through cron.
Branding your Help Center
Change the name, logo, and favicon so that customers will be 100% sure that they did not make a mistake with the address.
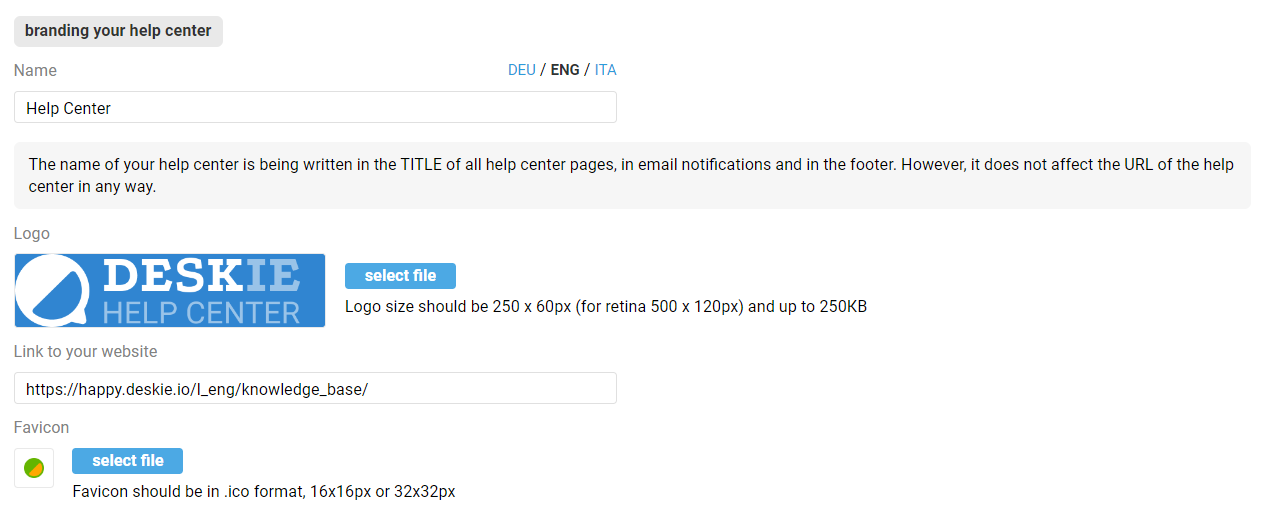
The Help Center's name is used in the TITLE of all pages, in email notifications (about registration, creating a case, etc.), and in the footer.
Be sure to add your logo, as it is the first thing that catches your eye when the page loads. The logo must be in png or jpg format, 250x60 px or 500x120 px in size for correct display on Retina and 4K displays, and not heavier than 250 Kb.
You can also add a favicon (the file must be in .ico format, 16x16 or 32x32 px in size). It will allow customers to find your Help Center faster when many tabs are open in the browser.
PRO hint: if you don't want your agents to get confused in the multiple tabs (cases, articles from the Help Center, administrator account) open simultaneously, you can use different favicons for each entity.
If you have filled in the "Link to your website" field, a separate icon that will let you go to your main website will appear to the left of the logo. Clicking on the logo takes the customer to the main page of the knowledge base.

Widgets and scripts
By default, a contact form widget is added so customers can contact you from the Help Center. You can customize it in the administrator account along the path "Channels" — "Widgets". More
Widgets support multilanguage. More
All widgets created in your admin account are displayed in the dropdown list.

If you want to delete the Help Center's widget, select a dash in the list.
Let's imagine you want to place an advanced Deskie widget in the Help Center, for example, to convert the "Subject" field into a dropdown list with options or get basic information about the customer. In that case, you need to place the widget's code and additional script code in a separate block for third-party scripts, and in the "Help Center widget" field, put a dash.
You can also add any other third-party script here — for instance, an analytics service or a callback.

Search engine indexing
The Help Center is visible to search engines by default, but you can turn off indexing if necessary.

Personal data collection
Add a link to your website page where the personal data processing agreement is published. The link will appear in the footer of the Help Center, in the registration form, and in the form for adding an idea. When creating an email widget, you need to add a link to this agreement yourself.

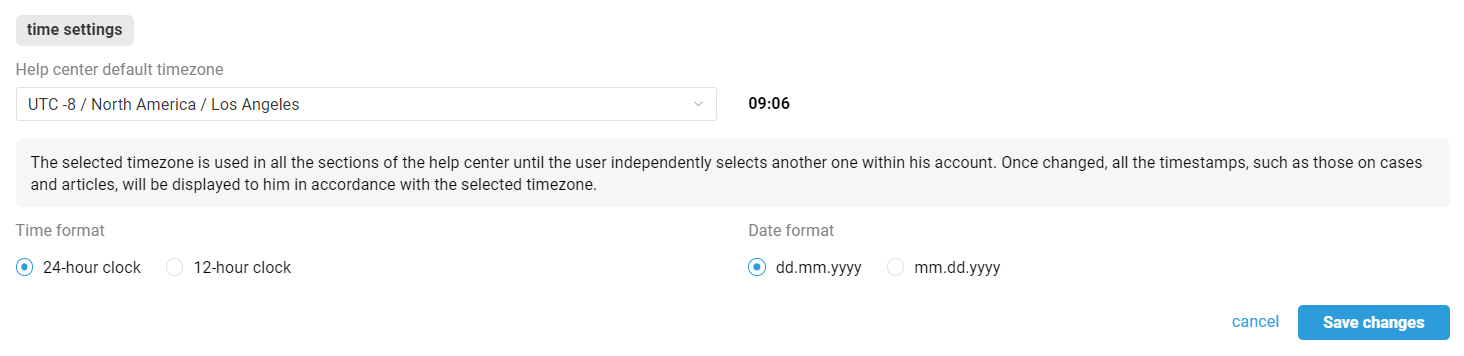
Time settings
The selected timezone is used in all the sections of the Help Center until your customer independently selects another one within their account. Once changed, all the timestamps, such as those on cases and articles, will be displayed to them in accordance with the selected timezone.