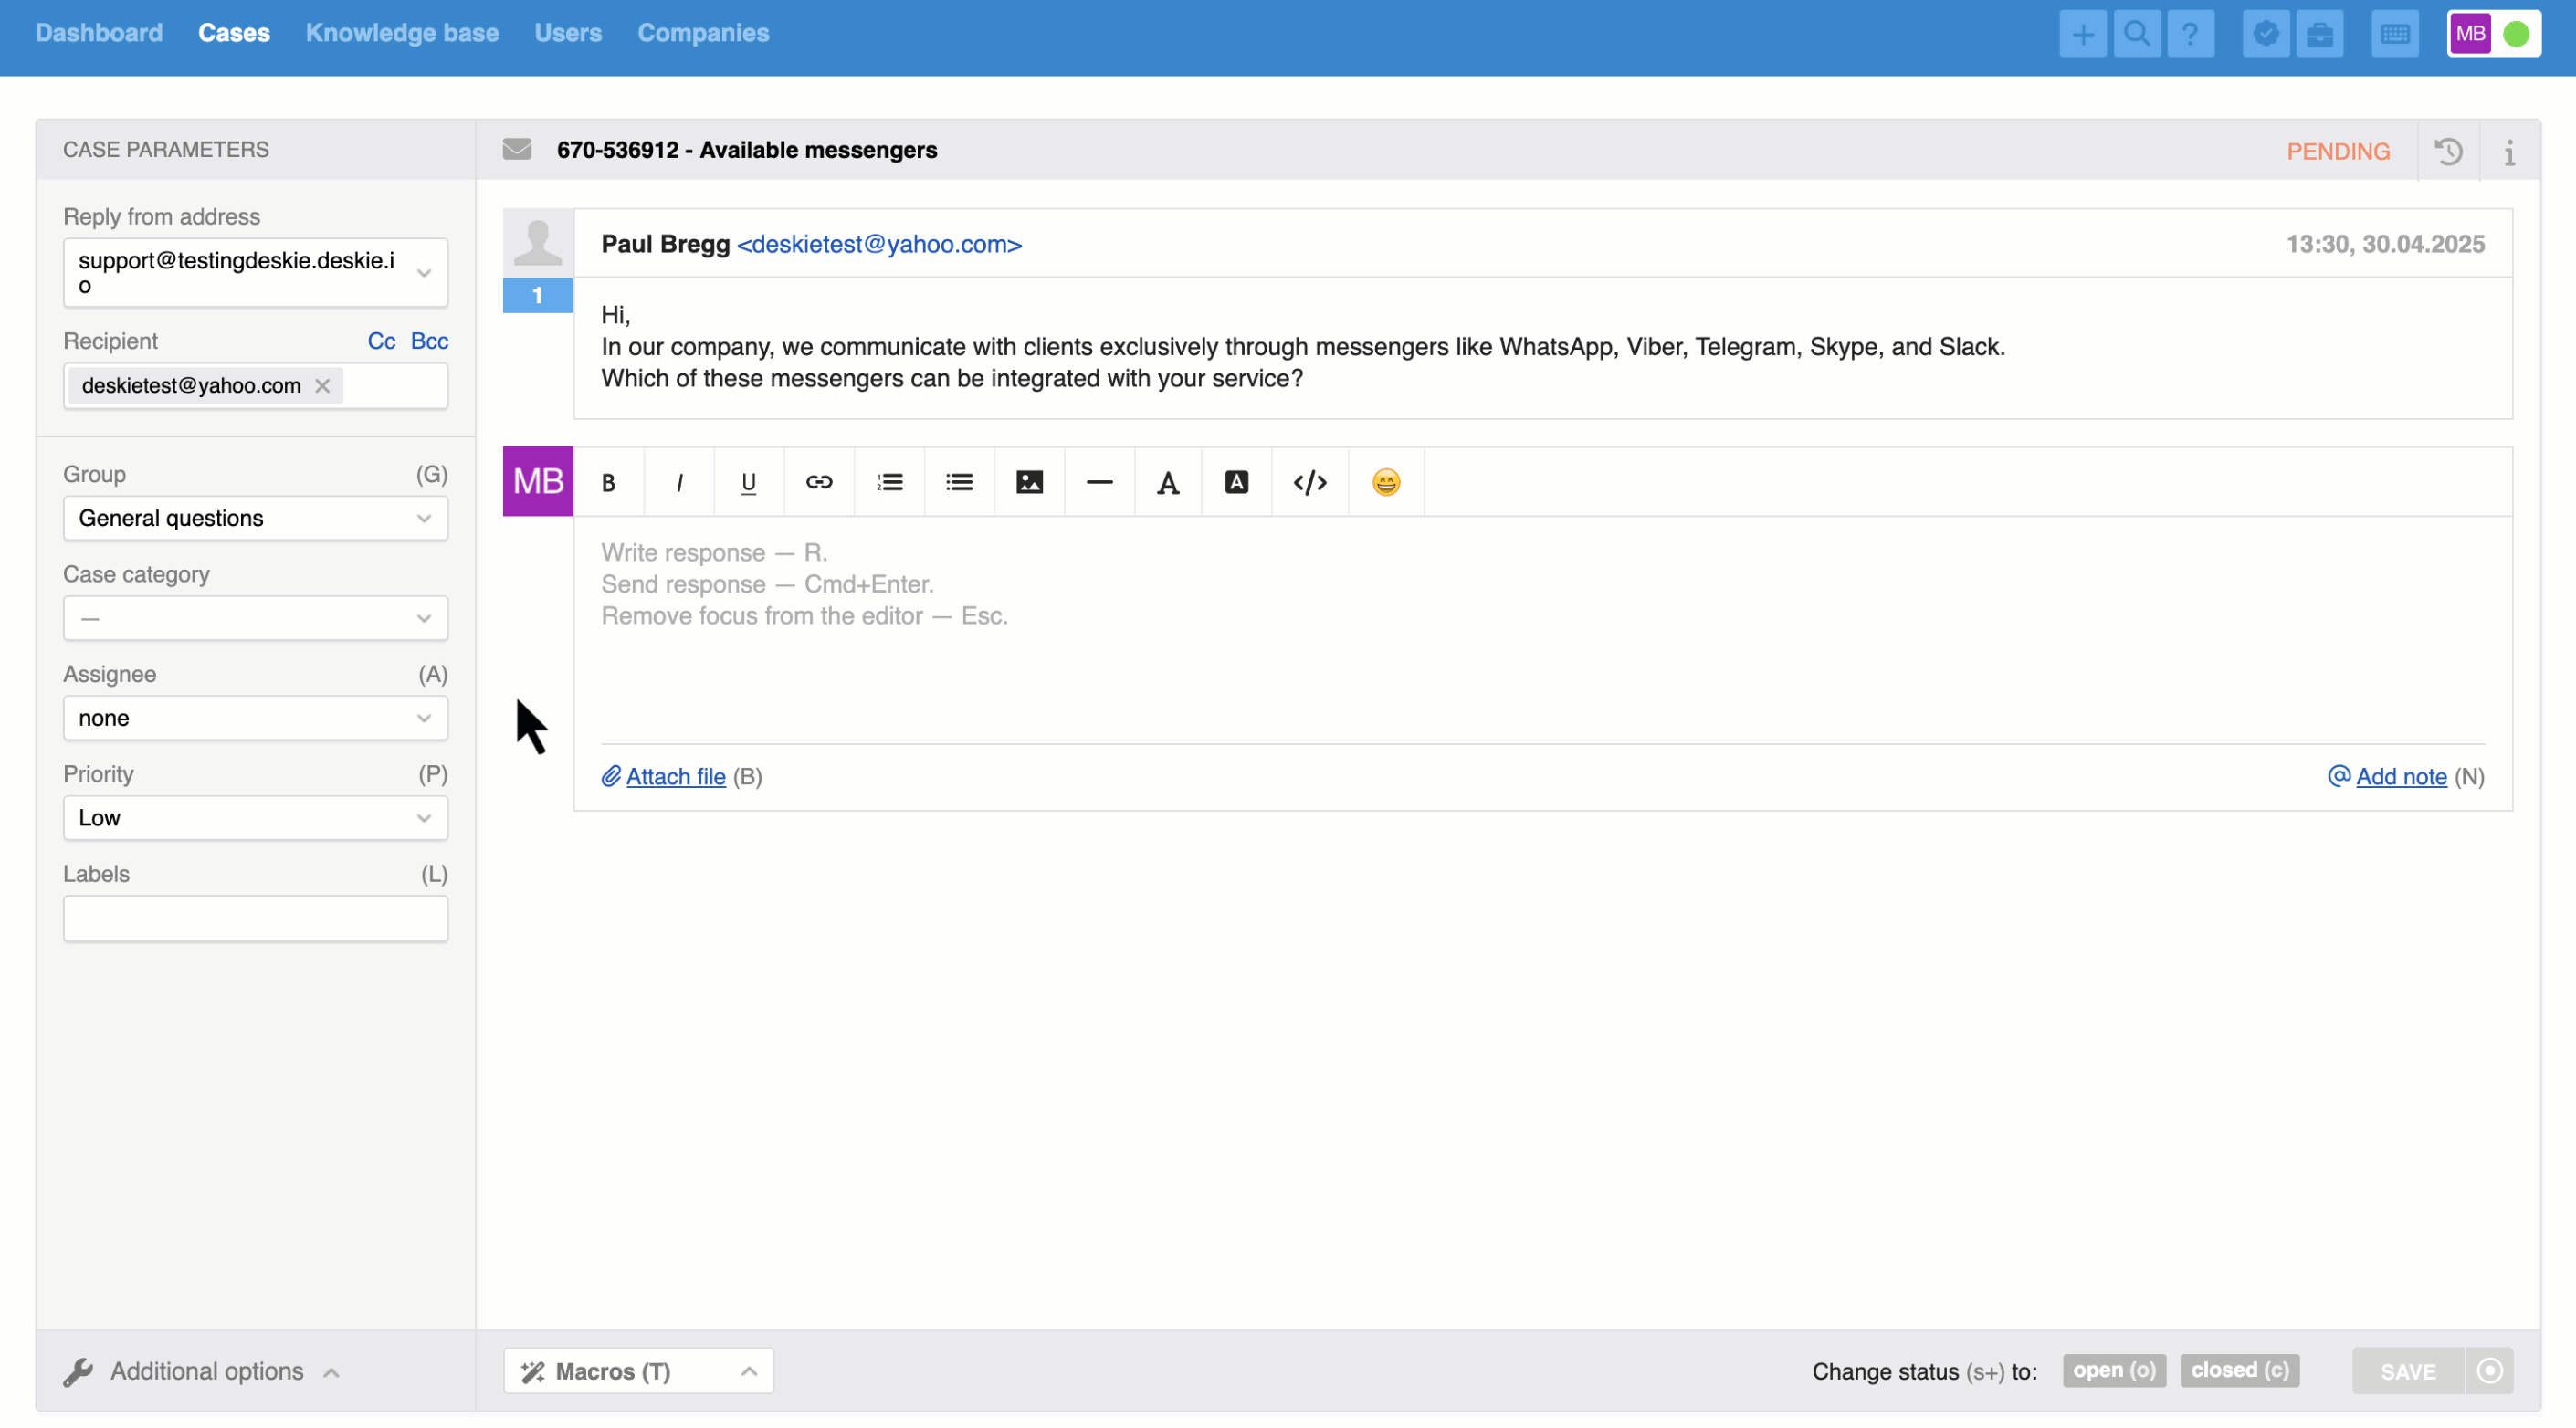
This article describes updates to the custom data field functionality. A complete description of all the nuances of working with data fields in Deskie can be found here.
Delivering great support gets a whole lot easier when you have the right info at your fingertips. Think about it: user data tells you which product and plan they're on, company details highlight contract terms and internal workflows, and the case itself gives you clues about the device involved and the nature of the issue.
Deskie has long allowed you to add custom fields to capture info in user data and request parameters. But some features were missing. We've enhanced the functionality - let's dive into the latest updates.
Mandatory fields: verification when the status is set to "closed"
Setting up mandatory fields helps your team remember to include important information that can later be used for filtering cases, generating reports, or triggering automated actions.
You could make case fields mandatory before, but the validation was applied whenever any action was performed on the case. That meant agents couldn’t send responses or update case details until all required fields were completed. While this setup can be useful, it didn't work well in situations where agents needed to first ask the user for more information to fill out those fields accurately.
Now, case fields have two separate settings:
mandatory to fill for any action (star icon);
mandatory to fill only when setting the status to "Closed" (lock icon).
At the same time, it's still possible to set the status to "Closed" through rules or the API without filling out these fields – just like with fields that are mandatory for any action.
Default values for dropdown lists
Usually, custom fields of the "dropdown" type have a dash set as the default, meaning agents or users must actively choose one of the available options. But sometimes it's helpful to set a different default value – like the most likely choice.
To set a default value for a dropdown list, simply tick the star next to it in the field settings.
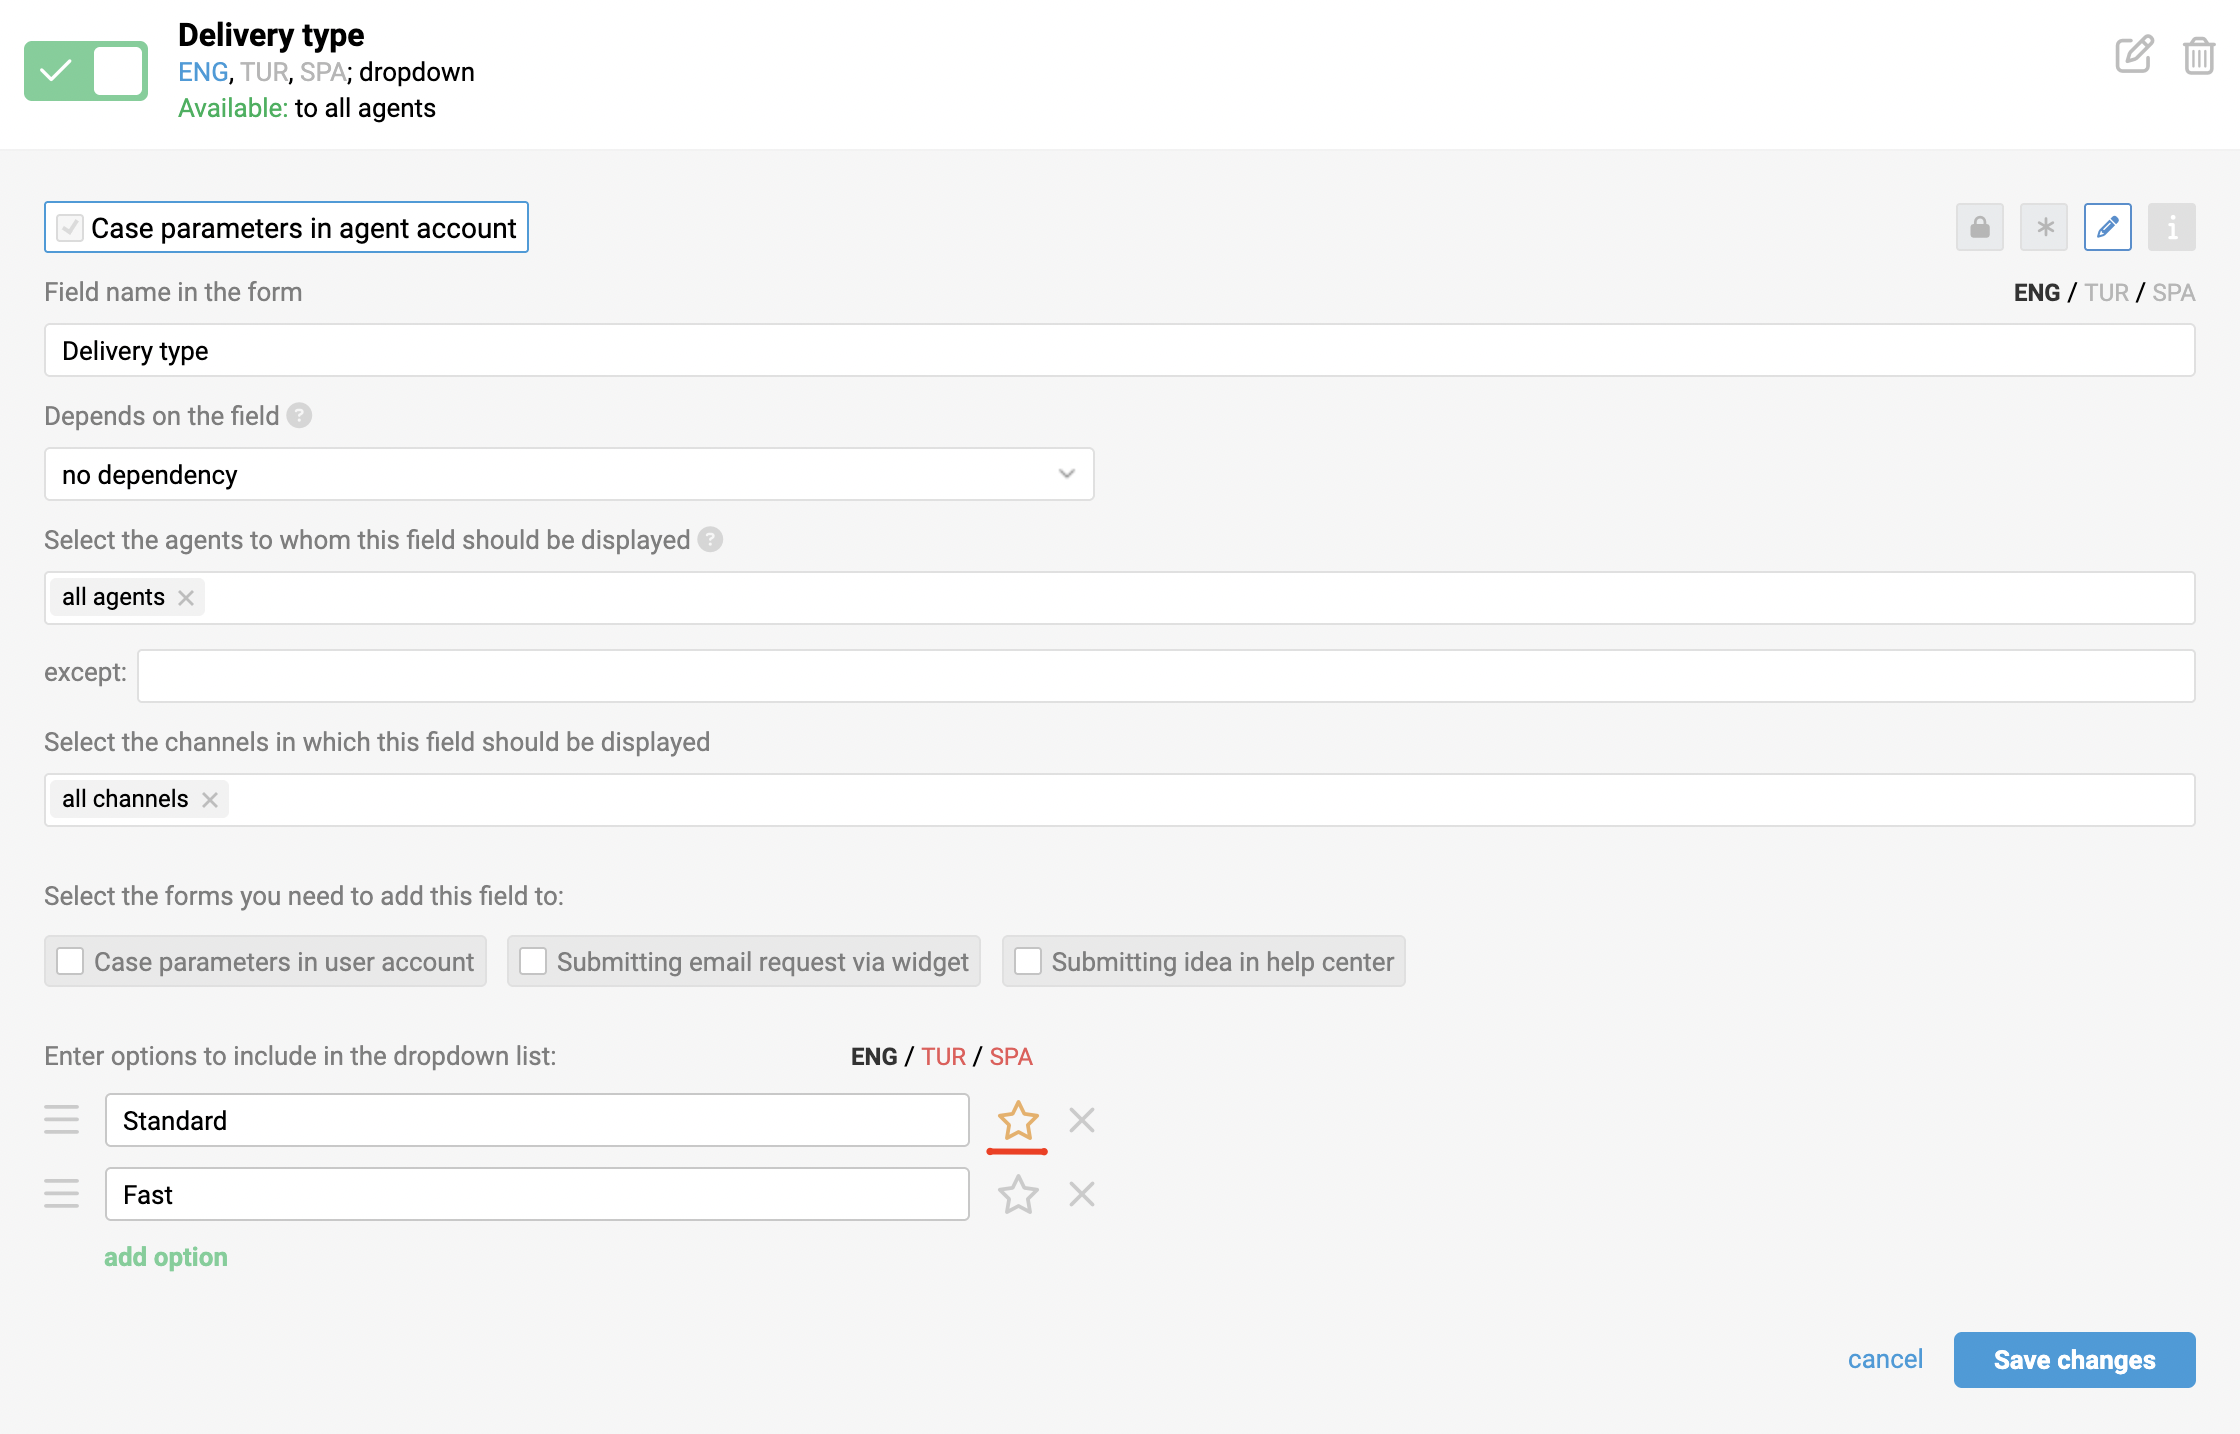
The selected default value will be applied only when creating a new case / user / company through the agent’s account interface or via the API, as well as when new cases are created through the widget or ideas form in the help center.
Additional fields for companies
A company's data can contain a lot of useful information essential for rule processing or for agents – for example, the paid tariff, number of enabled agents, contract expiration date, and so on.
To create an additional field for a company, go to: Administrator account → Channels section → Data fields subsection → click "Add field" → select "Company fields" as the affiliation.
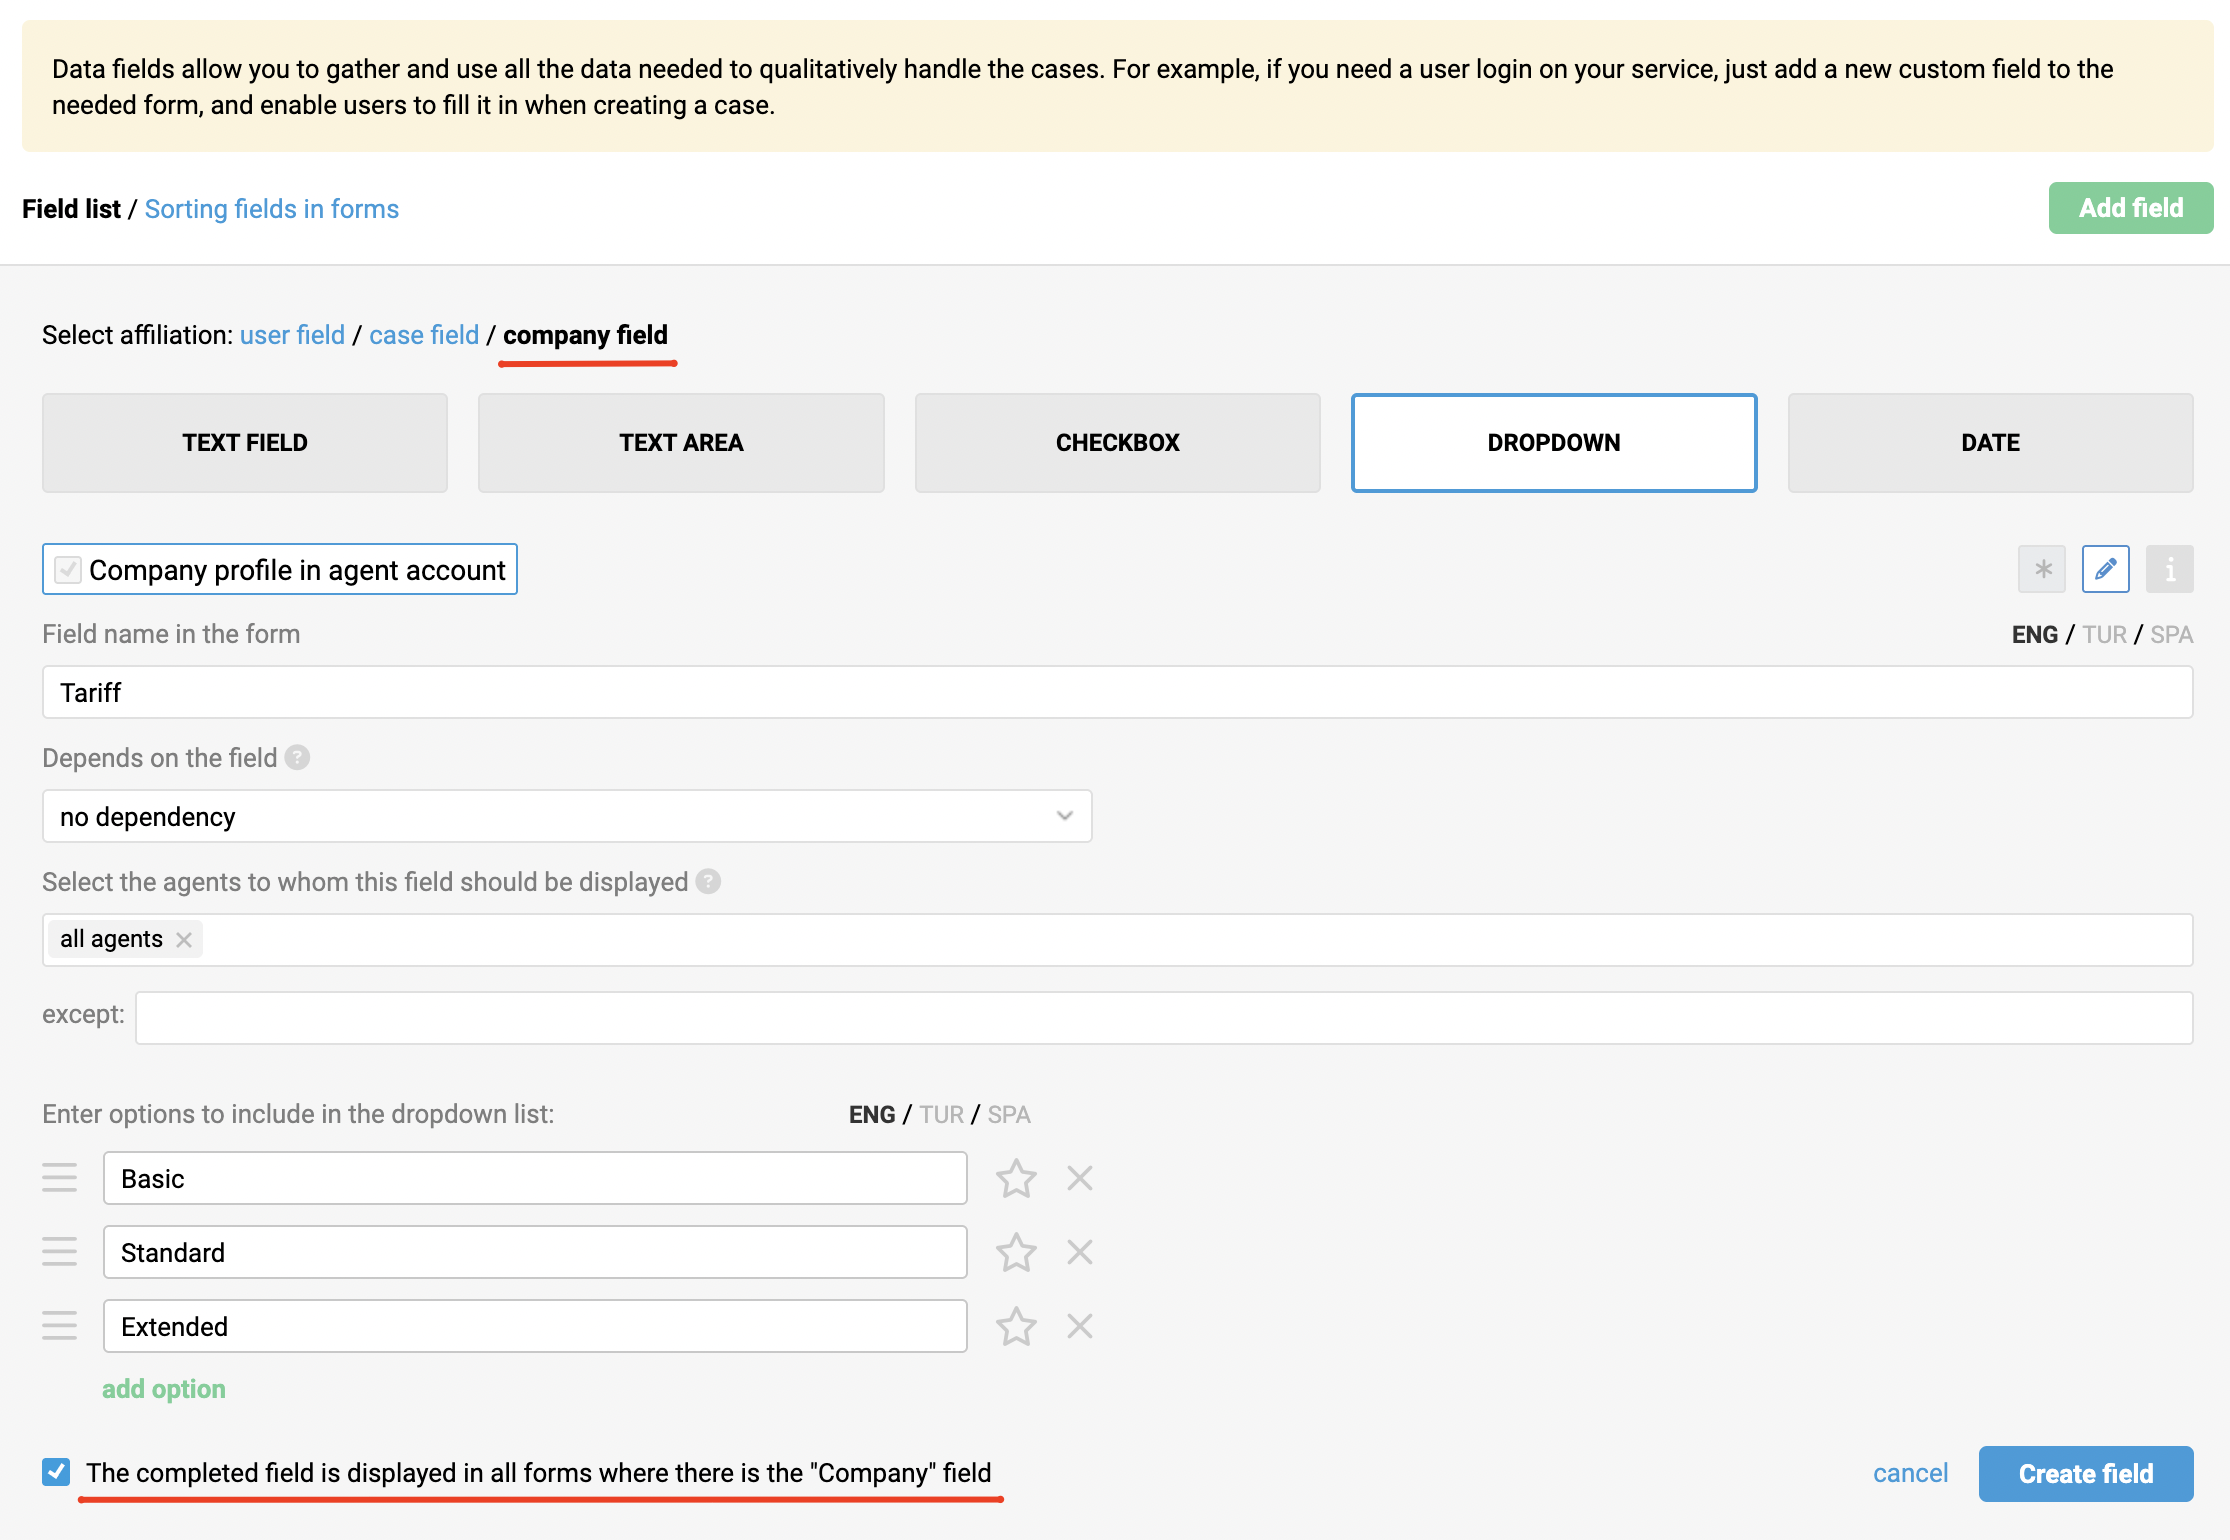
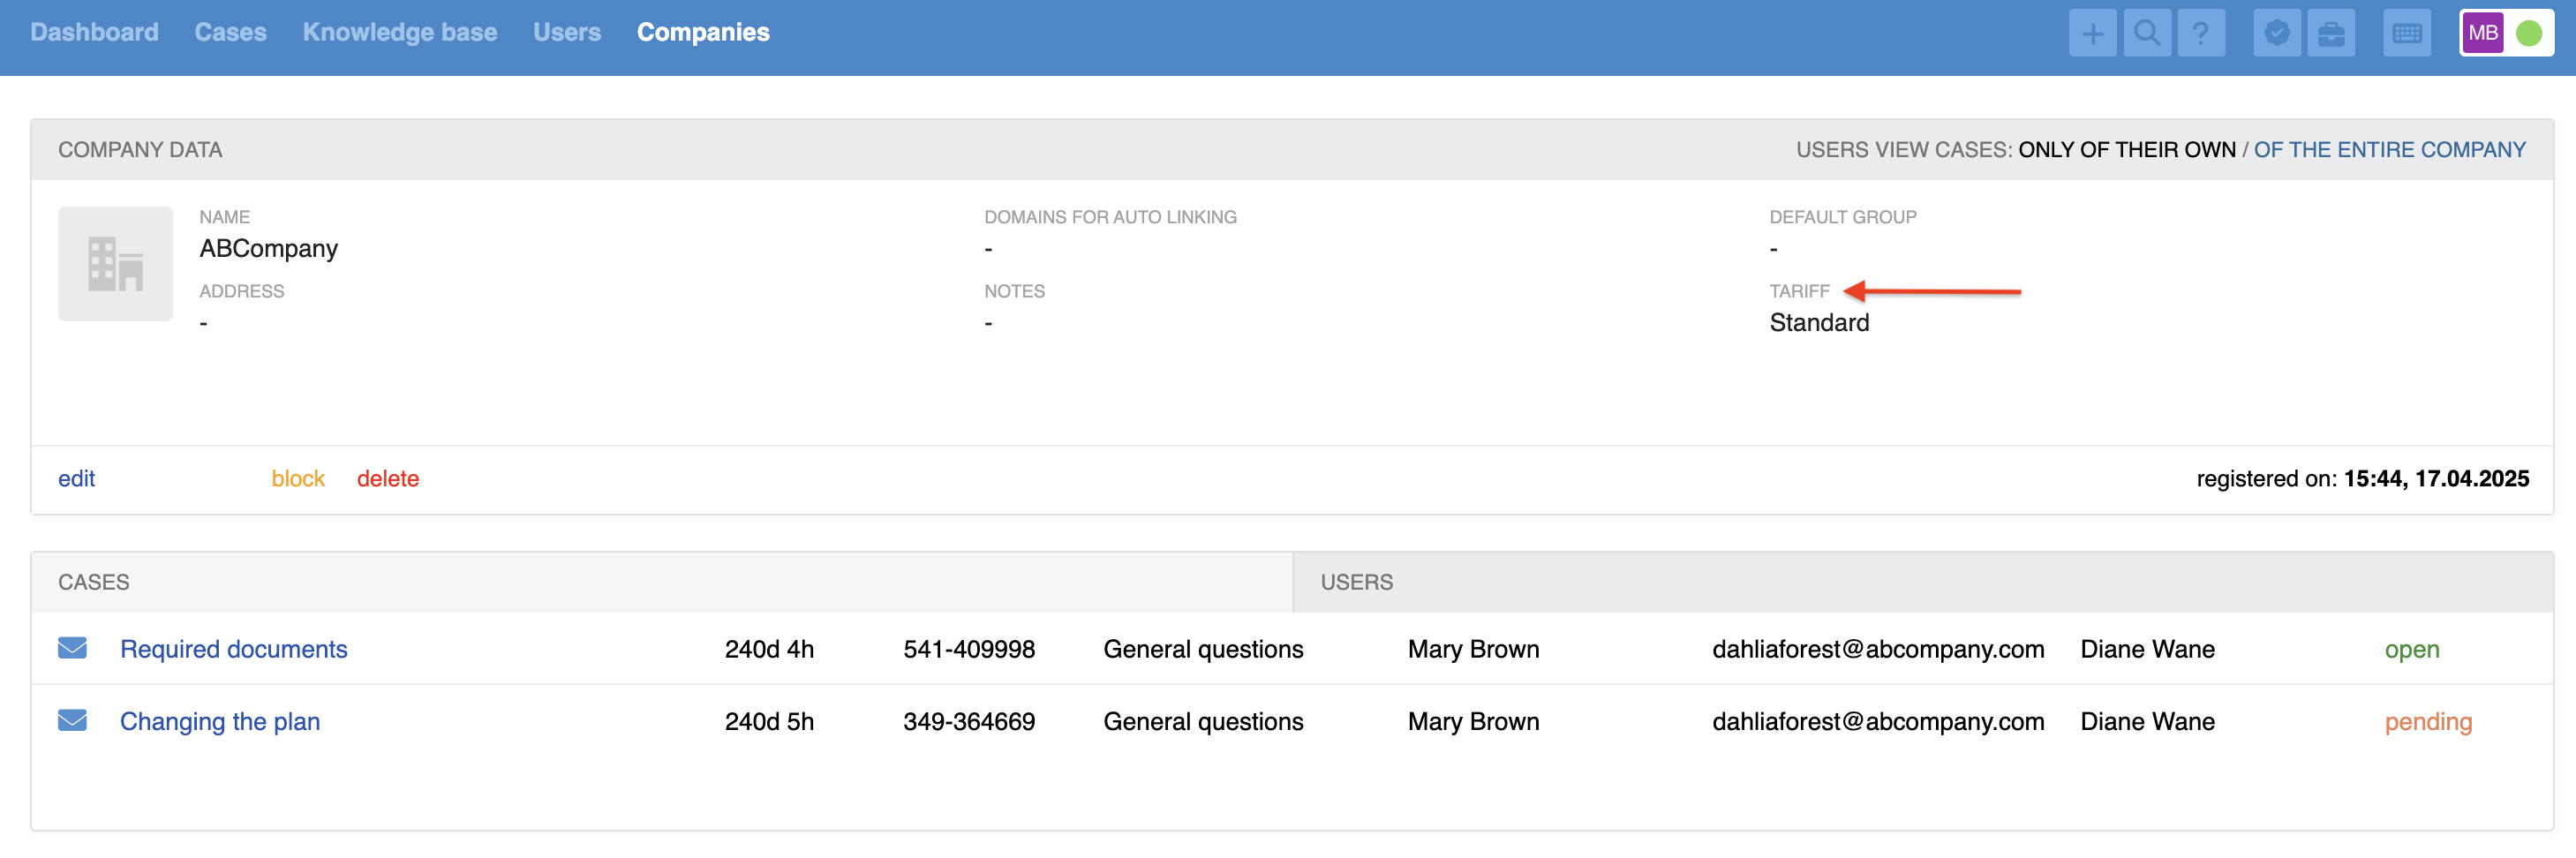
When creating a field, pay attention to the checkbox at the bottom of the form – "The completed field is displayed in all forms where there is the "Company" field". This checkbox is ticked by default. That means if this custom field is filled out, it will show up in the same forms where the "Company" field appears (on the case page in the user data panel, on the user's page, and in the incoming call card). This is handy if you want to see key company details right away without navigating to the company profile.
Although the company field will be visible in the user's data, it can only be edited on the company's profile page.
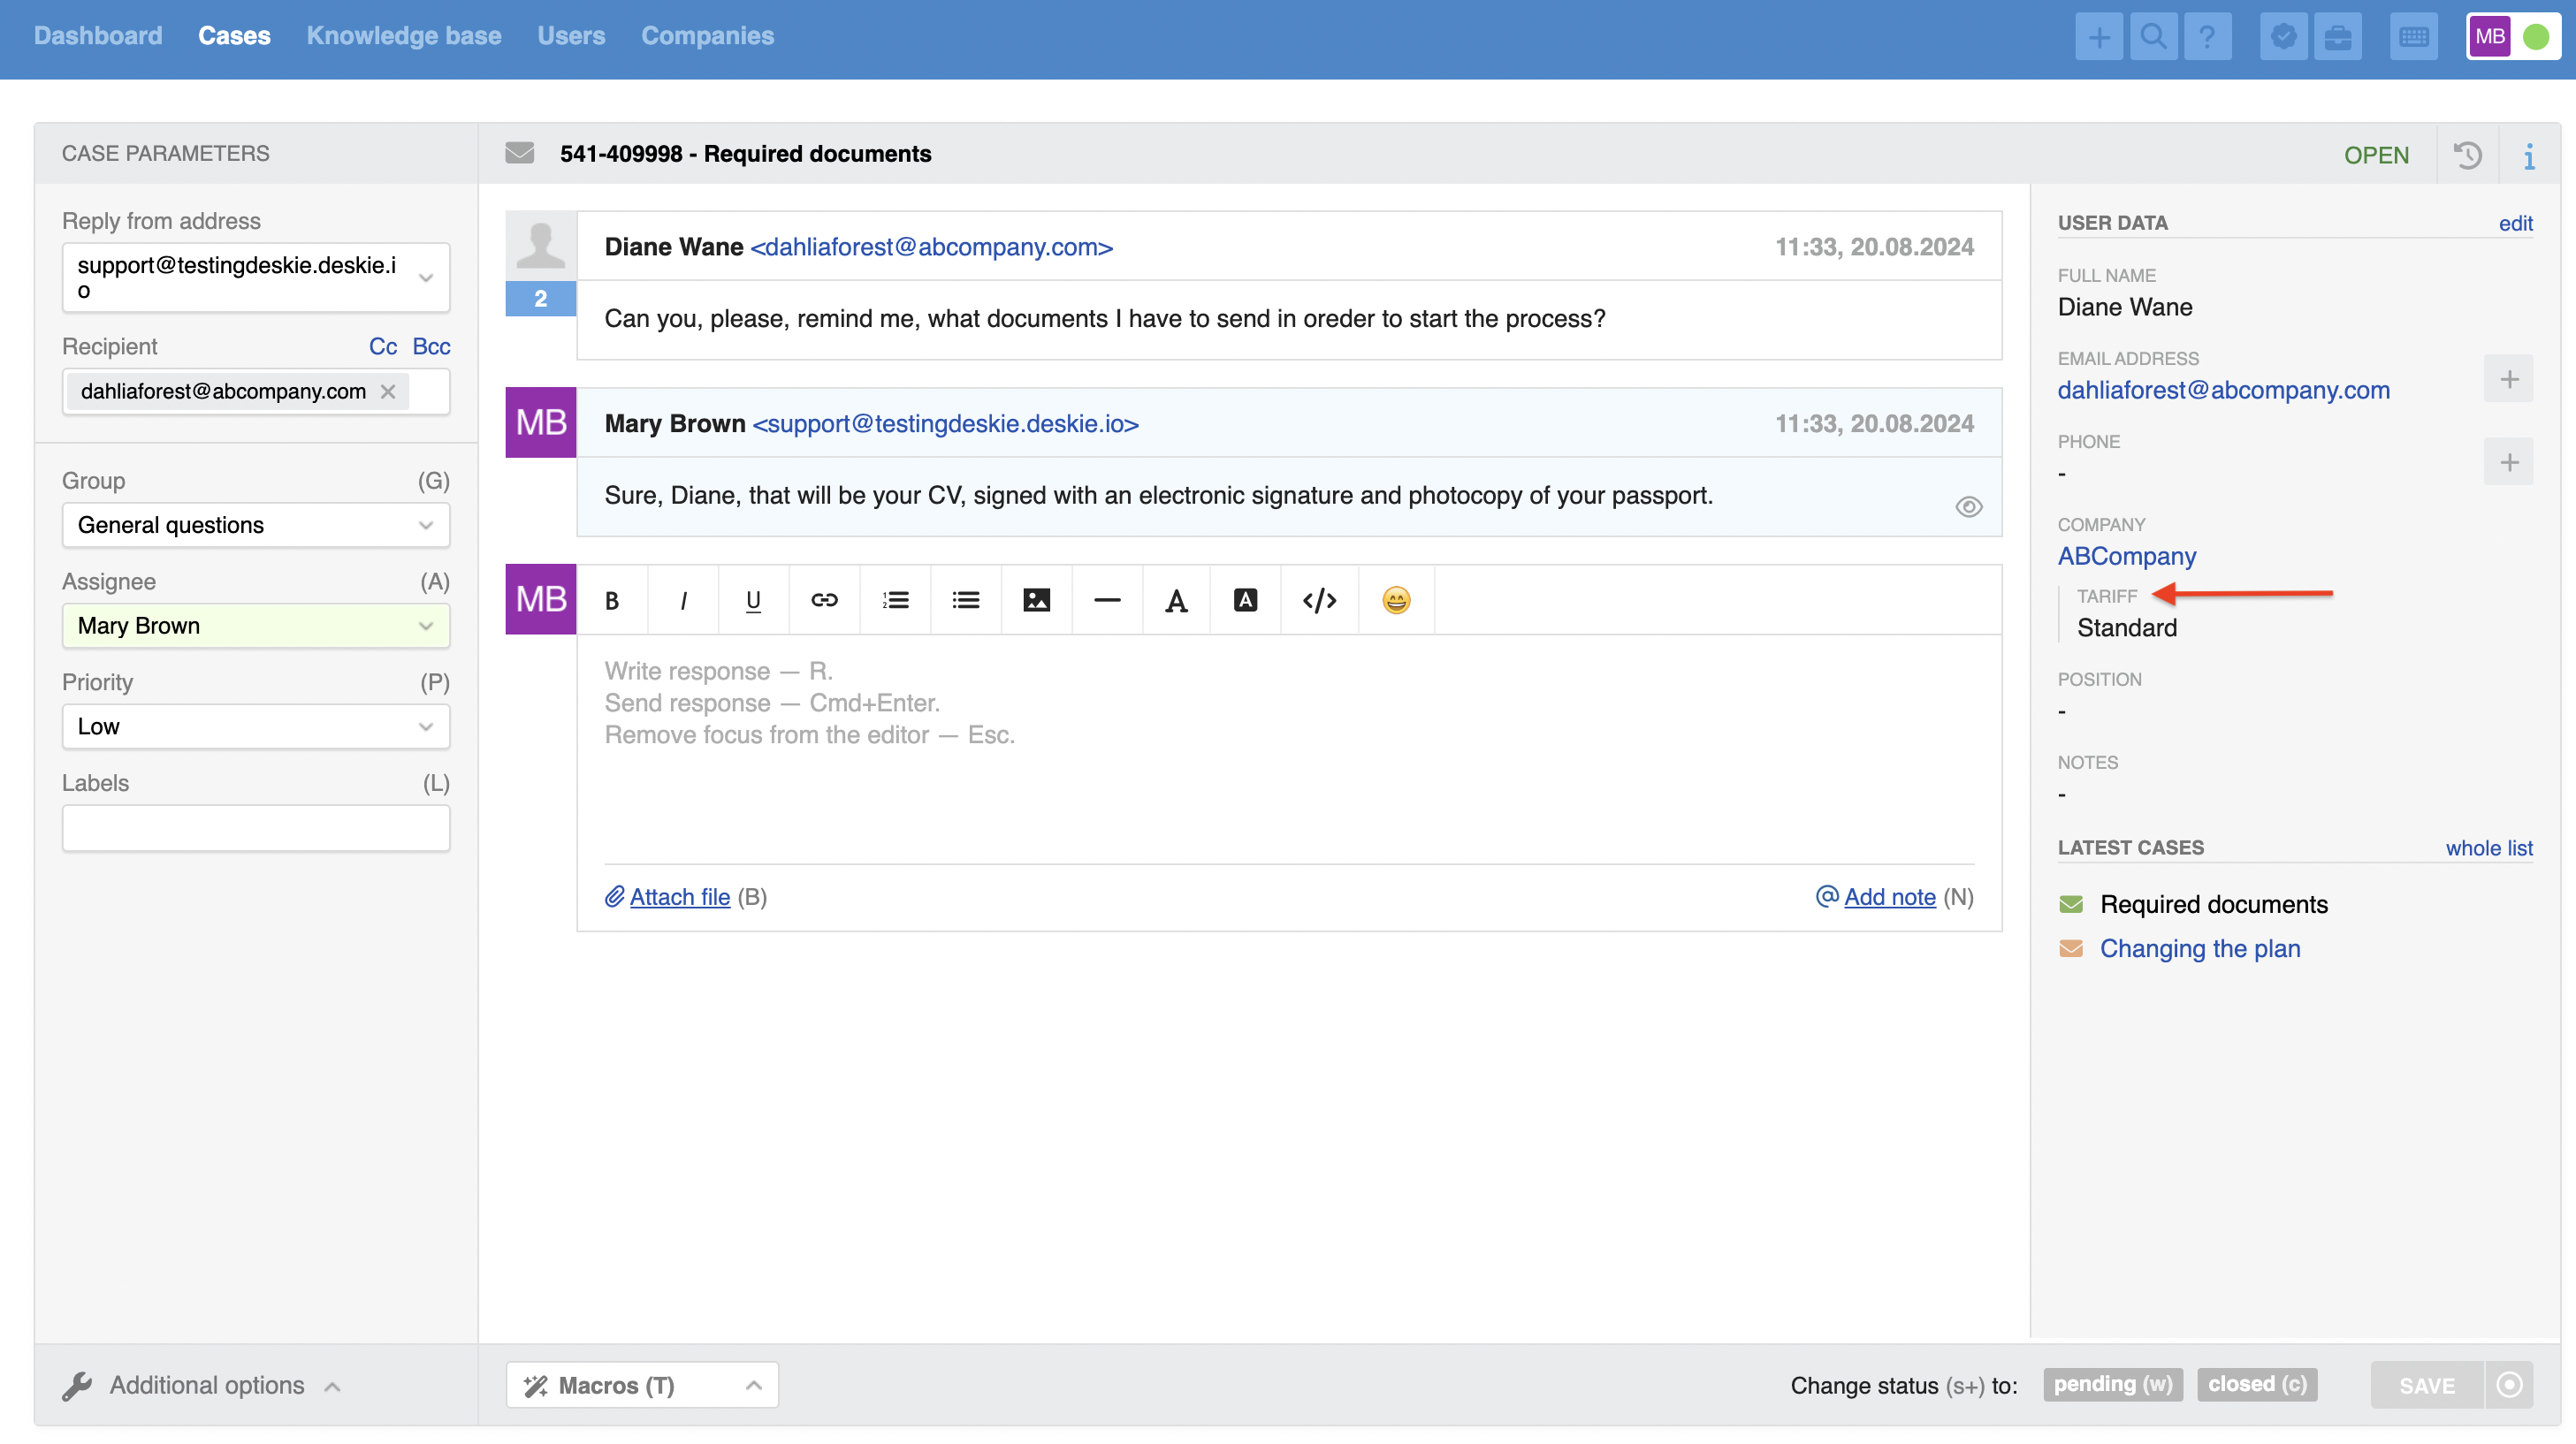
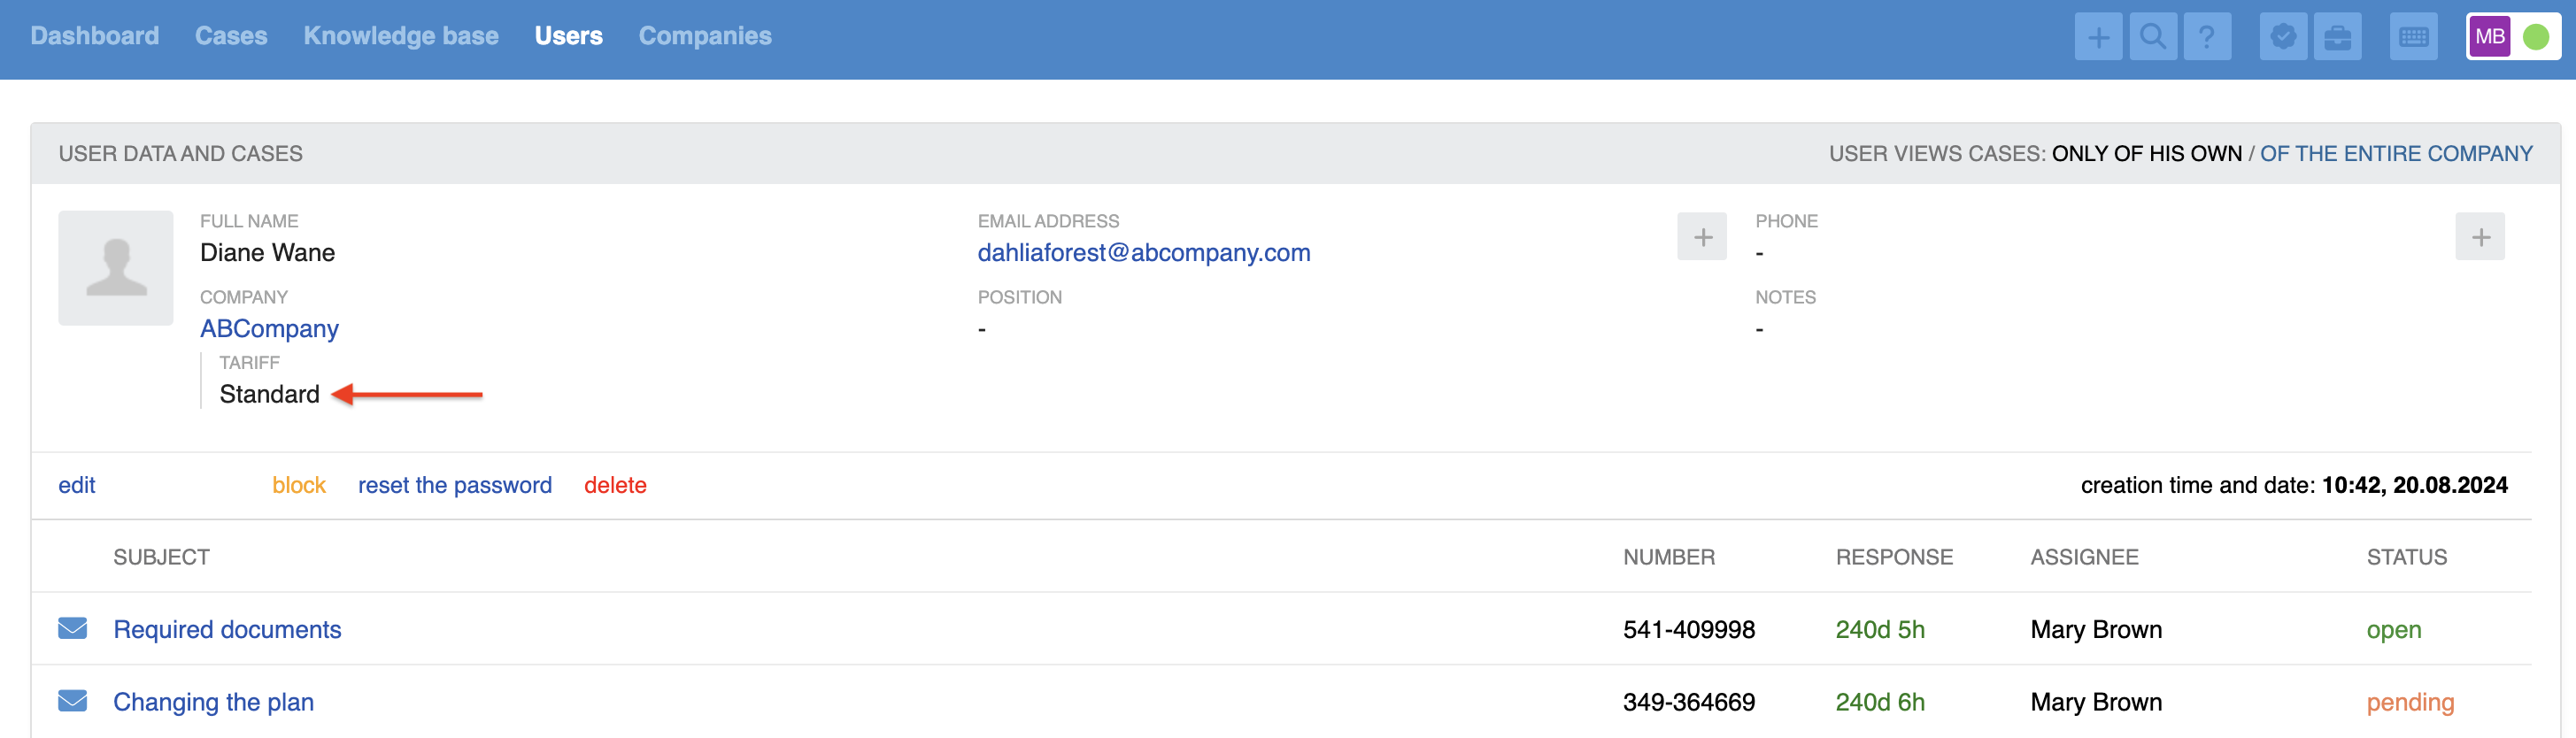
Company fields can also be used in automation rules: you can check their data through conditions and fill them in using actions.
Field visibility
Previously, it was only possible to set field visibility for all agents at once. This setting allowed data to be hidden in the interface while still using it in automation rules, reports, or via the API.
Now, in all forms available to agents, there's a flexible option to customize field visibility. You can select which agents see a field based on their roles, group access, or even specify individual names.
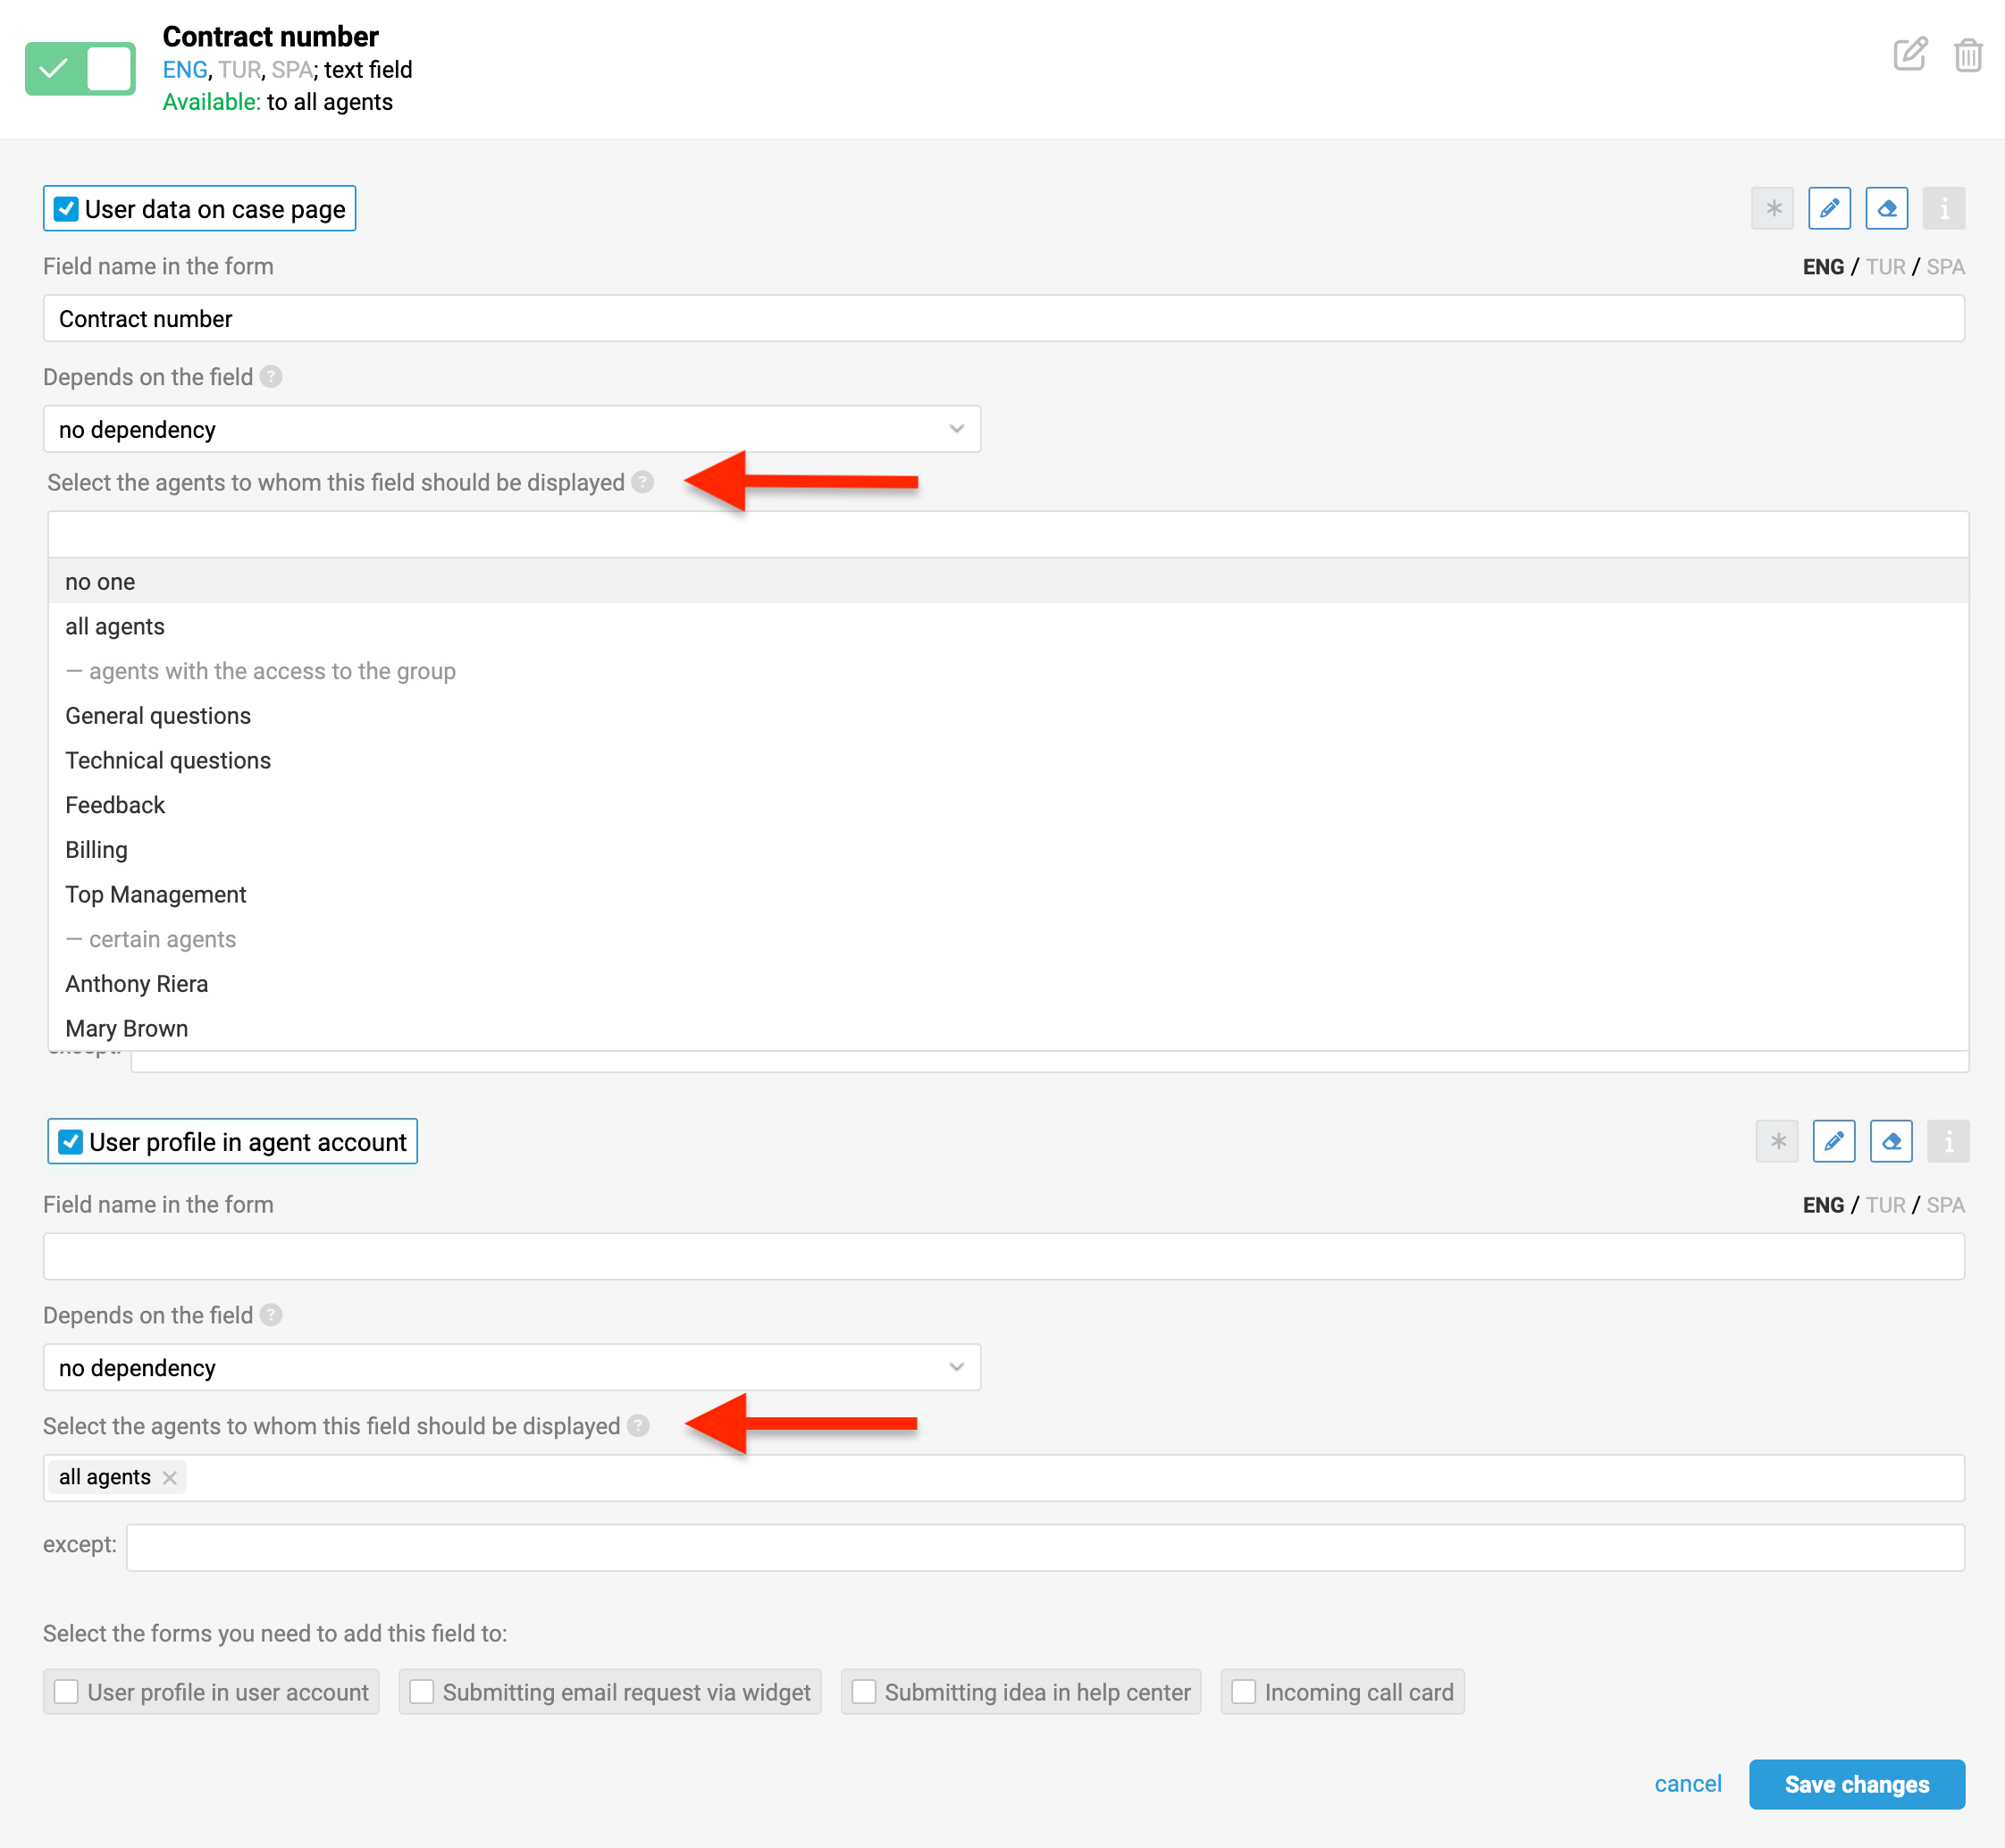
Field visibility can be customized separately for each form. For example, you can set it up so that certain information isn't visible to agents on the user data panel within a case, but is still accessible on the user’s profile page.
Besides hiding sensitive information, this setting helps simplify work for employees across different departments. For instance, you can make sure that accounting staff only see fields related to contracts, invoices, and deadlines, while support agents see information about the purchased product and subscription plan.
Hidden fields can still be used in automation rules, reports, and via the API as before.
For existing fields in forms where visibility was enabled, the option was set to "all agents". In forms where visibility was disabled, the option was set to "no one".
Dependent fields
Previously, Deskie did not support creating hierarchical field structures, such as those where each category has only its specific subcategories.
As a result, you had to either create the entire structure within a single field, which was difficult to manage due to a large number of options or create separate fields that were always visible, even when they weren't needed for a specific category of issues.
Now, this can be easily resolved by configuring field dependencies.
1) Dependency in different forms
In all forms, dependencies can only be set if two conditions are met:
dependent fields must have the same affiliation – either to the case, the user, or the company;
both fields must be added to the same form.
An exception is made for the form "Submitting email request via widget", where dependencies can be set based on fields of any affiliation added to this form.
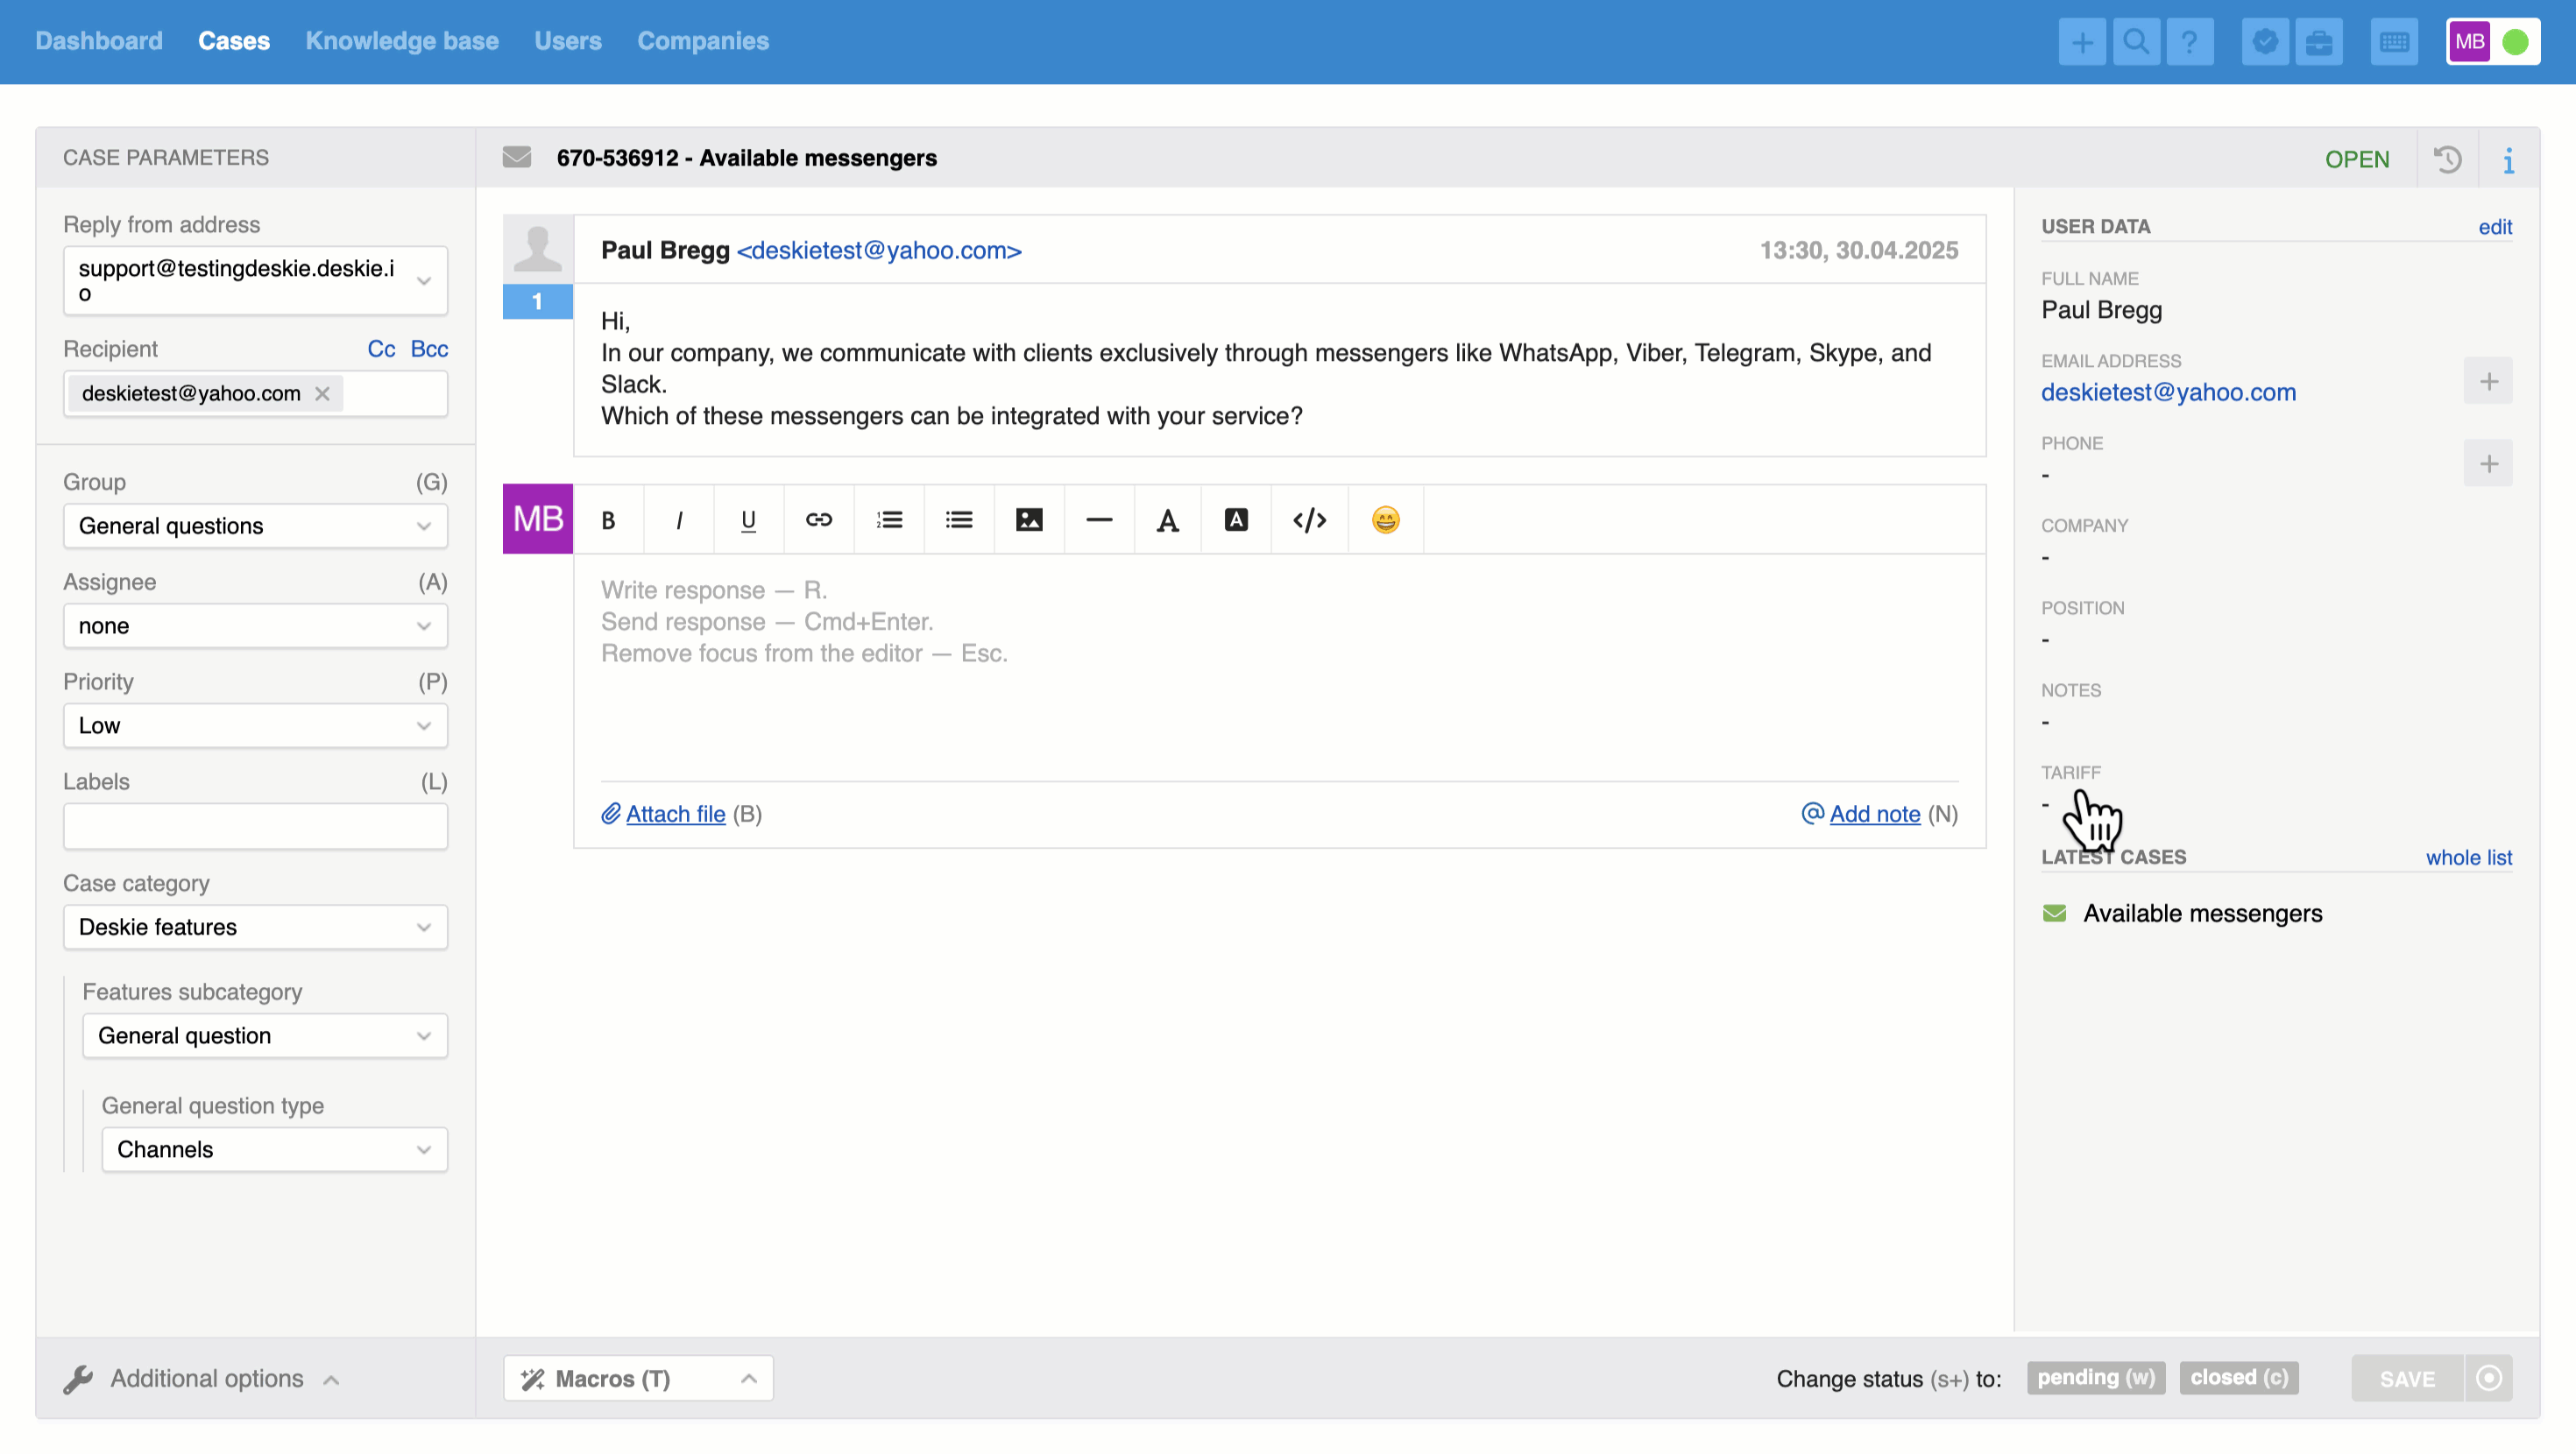
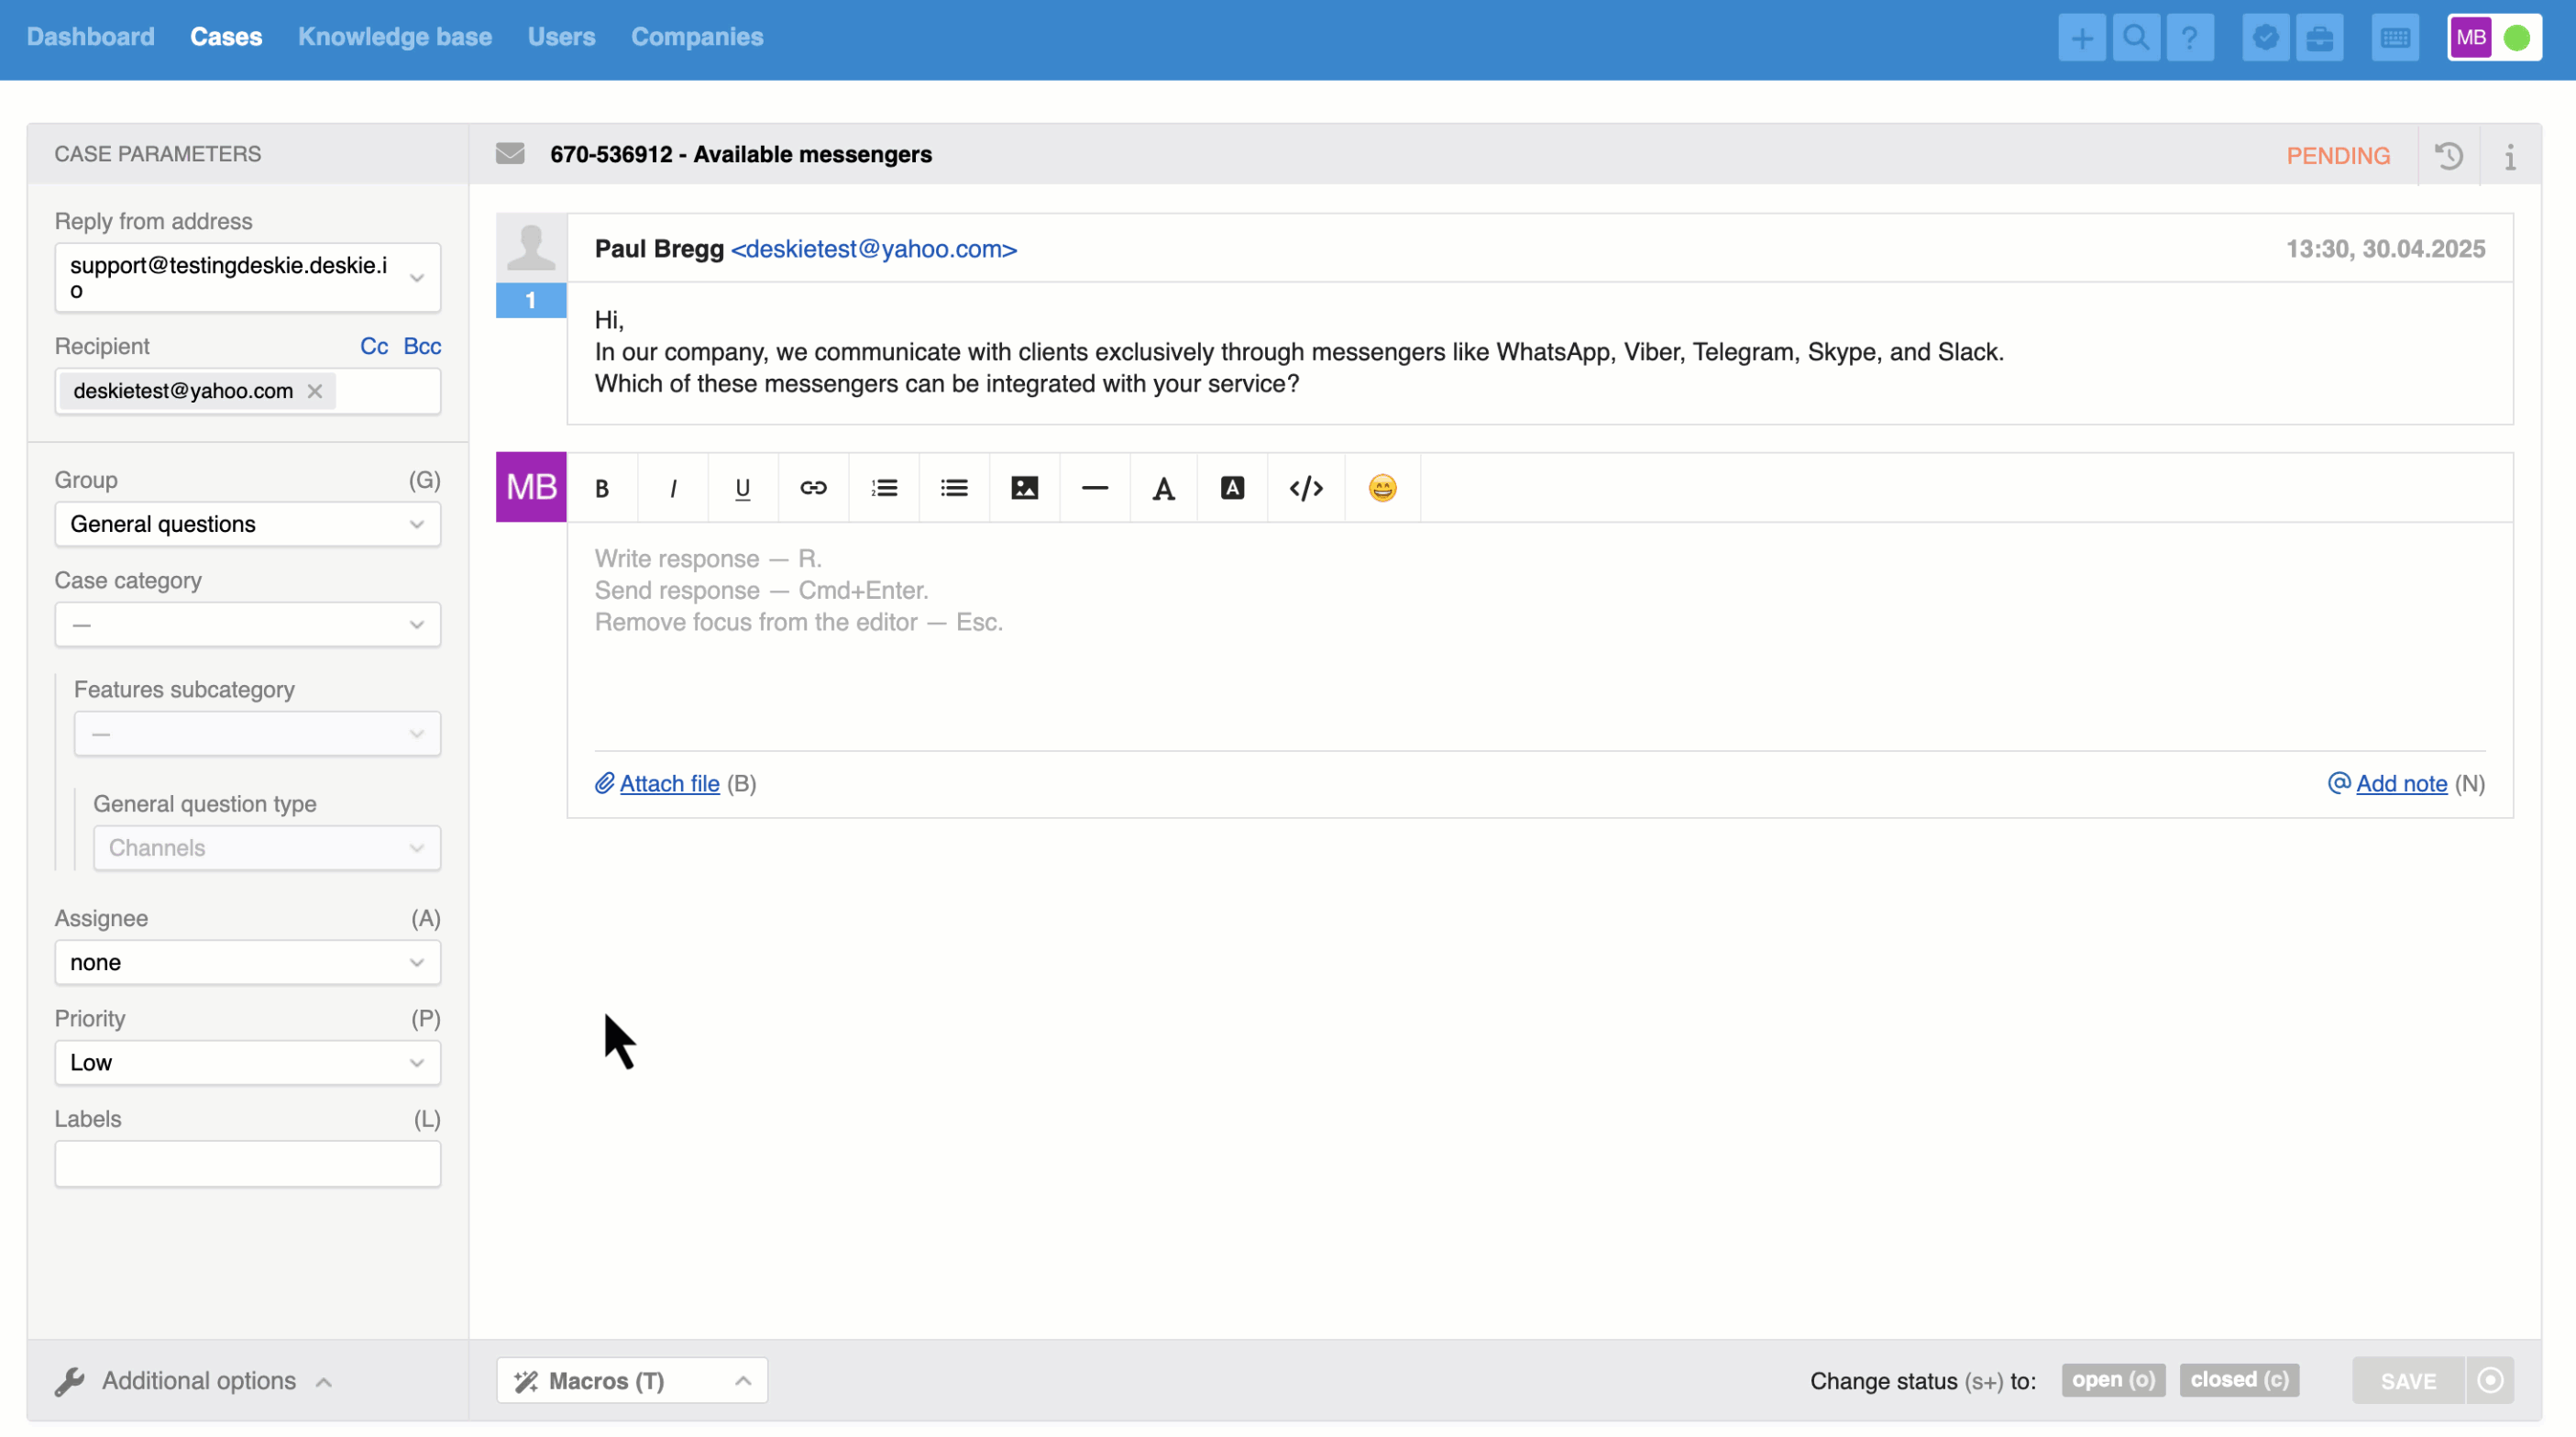
Let’s look at a specific example. We'll add a custom user field called "Contract Number". Since this is a user field, dependencies can only be set in the following forms: "Adding user in agent account", "User data on case page", "User profile in agent account", and "User profile in user account". Moreover, the value of this field can only depend on other user fields. We will specify that the "Contract Number" field depends on the "Tariff" field.
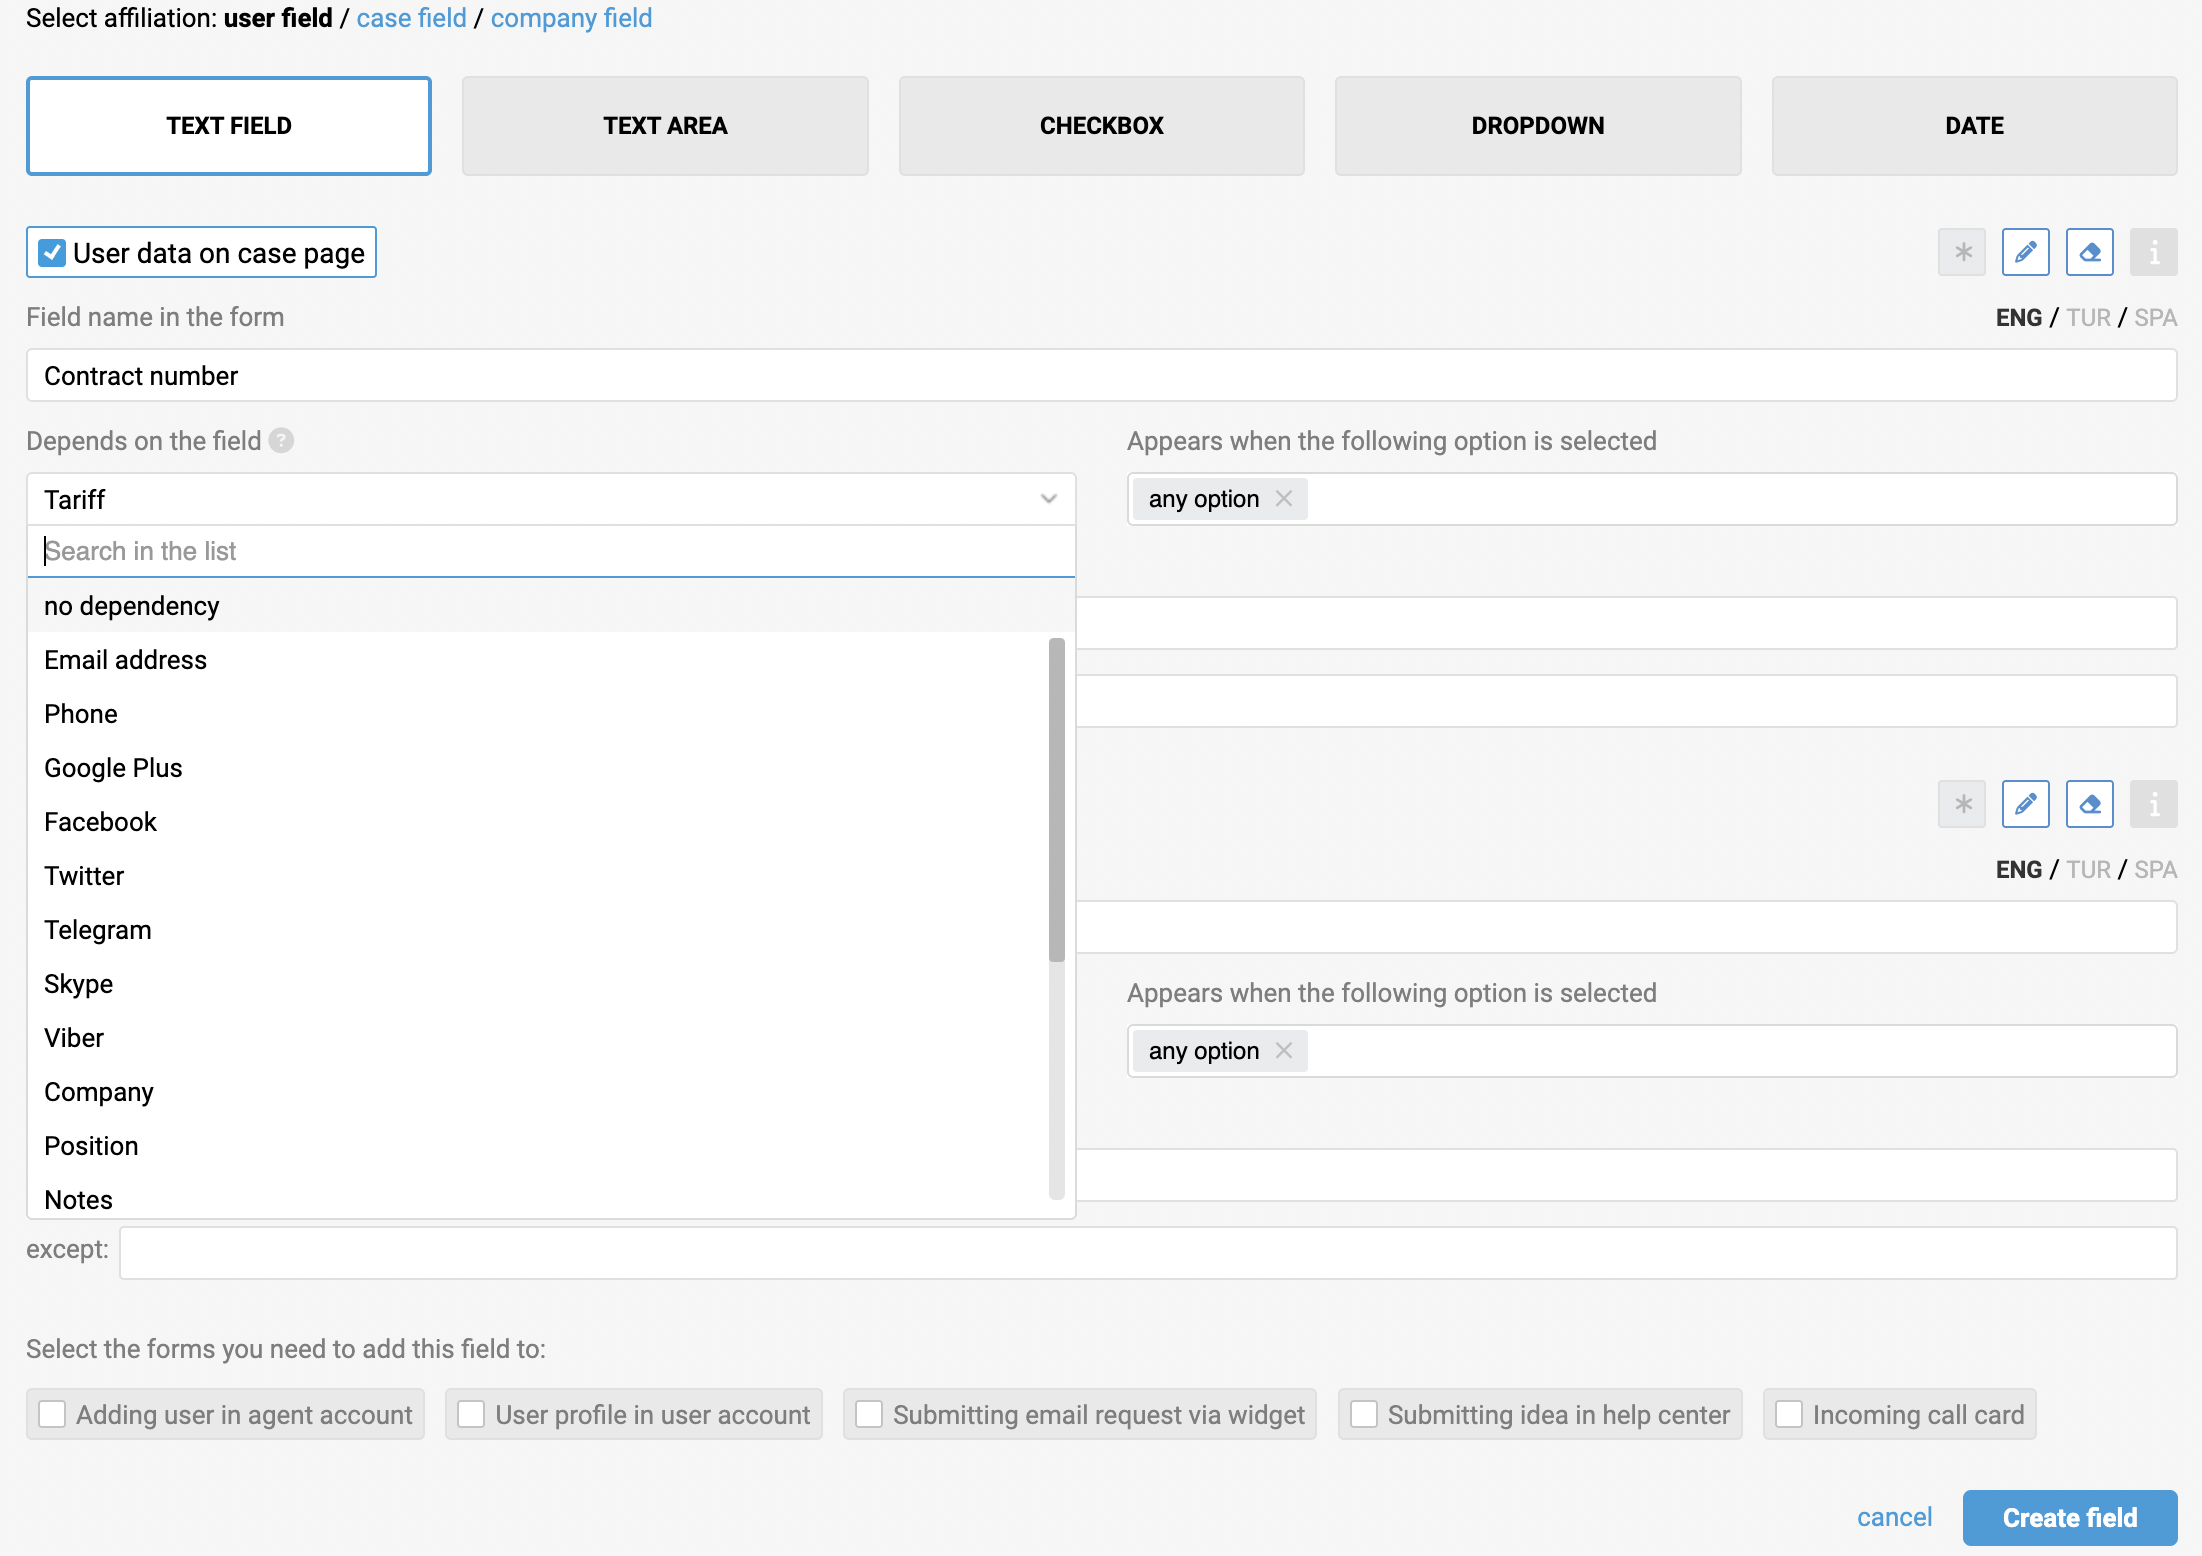
As a result, the "Contract Number" field will only be displayed if the user's "Tariff" field is filled in.
At the same time, dependencies can be set based on fields of any affiliation in the forms "Submitting email request via widget" and "Submitting idea in help center" since these fields can coexist in those forms. For example, we'll set the dependency of our "Contract Number" field on the "Group" field with the value "Billing".
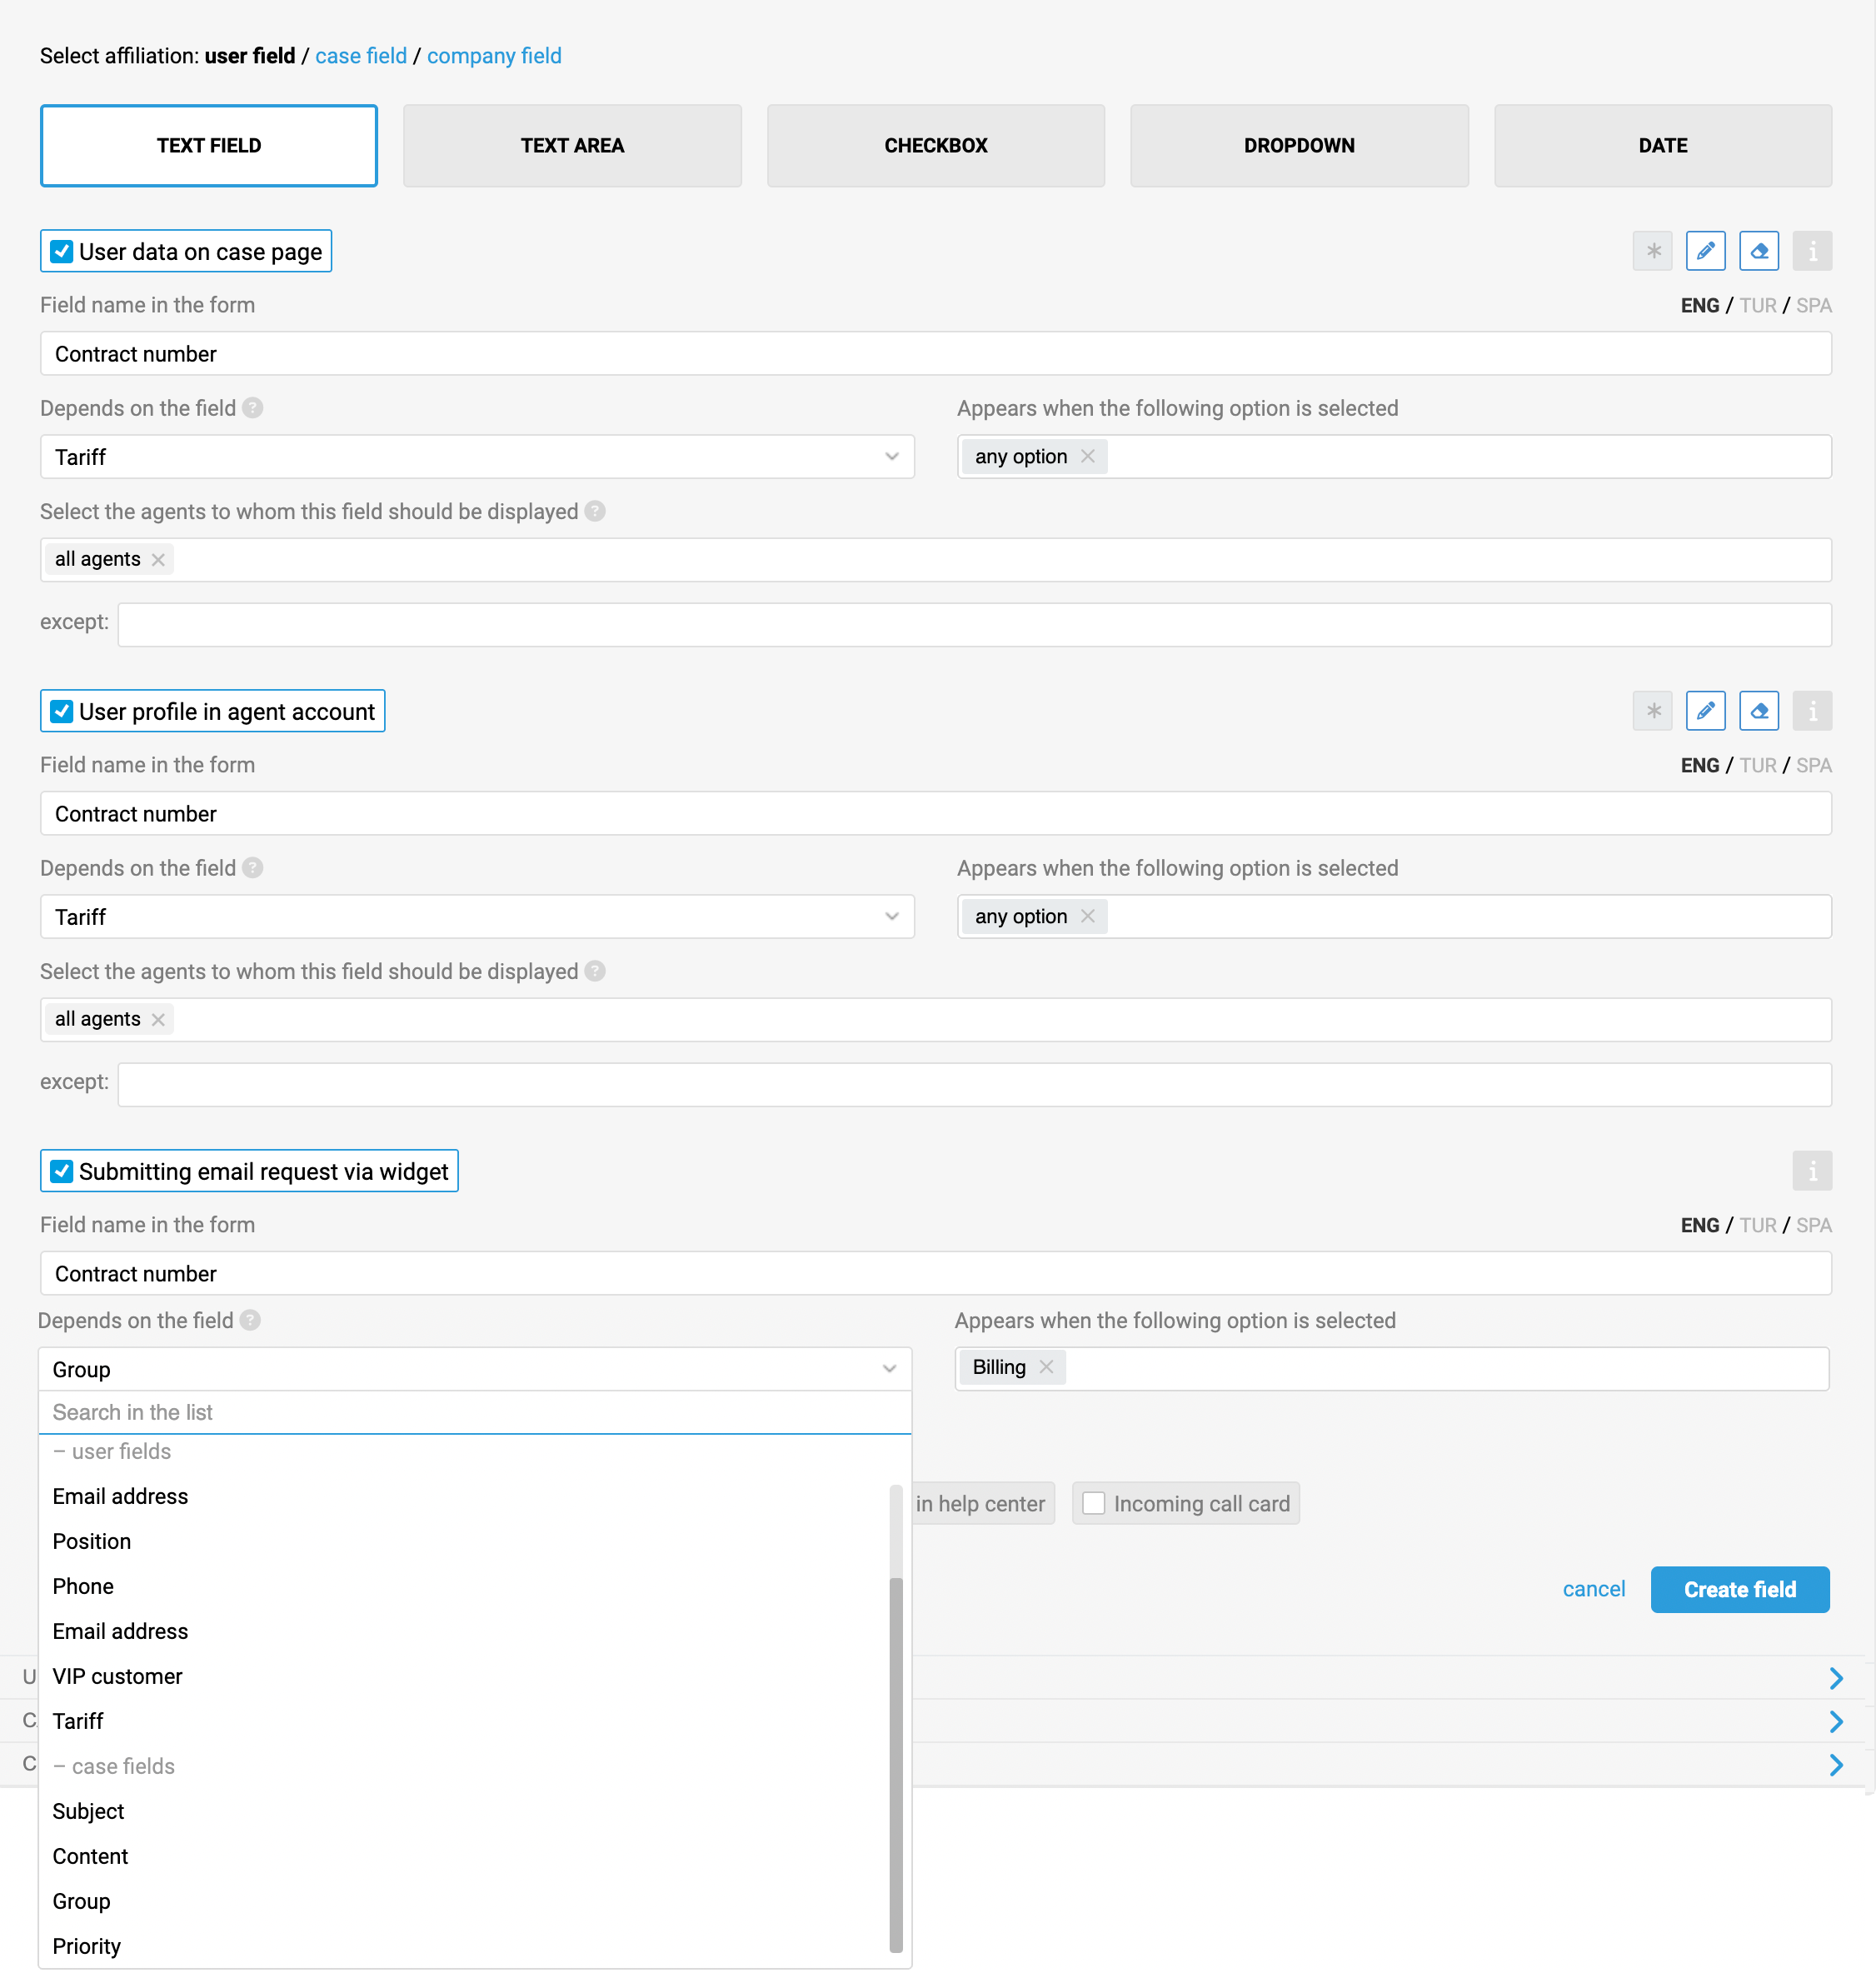
As a result, the "Contract Number" field will appear in the form if the user selects the "Billing" group in the email request widget.
The same applies to case fields. In the forms "Case parameters in agent account" and "Case parameters in user account", dependencies can only be set based on other case fields added to those forms. However, in the forms "Submitting email request via widget" and "Submitting idea in help center" dependencies can be set based on any field.
2) Dependence on different types of fields
Dependencies can be set in any field and will work as follows:
Choosing a dependency on fields of the types "text field", "text area", "checkbox" or "date" means that the dependent field will appear if the parent field is not empty – that is, if any text is entered in the text field or area, the checkbox is ticked, or a date is specified;

When you set a dependency on the "Dropdown" or "Labels" fields, you can choose specific values that will make the dependent field appear.
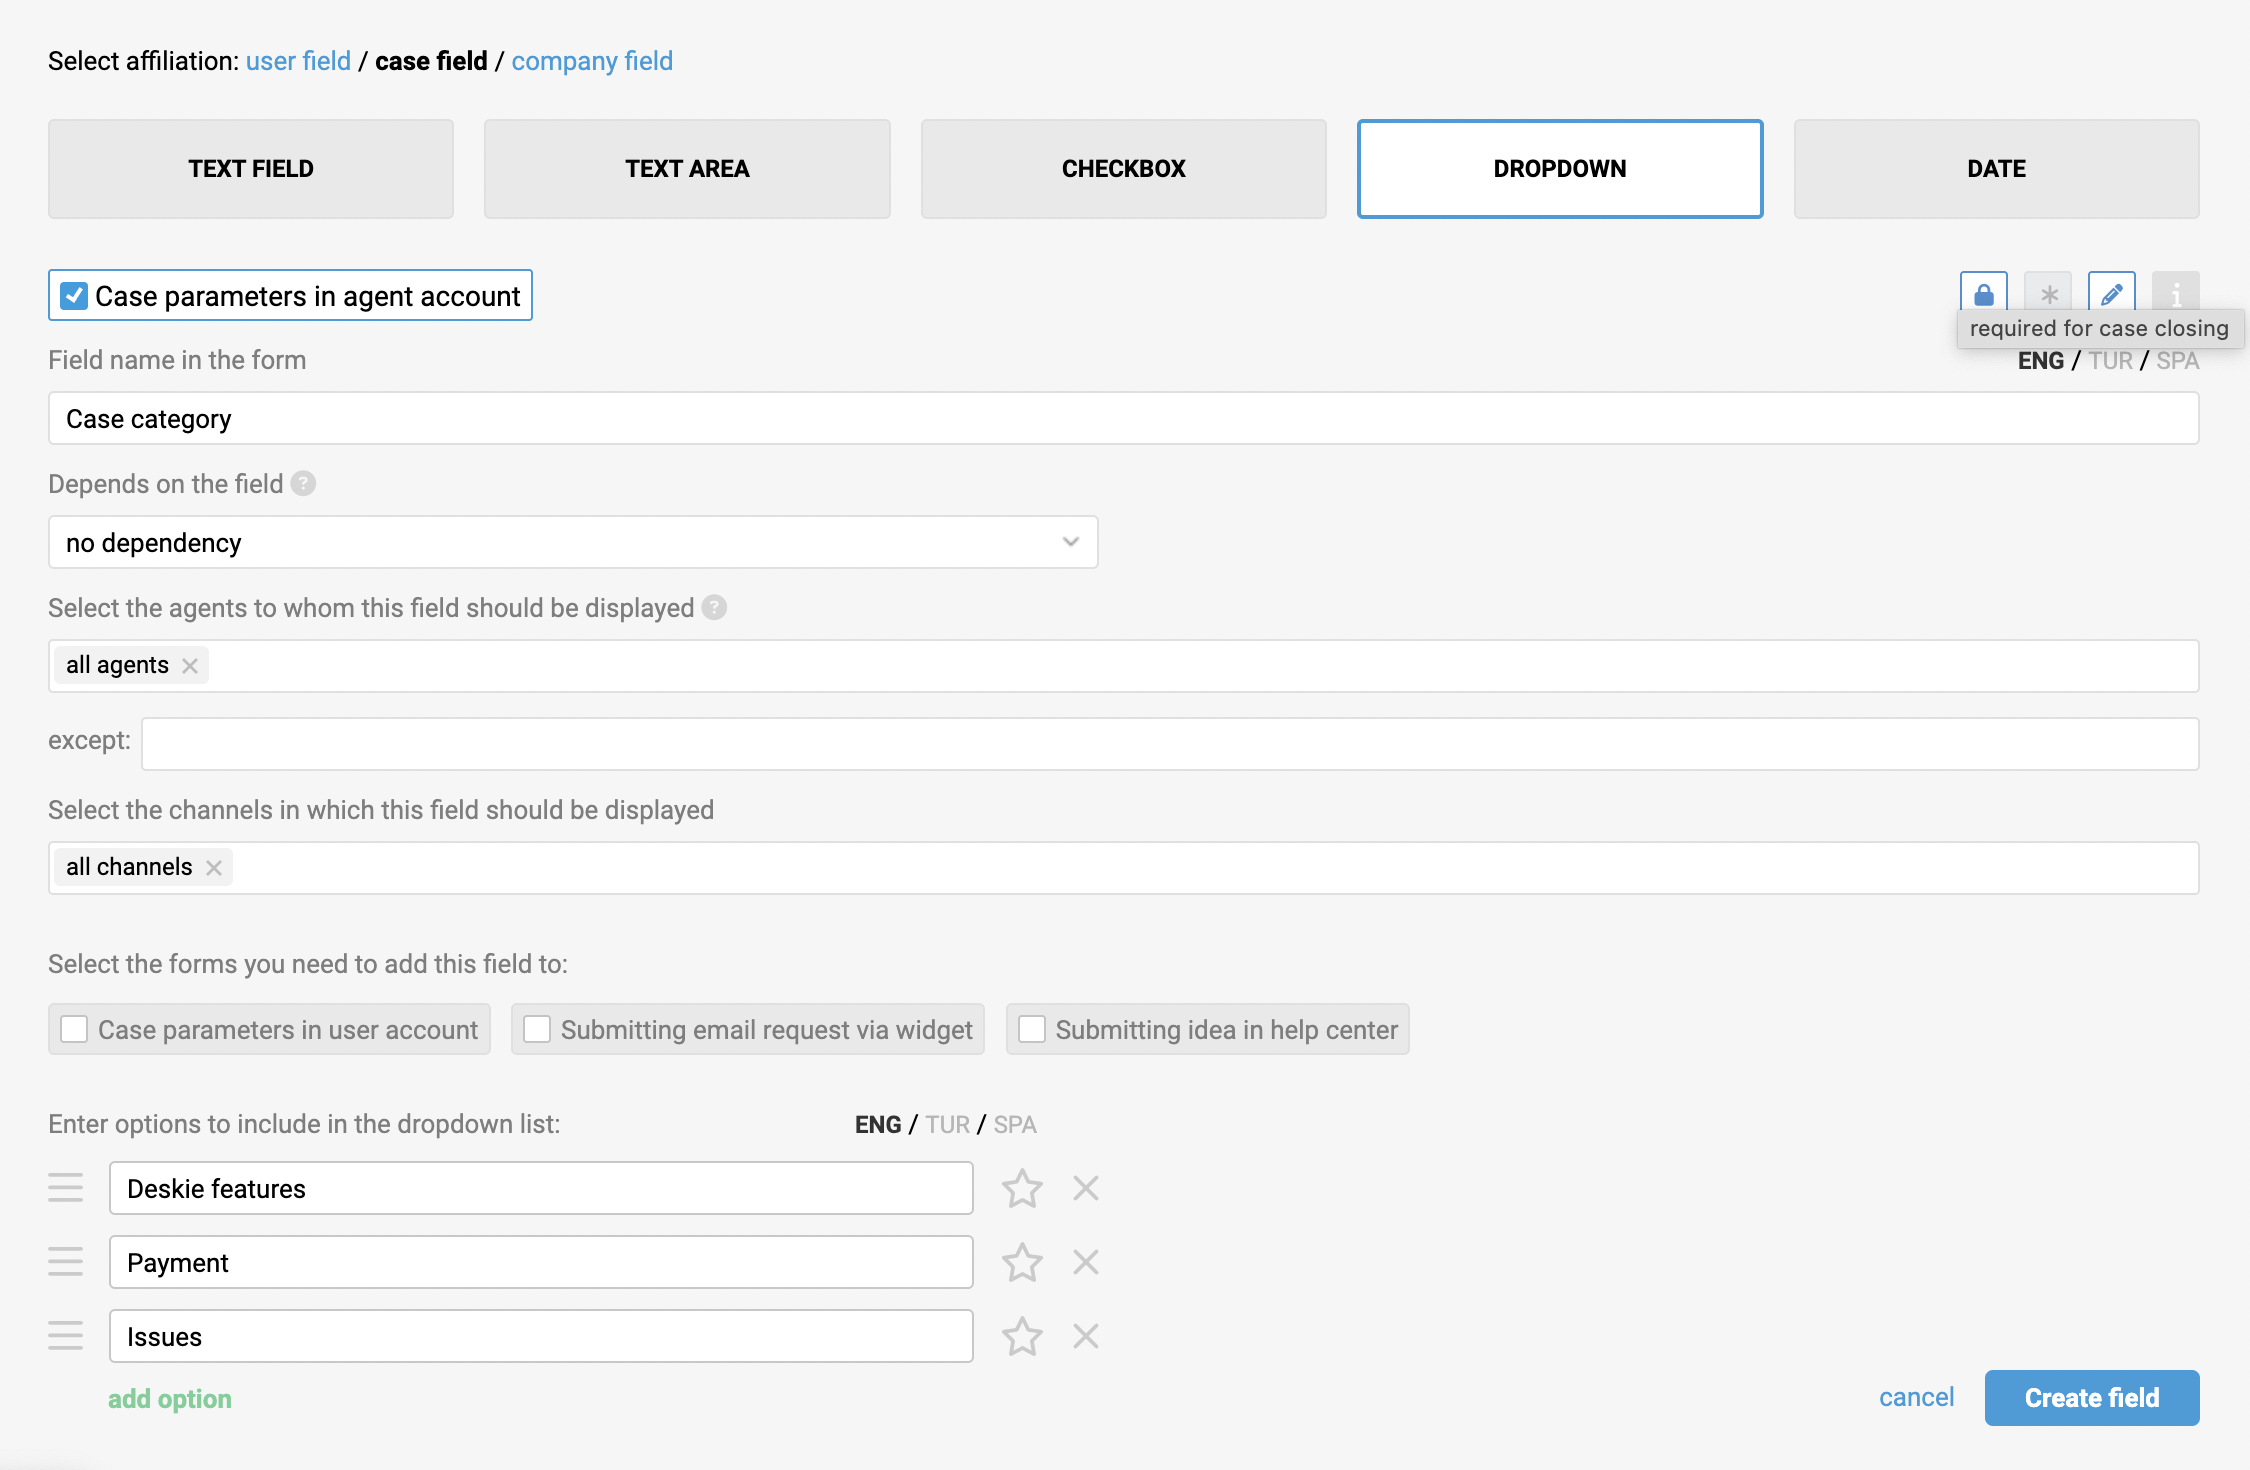
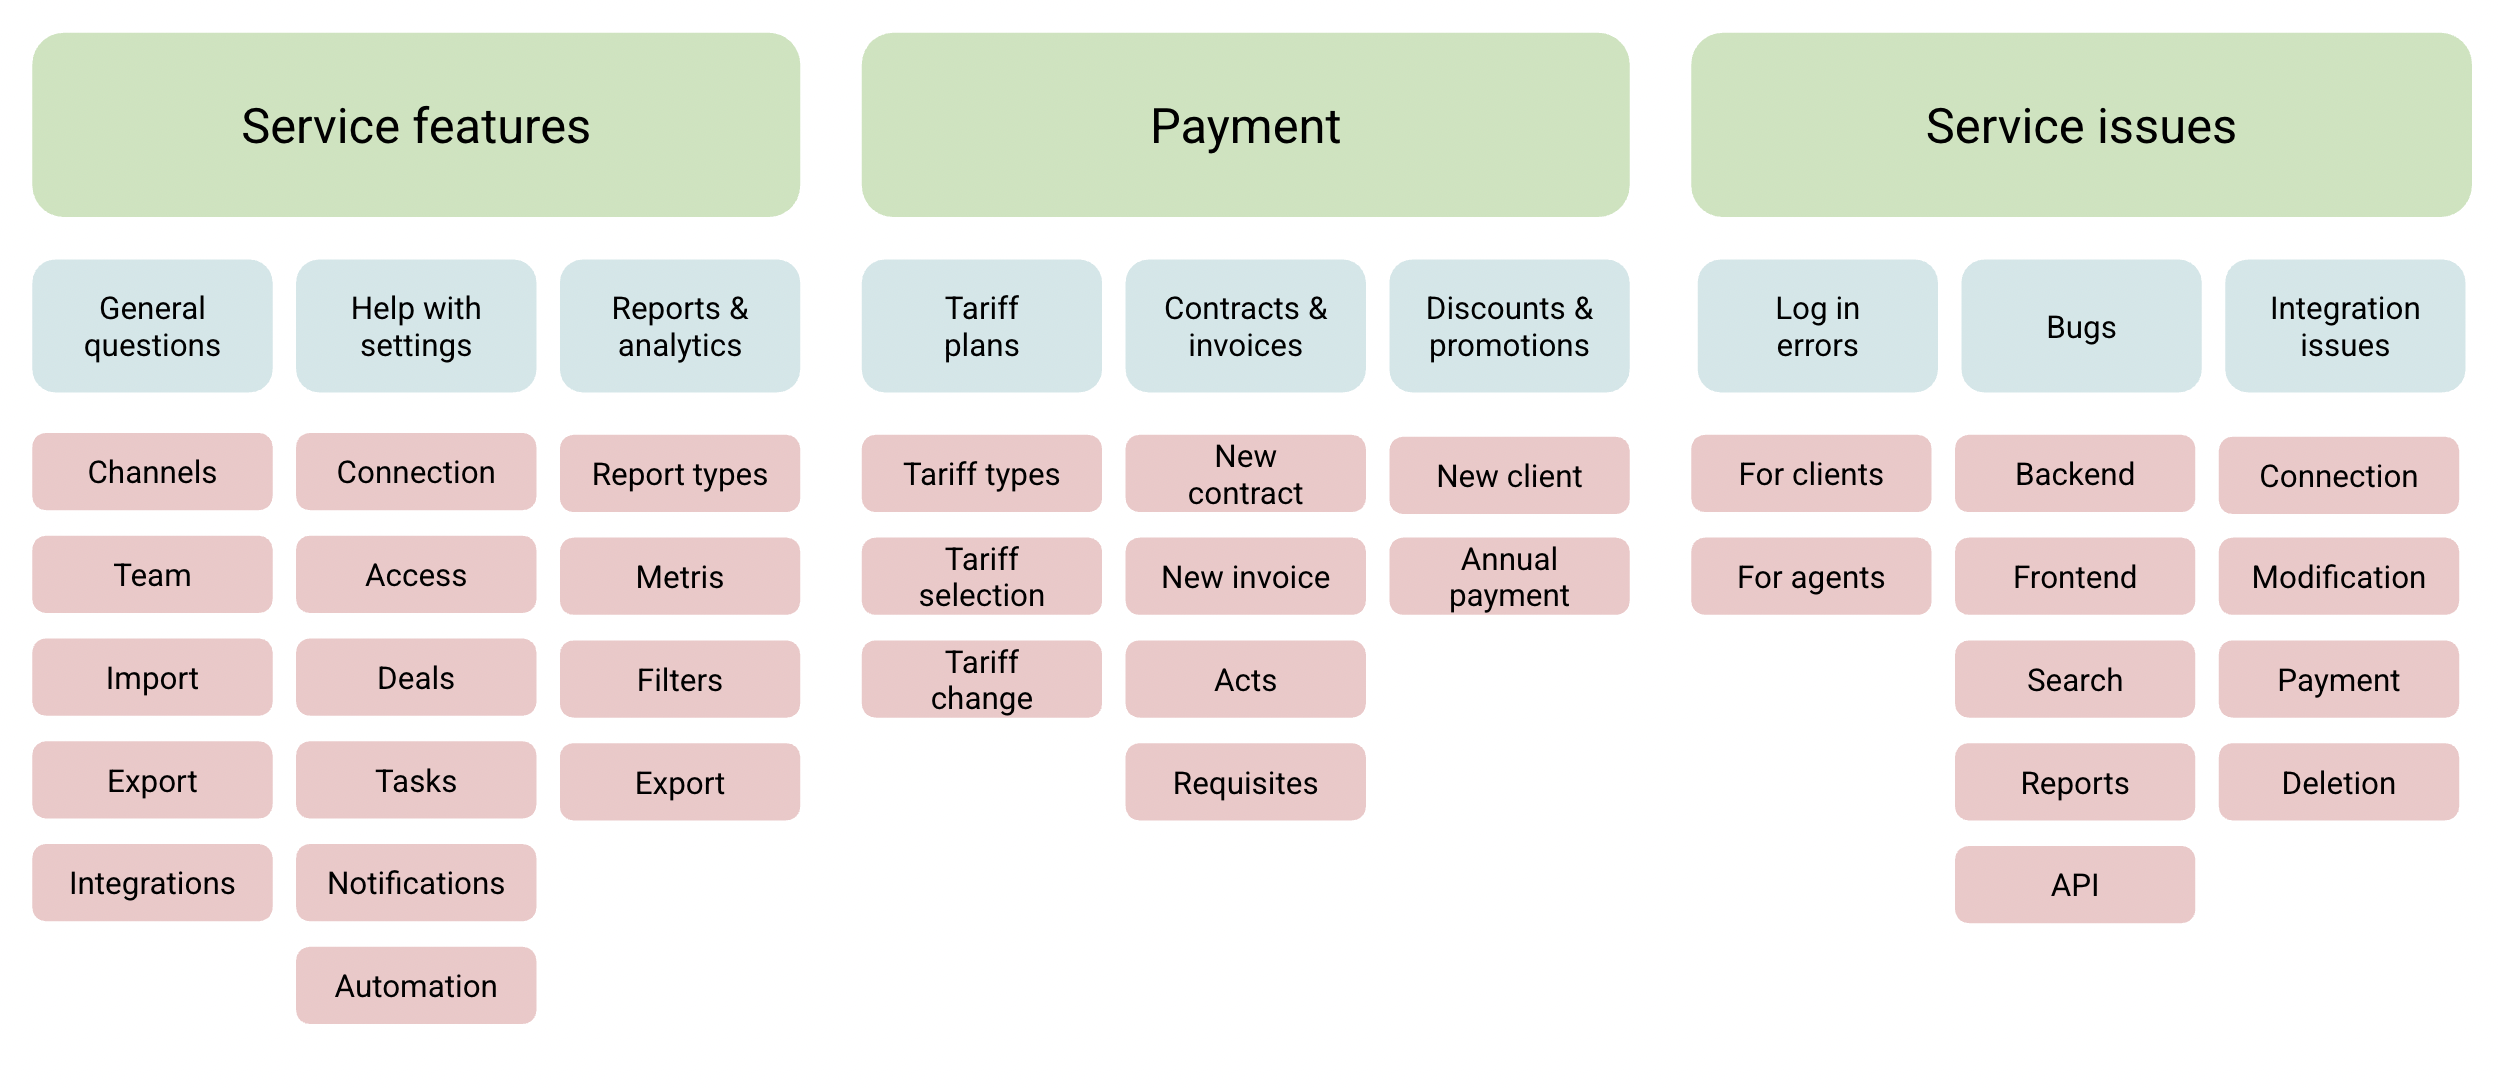
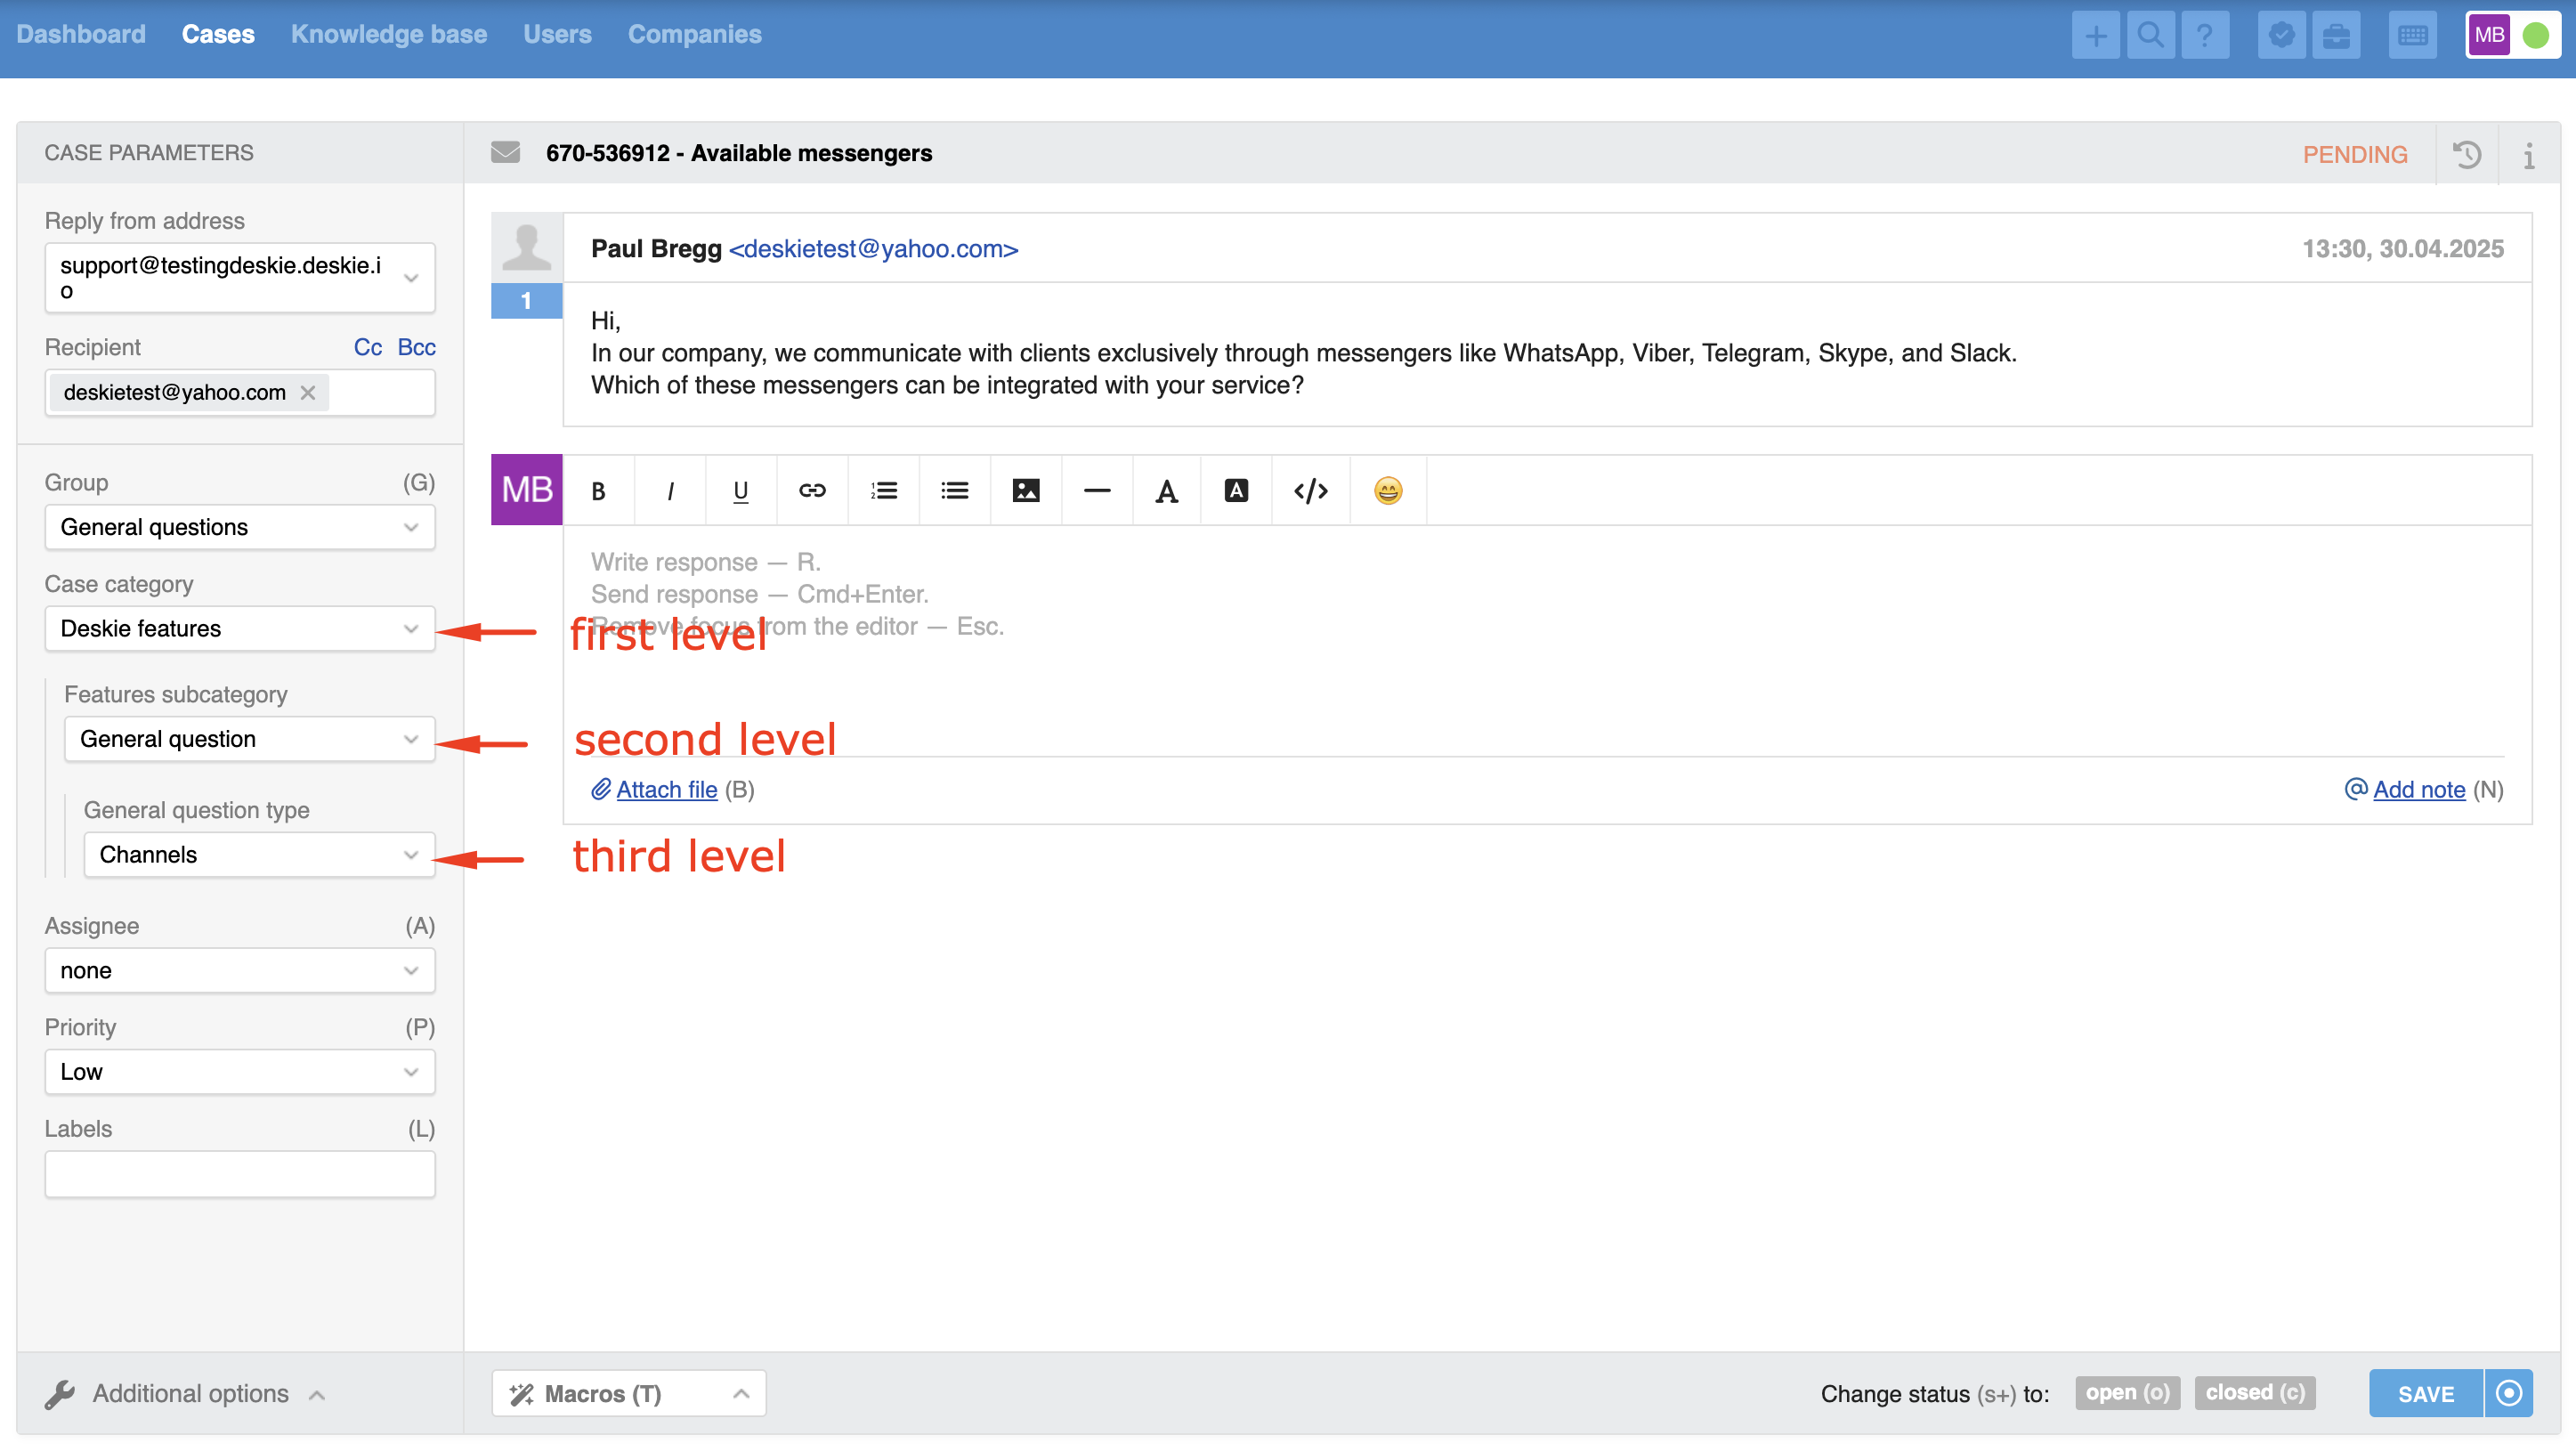
3) Three levels of dependency
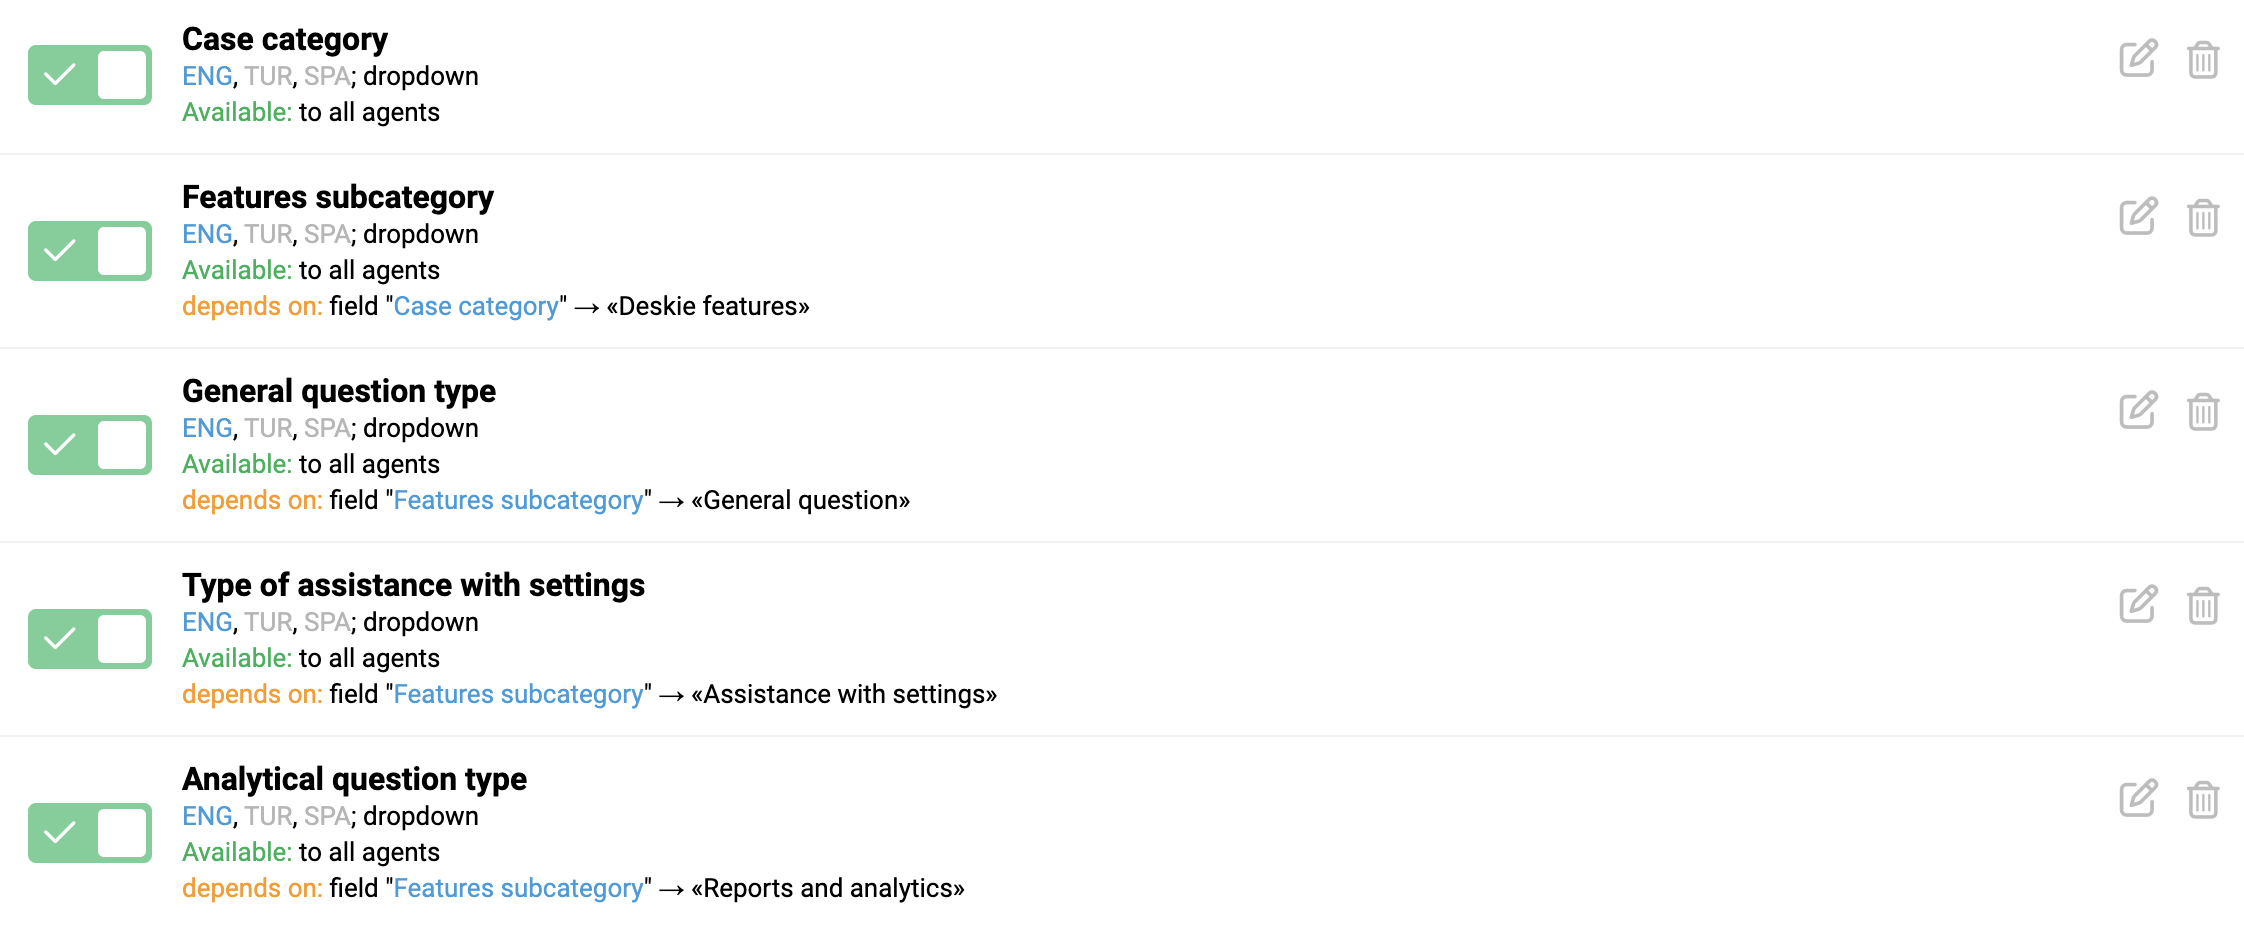
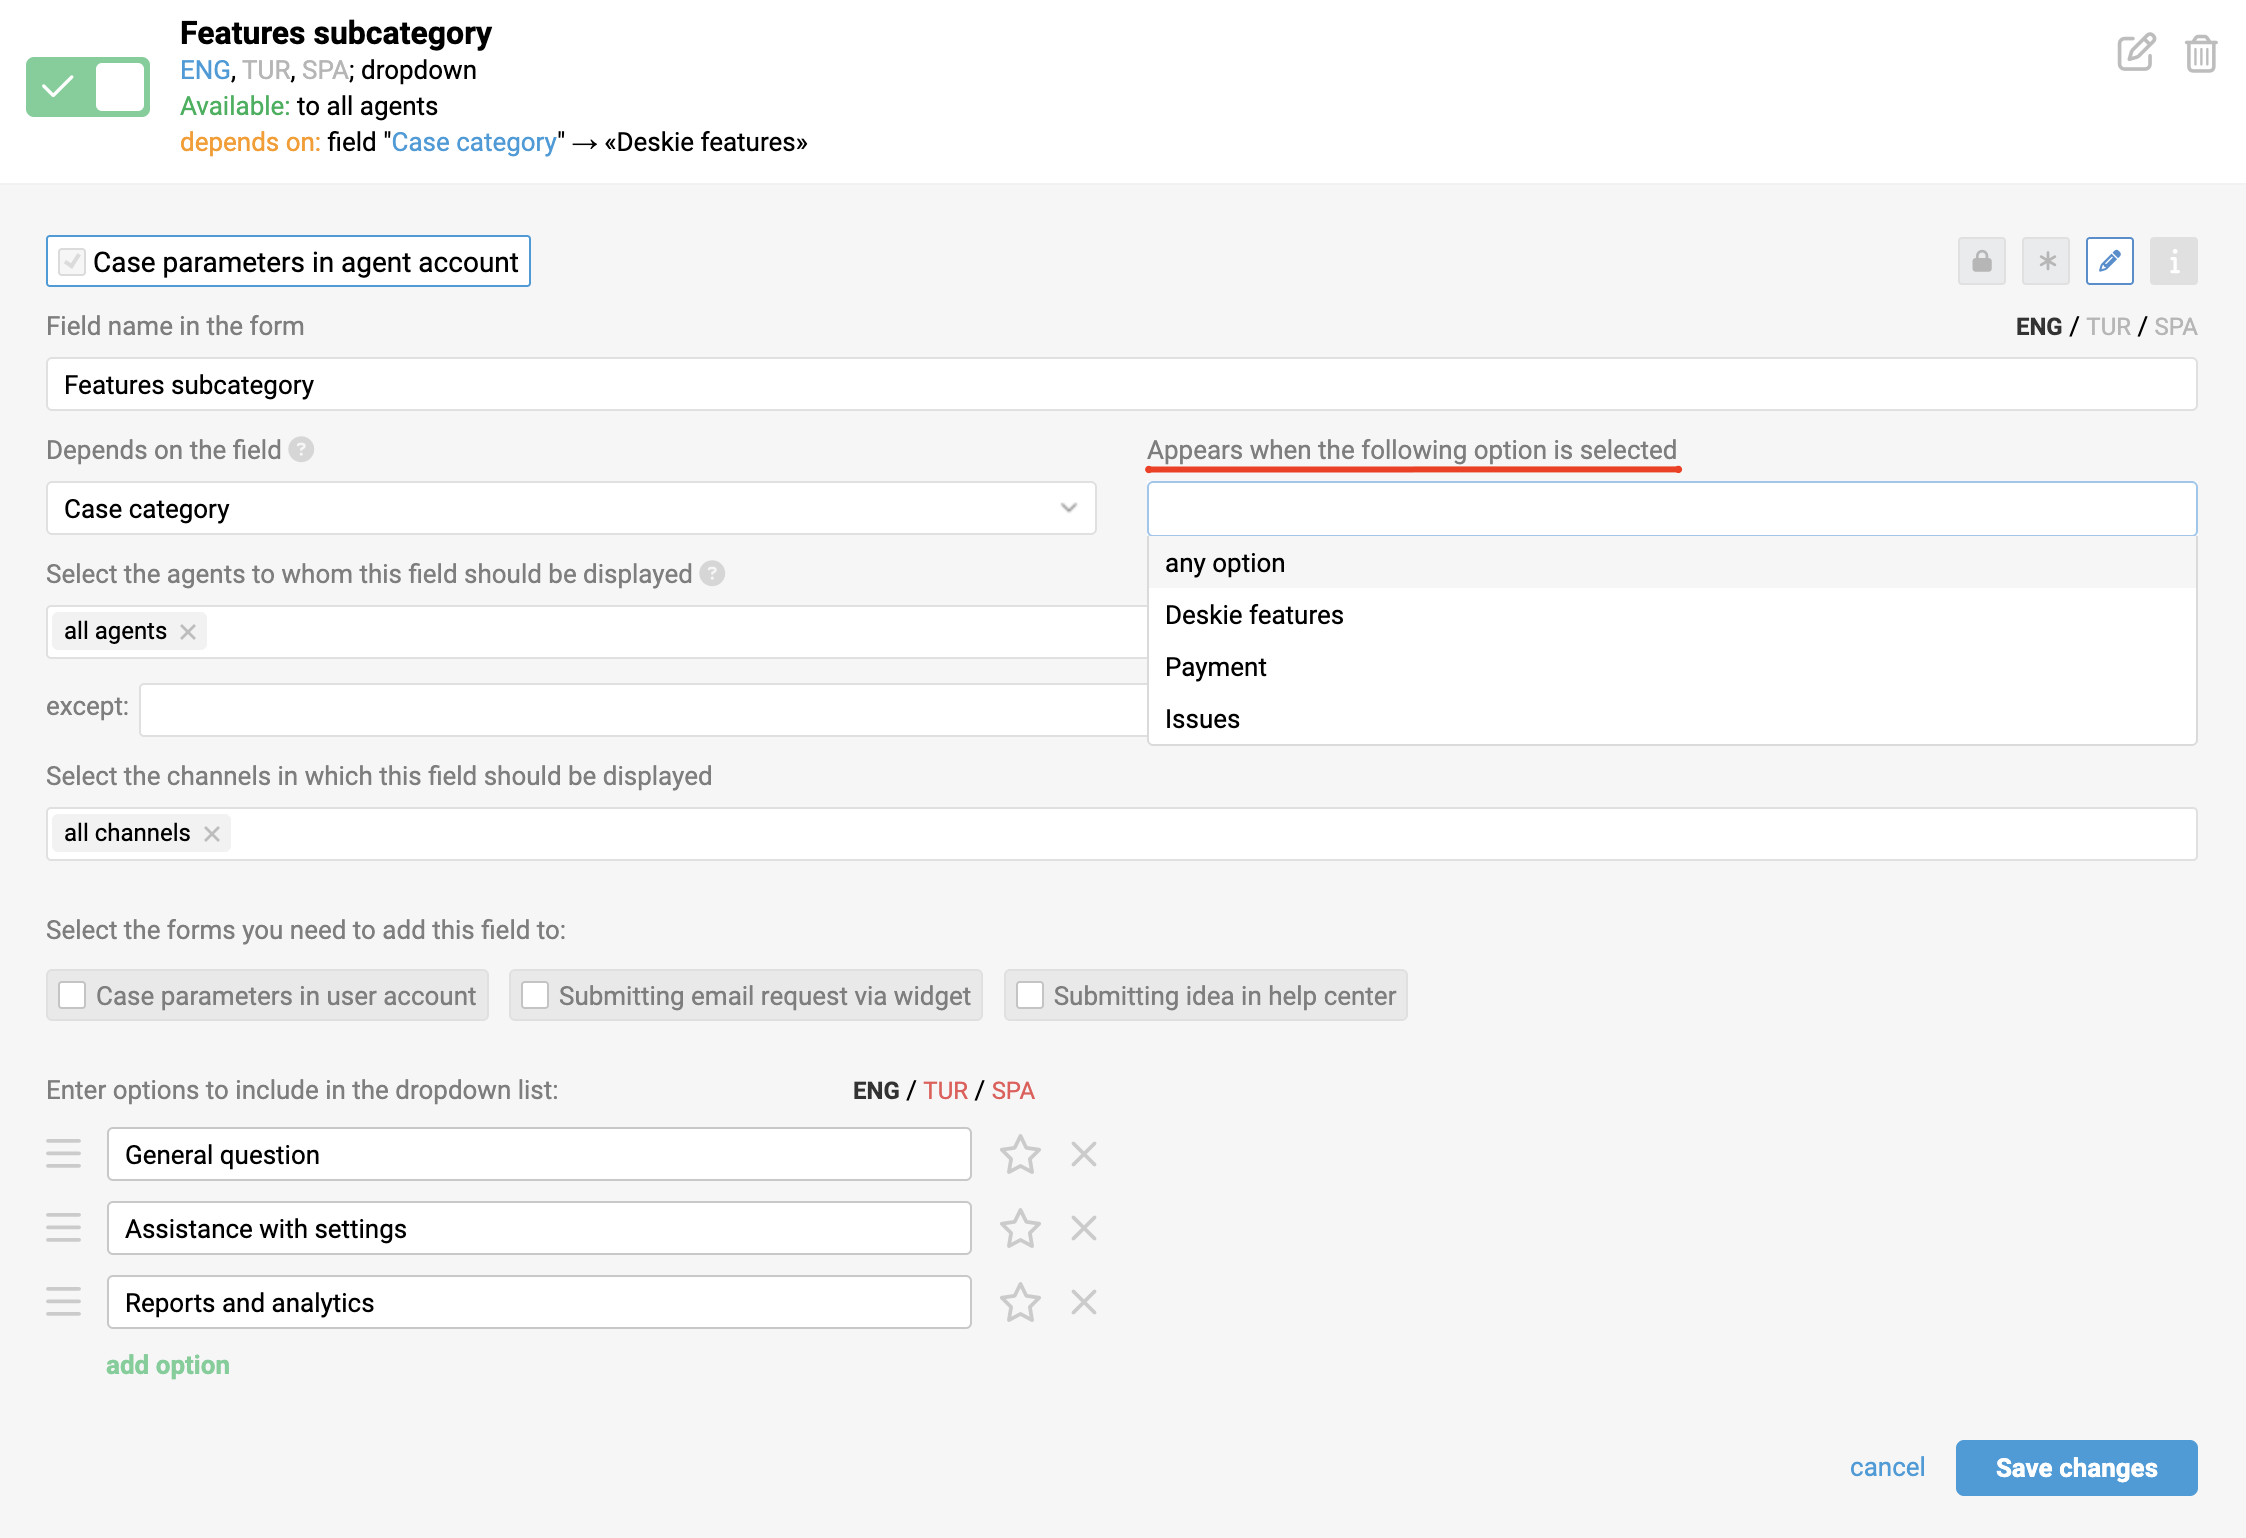
Dependencies are limited to three levels. For example, you can create a structure like the one in the example above:
"Case category" field (first level);
"Features subcategory" field (second level);
"Question type" field (third level).
You won’t be able to add a dependency on a third-level field, such as "Question type" because that field already depends on two other fields. Therefore, it won’t even appear as an option when setting up dependencies in the "Depends on the field" field.
4) Clearing dependent fields
Values in dependent fields are cleared if the dependency condition is no longer met.
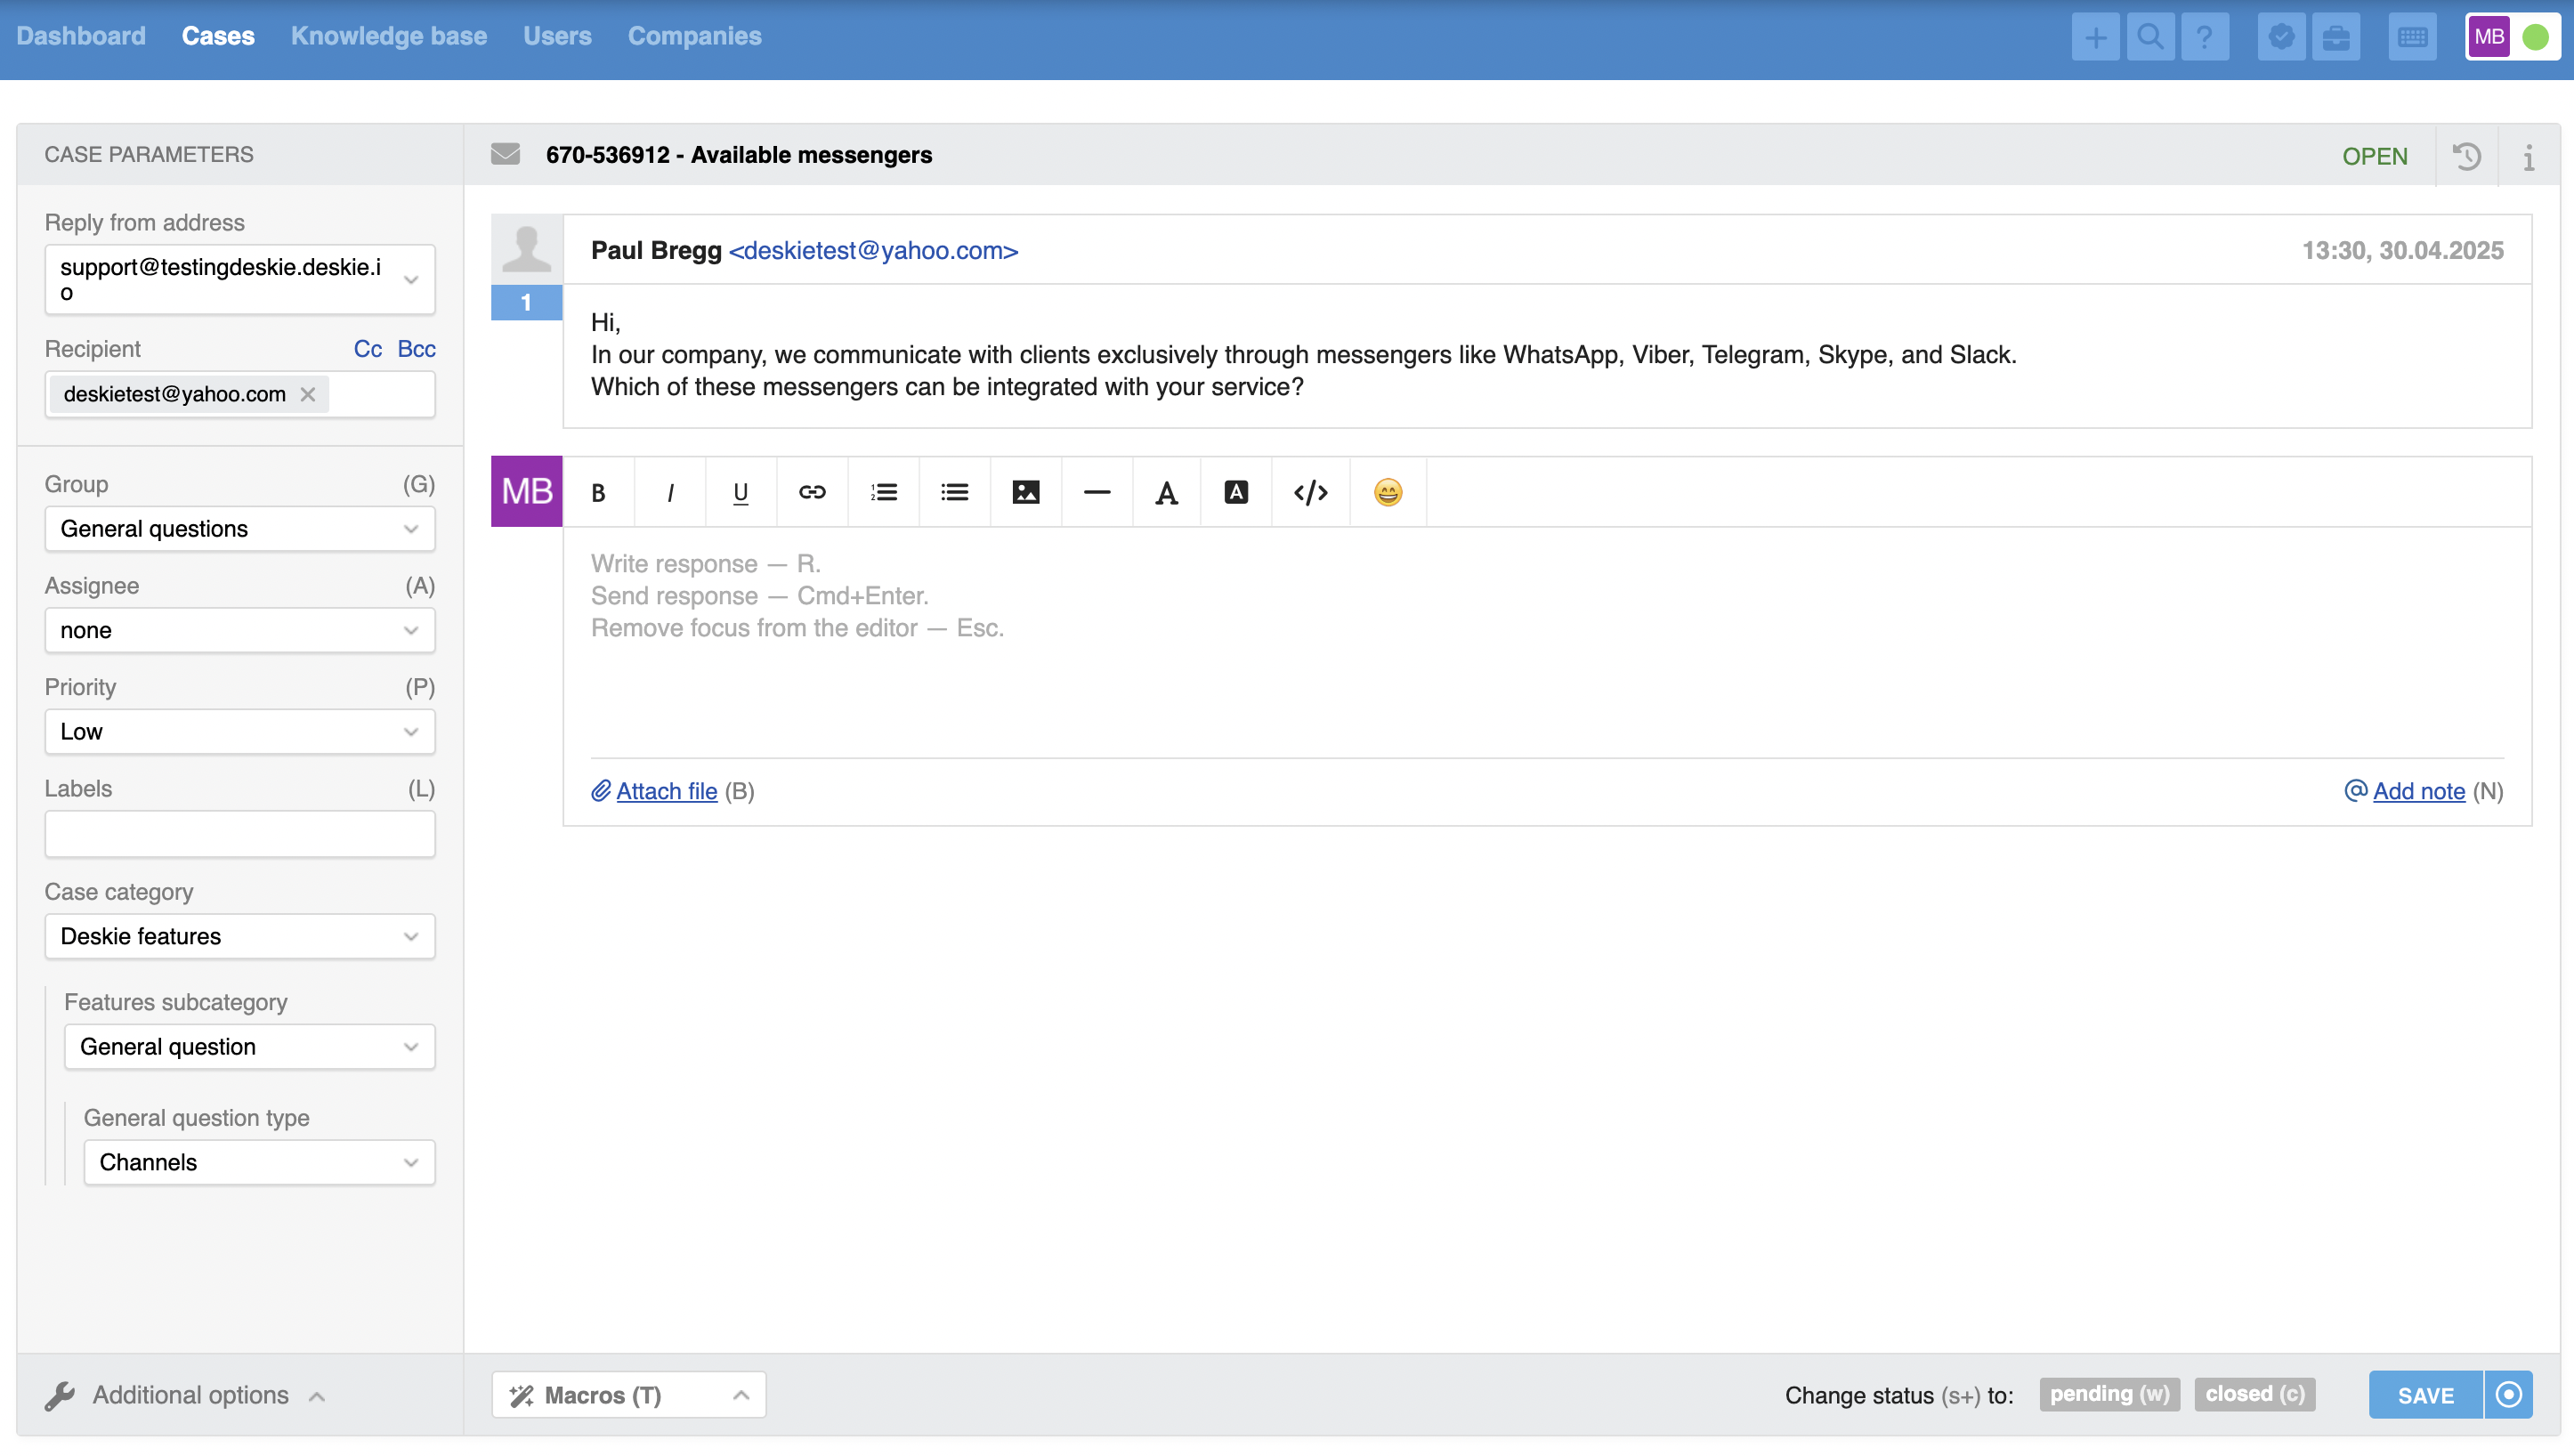
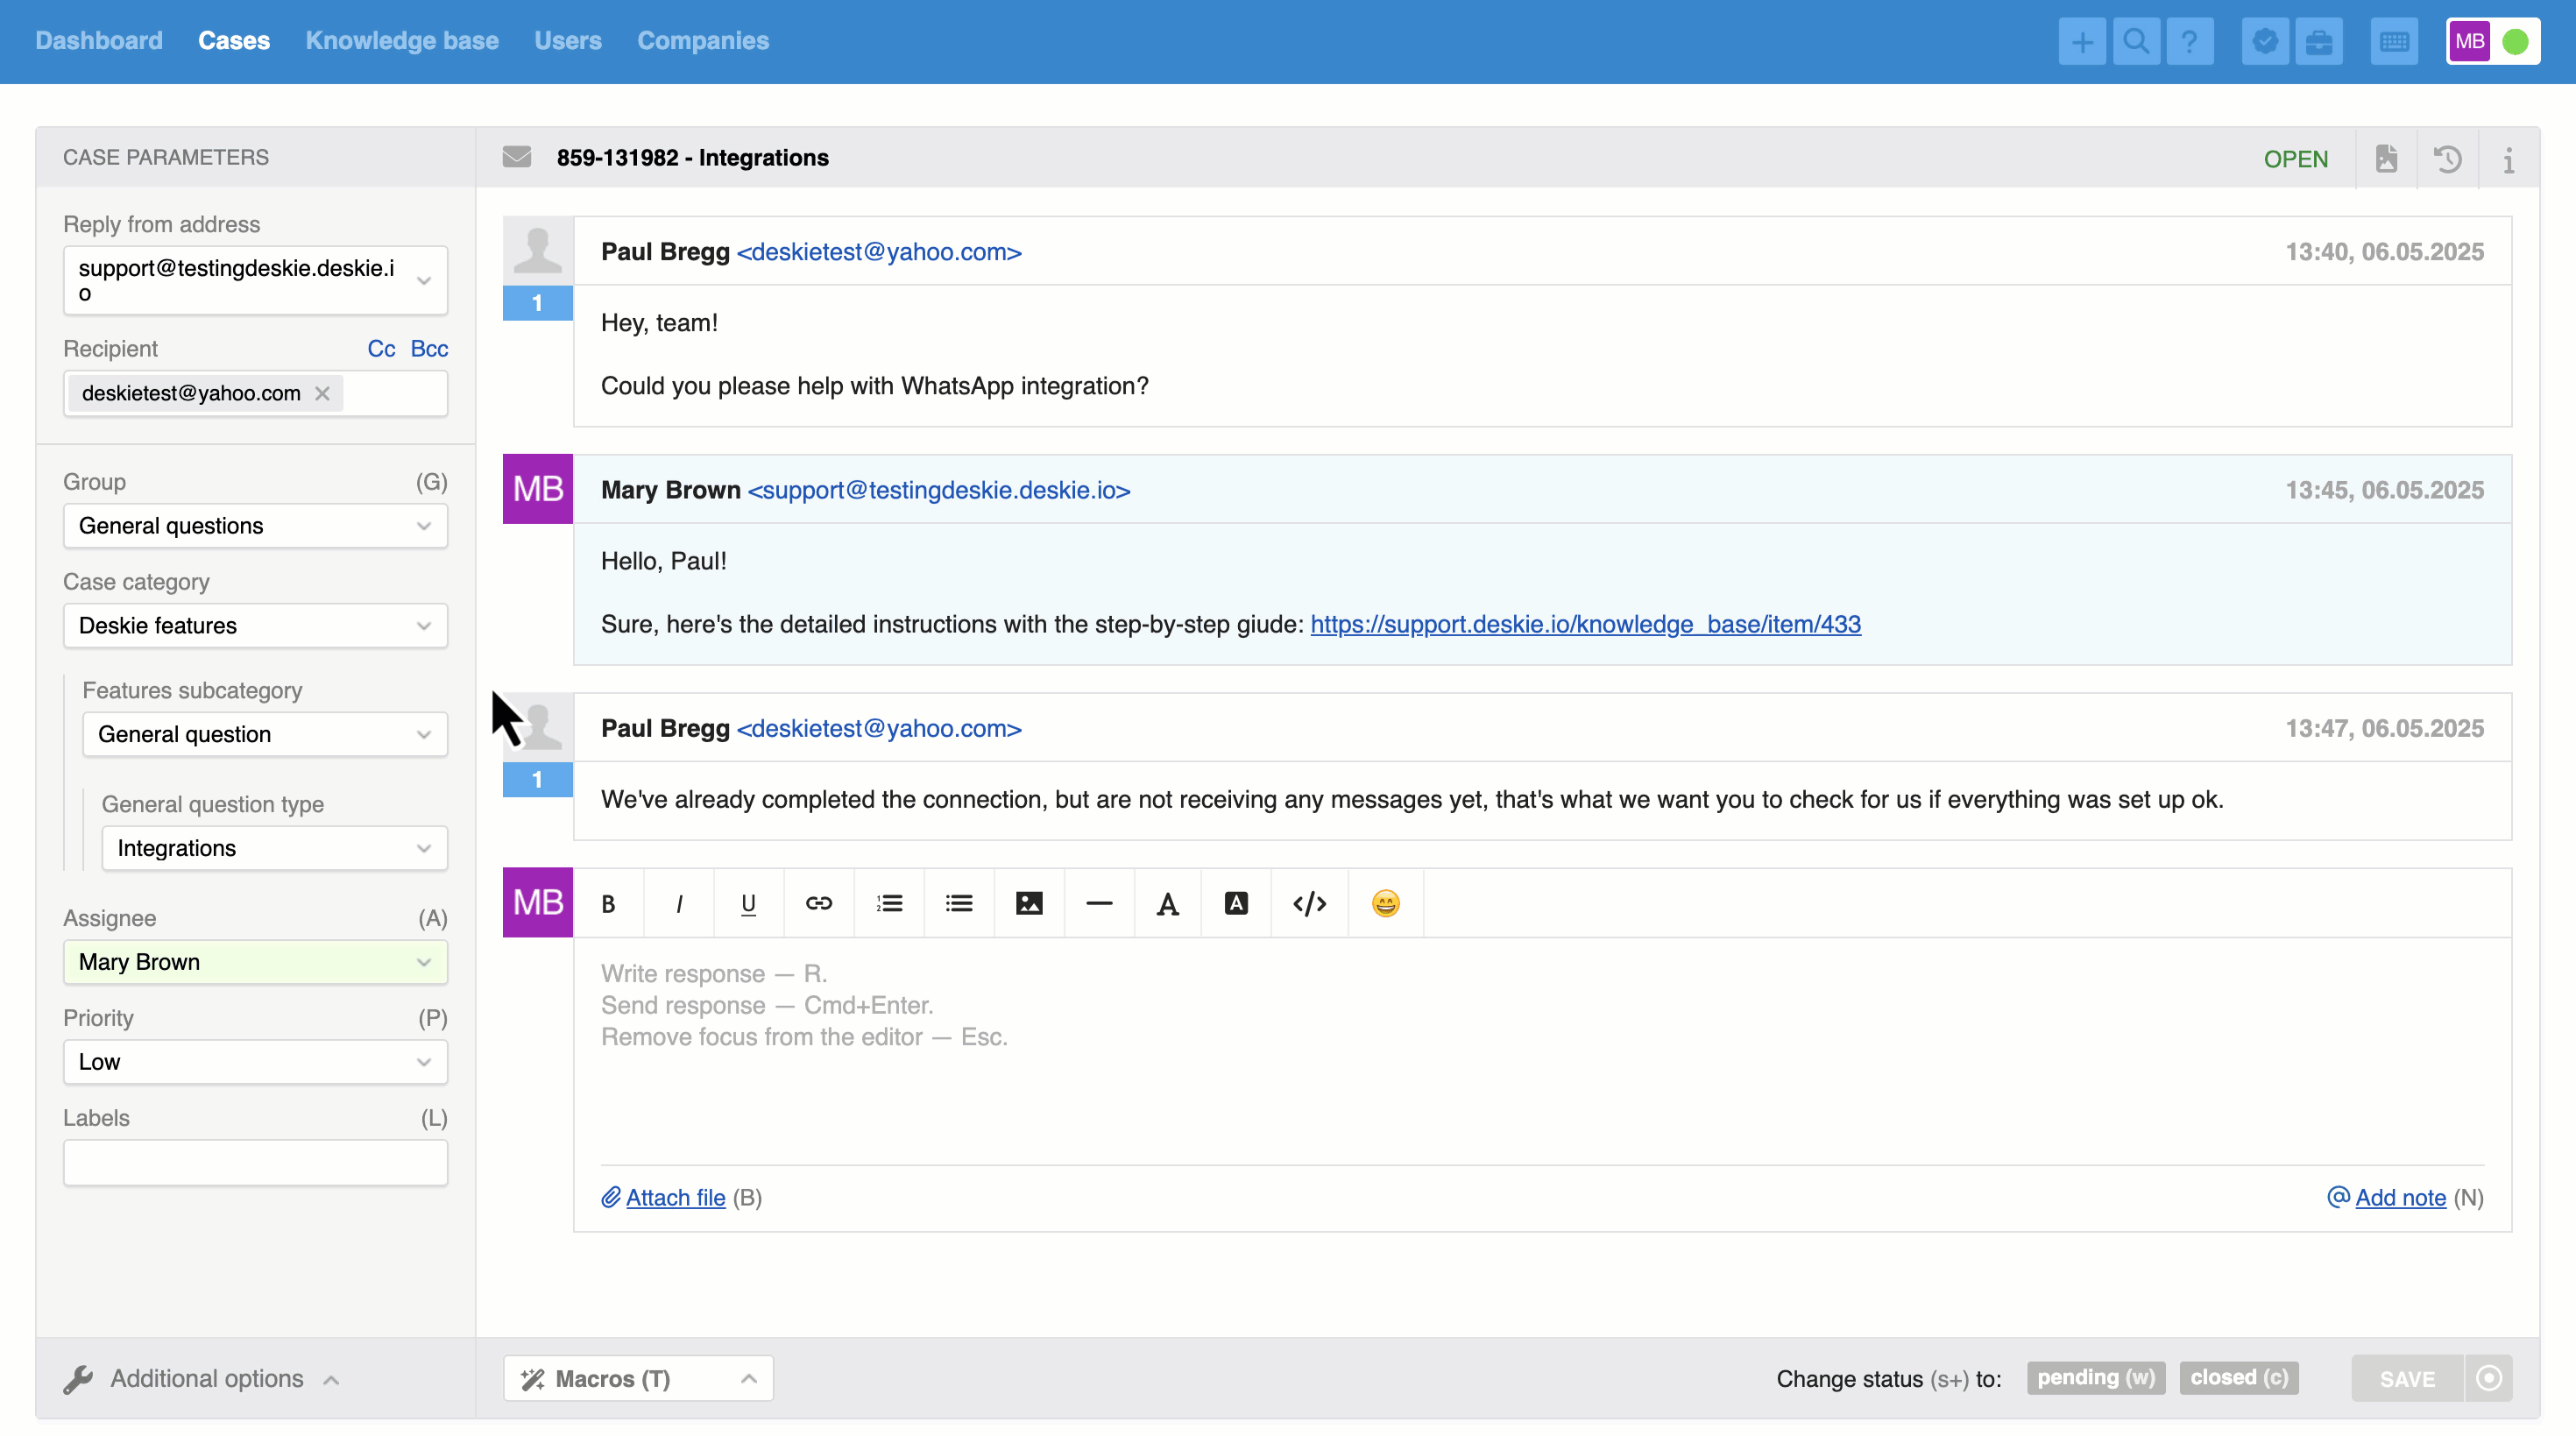
For example, let's say the following fields in a case were filled out:
Case category — Deskie features;
Features subcategory — General questions;
General question type — Integrations.
During the conversation, it became clear that the user wasn't asking for general information but was experiencing a problem with the integration's functionality. There's a specific case category for these situations: "Issues". When the agent changes the "Case category" field to "Issues", the "Features subcategory" and "Question type" fields will be cleared because the values previously entered no longer meet the dependency conditions.
5) Discrepancy of dependent fields with dependency conditions
In the agent account’s web interface, dependent fields are hidden and cannot be filled in manually by the agent or via macros and rules until the dependency condition set in the settings is met – that is until the parent field is filled out or specific values are selected in it.
At the same time, when working outside the web interface, dependent fields can still be filled even if the dependency conditions are not met – for example, when filling out fields via the API or mobile apps, which currently do not support field dependencies.
In such cases, dependent fields will be visible and editable even when the parent fields are empty or don’t meet the required conditions. However, these fields will remain disabled until the dependency condition is satisfied. When hovering over them, employees will see a tooltip prompting them to fill in the parent field or select a specific value that will make the dependent field available for editing.
The dependent field will be cleared according to the standard logic if the parent field is edited and an incompatible value is selected.
6) Dependent fields in widgets
If you want a field to be available in the widget for submitting email requests, enable the "Submitting email request via widget" option in that field’s settings.
When you add parent fields to the widget, their dependent fields will also be added automatically. However, you can easily hide them using the eye icon if they’re not needed in a specific widget.
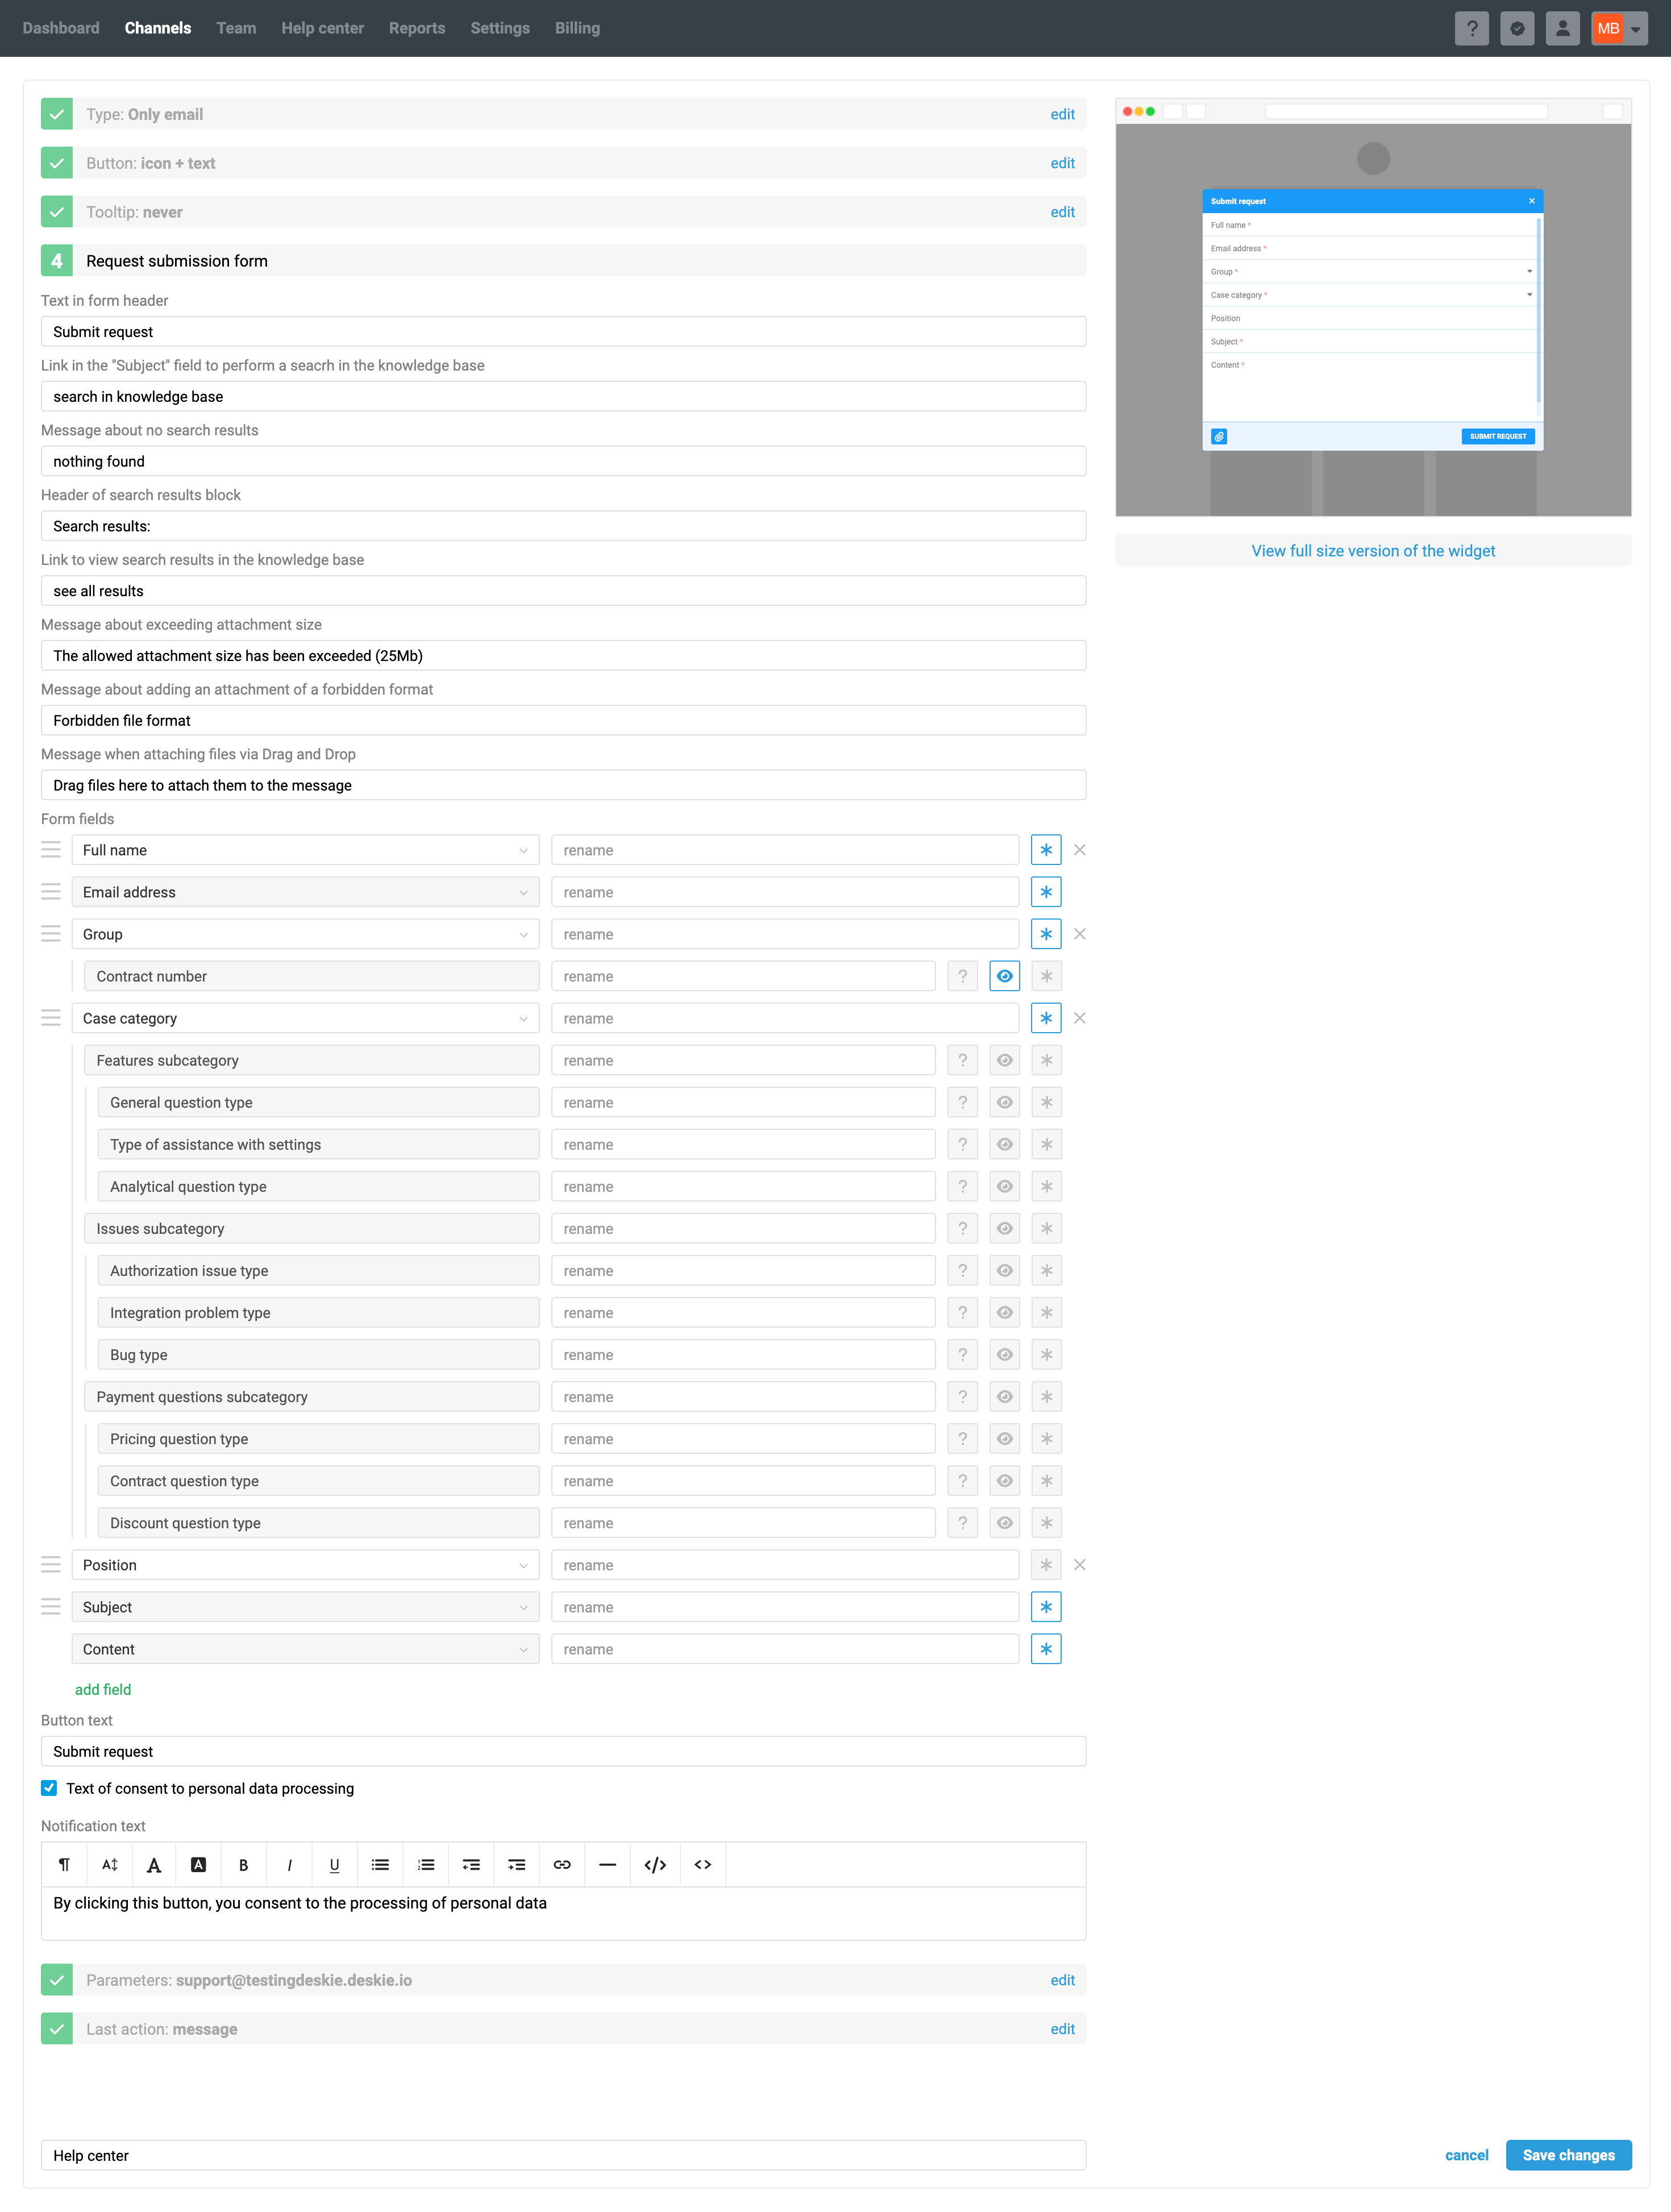
When you add fields that have dependencies in the "Submitting email request via widget" form, the corresponding parent fields will also be added automatically.