Fields classification
1. In terms of data affiliation, fields can refer to either a user, a case, or a company.

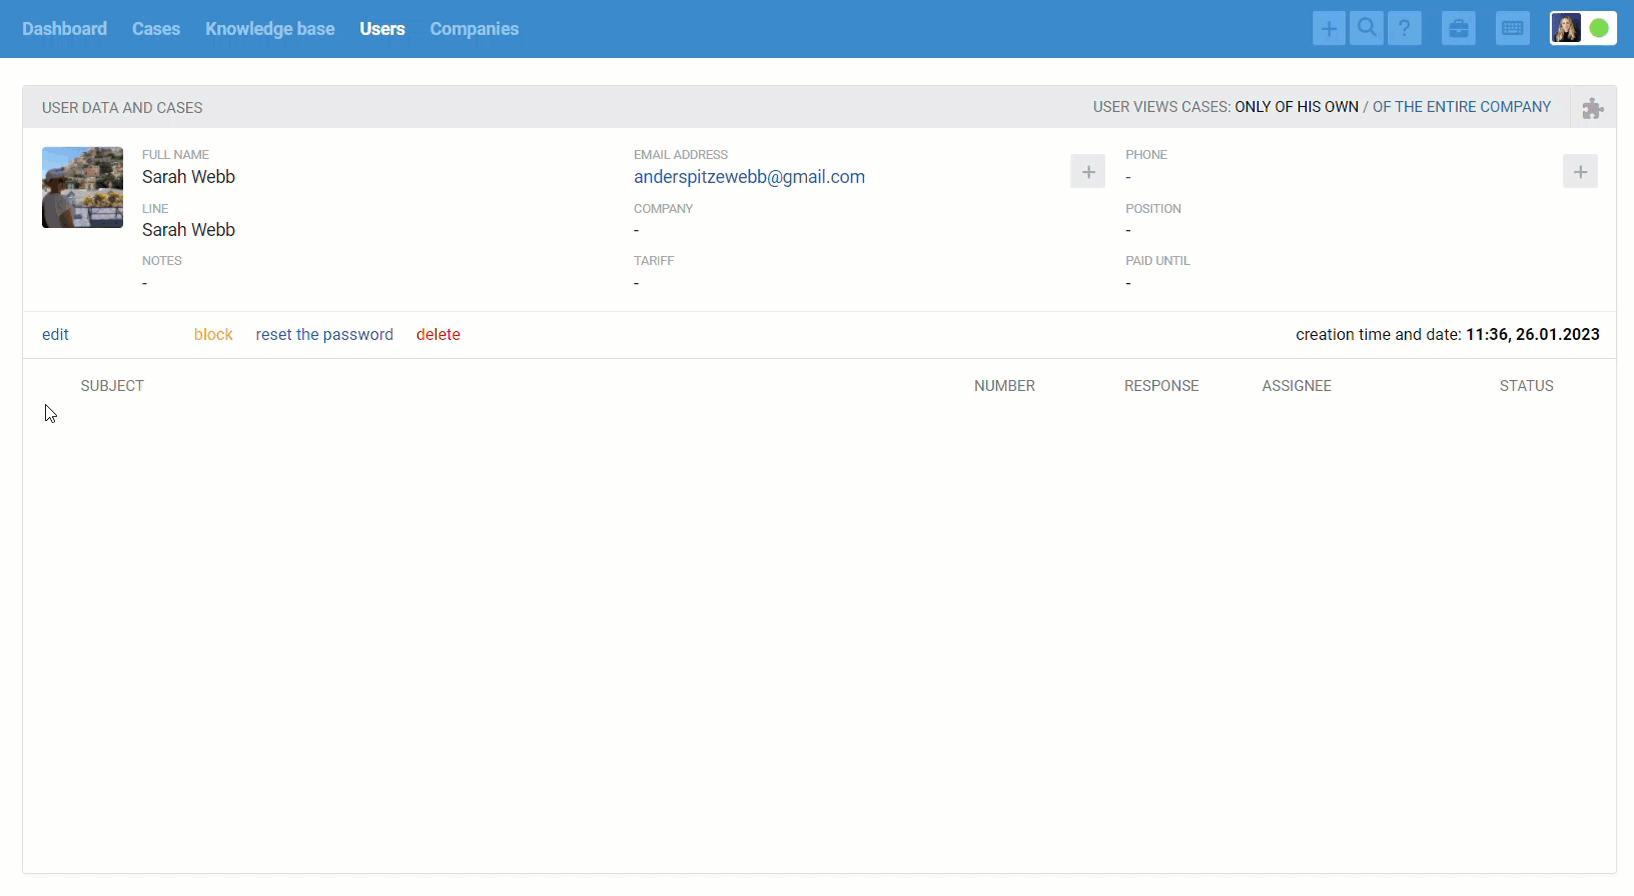
In user or company fields, the data is fixed for a specific user or company and does not change from case to case. An example is the "Email address" field.
Case fields, on the contrary, are fixed for a specific case and are not related to the user or company. For example, the checkbox "A task has been set".
The list of fields has a corresponding division into these three types. If necessary, any of the blocks can be collapsed.

2. According to the editing capabilities, fields are divided into standard and custom ones.
Standard fields cannot be disabled or completely removed. You can only edit, although editing is significantly limited. All this is done because the standard fields are an integral part of the platform, and a lot is tied to them.
Custom fields are fully customizable. You decide what type of field to create, in what forms and under what name they are displayed, and whether they are mandatory or not.
3. Depending on the data representation, the fields are divided into five types: text field, text area, checkbox, dropdown list, and date.

In the field list, the field type is displayed immediately below its name. You cannot change the type of standard fields. With custom fields, the type is set only when the field is created and cannot be changed later.
2. Form selection
You can choose where to display a standard or custom field.
Deskie has a total of 9 forms available:
Submit an idea (section "Ideas" in the Help Center);
Submitting email request via widget;
User profile (user account, help center);
User page (agent account, "Users" section);
User data (agent account, specific case, right sidebar);
Adding user (agent account, page for adding a case);
Incoming call (agent account, incoming call pop-up window);
Case parameters in agent account (agent account, specific case, left sidebar);
Case parameters in user account (user account, specific case, left sidebar).
When creating/editing fields, there is a tooltip to the right of the name of each form, that helps you understand which form it is.
If a field is added to the "User profile" or "Case parameters in user account" forms, which are located in the user's account in the help center, you can choose whether the user can edit the field or only view it.

3. Editing standard fields
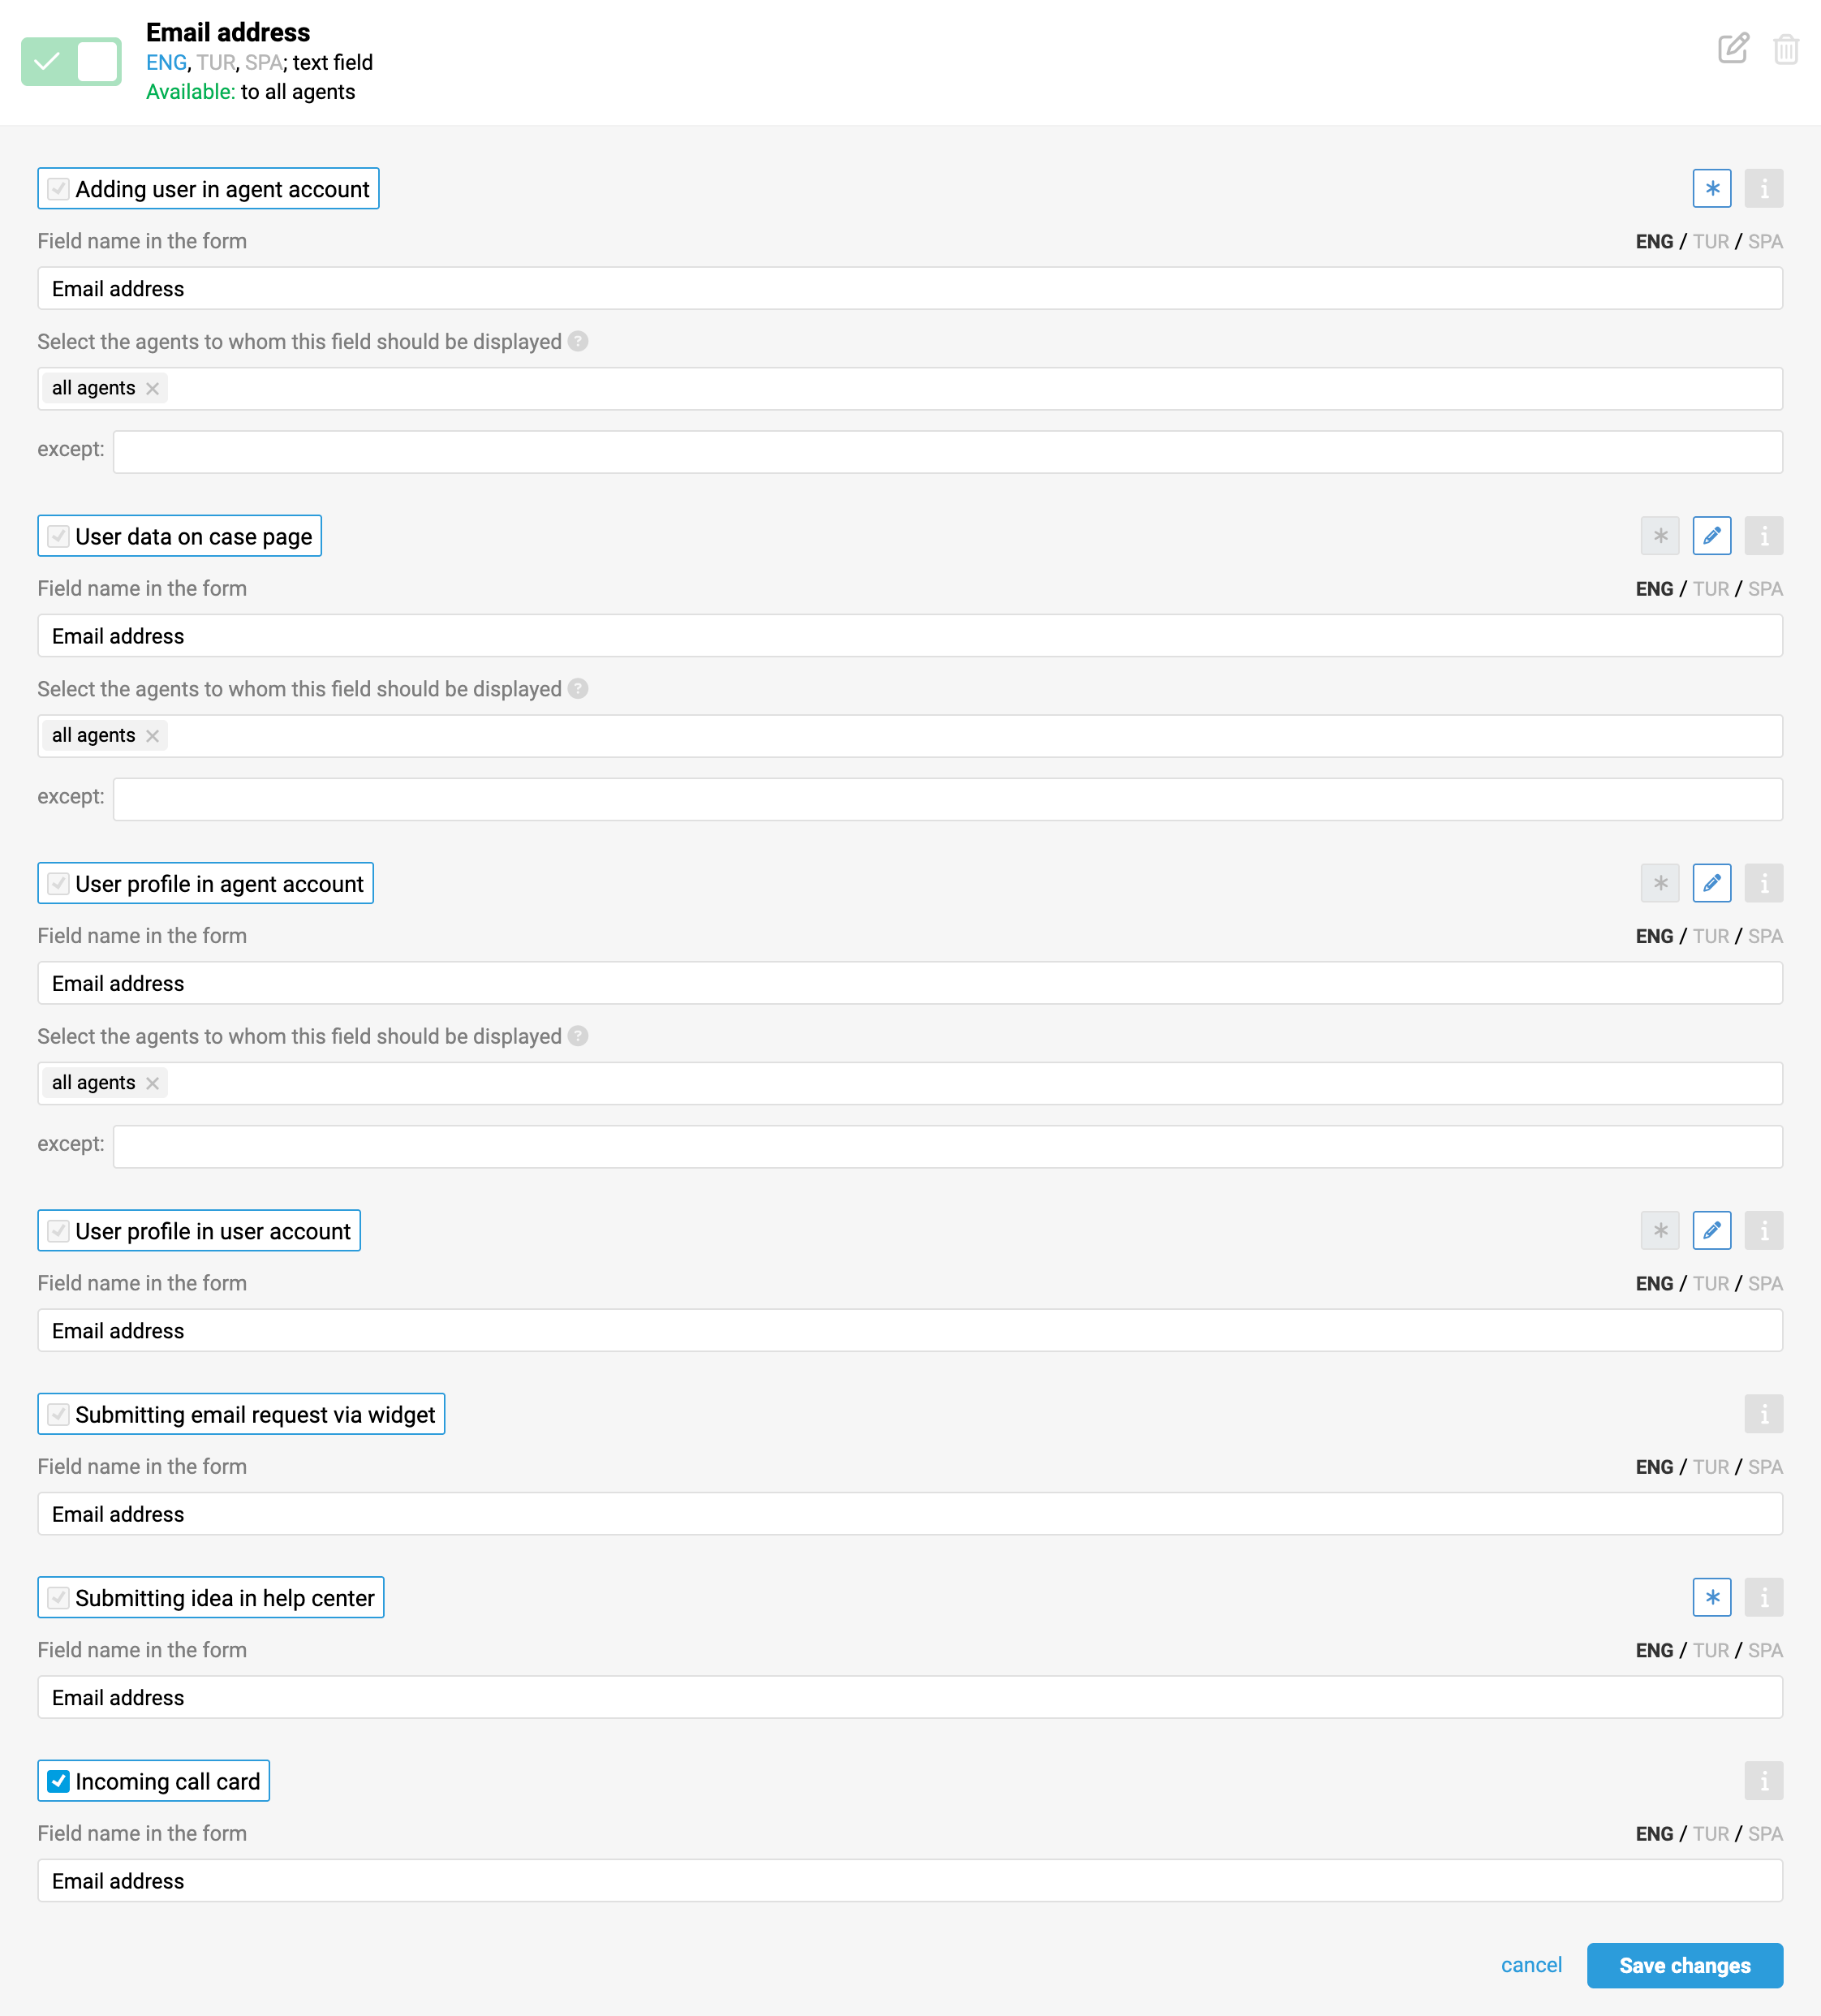
Each standard field displays by default all the forms it can be added to. In most cases, the desired forms are already active and cannot be disabled. However, there is the option to change the field name in any of the forms and, in some cases, specify whether the field is required to be filled in. Additionally, for forms that users can access, you can choose whether to allow or prevent them from editing the field.
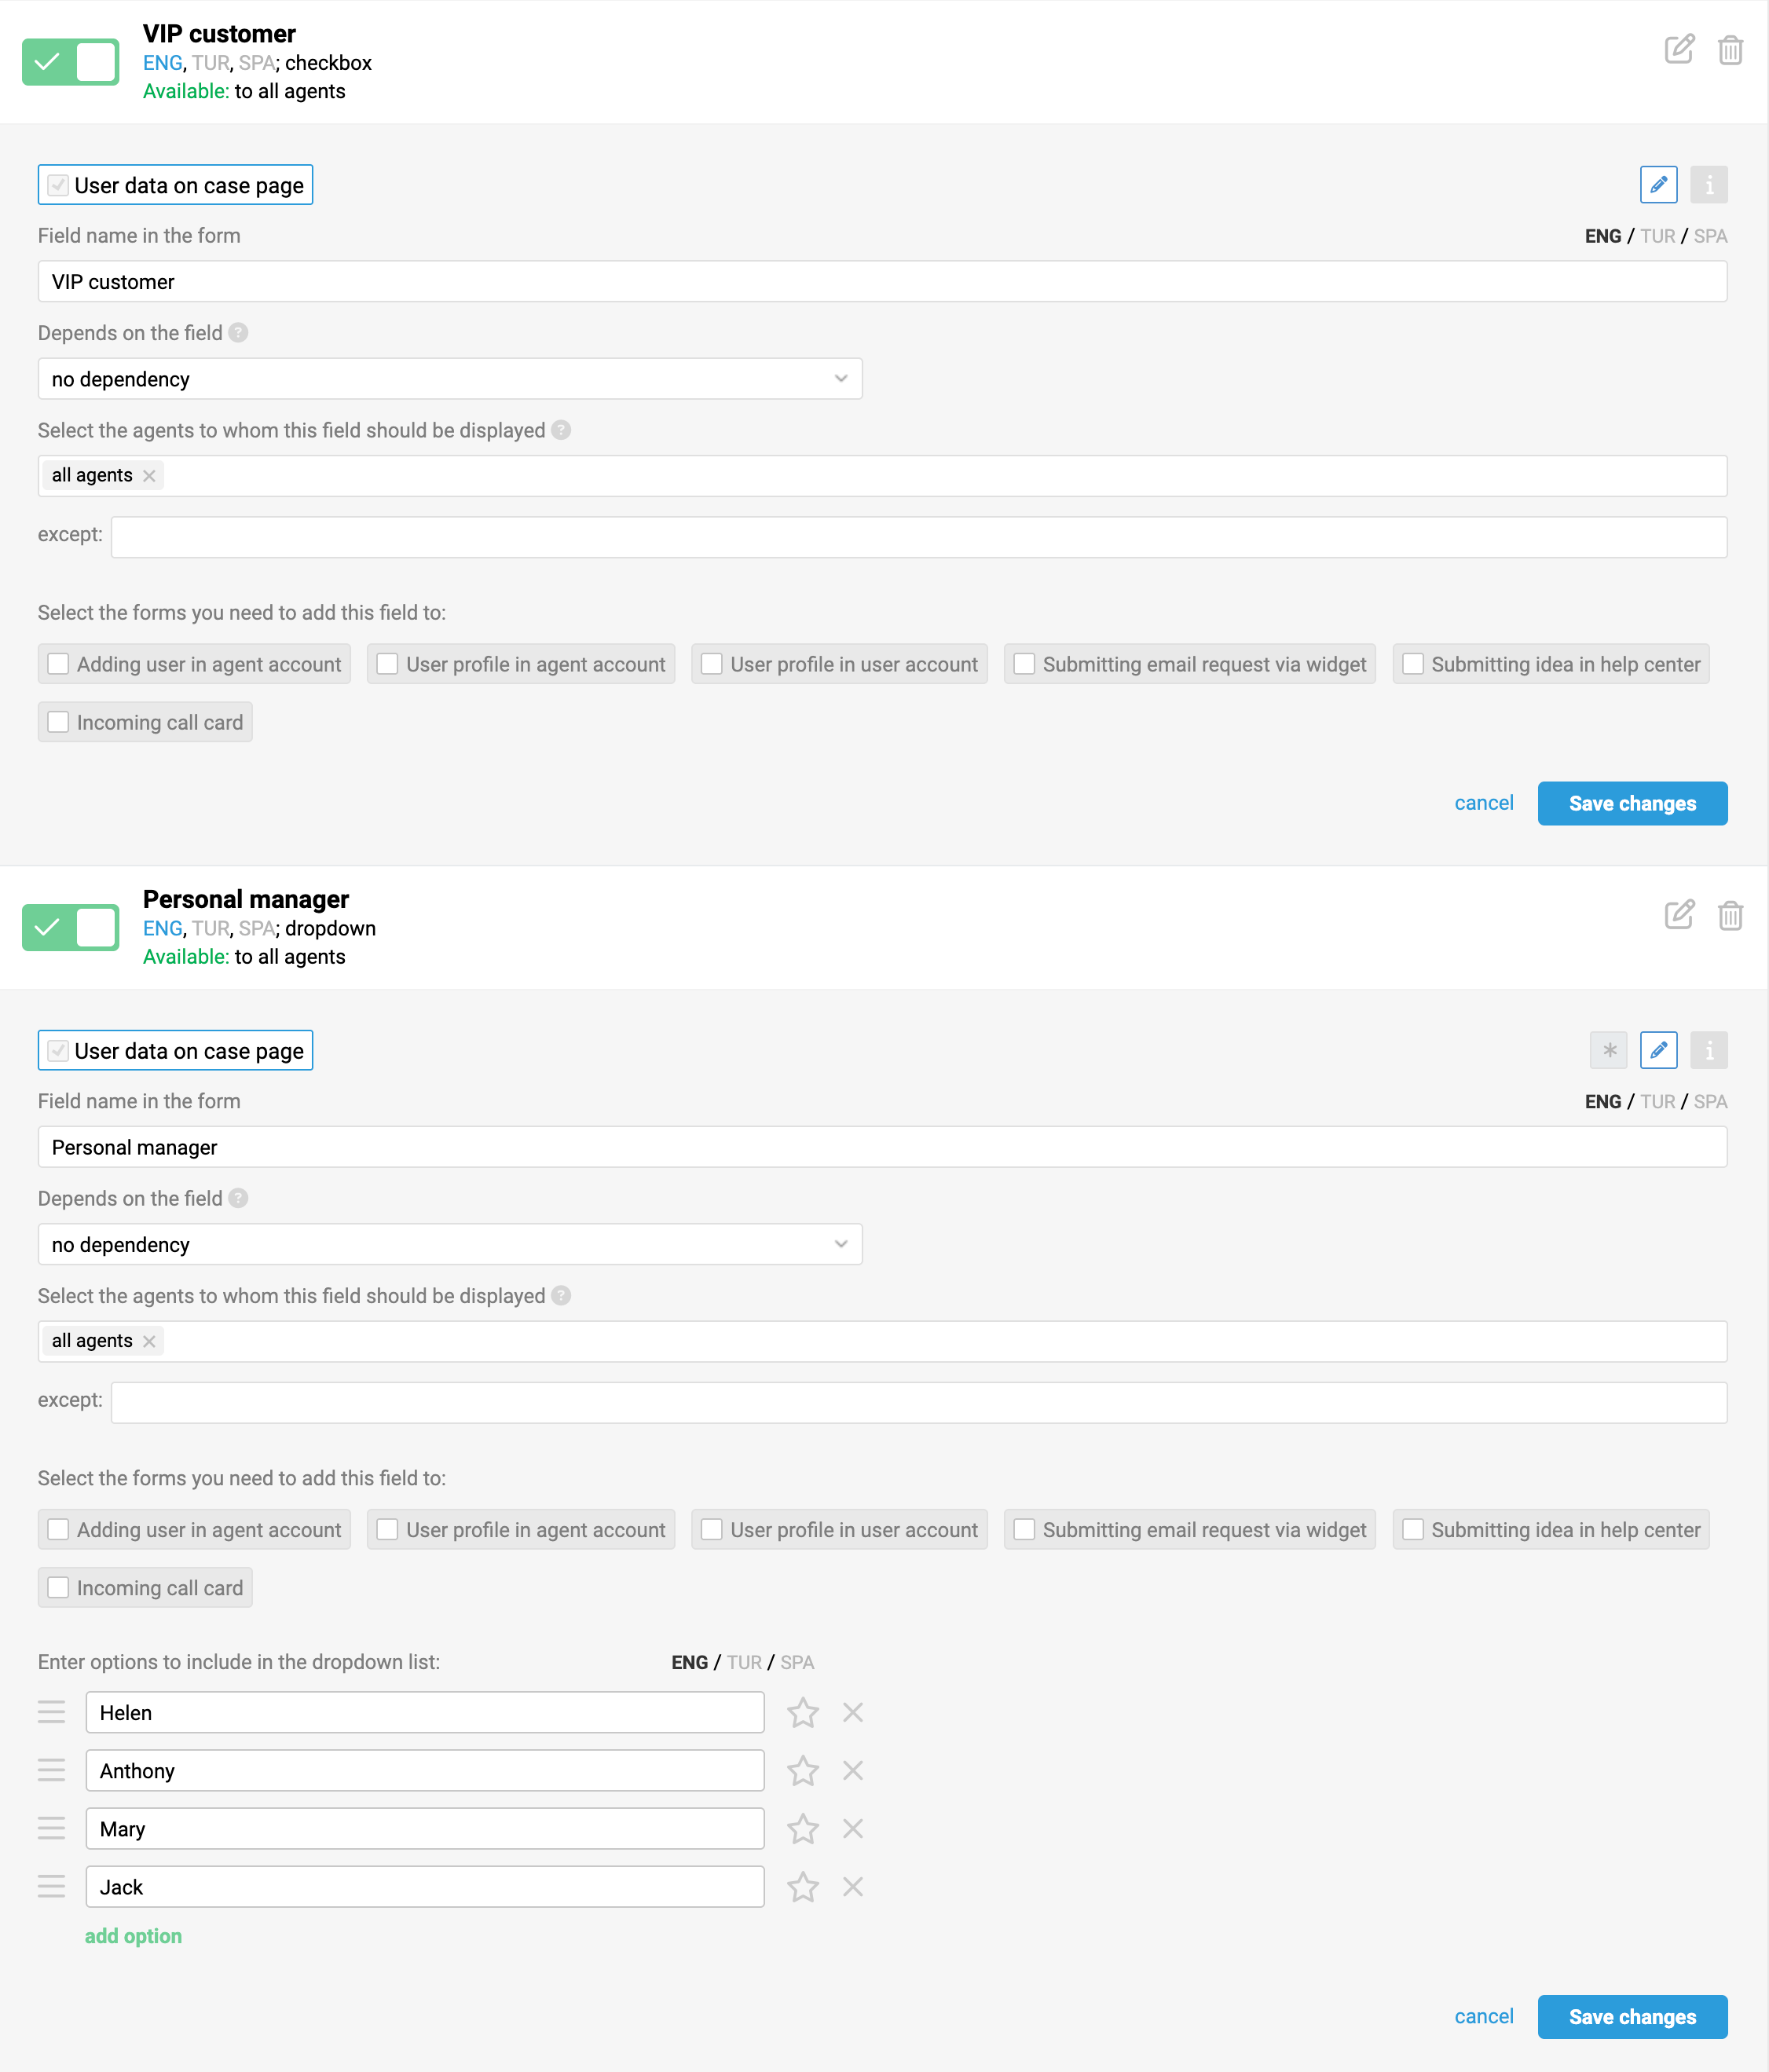
4. Creating and editing custom fields
When creating an additional field, you need to select:
the field's affiliation: whether it belongs to a case, user, or company
the field type: text field, text area, checkbox, dropdown, or date;
the forms where the field will be added.
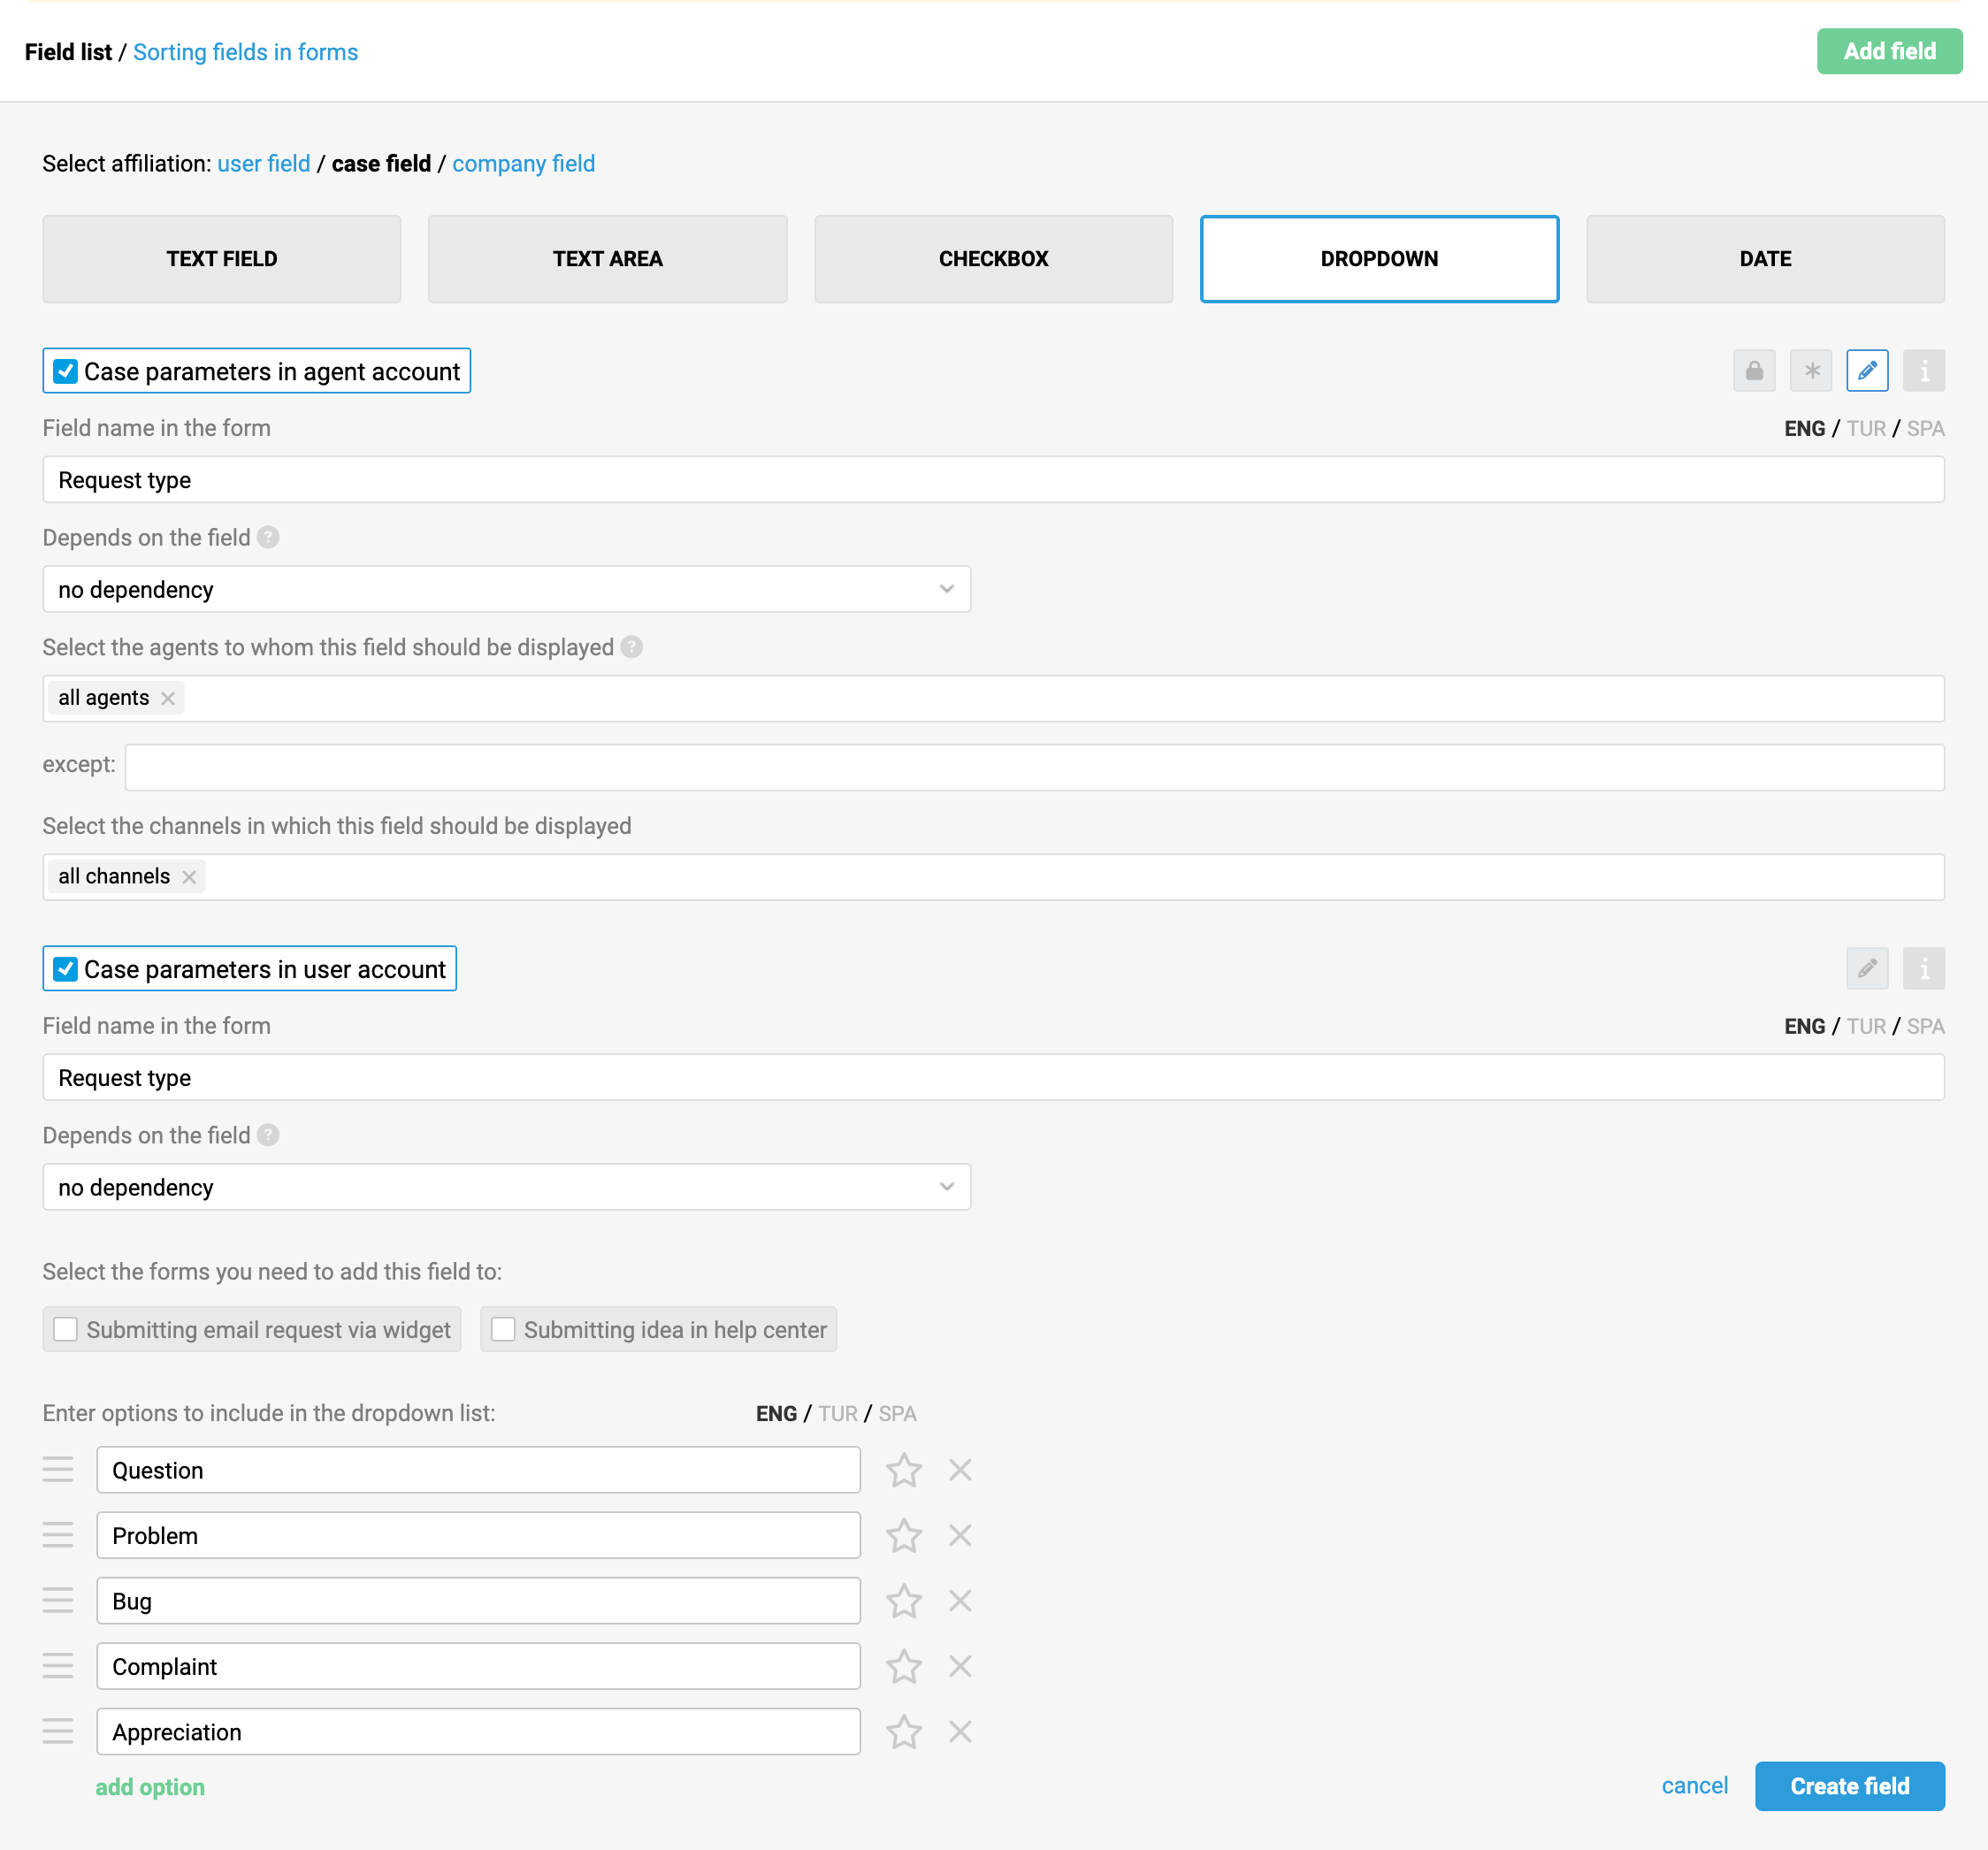
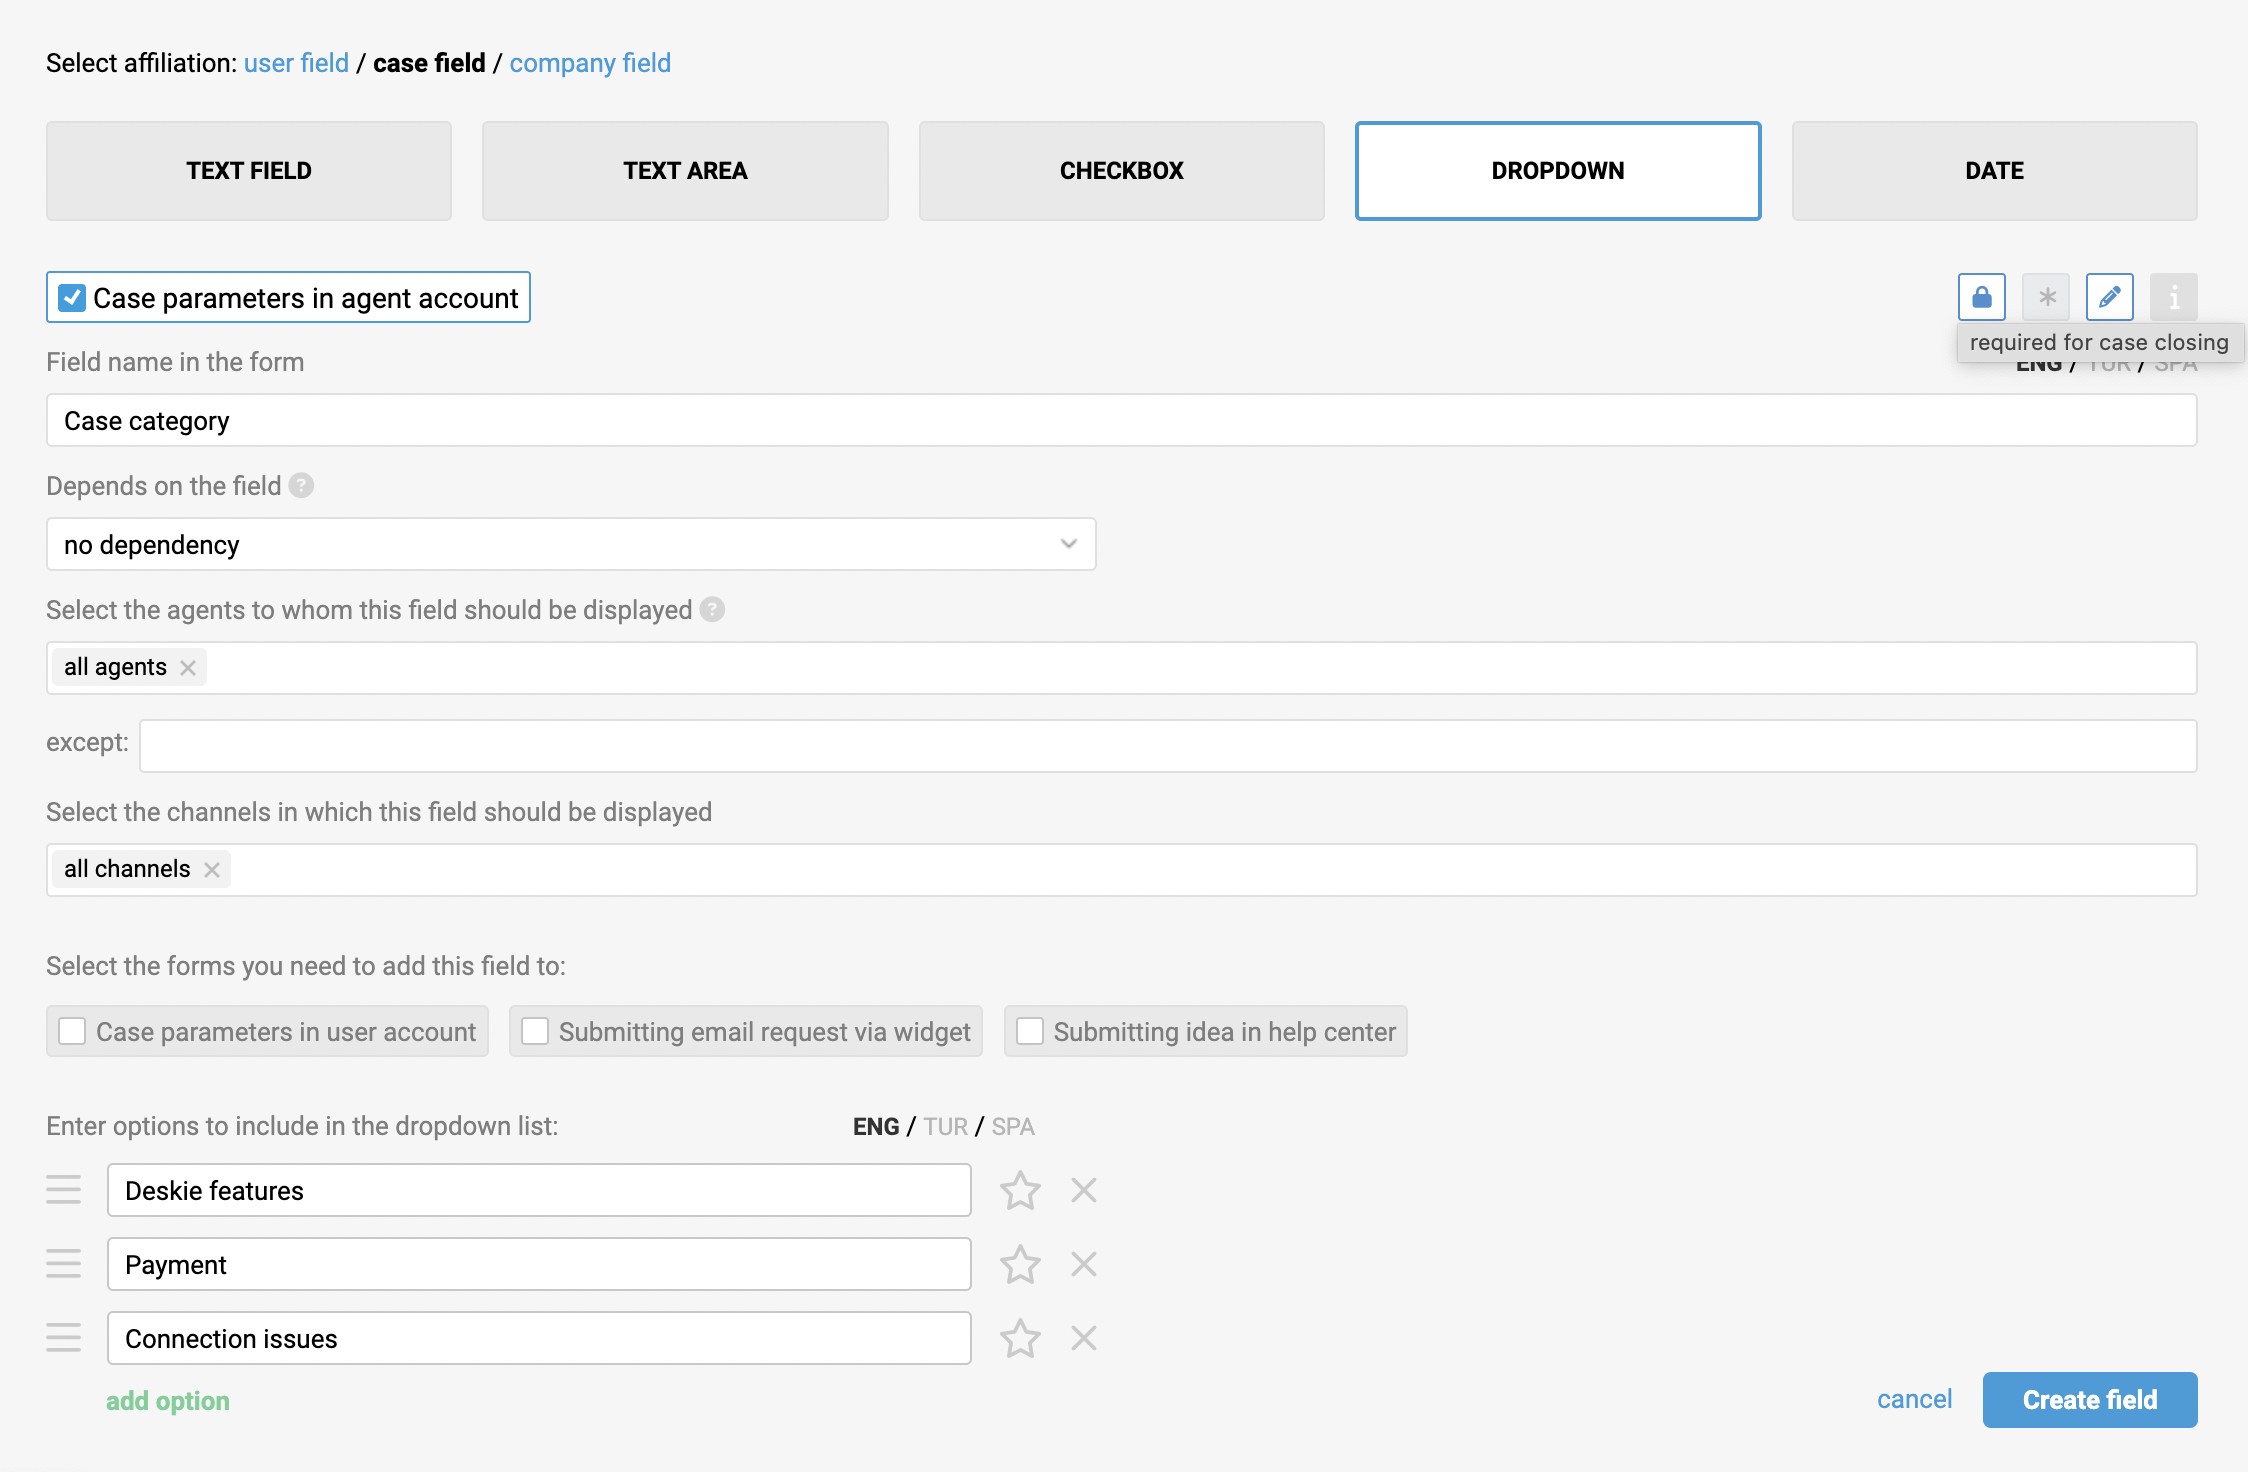
Let's break it down with a specific example. Suppose you want to create a field called "Request type" so that when a user submits a question via a widget, they can specify the nature of the issue by selecting from a list: question, problem, bug, complaint, or appreciation. After the case is created, the agent should see the specified information in the case parameters on the case page, and the user should see it in their personal account in Deskie.
Step 1: specify the field's affiliation — it would be the case field, as the data it collects pertains to a specific case rather than to the user or the company they represent;
Step 2: choose the field type – "Dropdown" – and specify the options for selection in the dropdown list;
Step 3: activate the necessary forms — "Submitting email request via widget", "Case parameters in agent account" and "Case parameters in user account";
Step 4: enter the field name for each form — this will be sufficient to create the field.
5. Data field settings
a) Required filling
The required field setting helps agents remember to provide important information that can later be useful for filtering cases, reports, or automated actions.
All fields have a required setting for any action (indicated by an asterisk icon). Case fields have two separate settings:
required for any action (asterisk icon);
required only when setting the status to "closed" (lock icon).
If a field is set as "required for case closing" — meaning the lock icon is activated — an agent will not be able to manually set the status to "Closed" or use a macro to do so until such fields are filled in.
These settings apply only to manual actions in the agent's account, and the fields will still be available for automatic editing through rules and API, including scenarios where the "Closed" status is assigned to a case by Deskie.
Required field validation
- Fields required for any action are marked with an asterisk (*). Fields required only when closing a case are not marked with an asterisk.
- When attempting to save changes or send a reply with required fields empty:
- a tooltip notification is shown;
- empty required fields are highlighted in red;
- the save or send button remains inactive.
- When attempting to send a reply in an active chat that has no assignee:
- the "Take all incoming" or "Take selected chats" link turns red;
- the tooltip notification appears as soon as the agent starts typing a reply.
- You cannot save changes to user data or create an outgoing case until all required fields in the user's data are filled in.
- If a user's data has empty required fields, the right panel opens in edit mode automatically when writing a reply or creating an outgoing case.
- When attempting to save changes to user data, the page scrolls to the first empty required field.
- If required fields remain empty after applying a macro, the macro will not be applied and a notification appears below the page header.
Actions exempt from validation
The following actions can be performed without filling in required fields:
- change the case subject;
- add a note;
- schedule a reopening;
- mark the case as spam or move it to trash;
- transfer an active chat to a colleague.
This allows you to perform administrative actions on a case even when filling in the required fields isn't yet possible.
Learn more about required field validation here.
b) Restriction on clearing and editing
— For "Text Field", "Text Area", and "Date" field types, you can enable restrictions that prevent clearing or both clearing and editing. Since editing includes the ability to clear, enabling editing automatically allows clearing as well.
— For fields of types "Checkbox" and "Dropdown", you can enable a restriction against editing.
These settings apply only to manual actions in the agent's account, and the fields will still be available for automatic editing through rules and API.
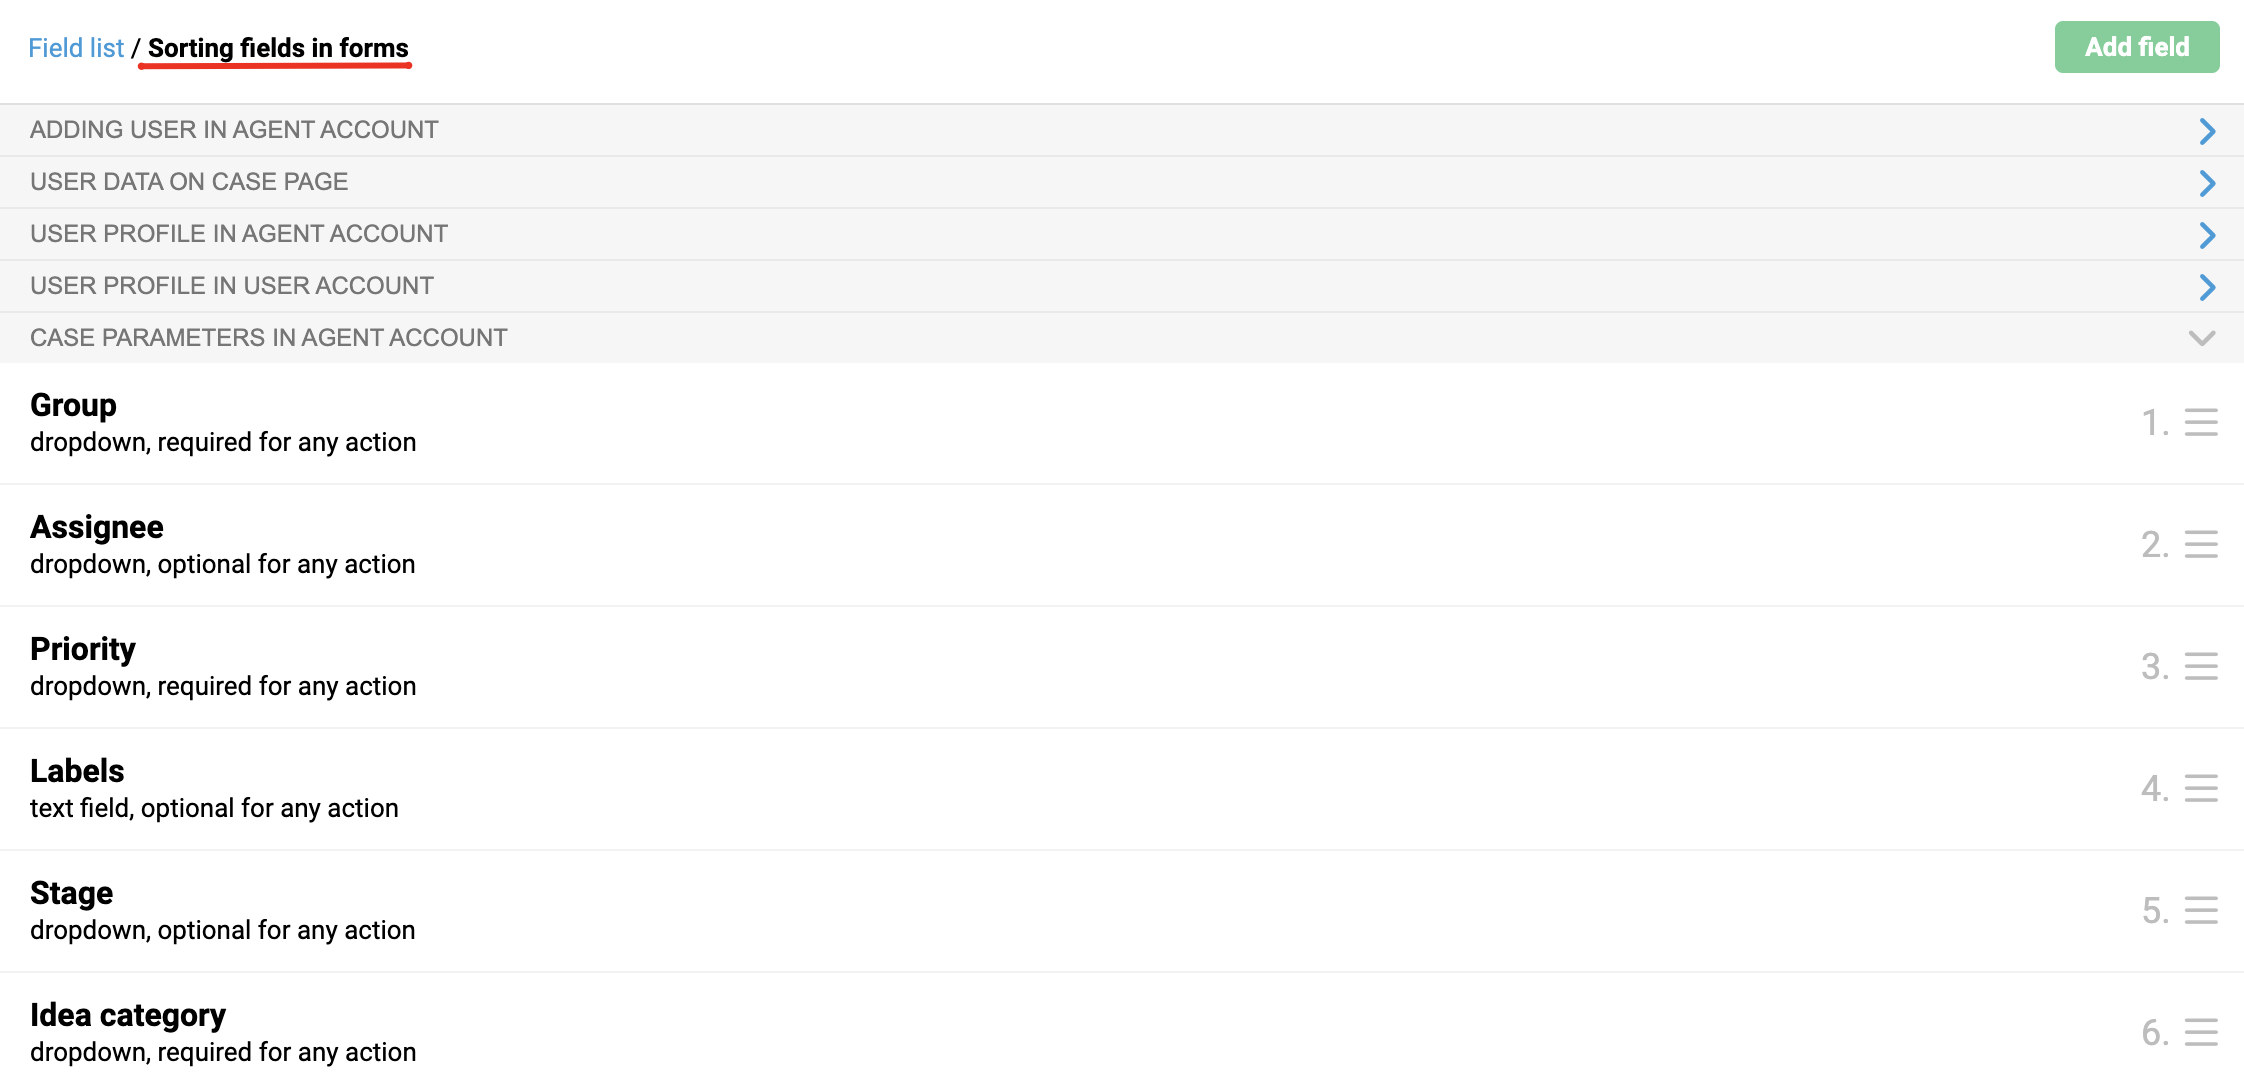
c) Field order in forms
You can also change the order of the fields in the forms. To do this, go to the "Sorting fields in forms" tab, find the desired form and arrange the fields in the desired order.
d) Default dropdown list values
In custom fields of type "Dropdown", a dash is set by default, meaning agents or users must manually select one of the proposed values. However, it can sometimes be useful to set a different default value for the list, such as the most likely option.
To set a default value for the list, simply mark the asterisk icon next to it in the field settings.
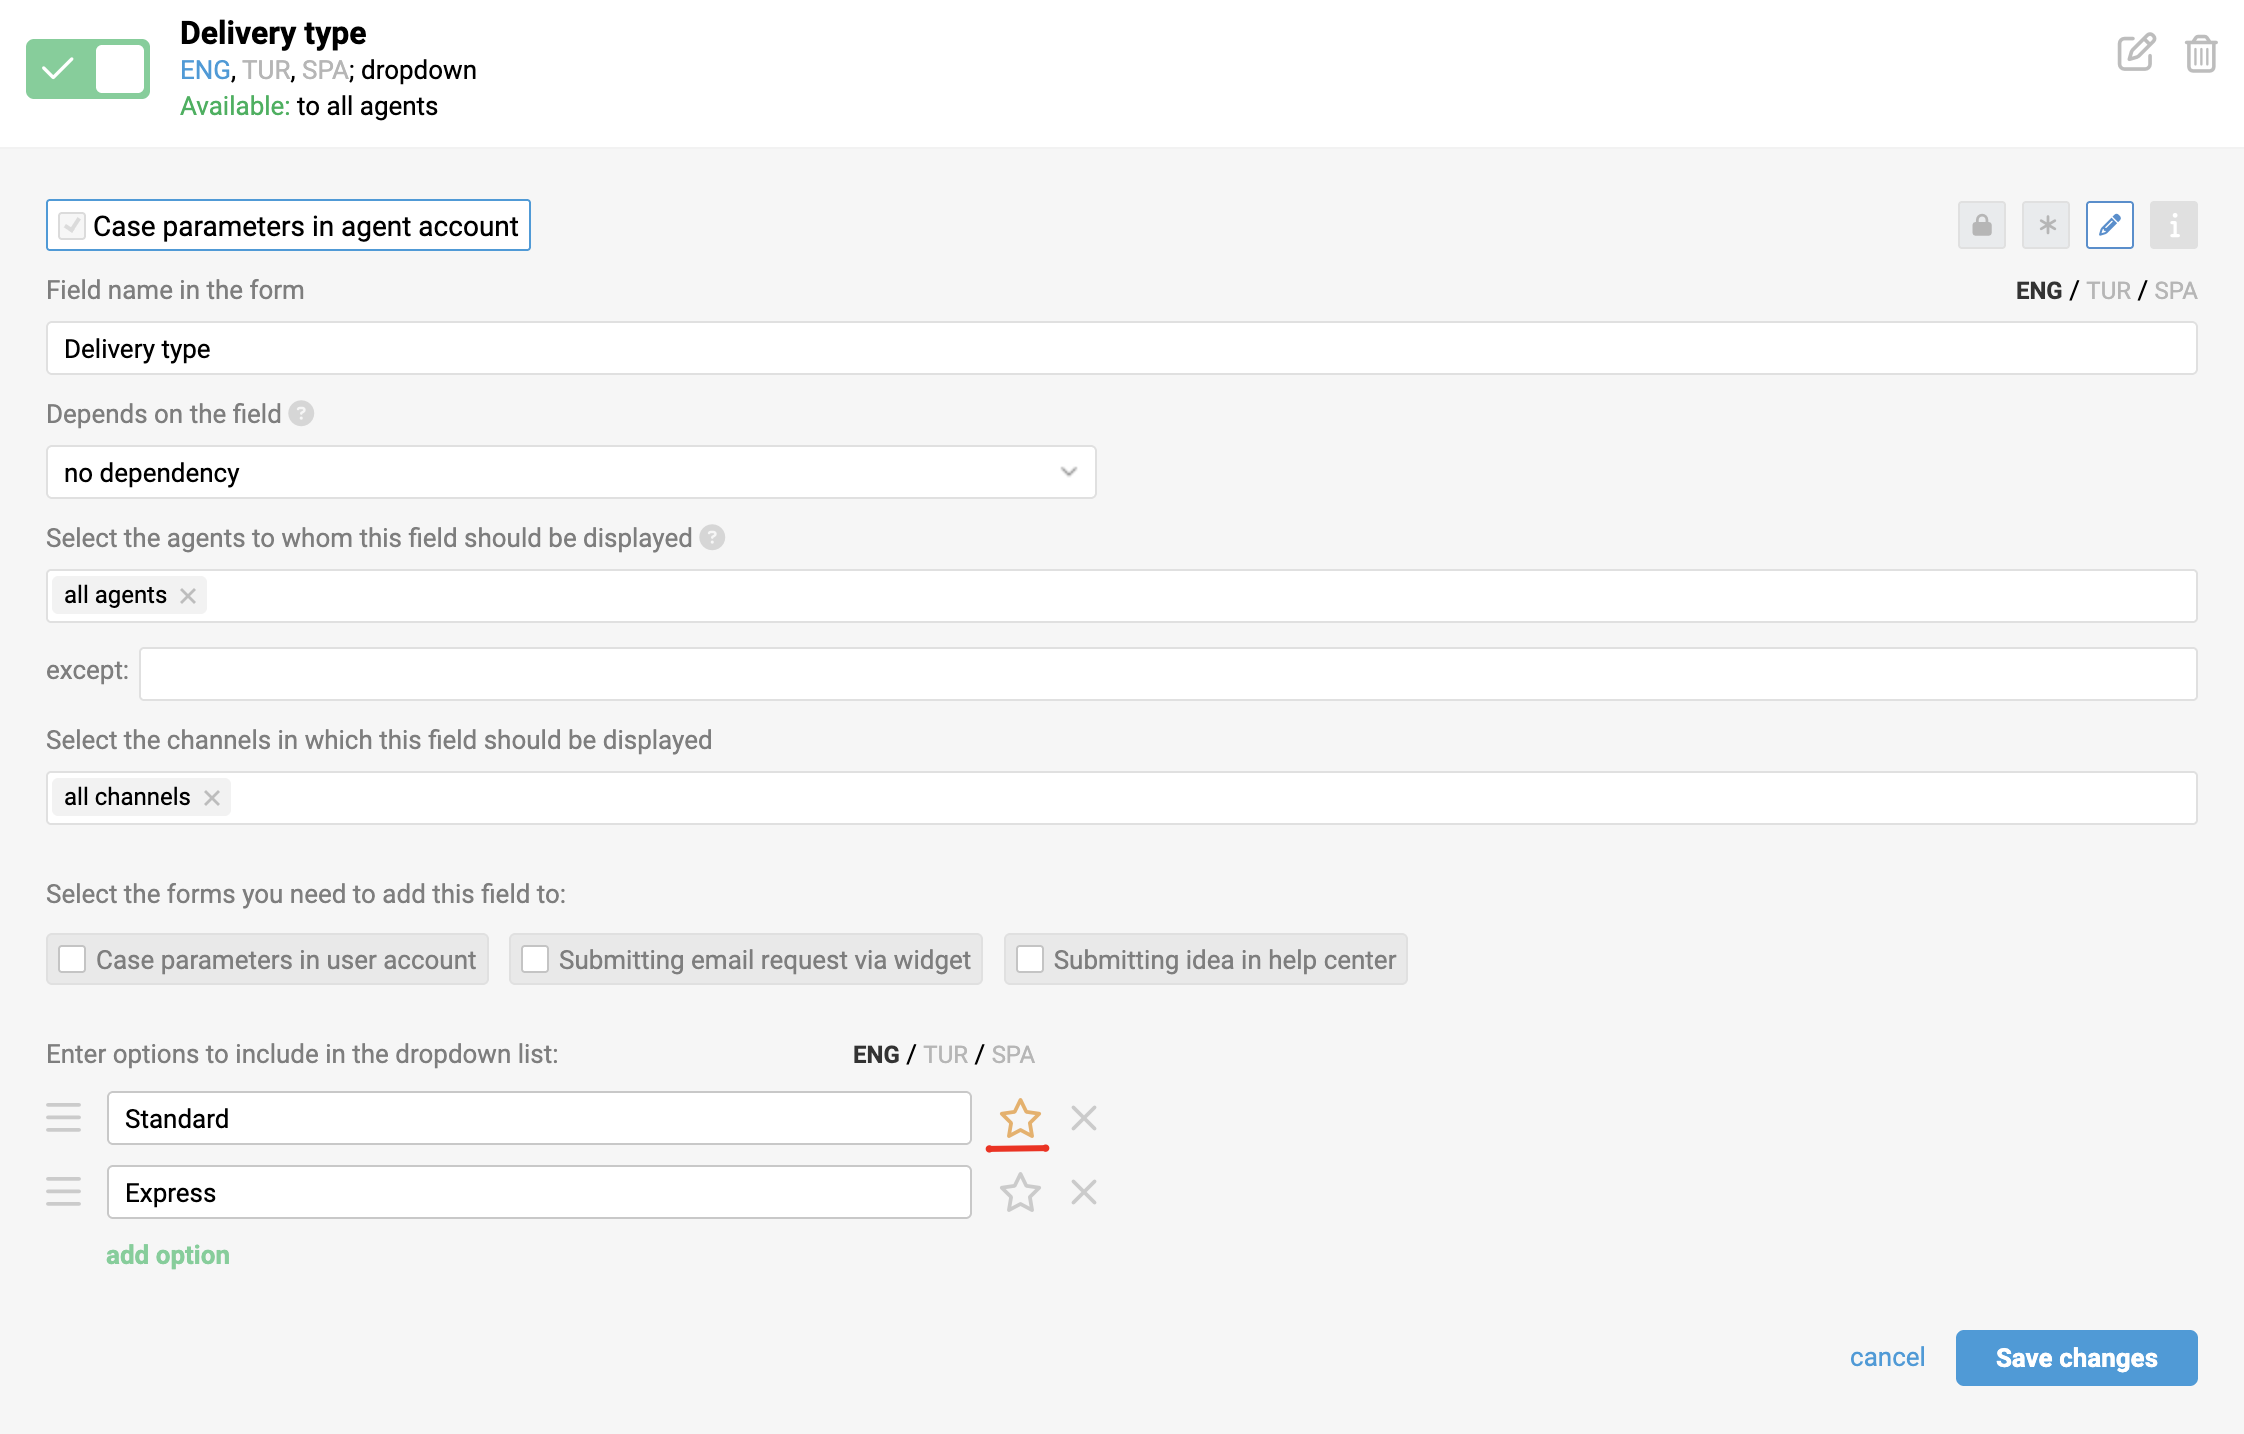
The selected default value will be applied only when creating a new case, user, or company in the agent's account interface or via API and when creating new cases through a widget or idea form in the help center.
e) Field visibility
In all forms accessible to agents, you can flexibly configure field visibility. You can select which agents can see a field based on their roles or group access or even specify individual names.
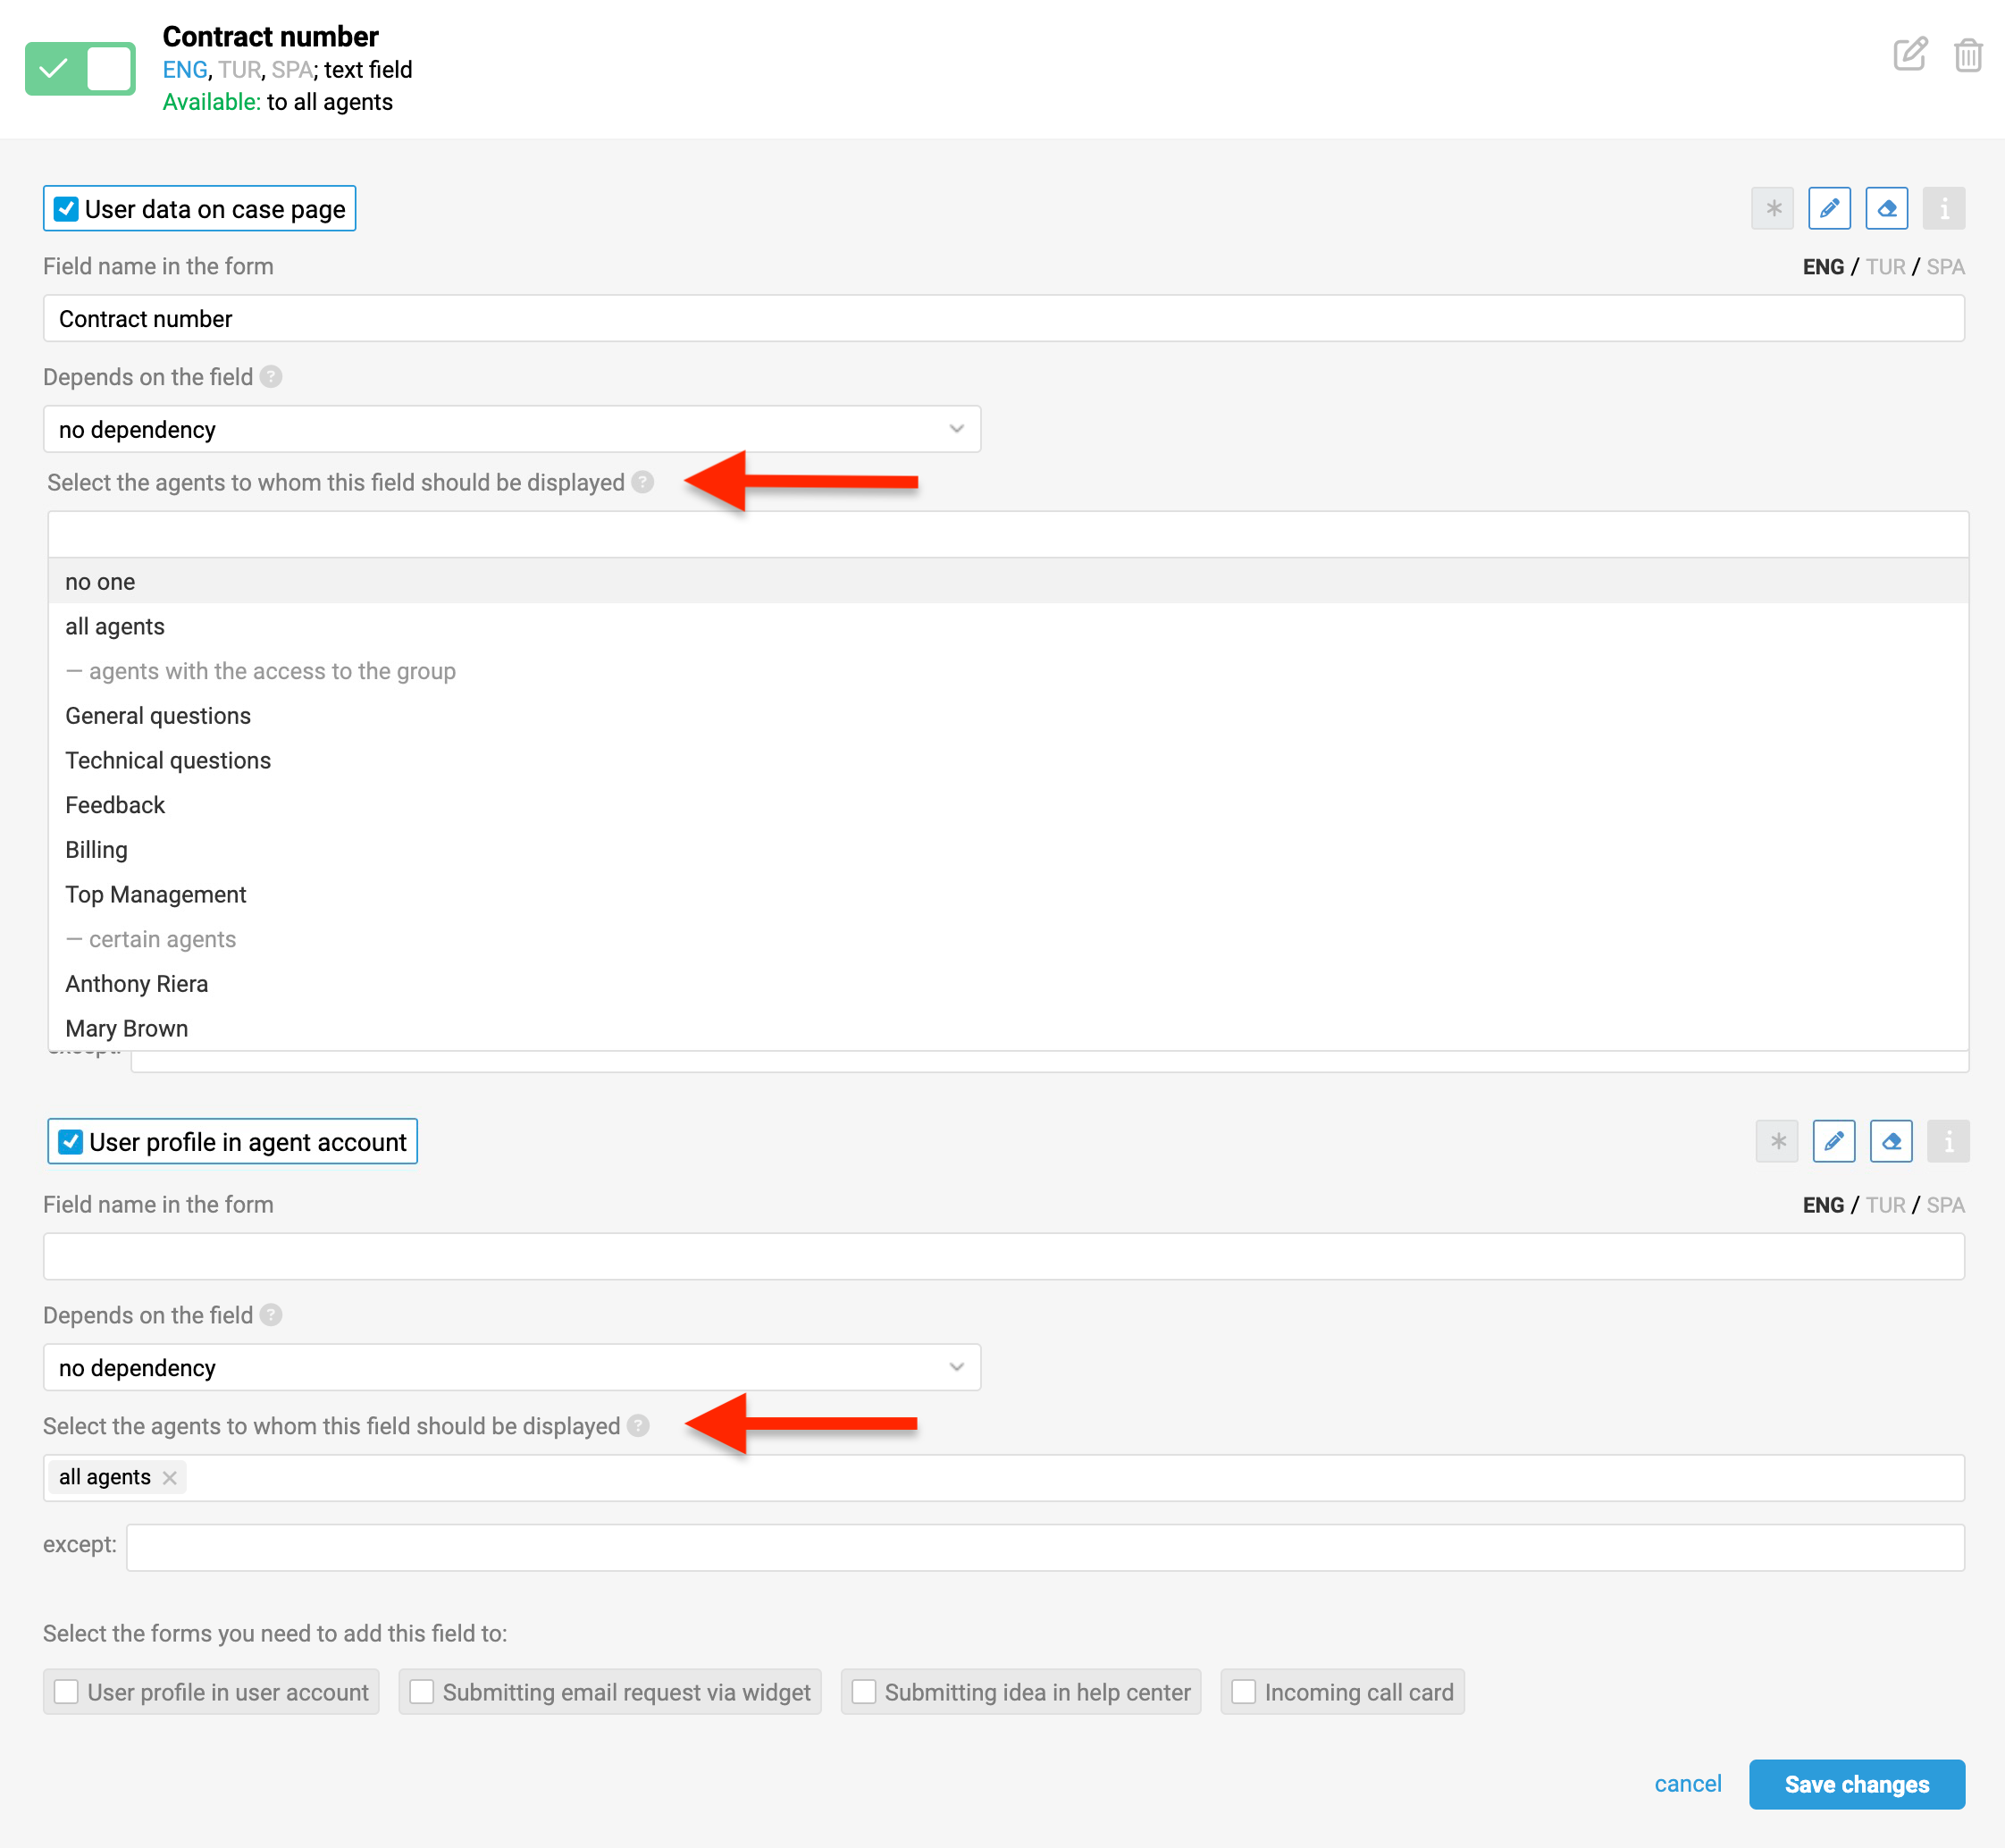
Visibility can be customized for each form individually. For example, you might set it up so agents don’t see certain user information on the case page, but that info is still visible on the user’s profile page.
Besides protecting sensitive data, this setting makes it easier for different teams to focus on what matters to them. For instance, accounting staff can be limited to fields about contracts, invoices, and deadlines, while support teams see details about the purchased product and subscription plan.
You can also hide certain fields in the interface so they don’t distract agents, while still using fields' data for automation rules, reports, or API.
f) Display depending on channel
In the "Case parameters in agent account" form within the agent account, you can specify which channels will display custom case fields, as well as the "Reply by" and "Close by" fields.
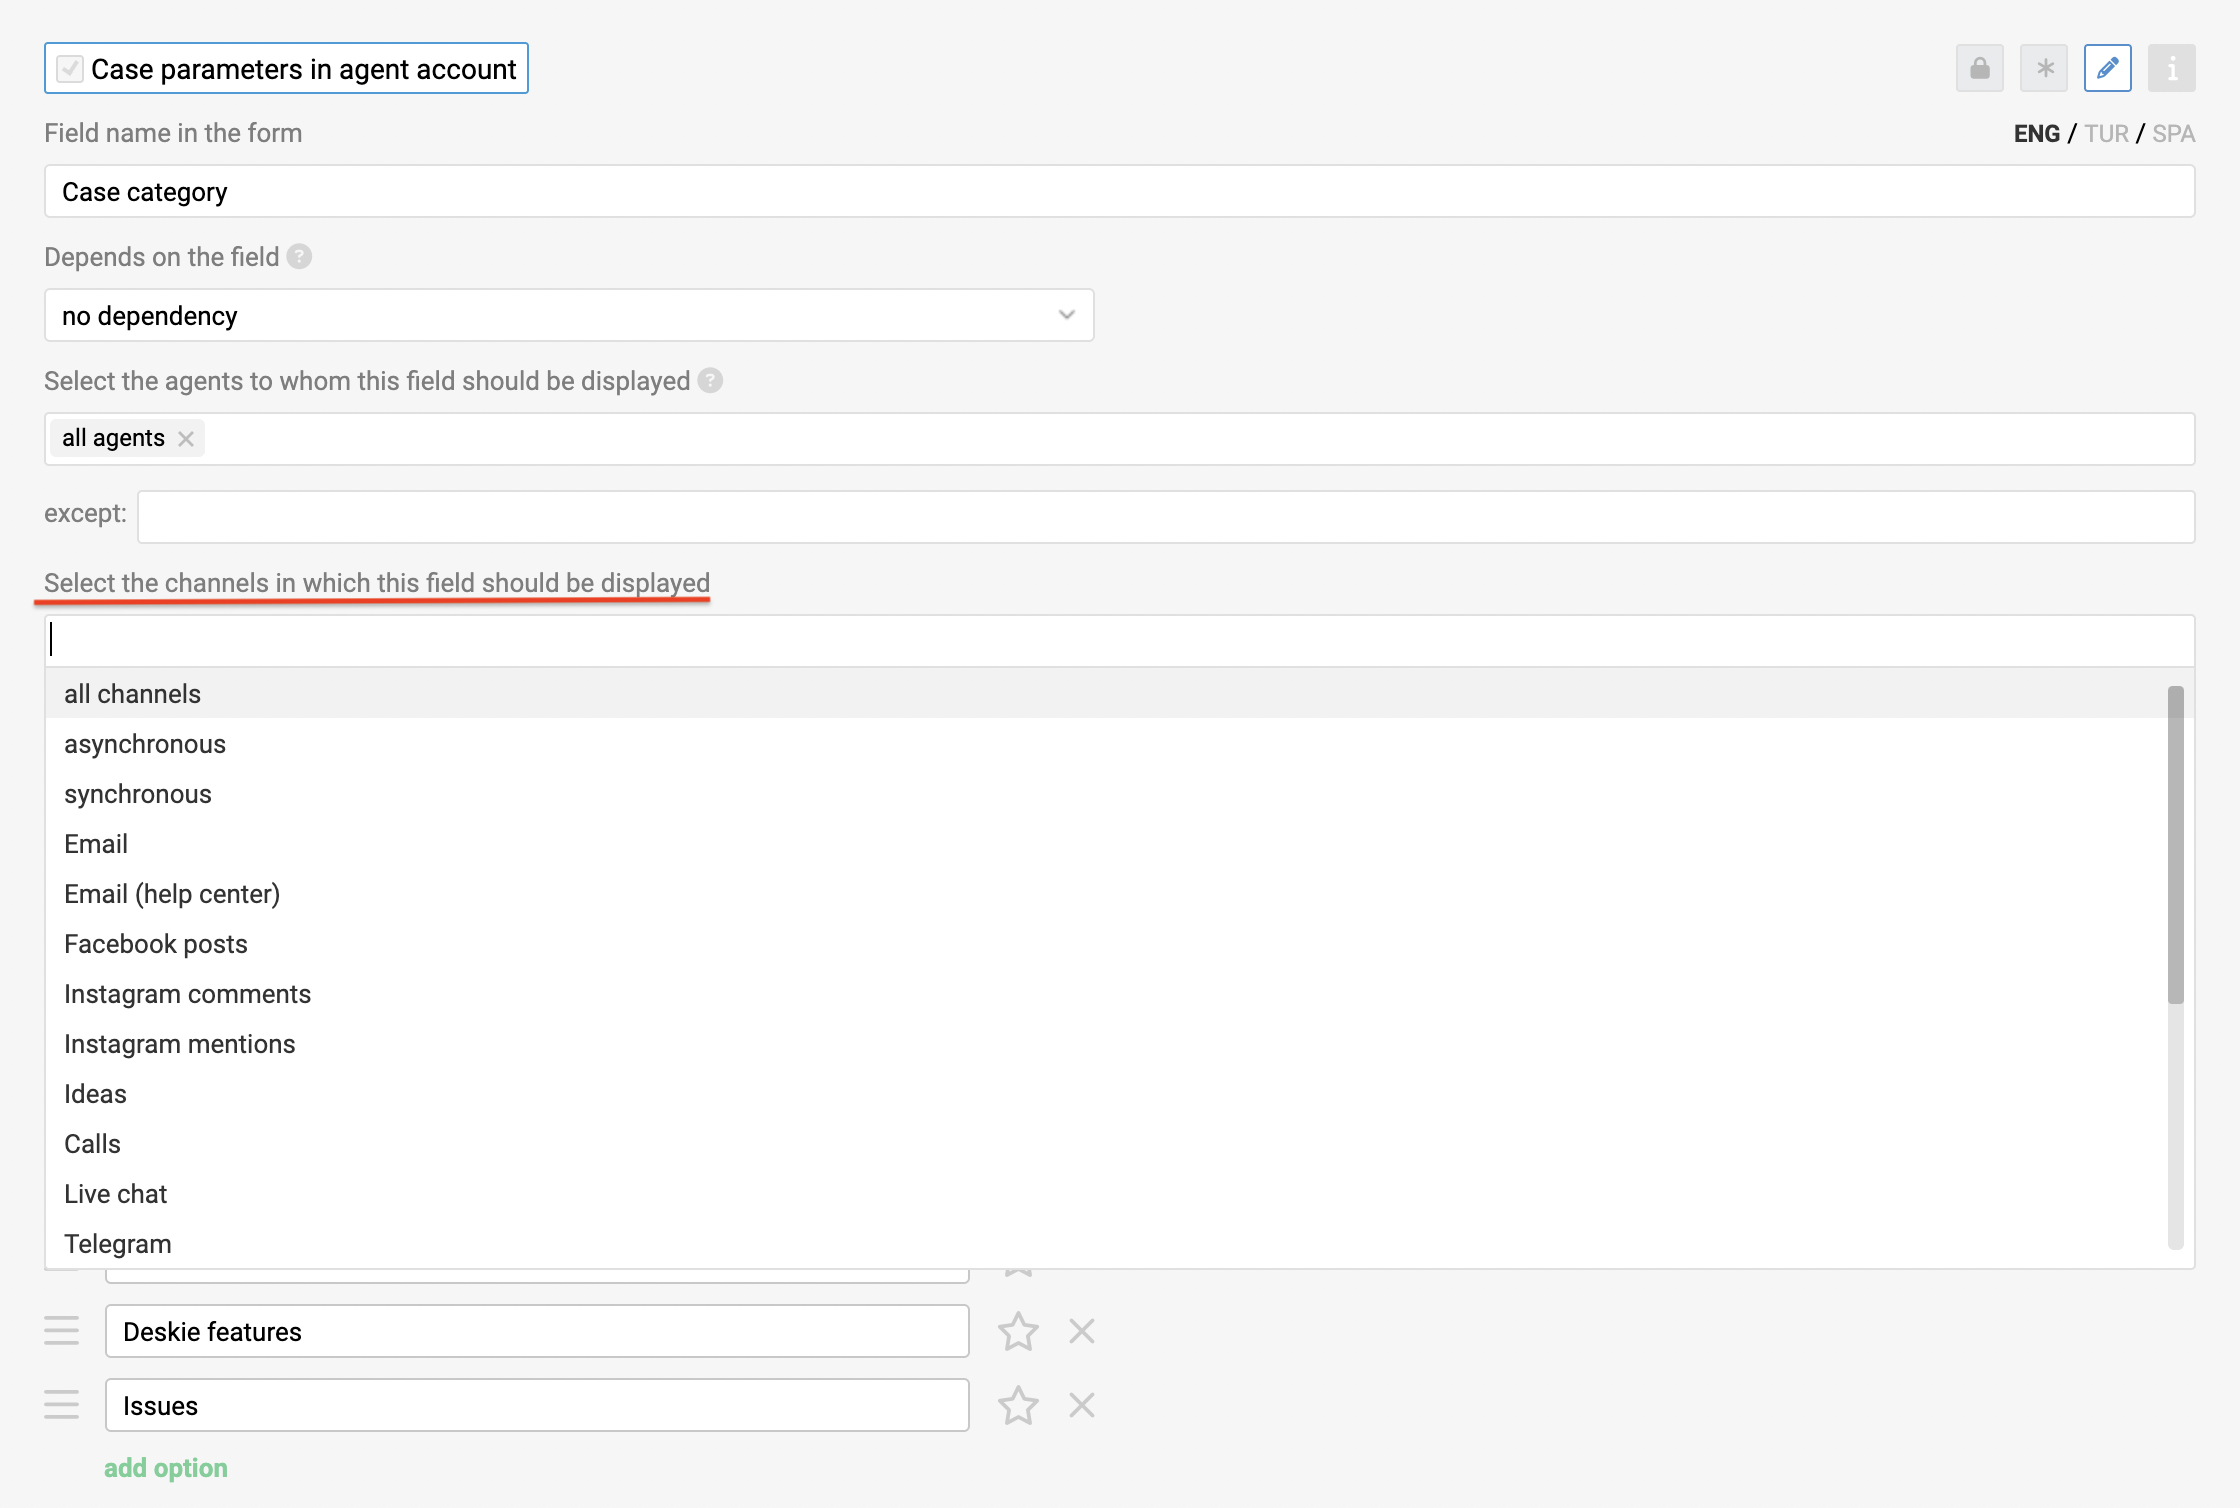
For example, if you only track SLA in groups that handle chats, you can choose not to display SLA tracking fields in email-based cases.
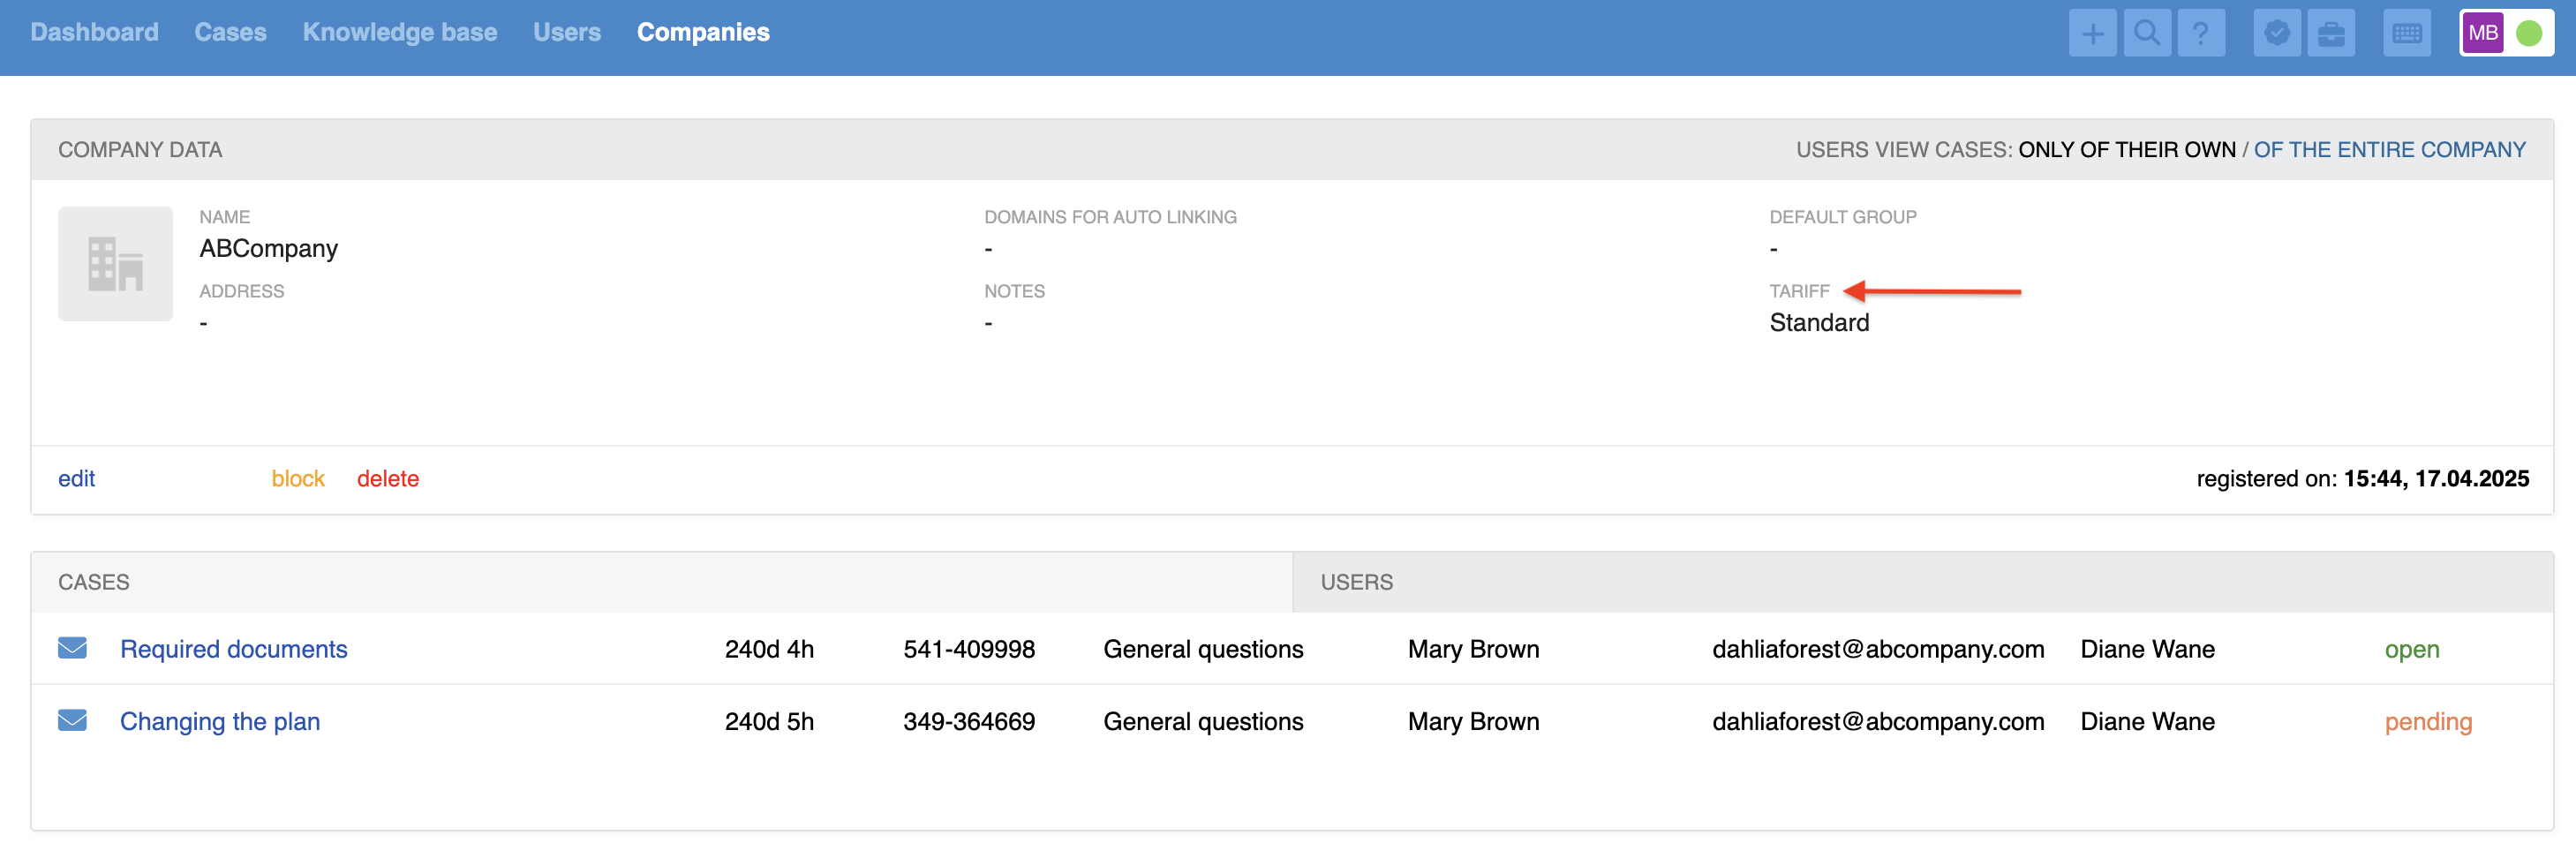
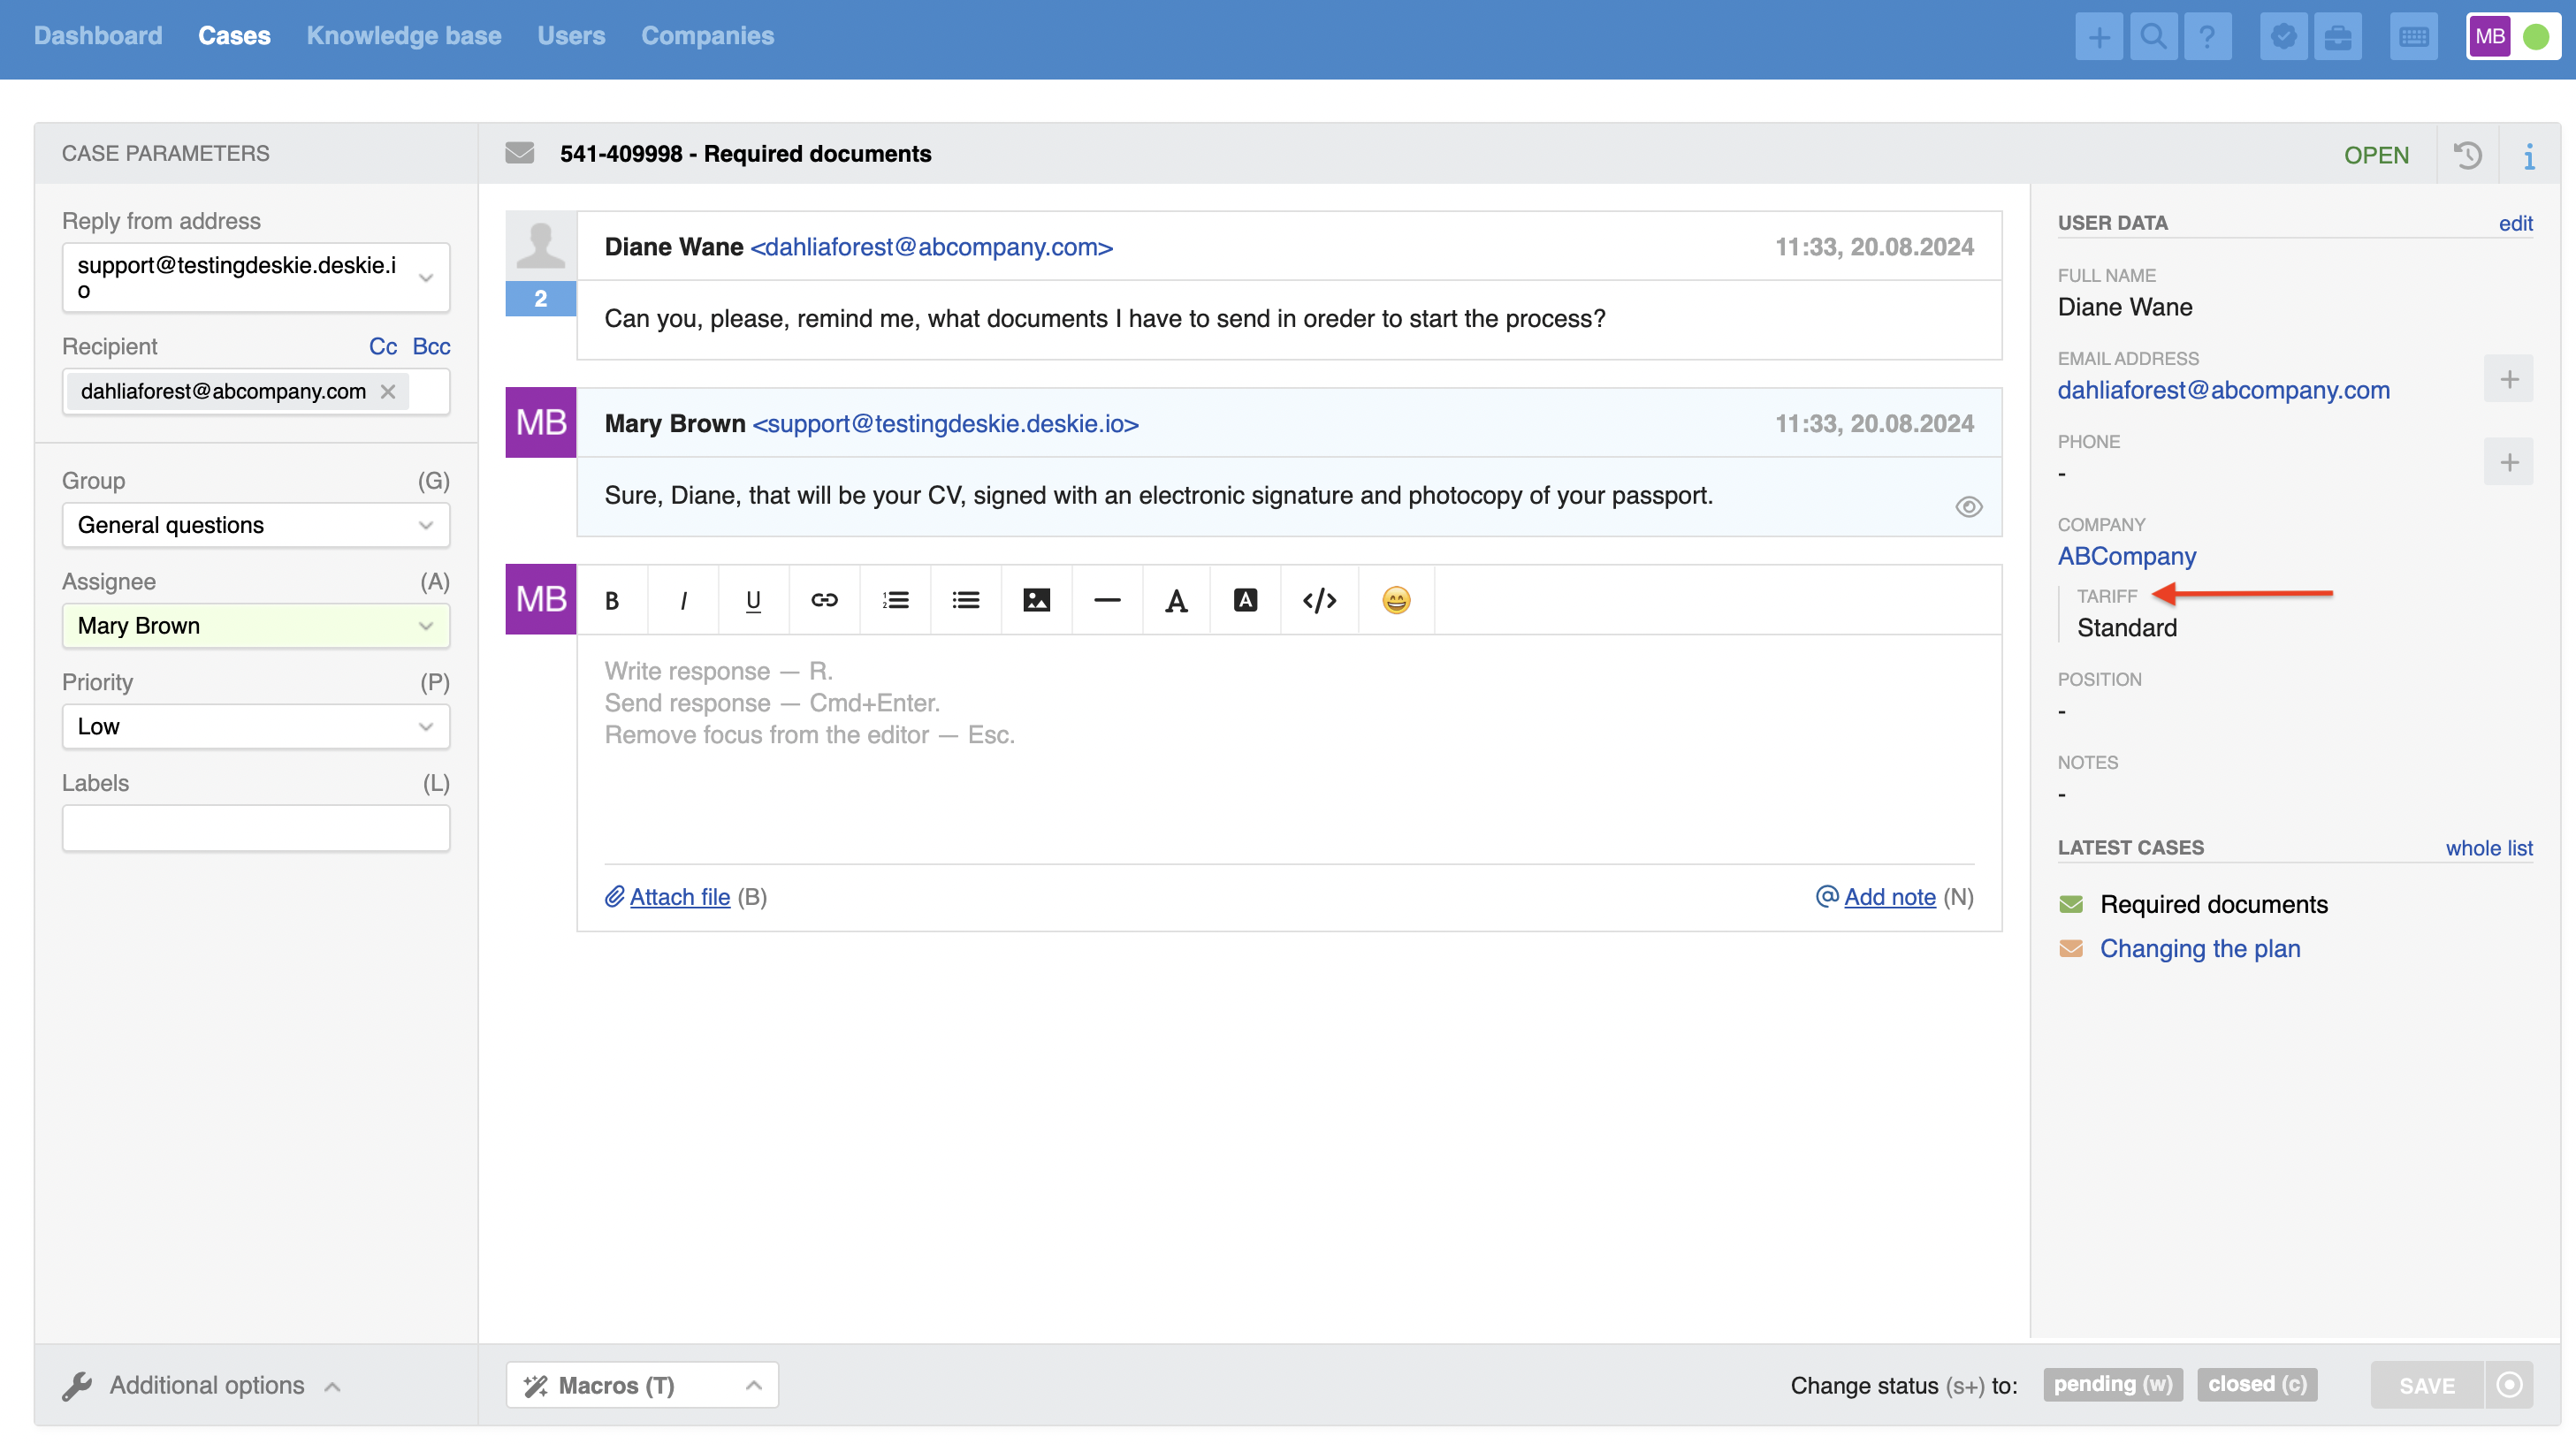
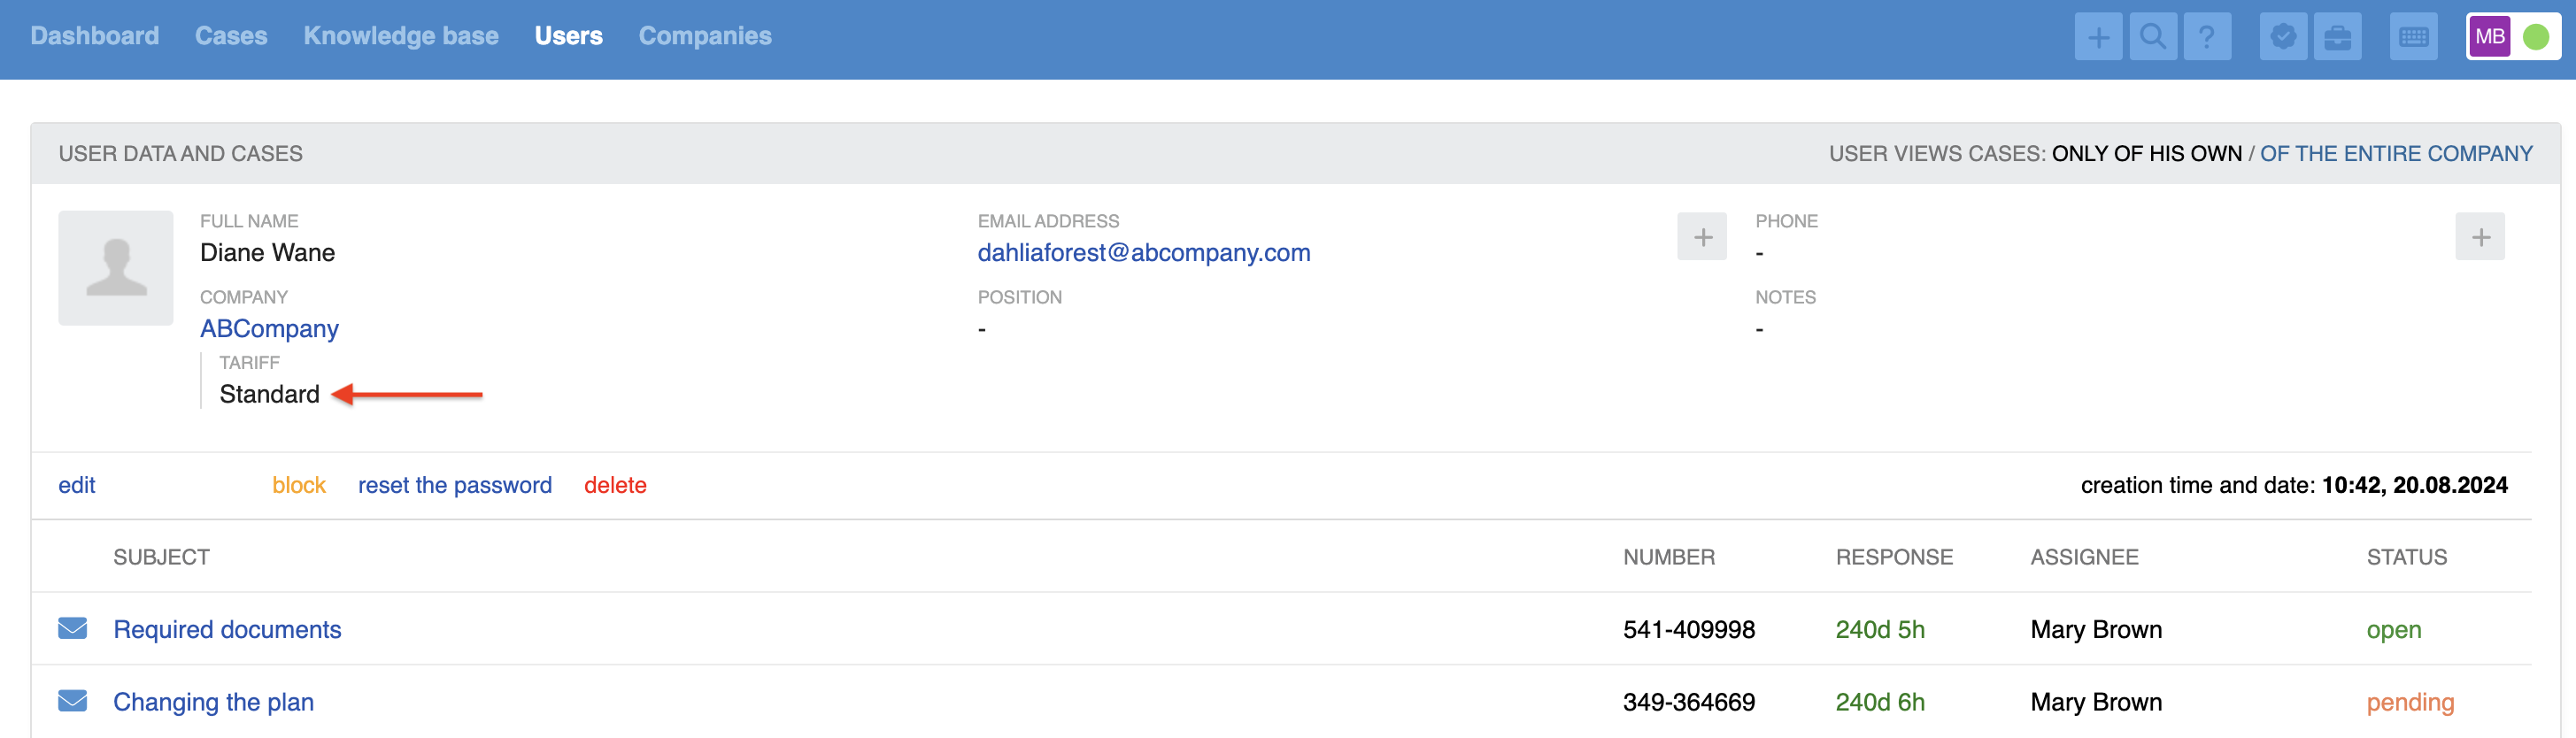
g) Company field features
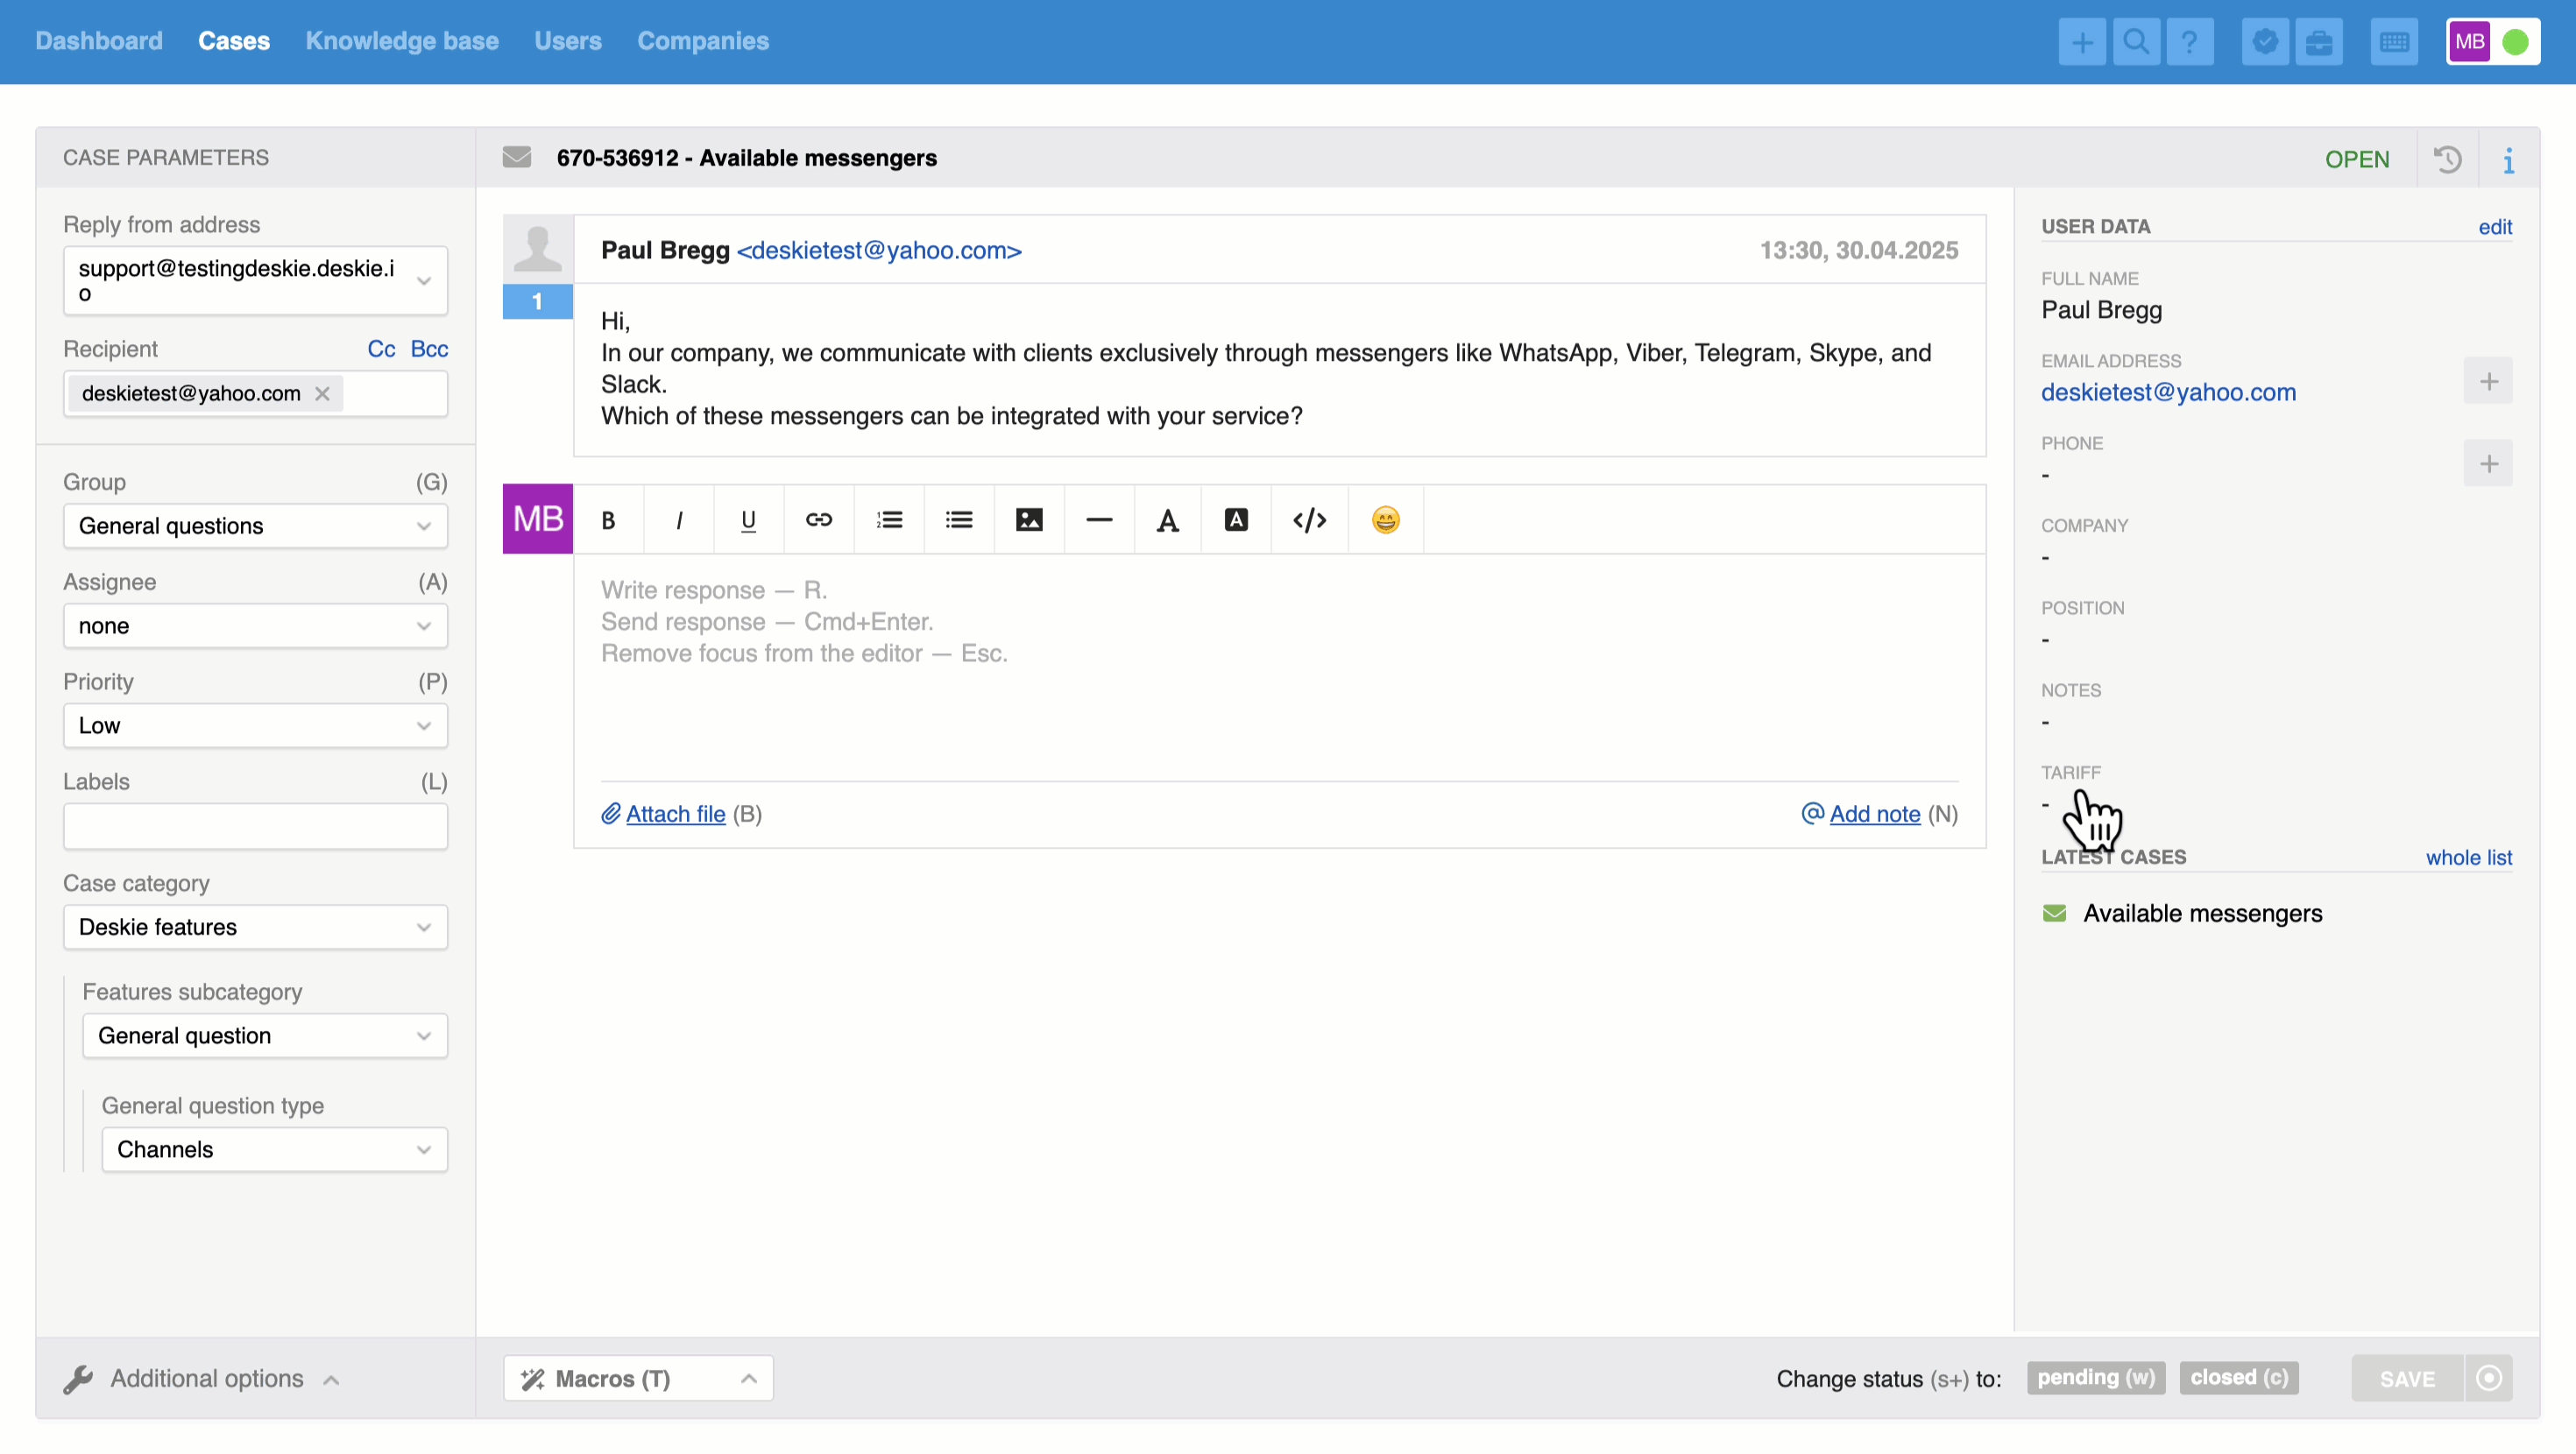
At the bottom of the company field creation form, there is a checkbox labeled "The completed field is displayed in all forms where there is the 'Company' field". This checkbox is ticked by default. If the custom field is filled out, it will appear everywhere the "Company" field does – like on the case page in the user data panel, the user’s profile page, and the incoming call card). This is convenient if you want to see key company information immediately without navigating to the company profile.
Although the company field will be visible in the user’s data, it can only be edited on the company’s profile page.
h) Date field type features
When working with this type of field, a calendar pops up so you don’t have to enter the date manually. By default, the calendar opens to the current month, with today’s date highlighted in blue. You can quickly switch between months and years using the calendar header:
Rules and macros offer conditions and actions that let you work with and update values in date fields. Learn more
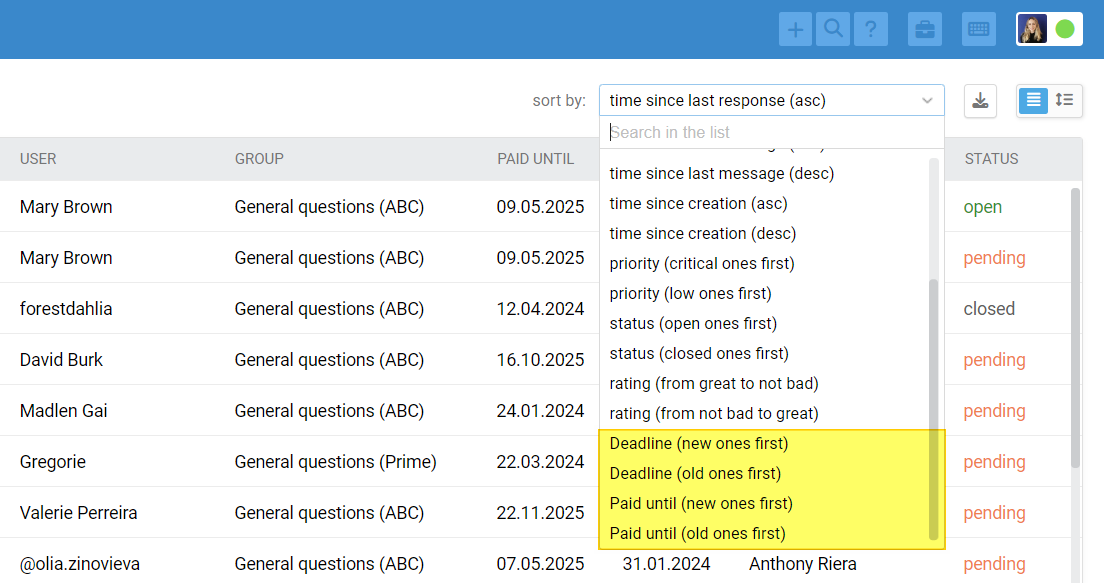
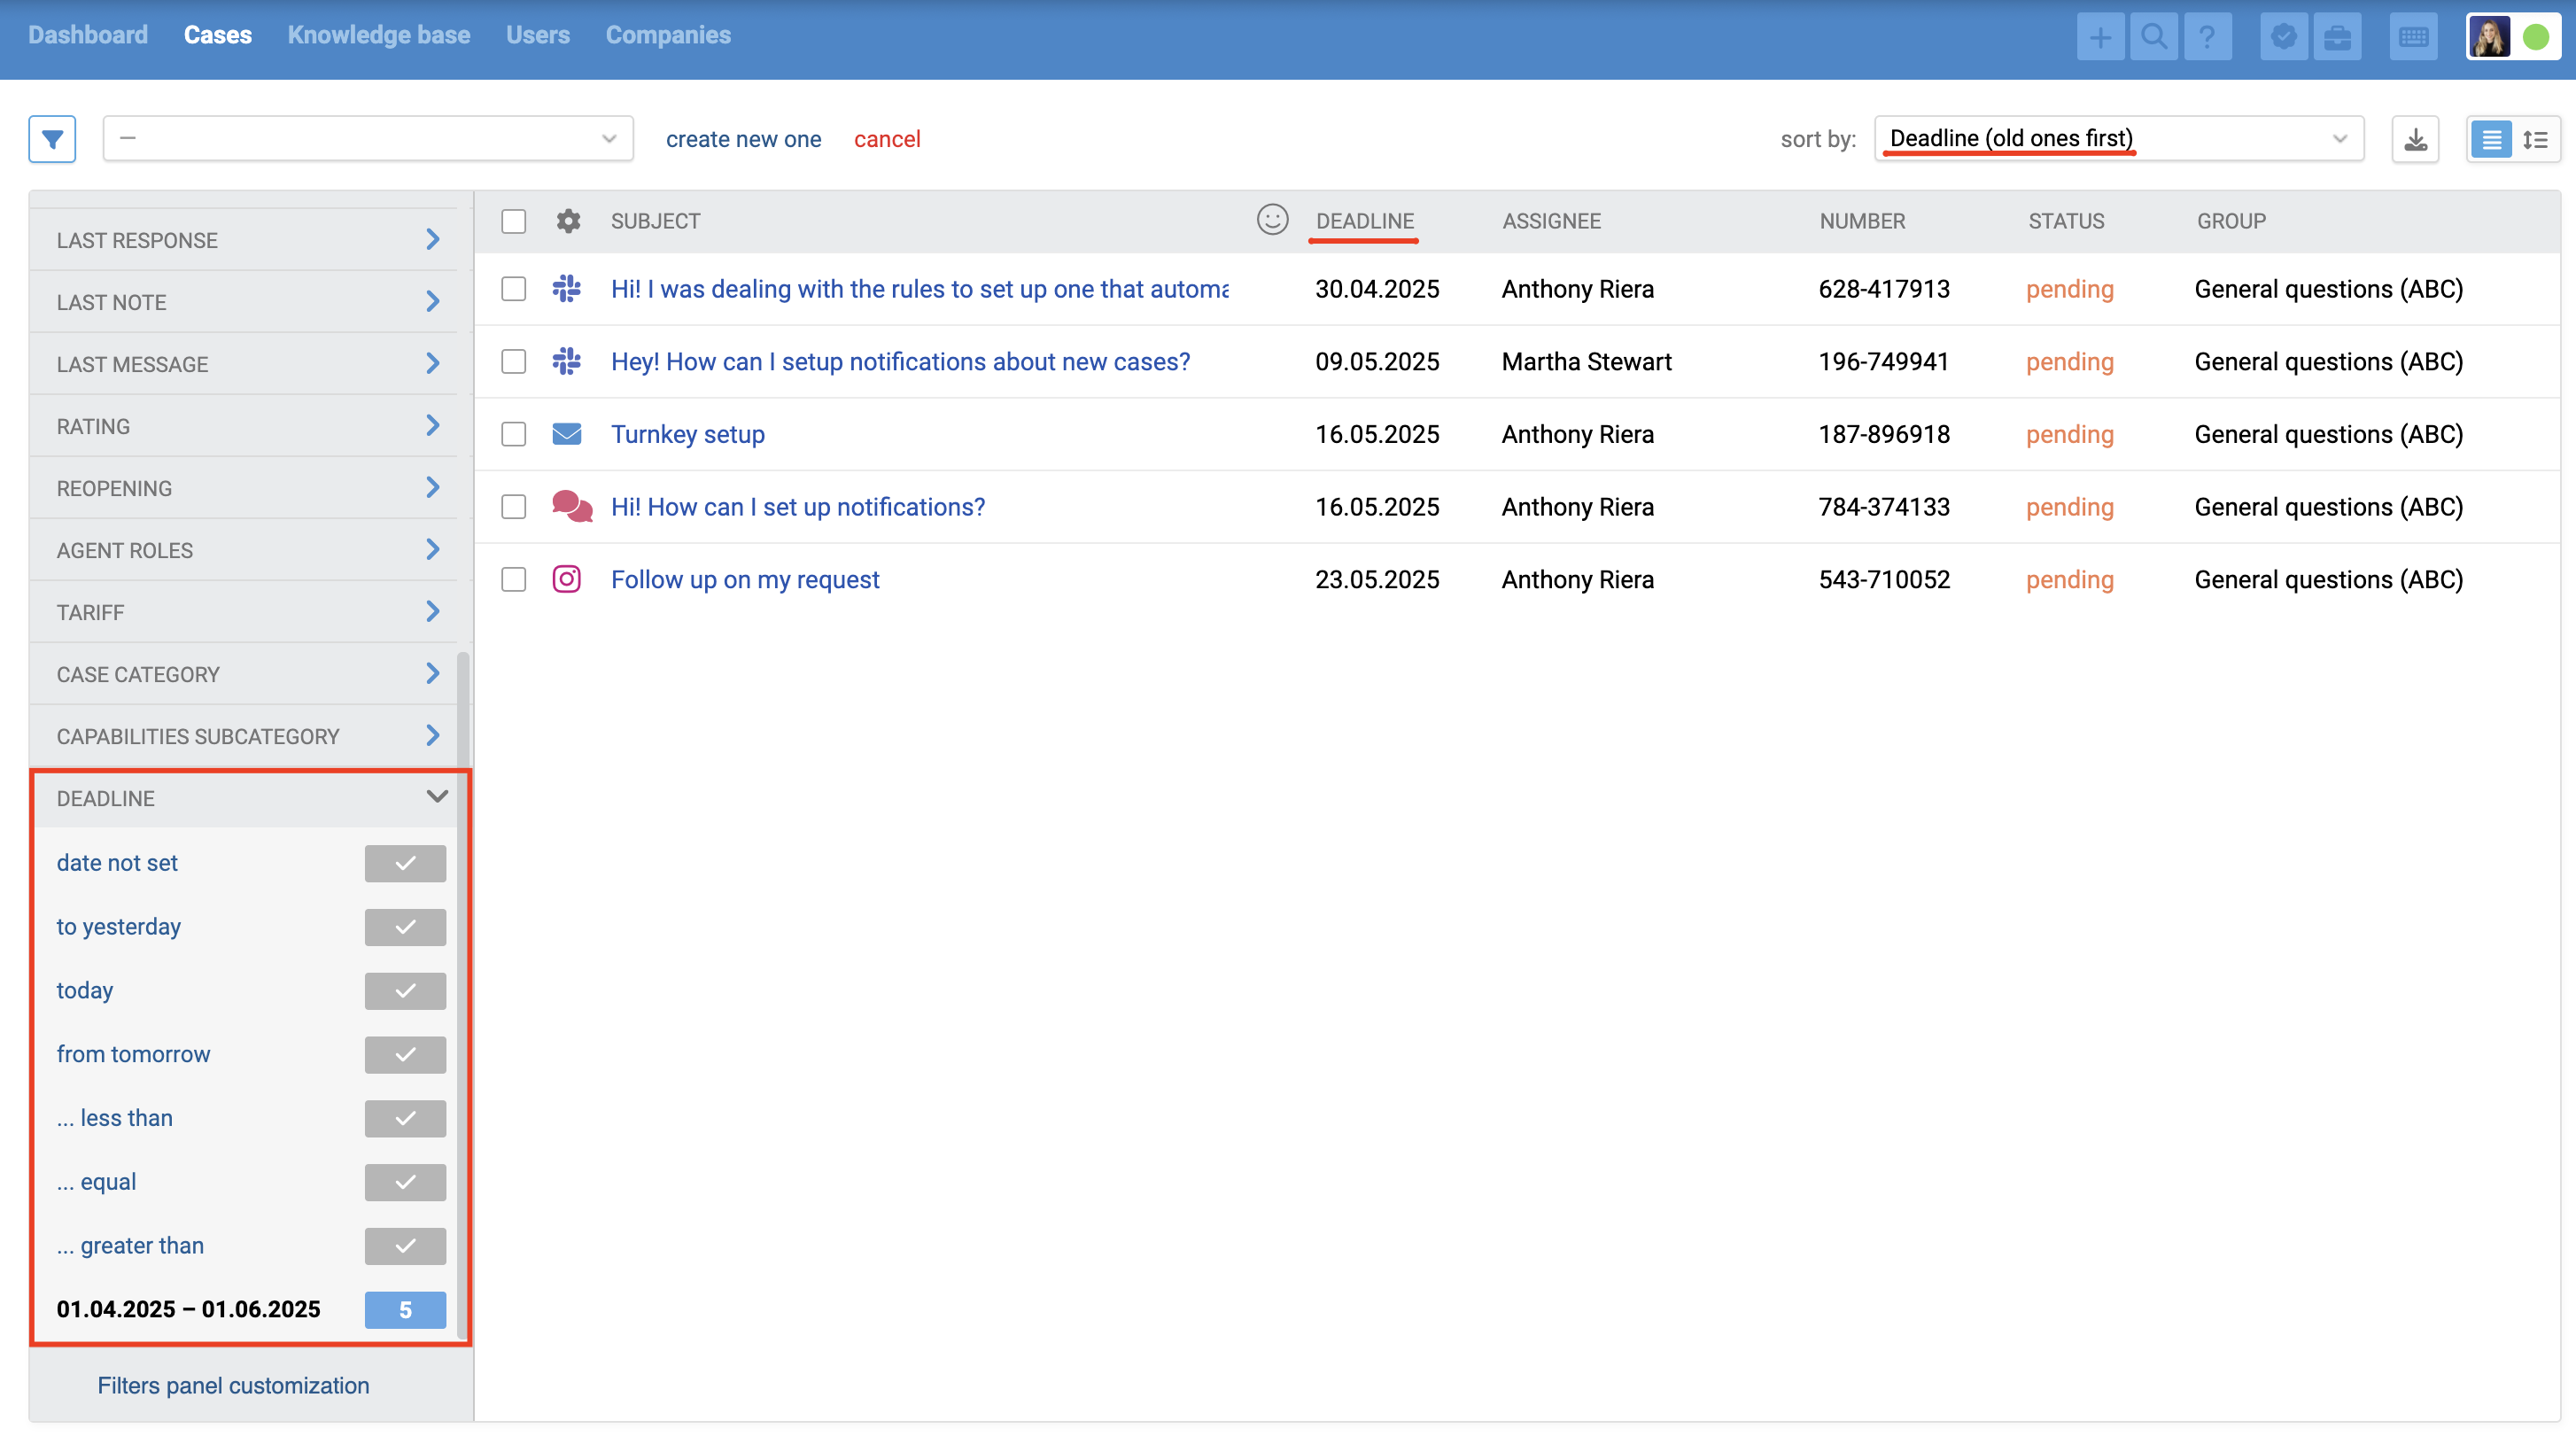
For each created field of the "Date" type, there is an option to sort cases: "new ones first" or "old ones first".
In the filter panel, a separate block with parameters for filtering appears for each field of the "Date" type. The following options are available:
— date not set,
— to yesterday,
— today,
— from tomorrow,
— [date] less than,
— [date] equal,
— [date] greater than,
— from [date] to [date].
Thanks to the relative options ( to yesterday, today, and from tomorrow), the filters are updated dynamically based on the current date and you don't need to create new filters every day.
6. Dependent fields
You can create hierarchical field structures – for example, where each category has its specific subcategories.
This is achieved by configuring field dependencies.
a) Dependency in different forms
In all forms, dependencies can only be set if two conditions are met:
dependent fields must have the same affiliation – either to the case, the user, or the company;
both fields must be added to the same form.
An exception is made for the form "Submitting email request via widget", where dependencies can be set based on fields of any affiliation added to this form.
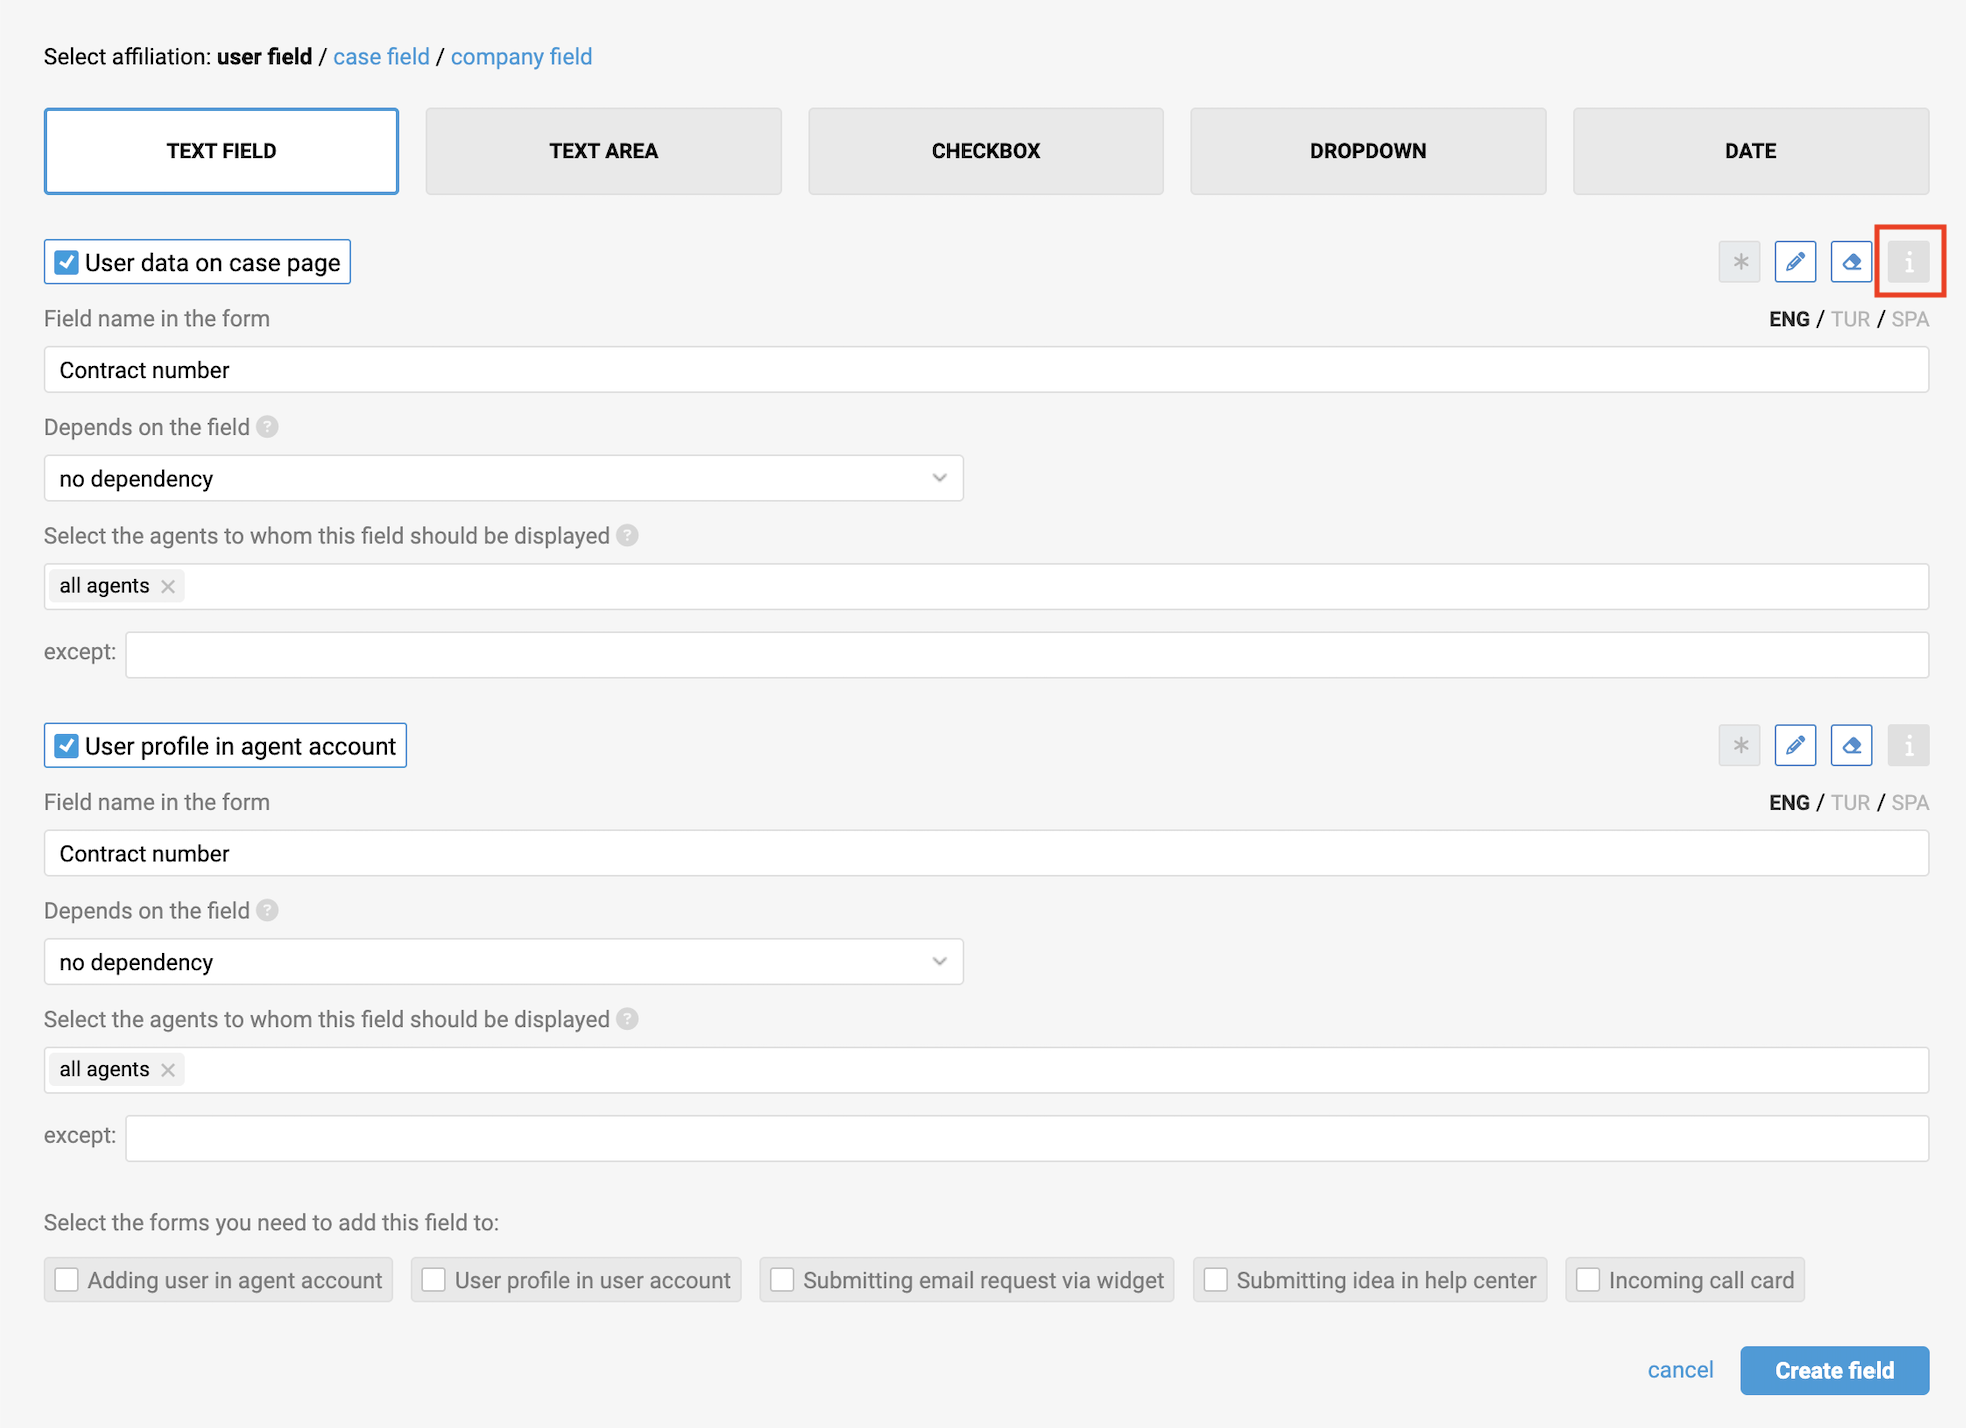
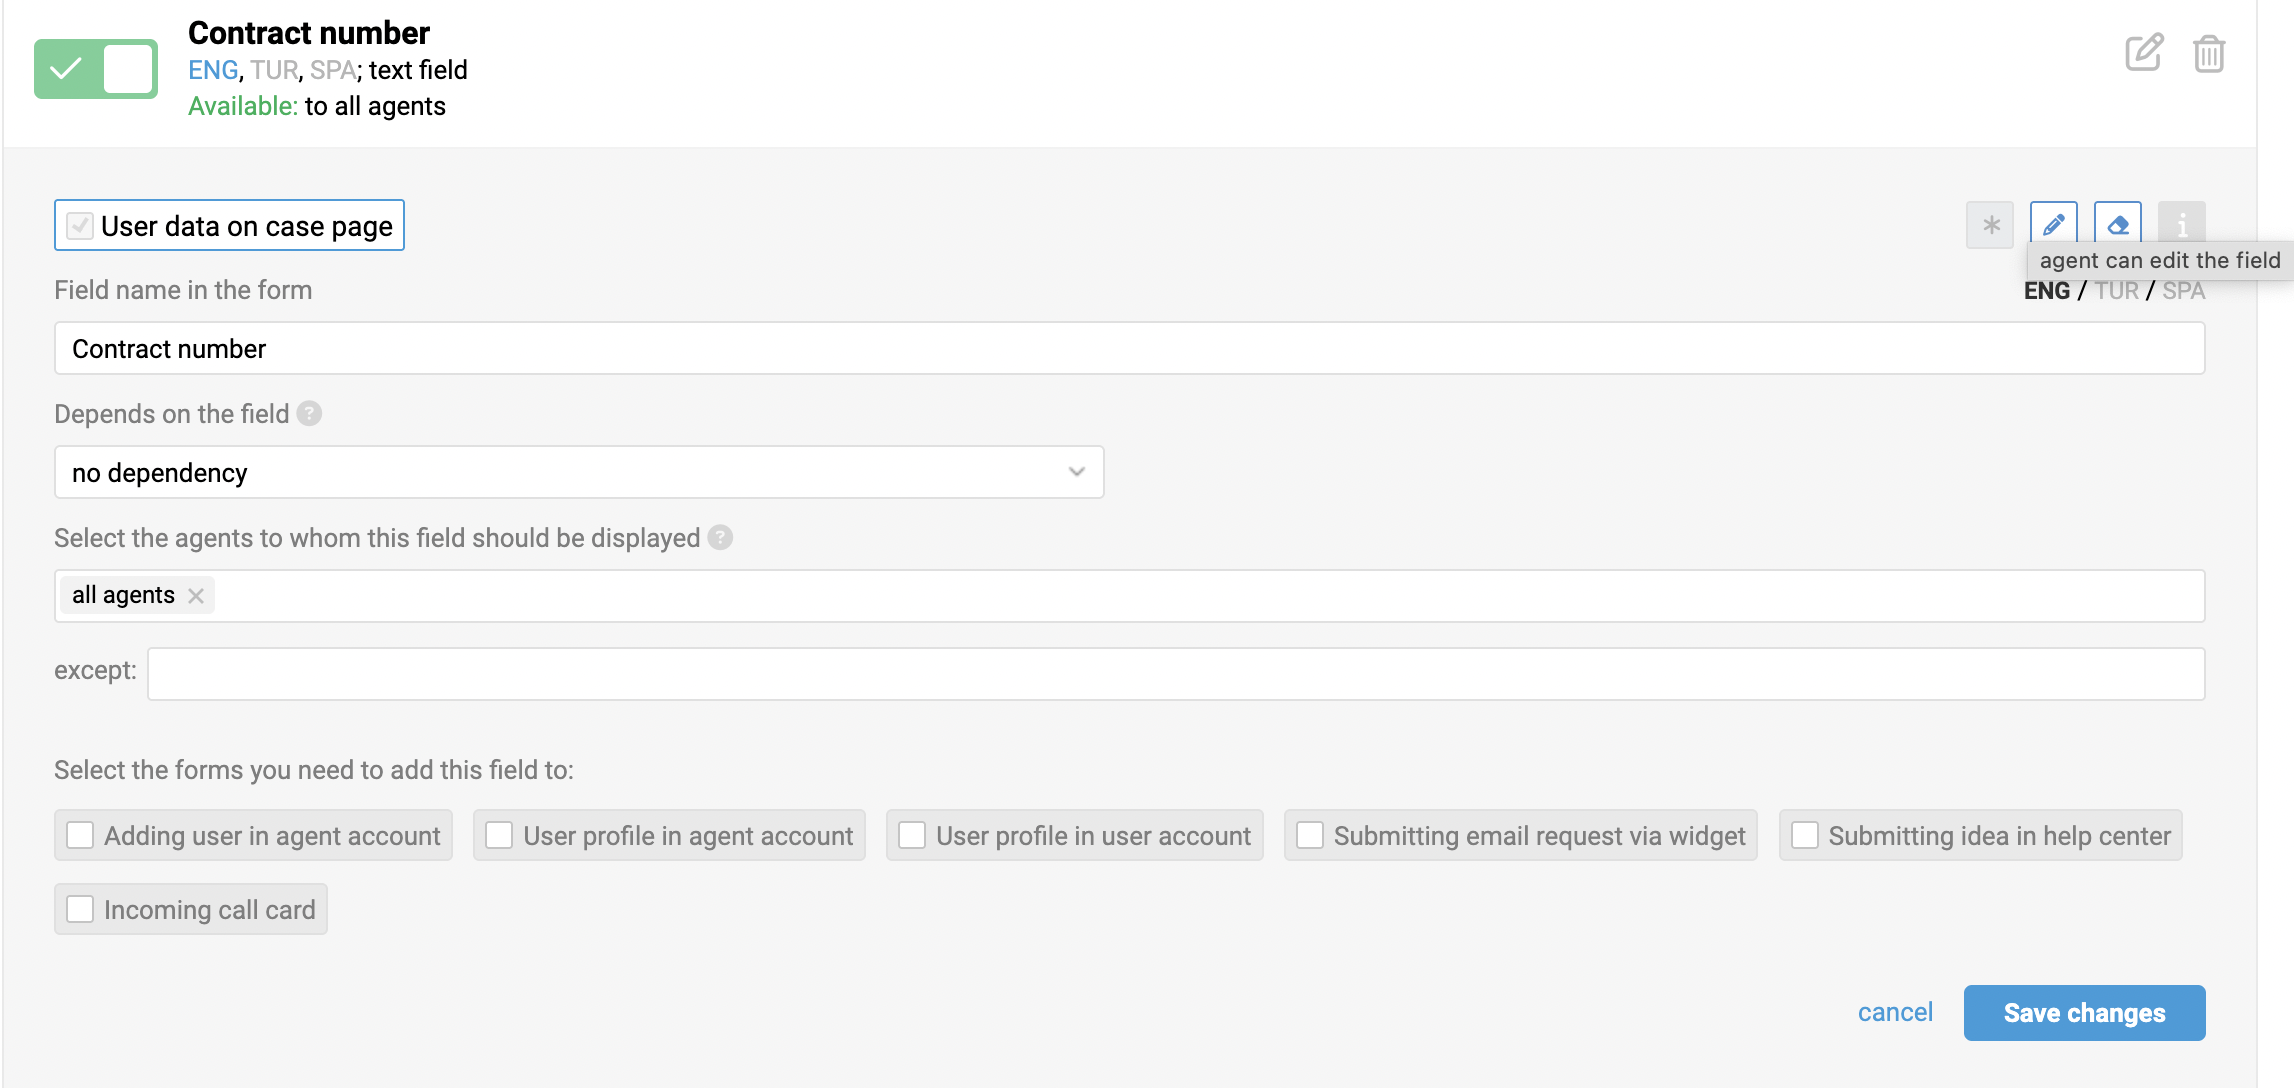
Let’s look at a specific example. We'll add a custom user field called "Contract Number". Since this is a user field, dependencies can only be set in the following forms: "Adding user in agent account", "User data on case page", "User profile in agent account", and "User profile in user account". Moreover, the value of this field can only depend on other user fields. We will specify that the "Contract Number" field depends on the "Tariff" field.
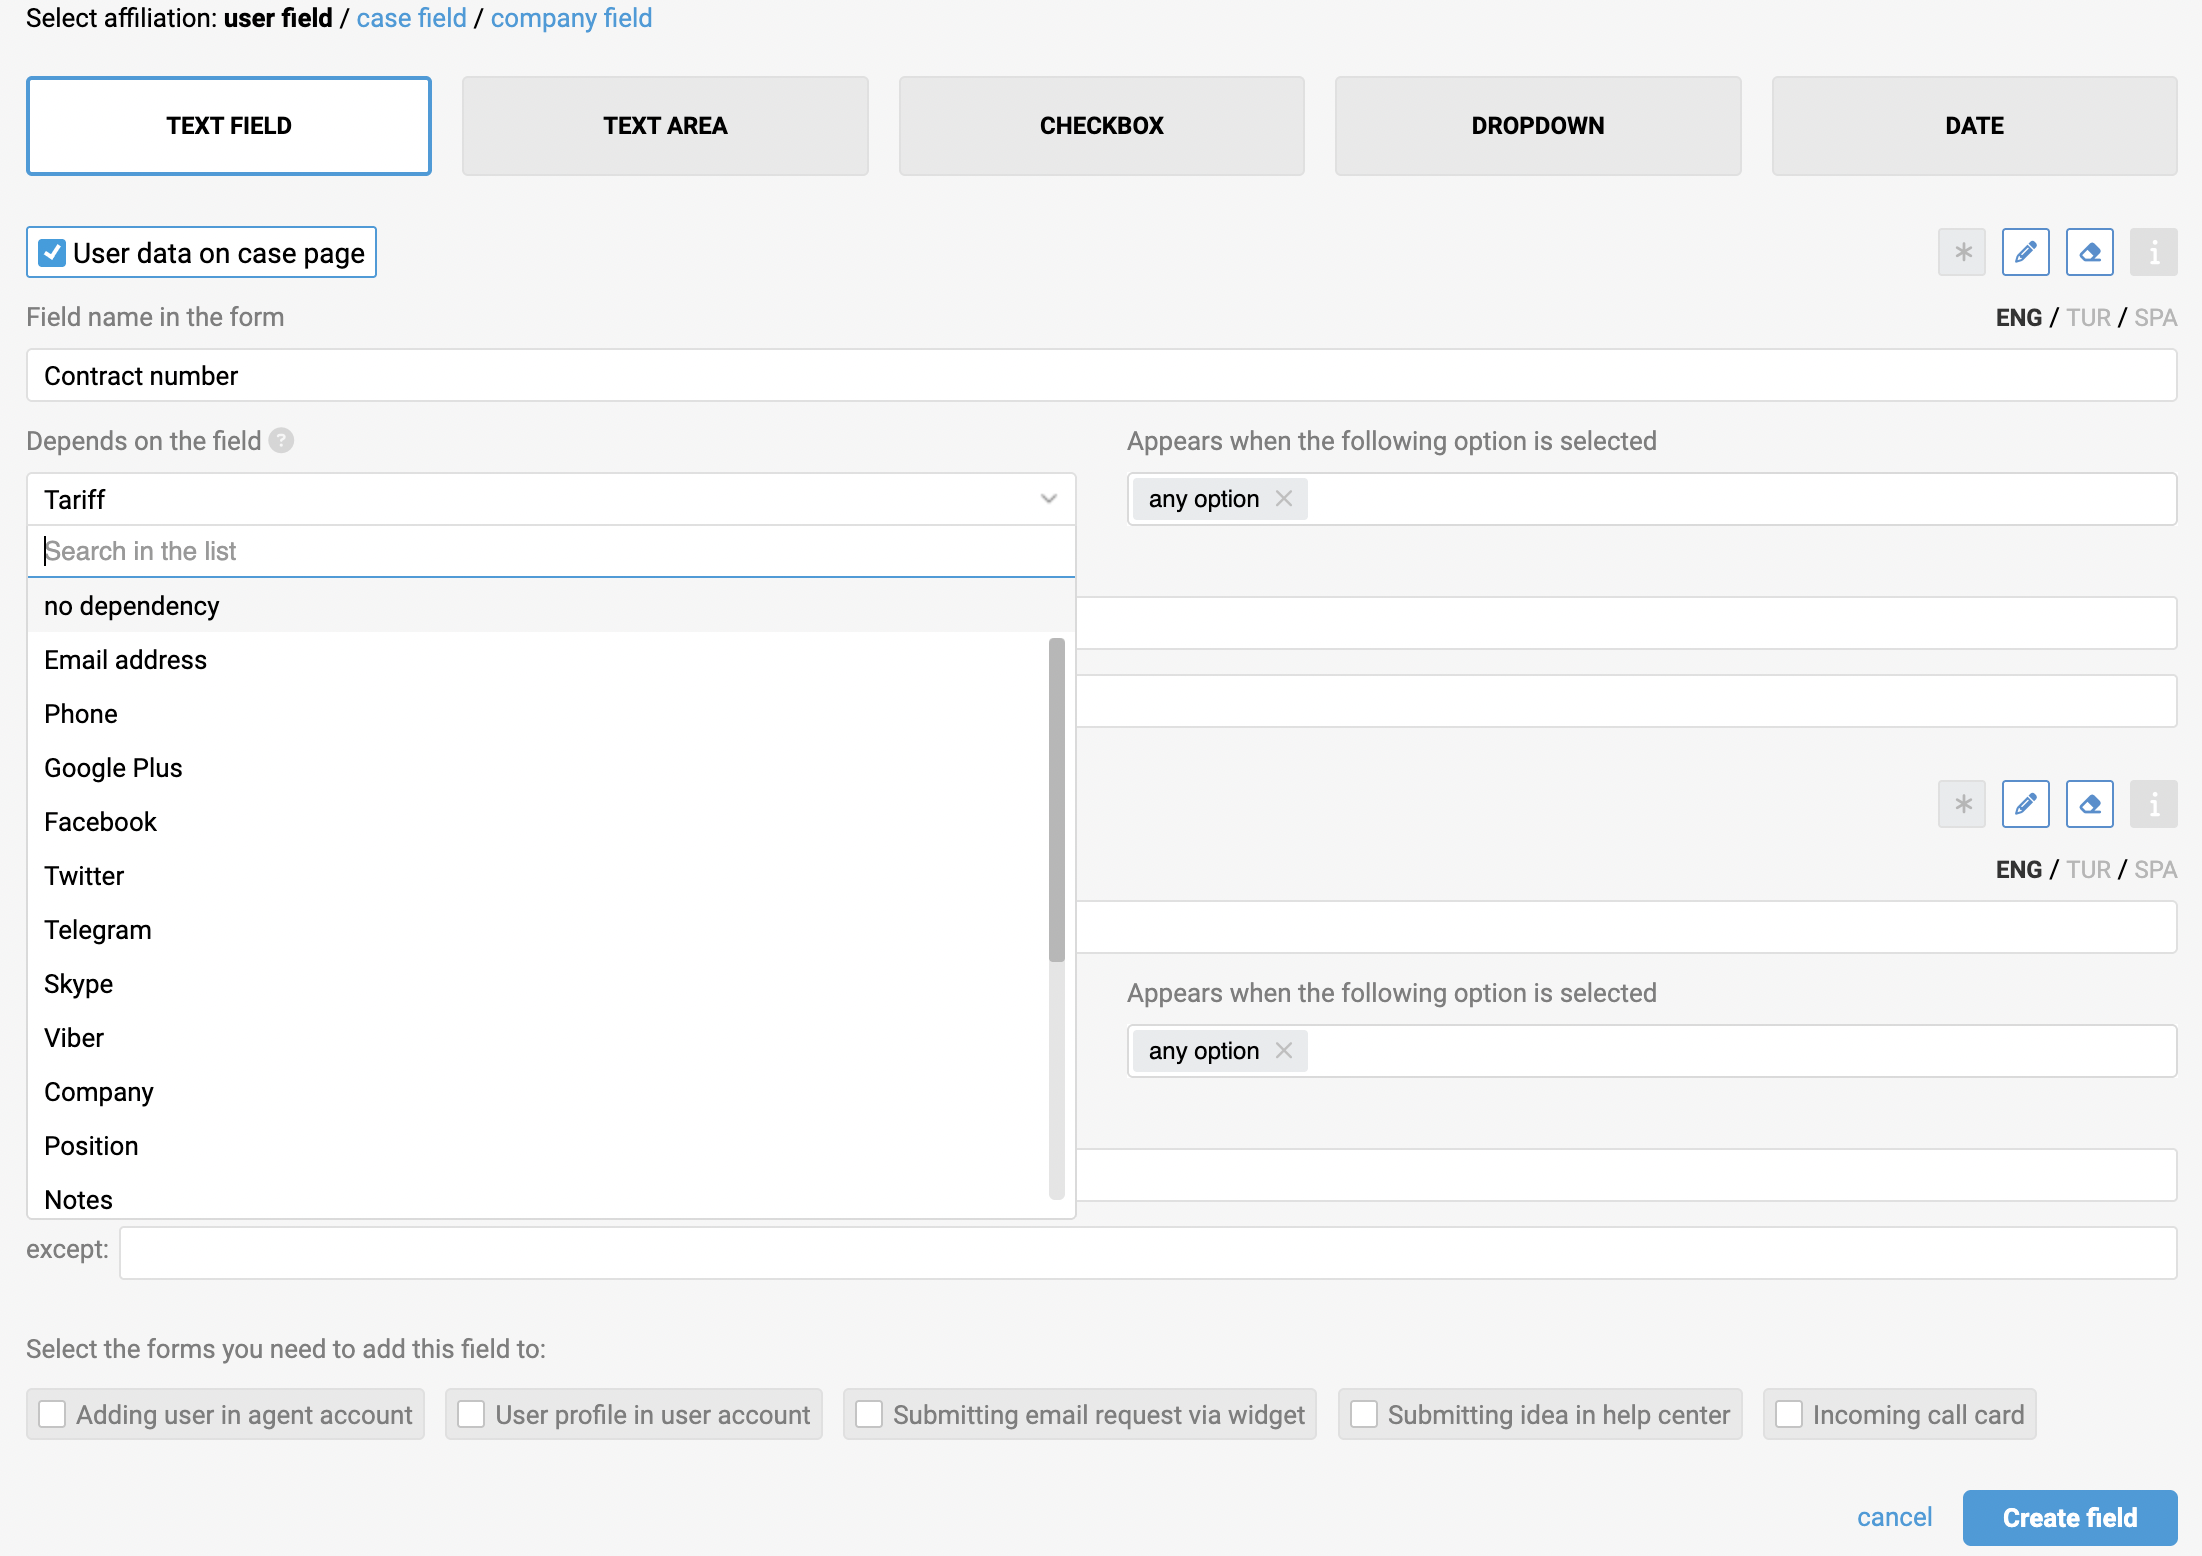
As a result, the "Contract Number" field will only be displayed if the user's "Tariff" field is filled in.
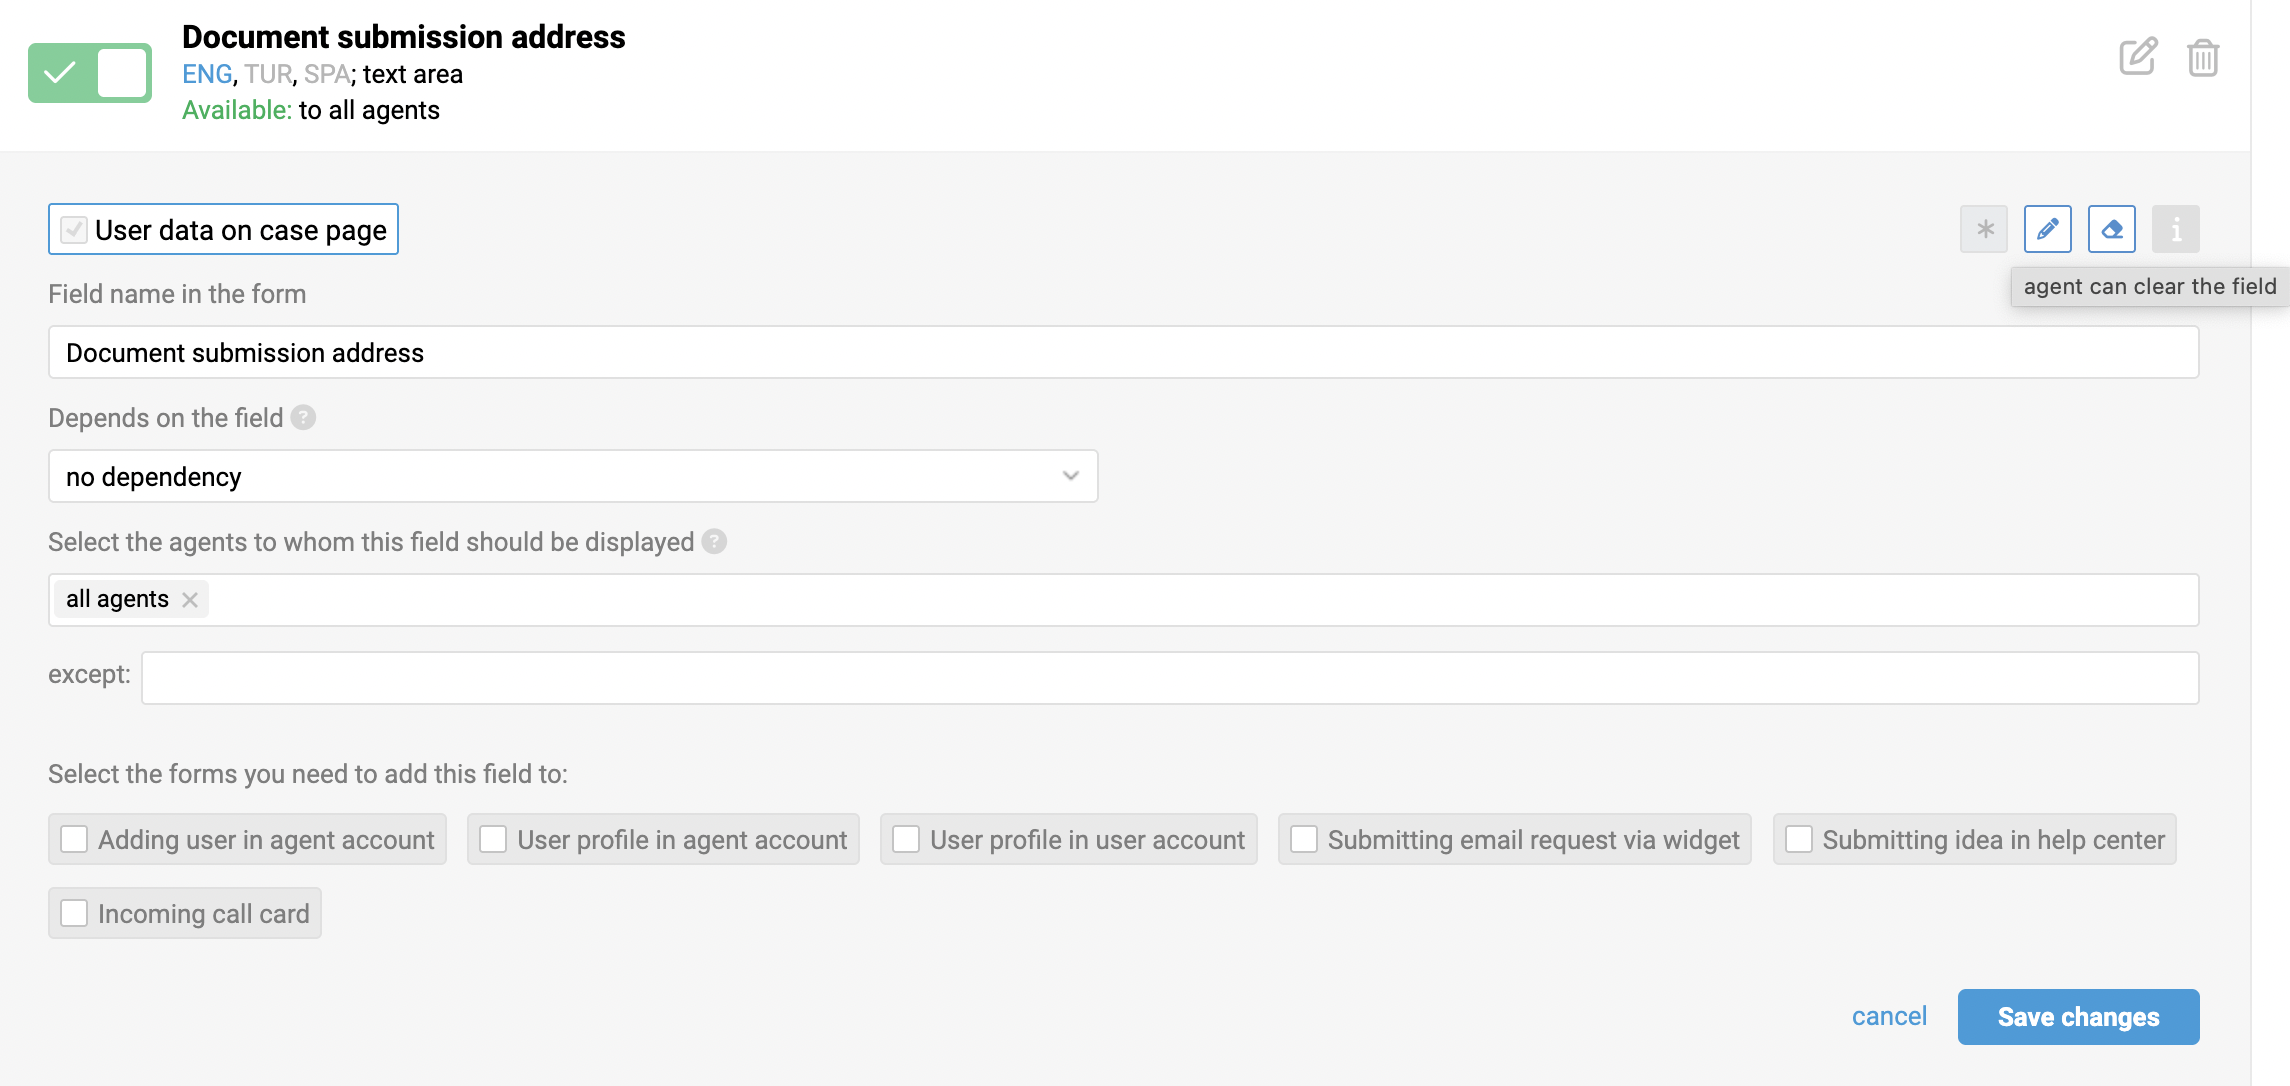
At the same time, dependencies can be set based on fields of any affiliation in the forms "Submitting email request via widget" and "Submitting idea in help center" since these fields can coexist in those forms. For example, we'll set the dependency of our "Contract Number" field on the "Group" field with the value "Billing".
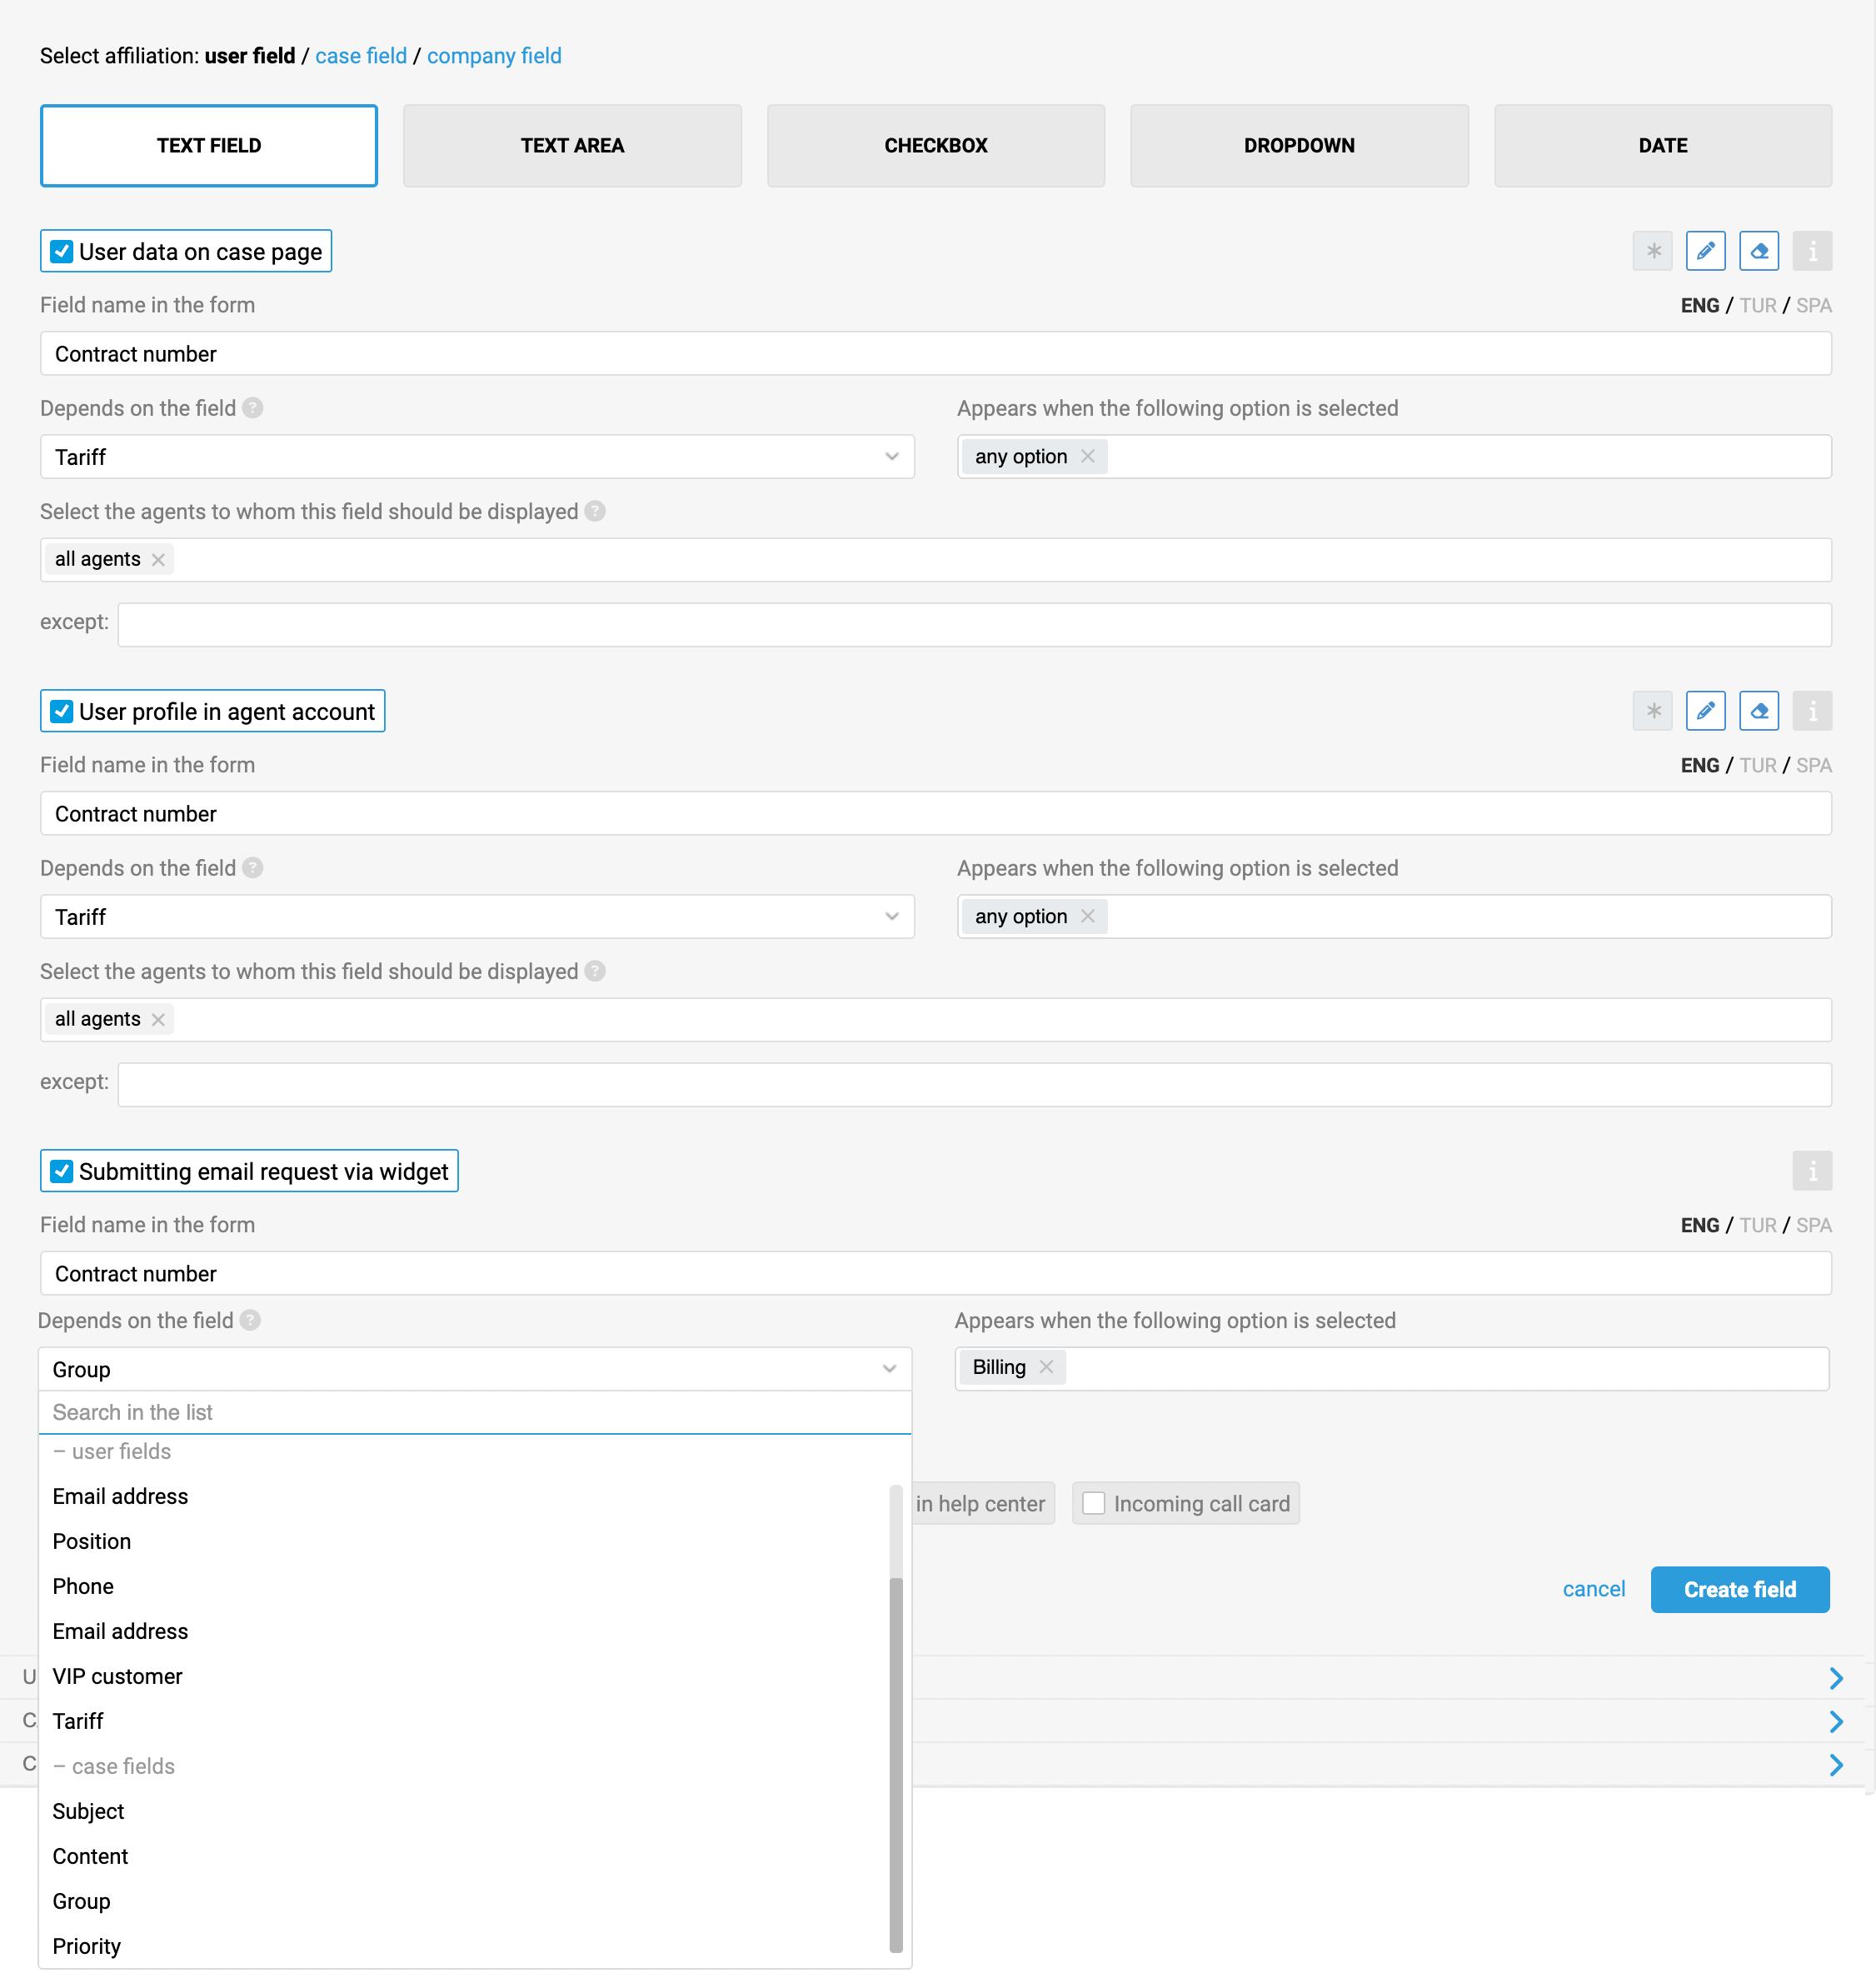
As a result, the "Contract Number" field will appear in the form if the user selects the "Billing" group in the email request widget.
The same applies to case fields. In the forms "Case parameters in agent account" and "Case parameters in user account", dependencies can only be set based on other case fields added to those forms. However, in the forms "Submitting email request via widget" and "Submitting idea in help center" dependencies can be set based on any field.
b) Dependence on different types of fields
Dependencies can be set in any field and will work as follows:
Choosing a dependency on fields of the types "text field", "text area", "checkbox" or "date" means that the dependent field will appear if the parent field is not empty – that is, if any text is entered in the text field or area, the checkbox is ticked, or a date is specified;

When you set a dependency on the "Dropdown" or "Labels" fields, you can choose specific values that will make the dependent field appear.
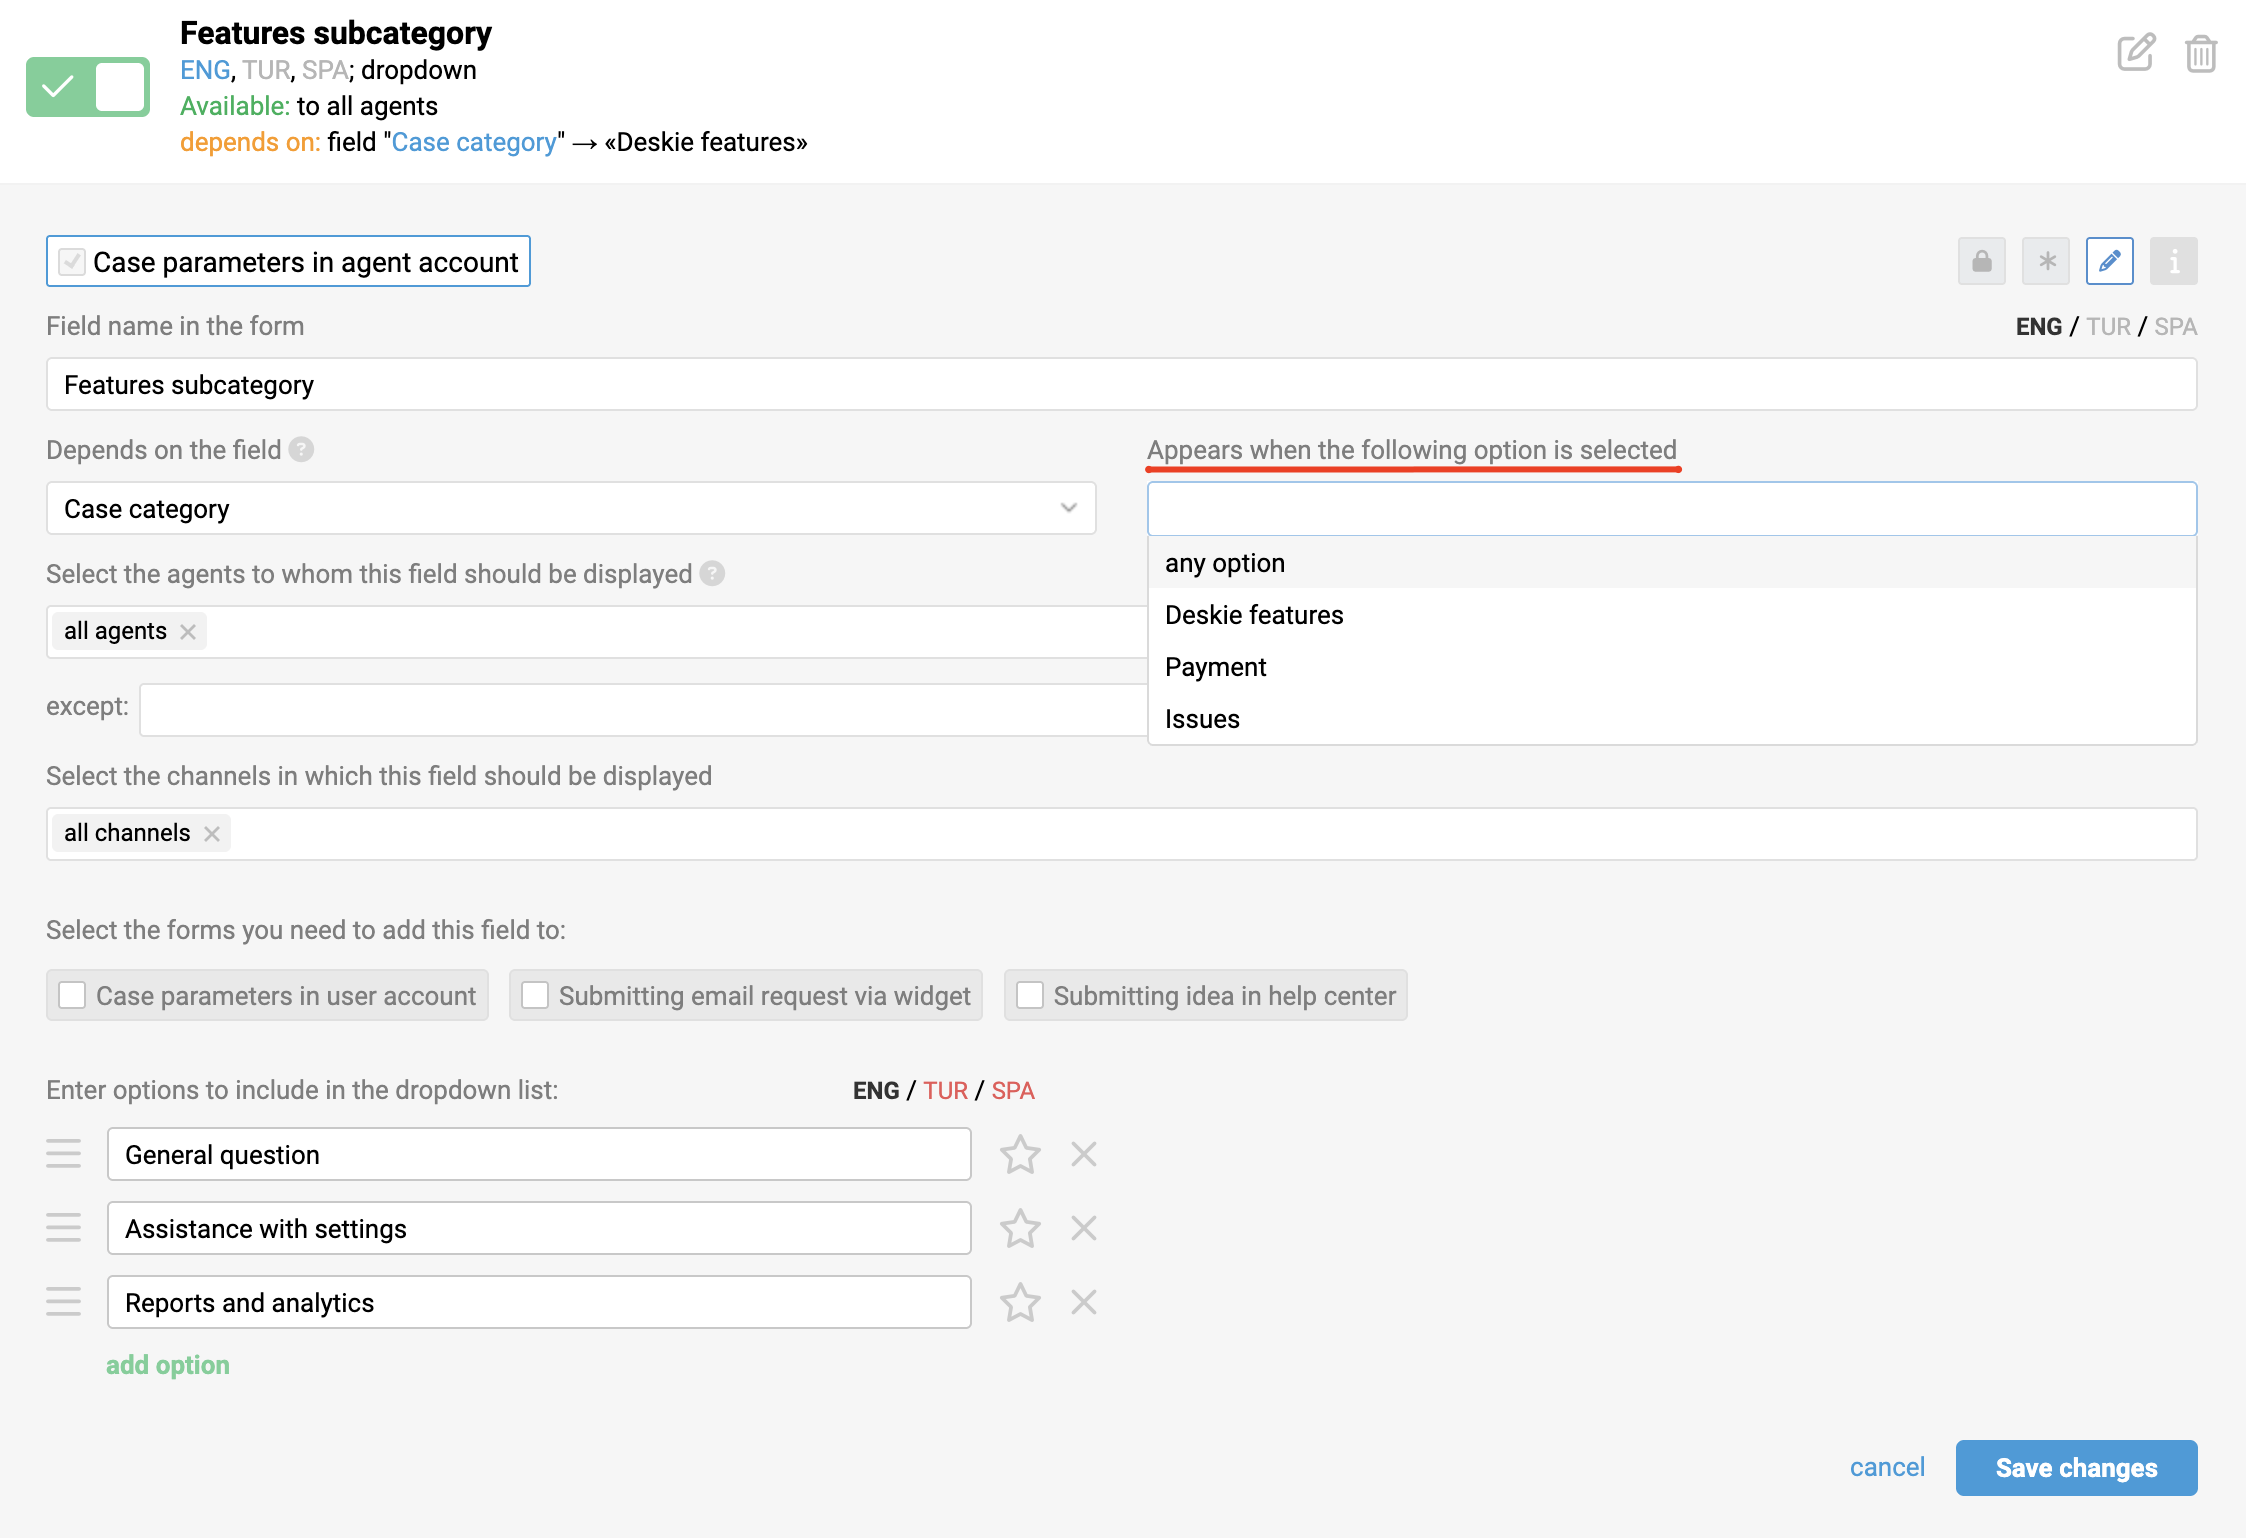
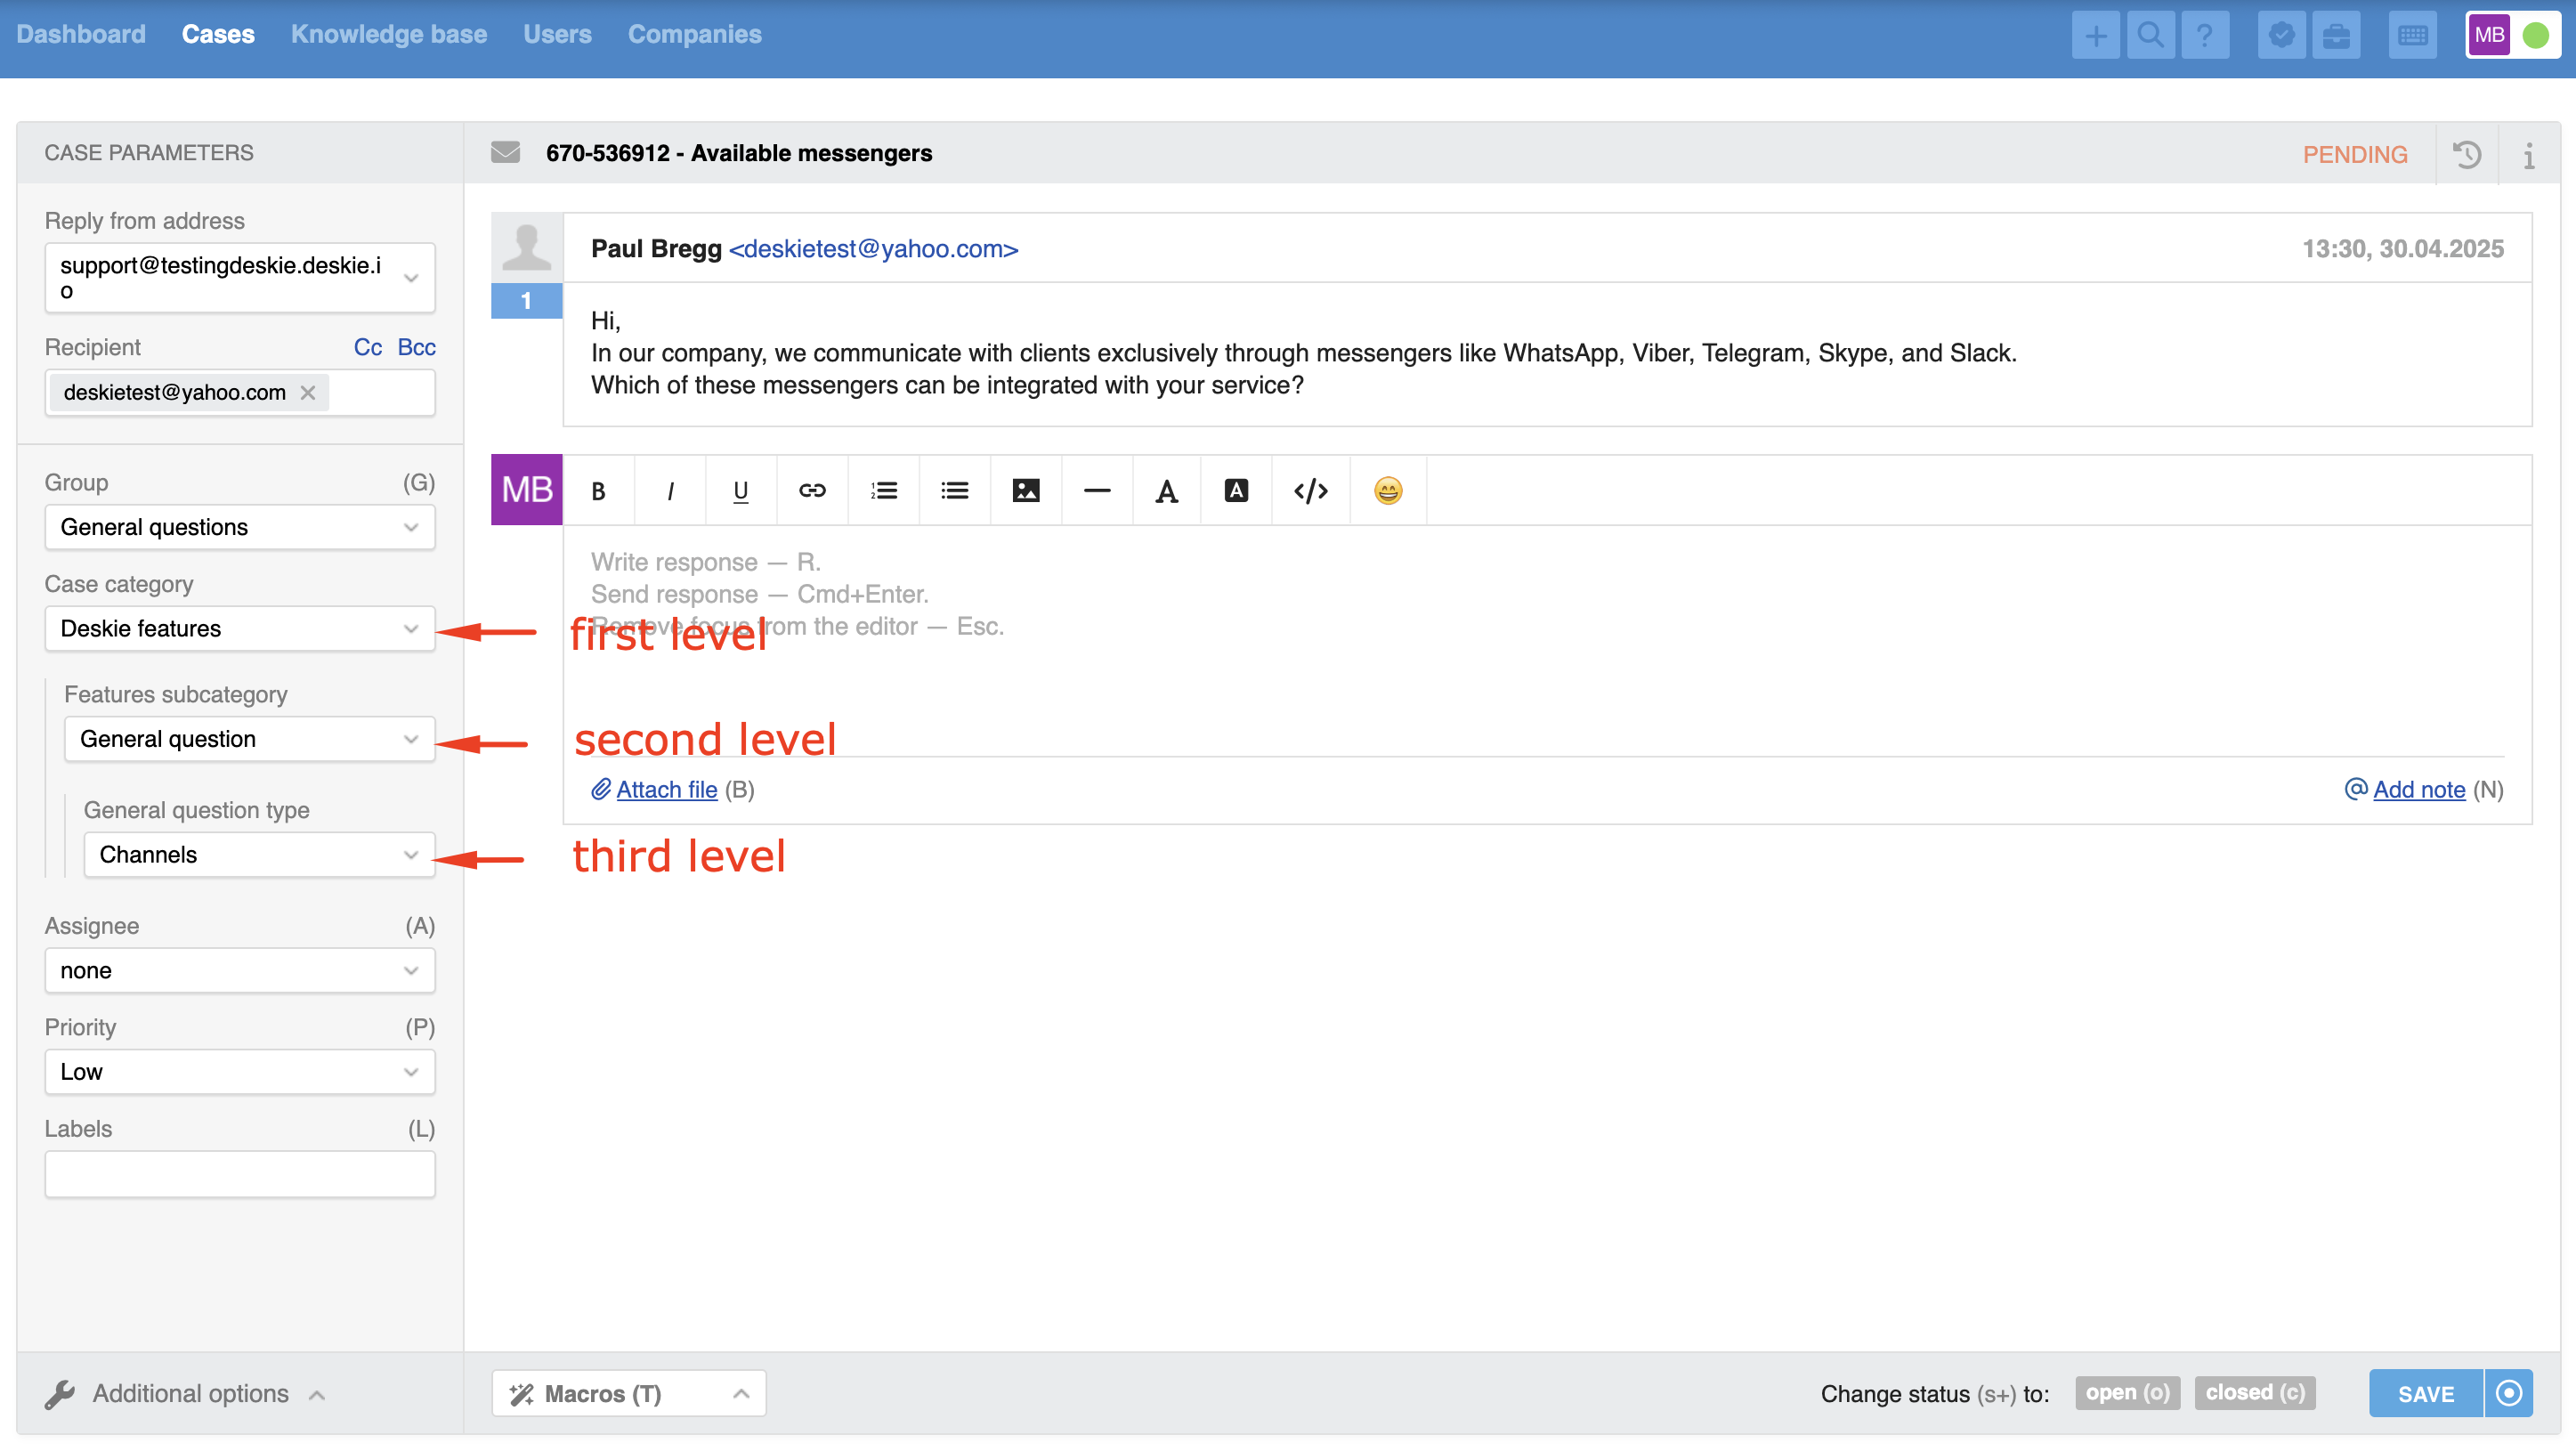
c) Three levels of dependency
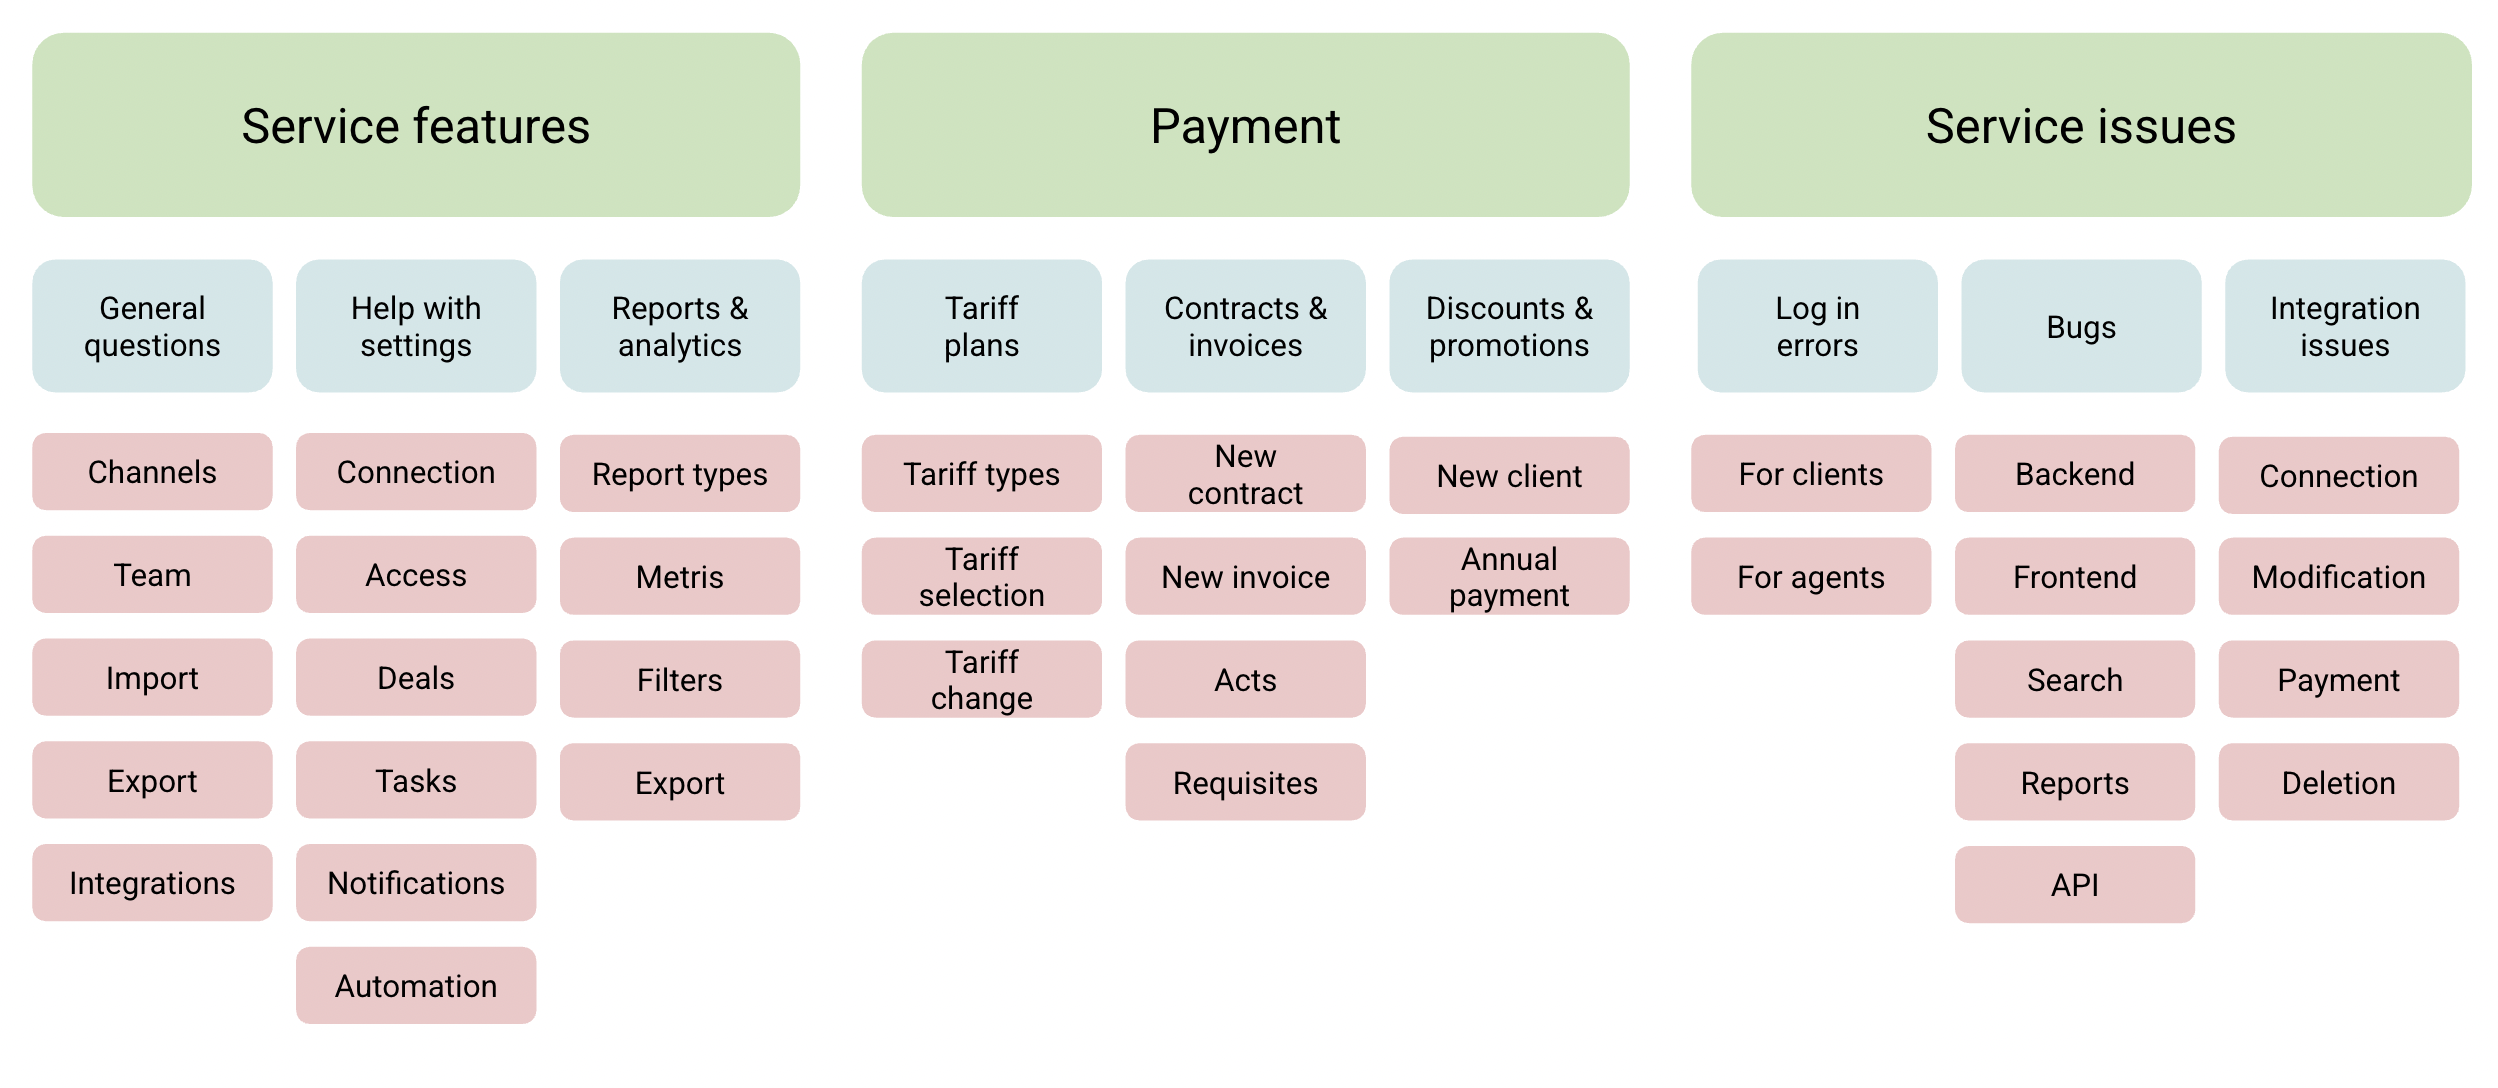
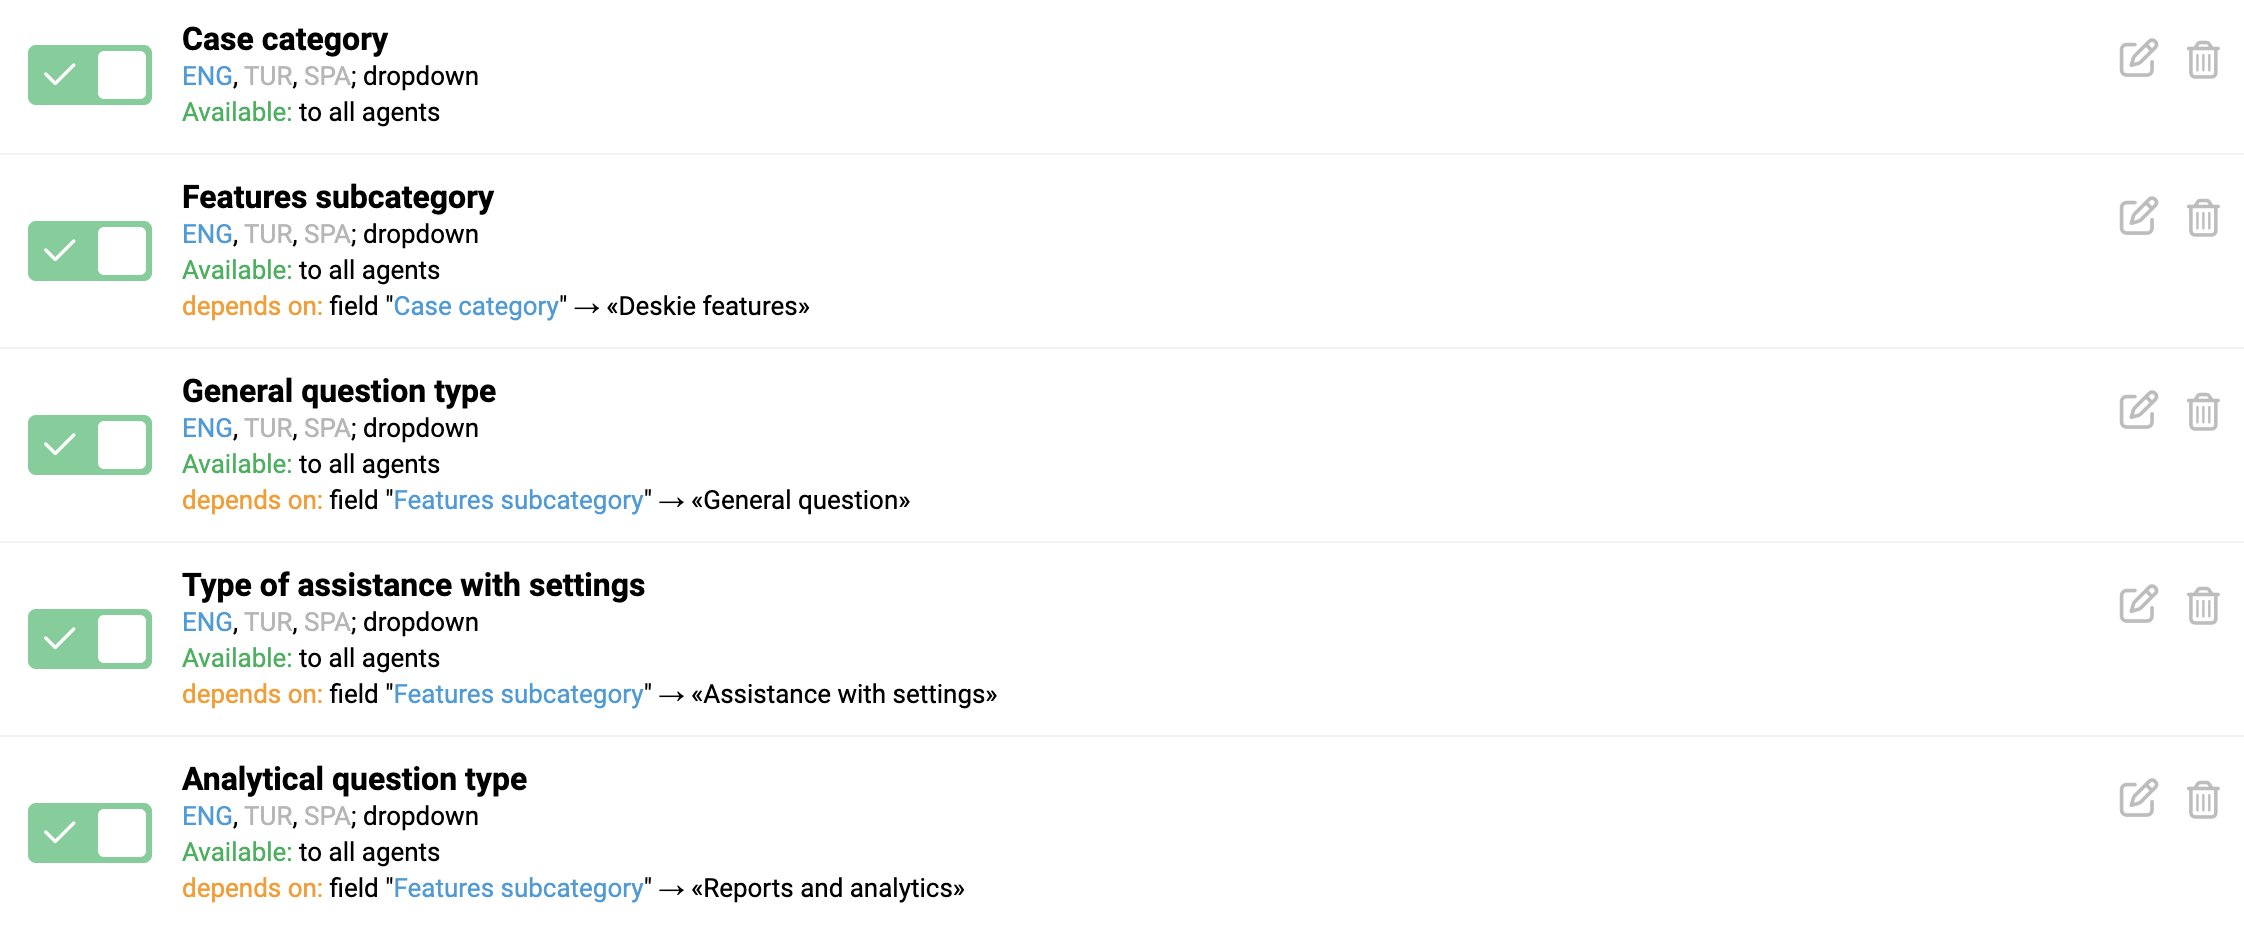
Dependencies are limited to three levels. For example, you can create a structure like the one in the example above:
"Case category" field (first level);
"Features subcategory" field (second level);
"Question type" field (third level).
You won’t be able to add a dependency on a third-level field, such as "Question type" because that field already depends on two other fields. Therefore, it won’t even appear as an option when setting up dependencies in the "Depends on the field" field.
d) Clearing dependent fields
Values in dependent fields are cleared if the dependency condition is no longer met.
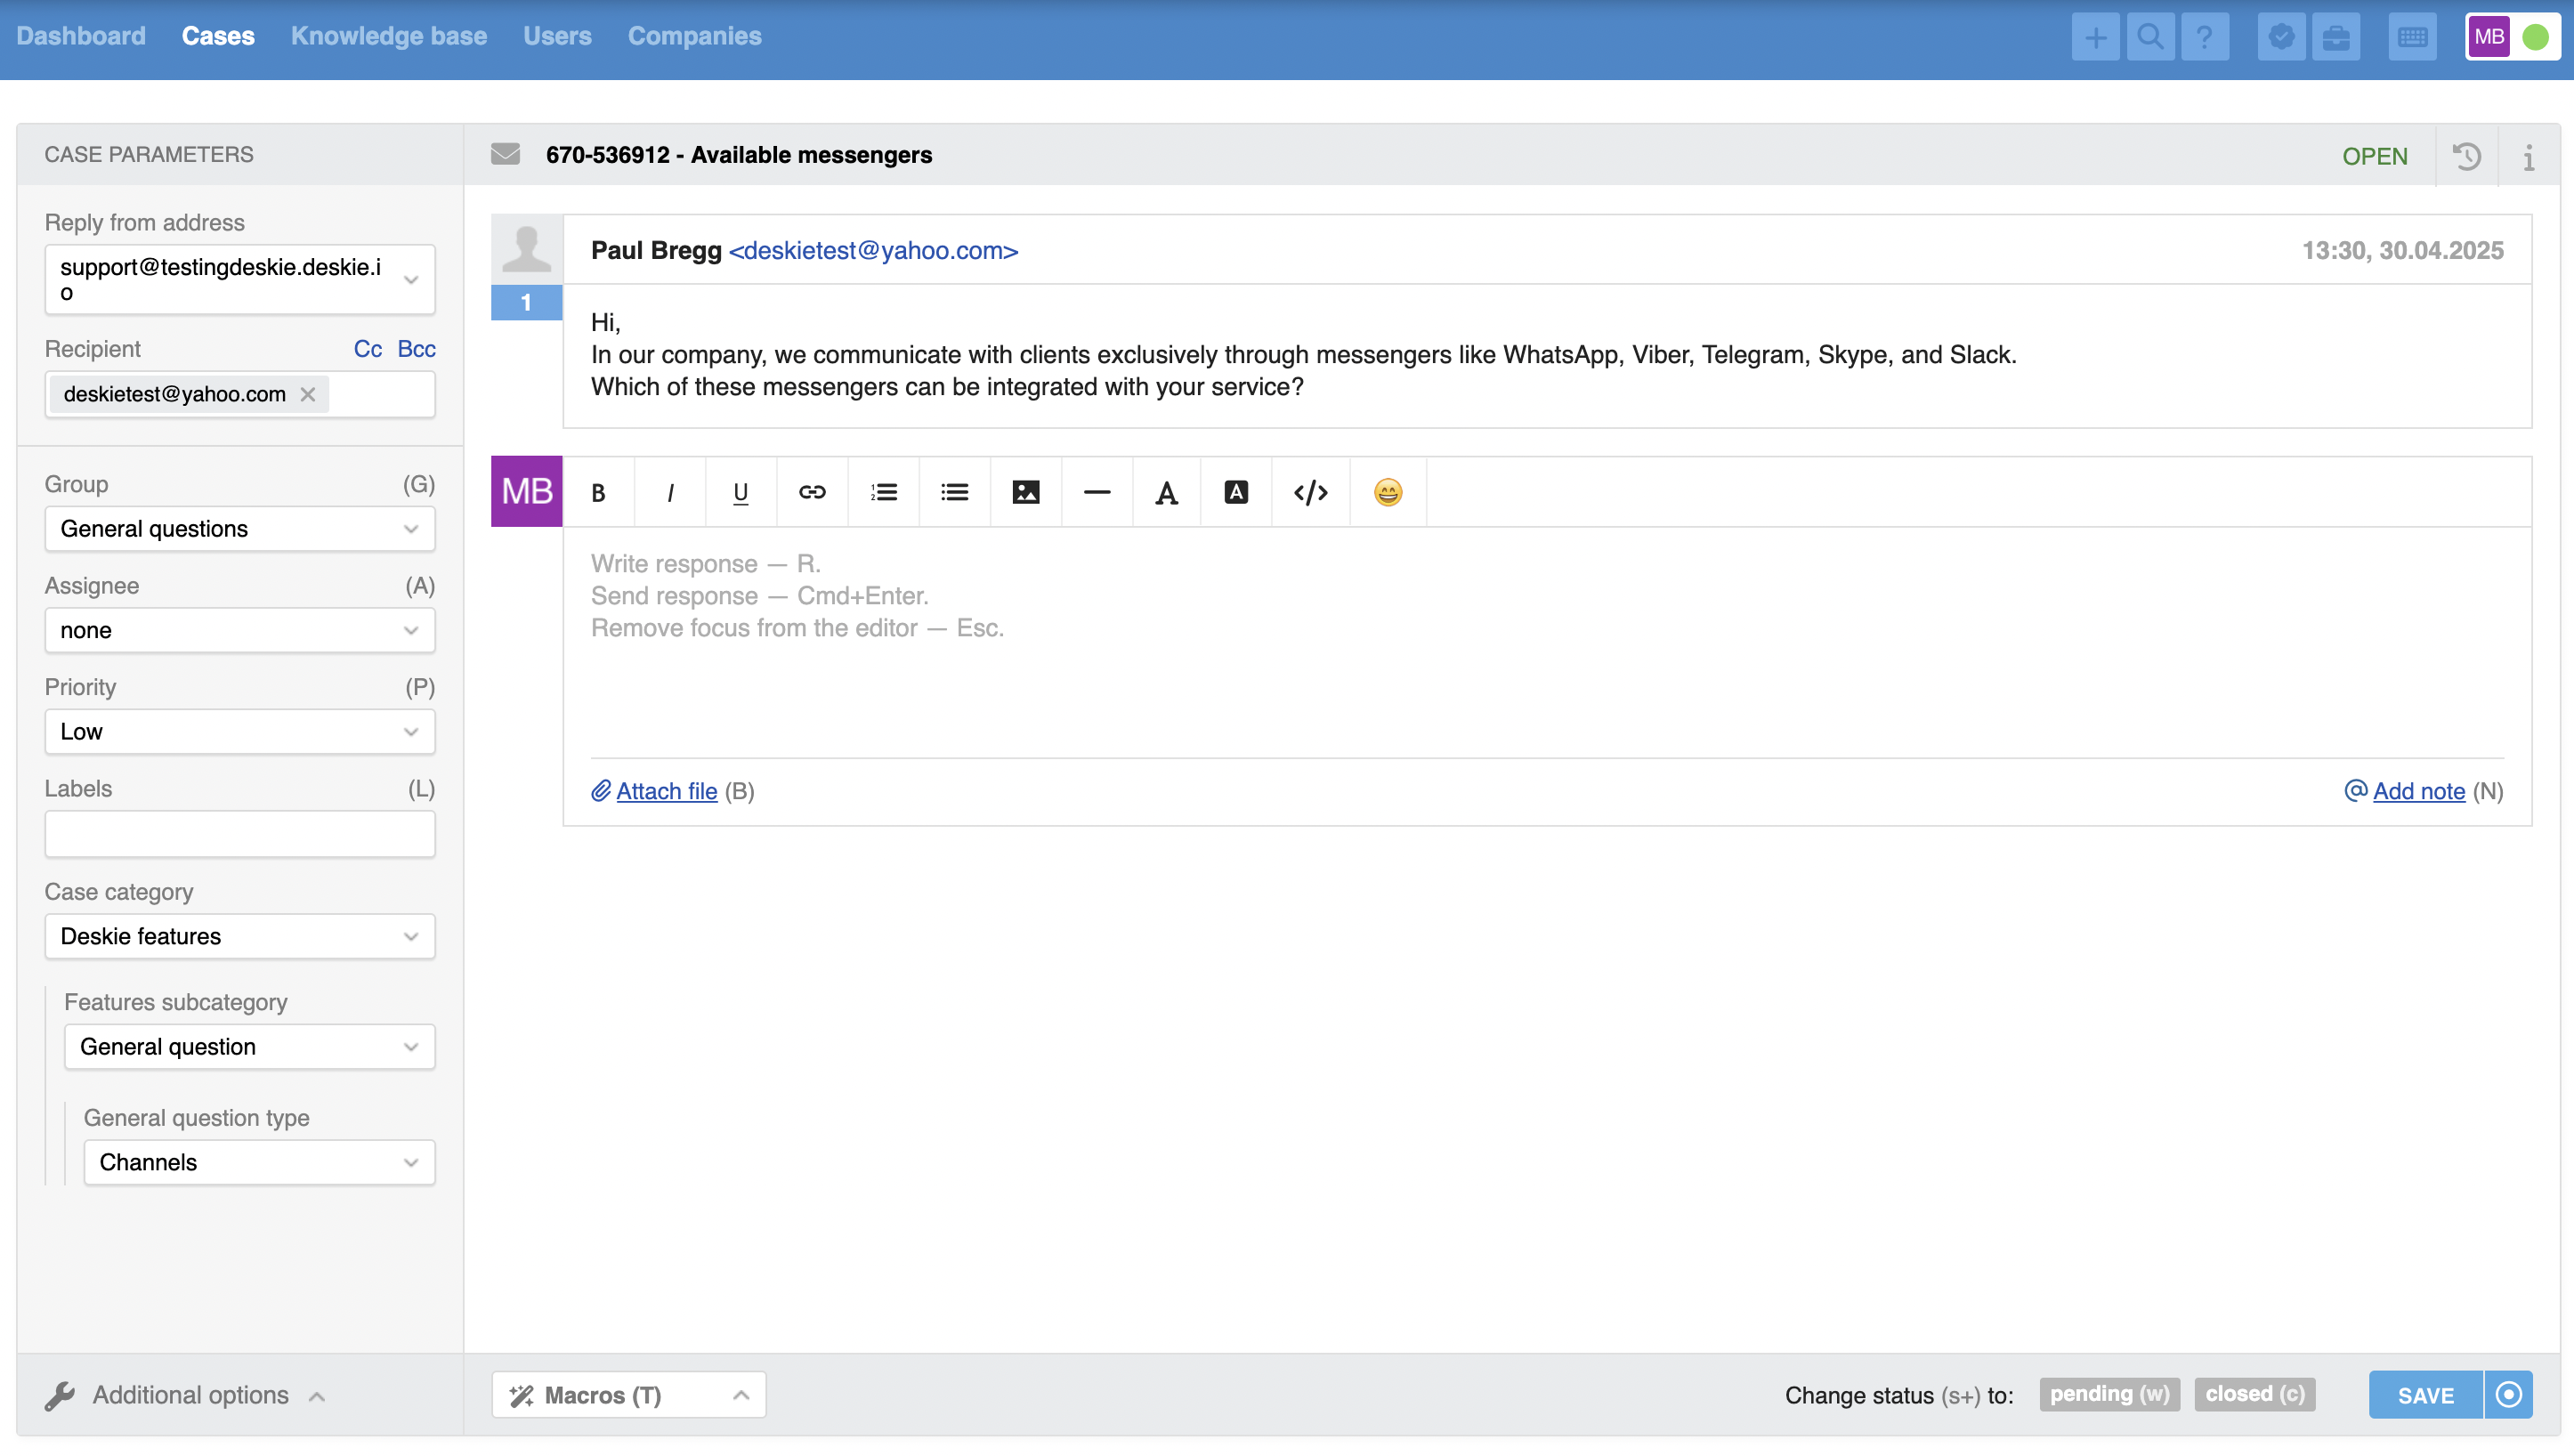
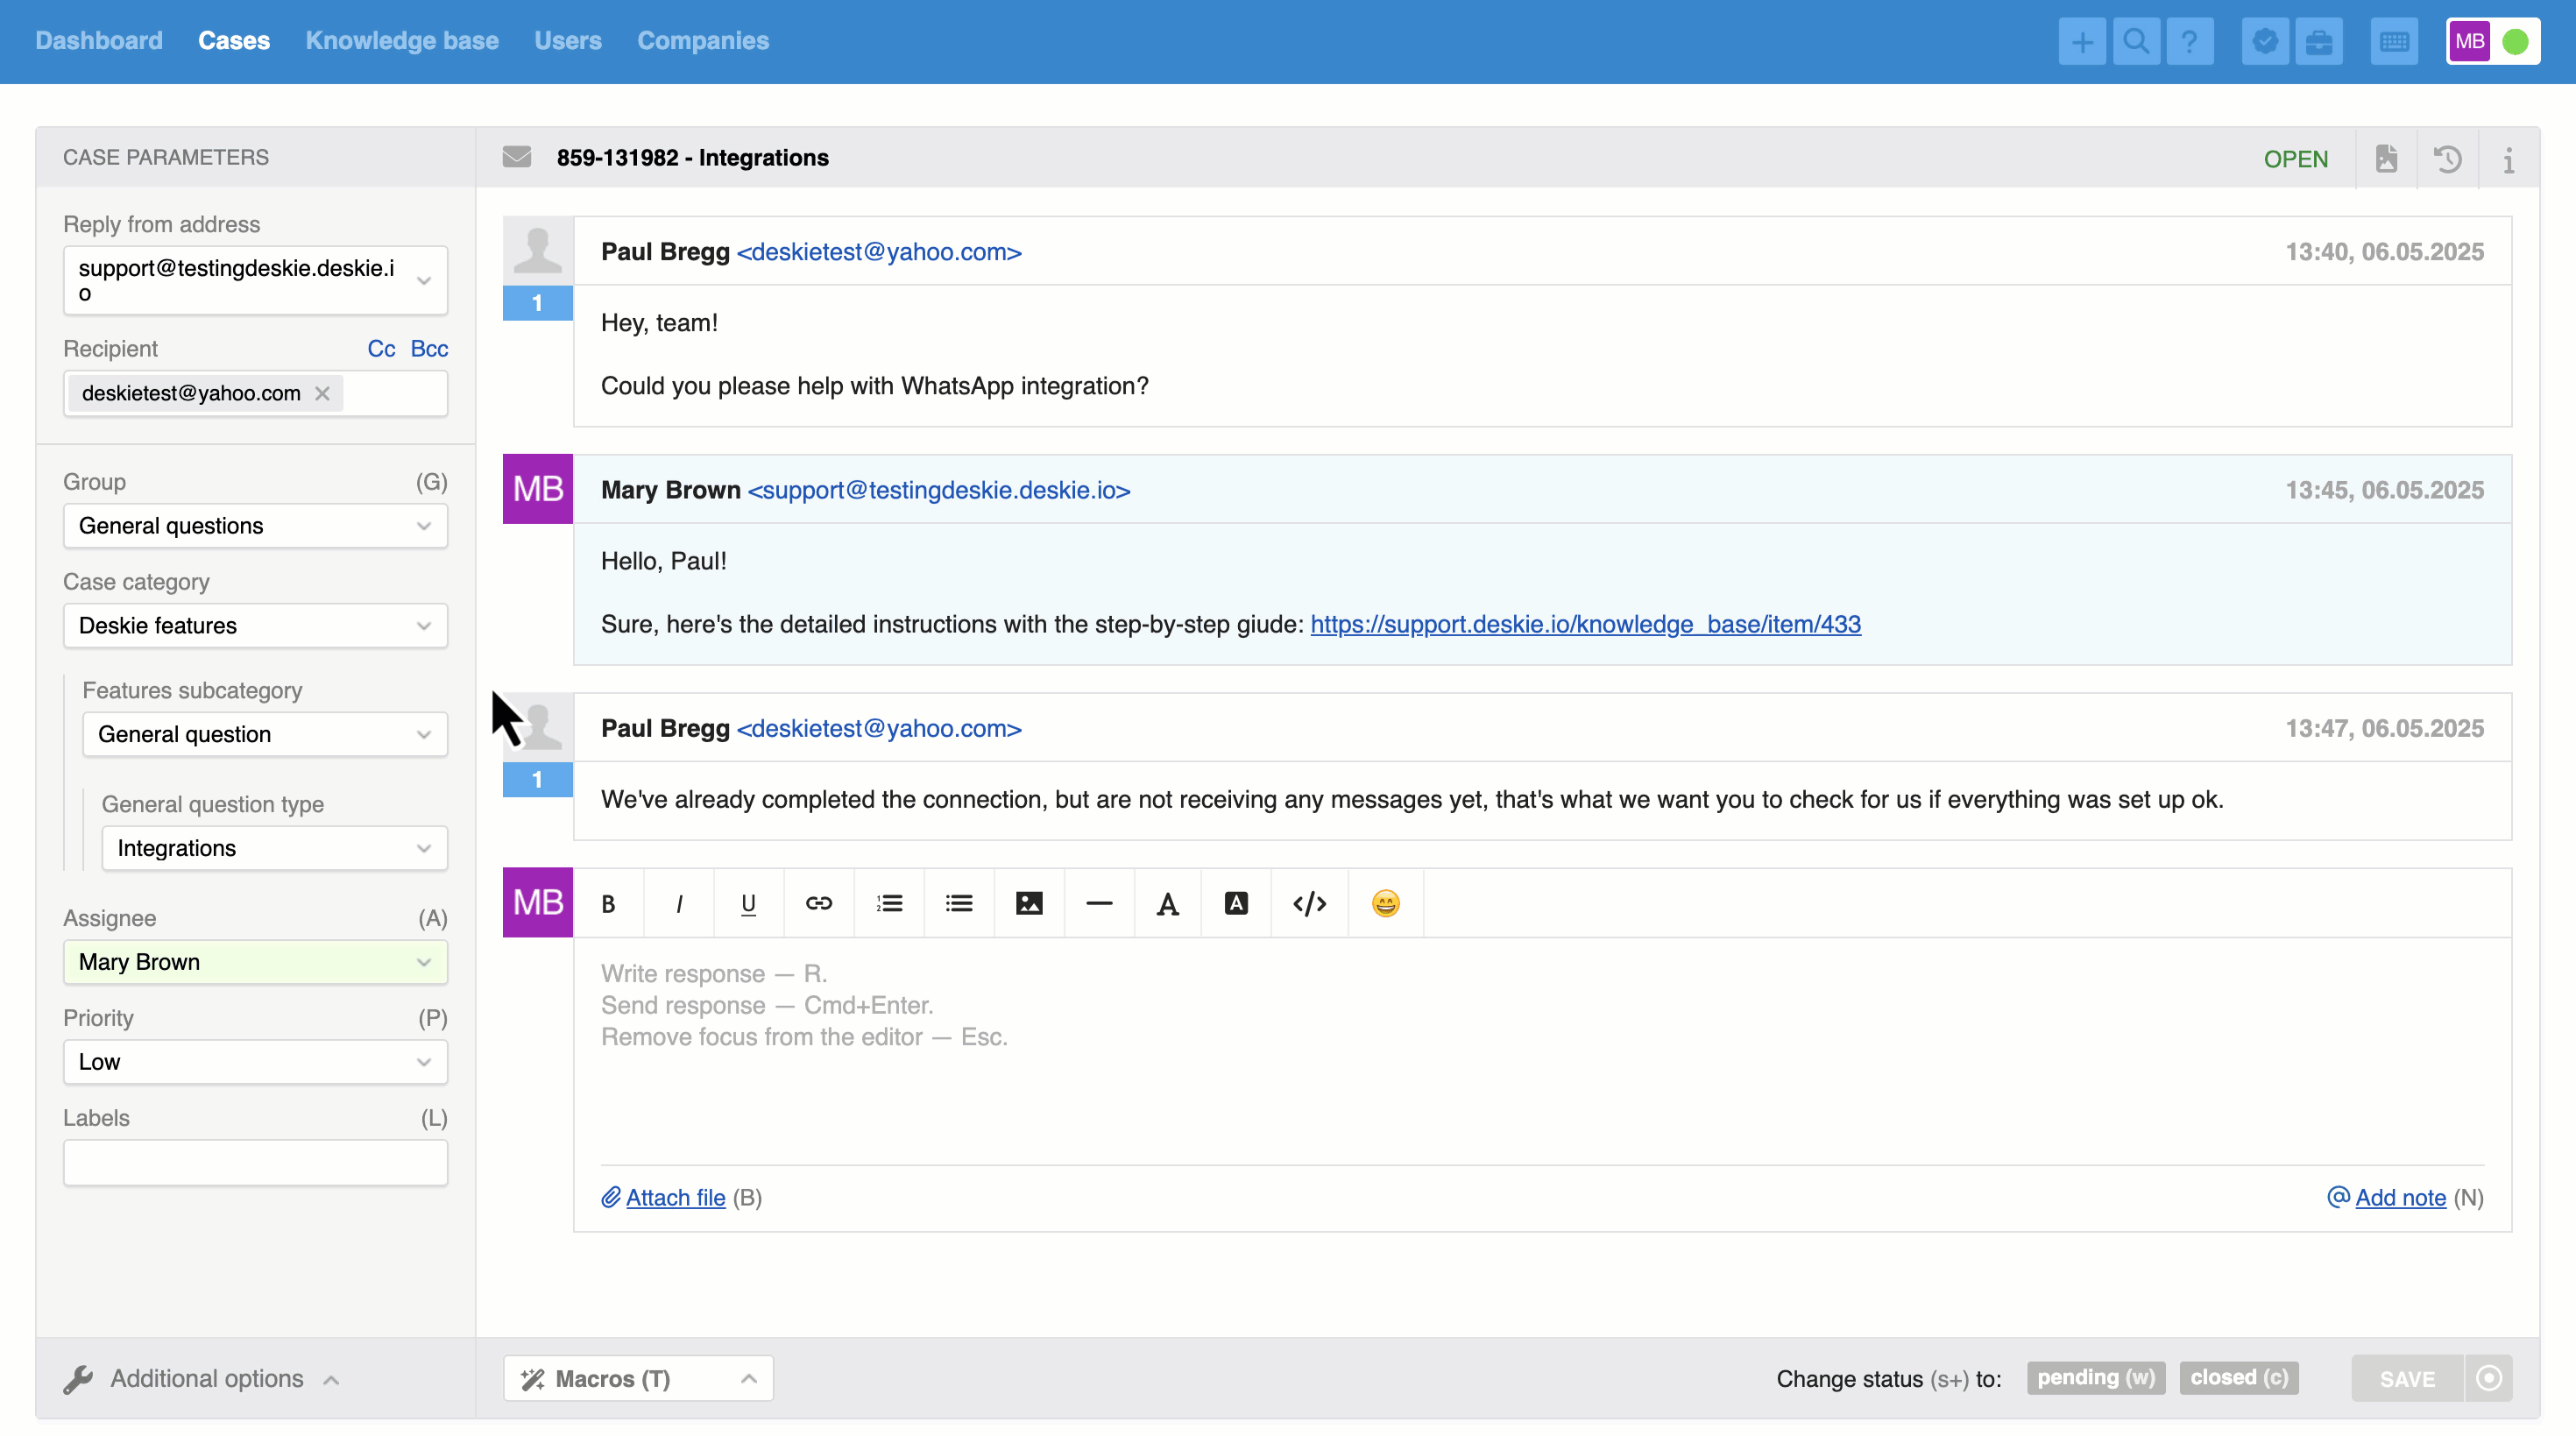
For example, let's say the following fields in a case were filled out:
Case category — Deskie features;
Features subcategory — General questions;
General question type — Integrations.
During the conversation, it became clear that the user wasn't asking for general information but was experiencing a problem with the integration's functionality. There's a specific case category for these situations: "Issues". When the agent changes the "Case category" field to "Issues", the "Features subcategory" and "Question type" fields will be cleared because the values previously entered no longer meet the dependency conditions.
e) Discrepancy of dependent fields with dependency conditions
In the agent account’s web interface, dependent fields are hidden and cannot be filled in manually by the agent or via macros and rules until the dependency condition set in the settings is met – that is, until the parent field is filled out or specific values are selected in it.
At the same time, when working outside the web interface, dependent fields can still be filled even if the dependency conditions are not met – for example, when filling out fields via the API or mobile apps, which currently do not support field dependencies.
In such cases, dependent fields will be visible and editable even when the parent fields are empty or don’t meet the required conditions. However, these fields will remain disabled until the dependency condition is satisfied. When hovering over them, employees will see a tooltip prompting them to fill in the parent field or select a specific value that will make the dependent field available for editing.
The dependent field will be cleared according to the standard logic if the parent field is edited and an incompatible value is selected.
f) Dependent fields in widgets
If you want a field to be available in the widget for submitting email requests, enable the "Submitting email request via widget" option in that field’s settings.
When you add parent fields to the widget, their dependent fields will also be added automatically. However, you can easily hide them using the eye icon if they’re not needed in a specific widget.
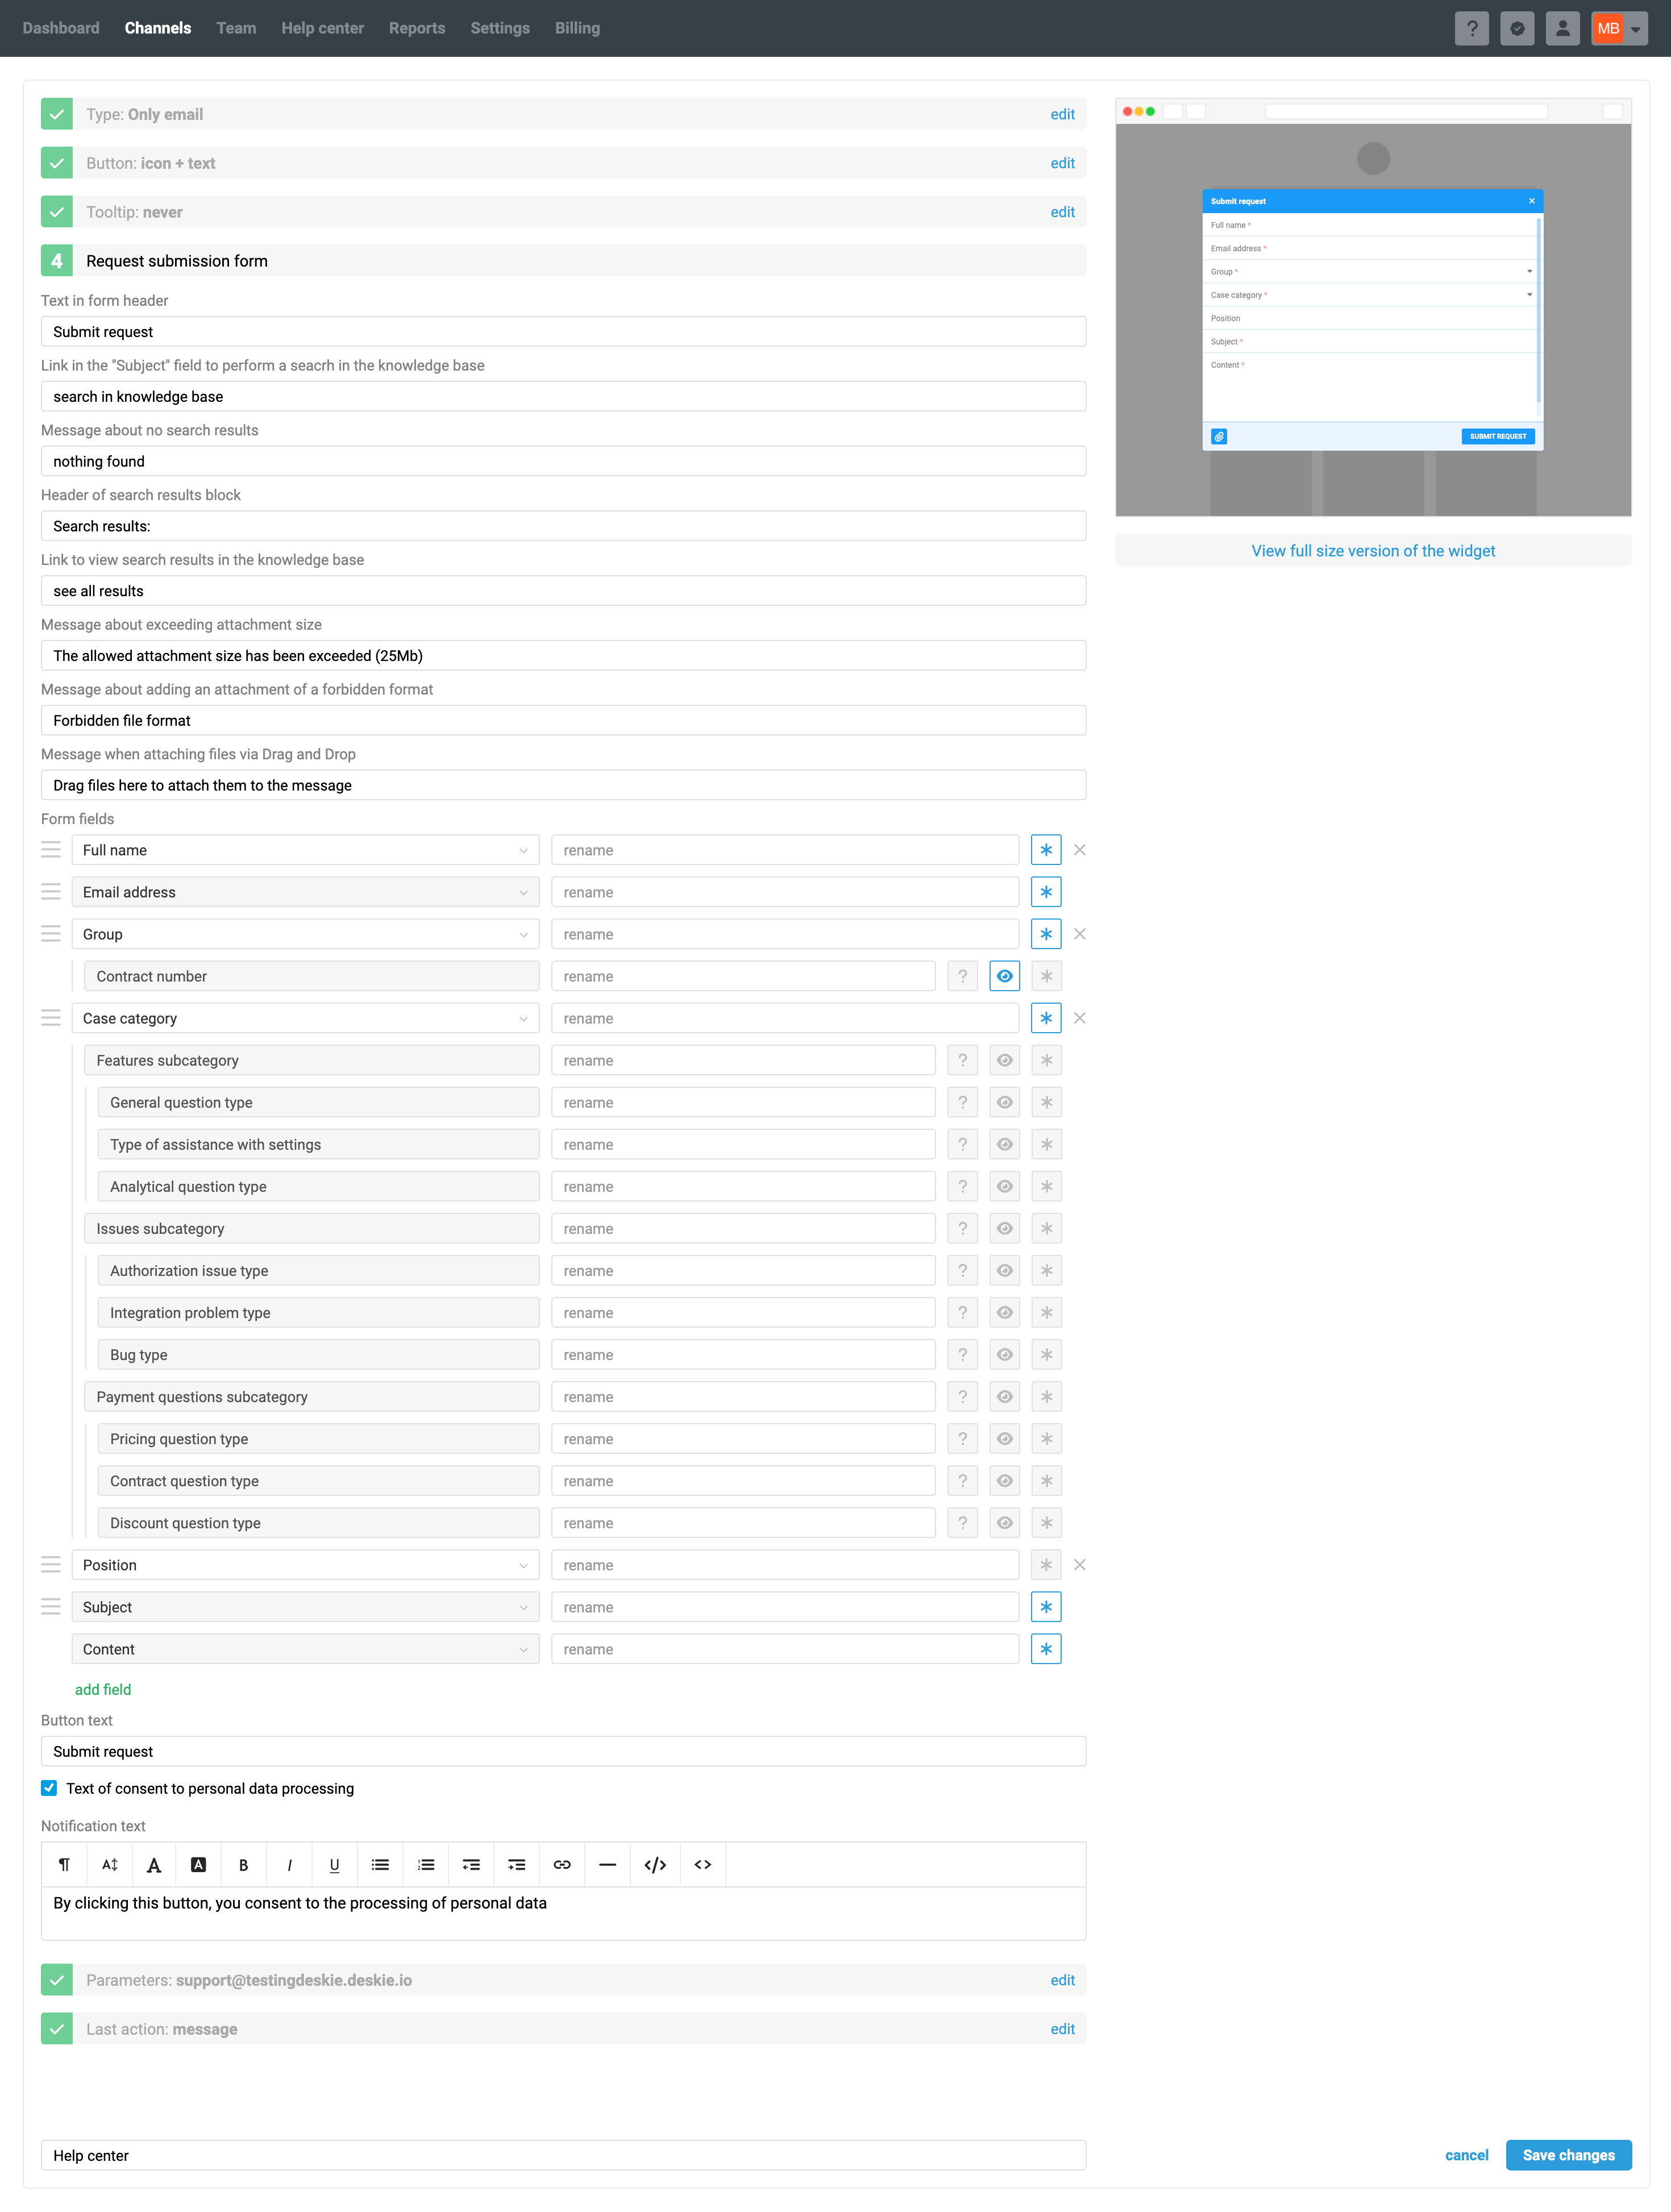
When you add fields that have dependencies in the "Submitting email request via widget" form, the corresponding parent fields will also be added automatically.
7. Other points
For custom fields, the name shown in the field list within the admin account comes from the first active form where the field is used.
If your help center is disabled, the forms associated with it ("Submitting idea in help center", "User profile in agent account") will be hidden in all fields – both standard and custom.
If the fields like "Microsotf Teams", "Facebook", "Telegram", and other standard contact fields are enabled for the "User profile in agent account" form – and these fields are automatically filled by Deskie – then if the user hasn’t contacted you through these channels yet and the fields are empty, we hide them to avoid cluttering the interface.
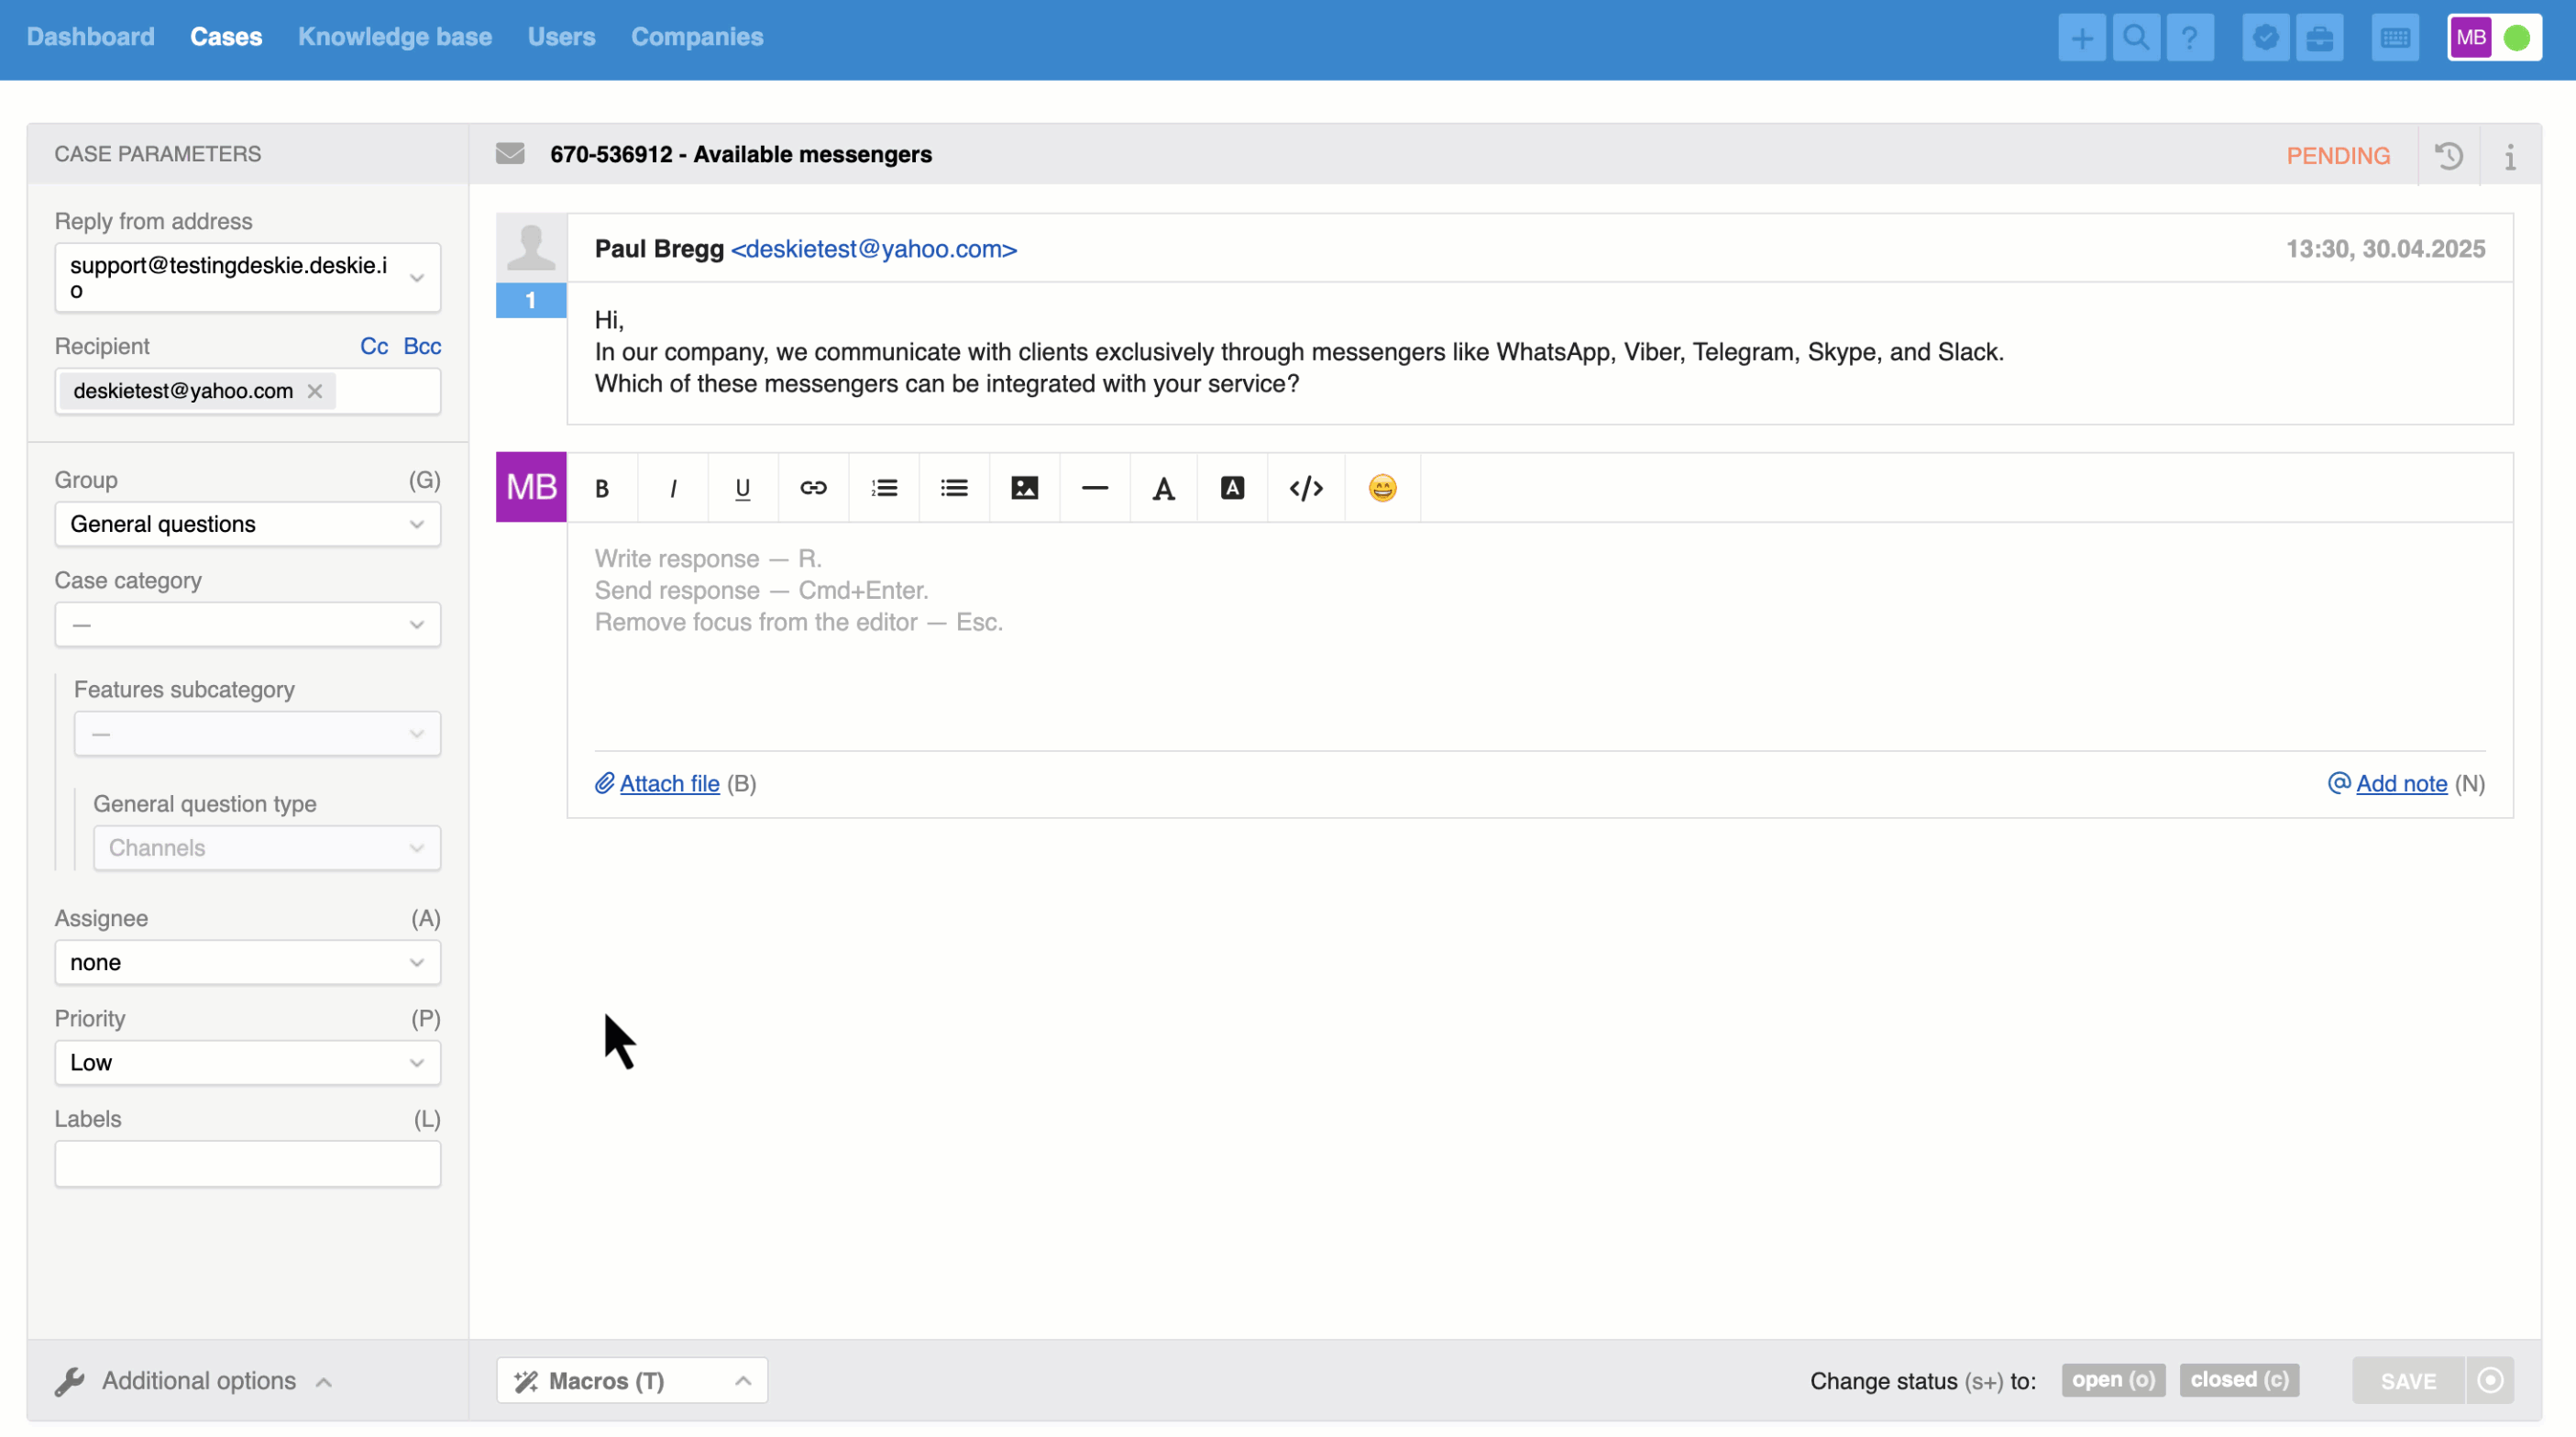
In the case settings, the fields "Reply from address" and "Recipient" are pinned at the top for easier access.
Additional fields are supported via the API, rules, and macros.
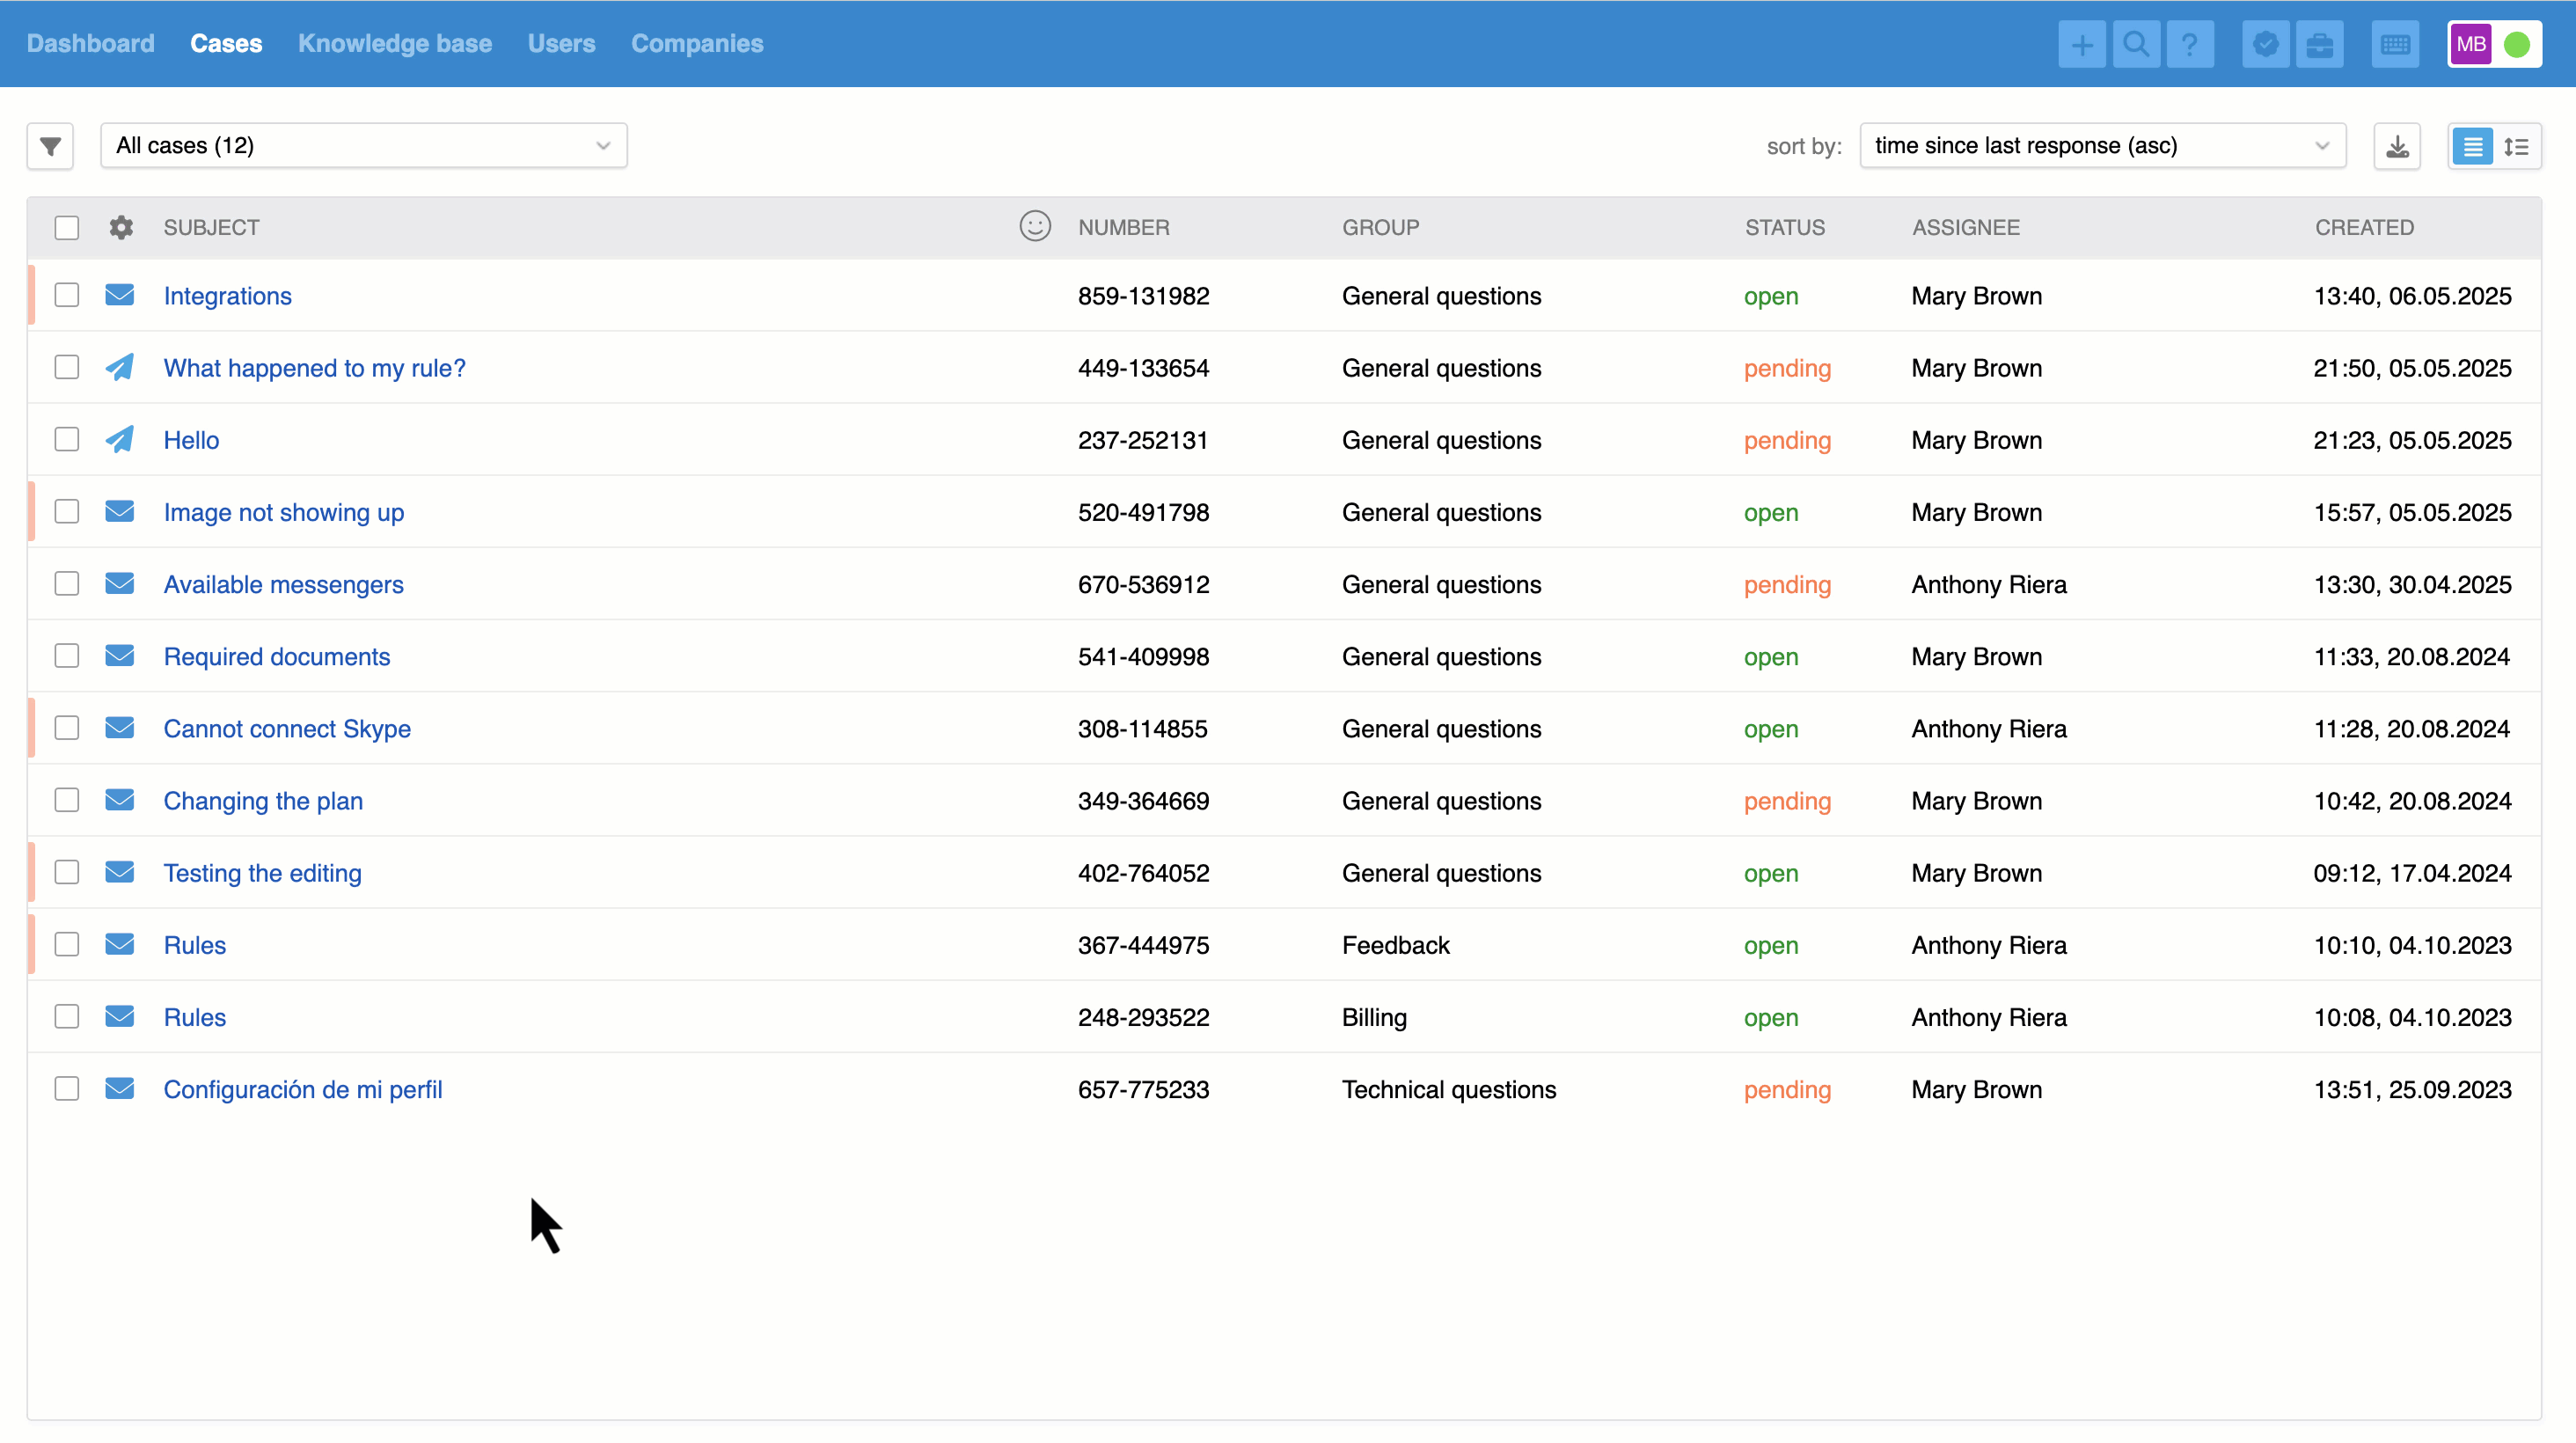
Fields can be displayed in the all cases list, allowing you to track important information directly from the list without opening individual cases: