Bulk actions help agents handle multiple cases at once: this saves time and reduces the chance of errors during routine operations.
Possible use cases include:
- sending the same response to several customers who reported the same issue;
- assigning one agent to handle related cases or those tied to a larger project;
- adding a shared note with a plan of action for a widespread incident;
- changing the priority of urgent cases with a single action;
- scheduling the reopening of several cases on a specific date;
- merging duplicate email cases into one;
- quickly clearing spam from the case list.
How to select cases for bulk actions
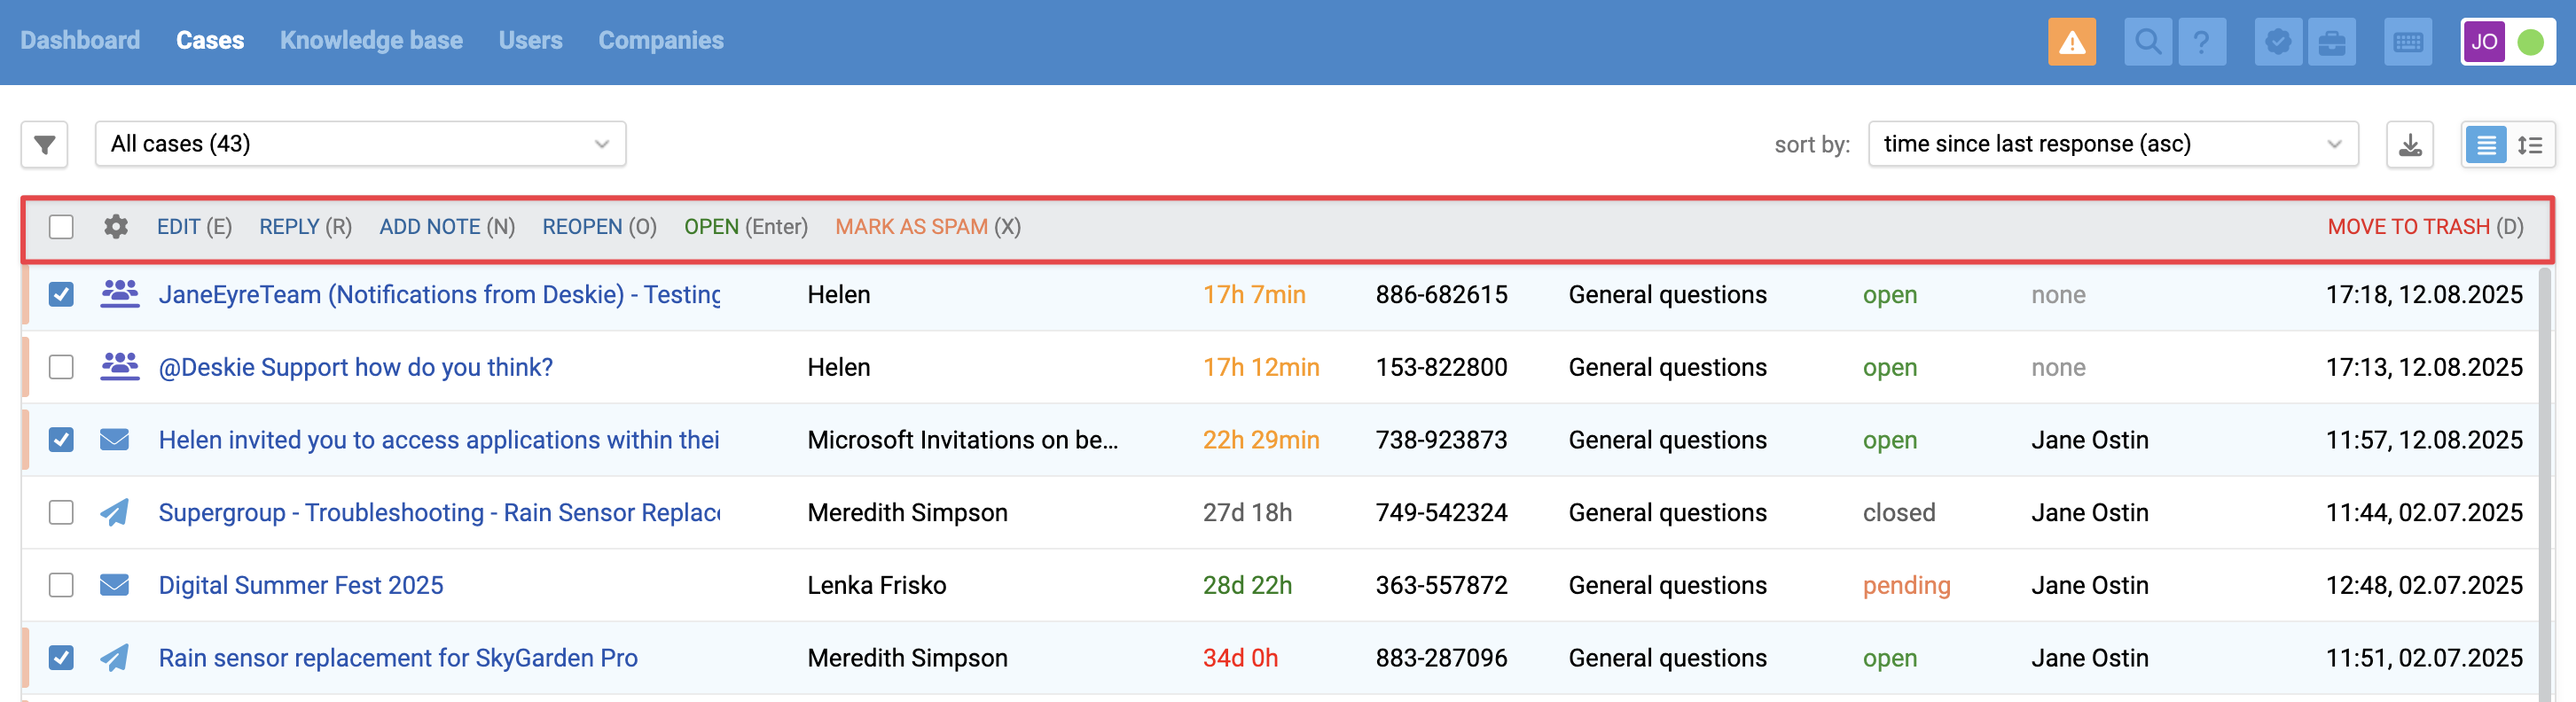
To perform bulk actions, you first need to select one or several cases in the all cases list. There are two ways to do this:
- using the mouse: tick the checkboxes next to the cases you want to process;
- using the keyboard: use the up and down arrow keys to navigate through the list, and press the spacebar to select the cases you need.
Once cases are selected, a menu of available bulk actions will appear on the panel.
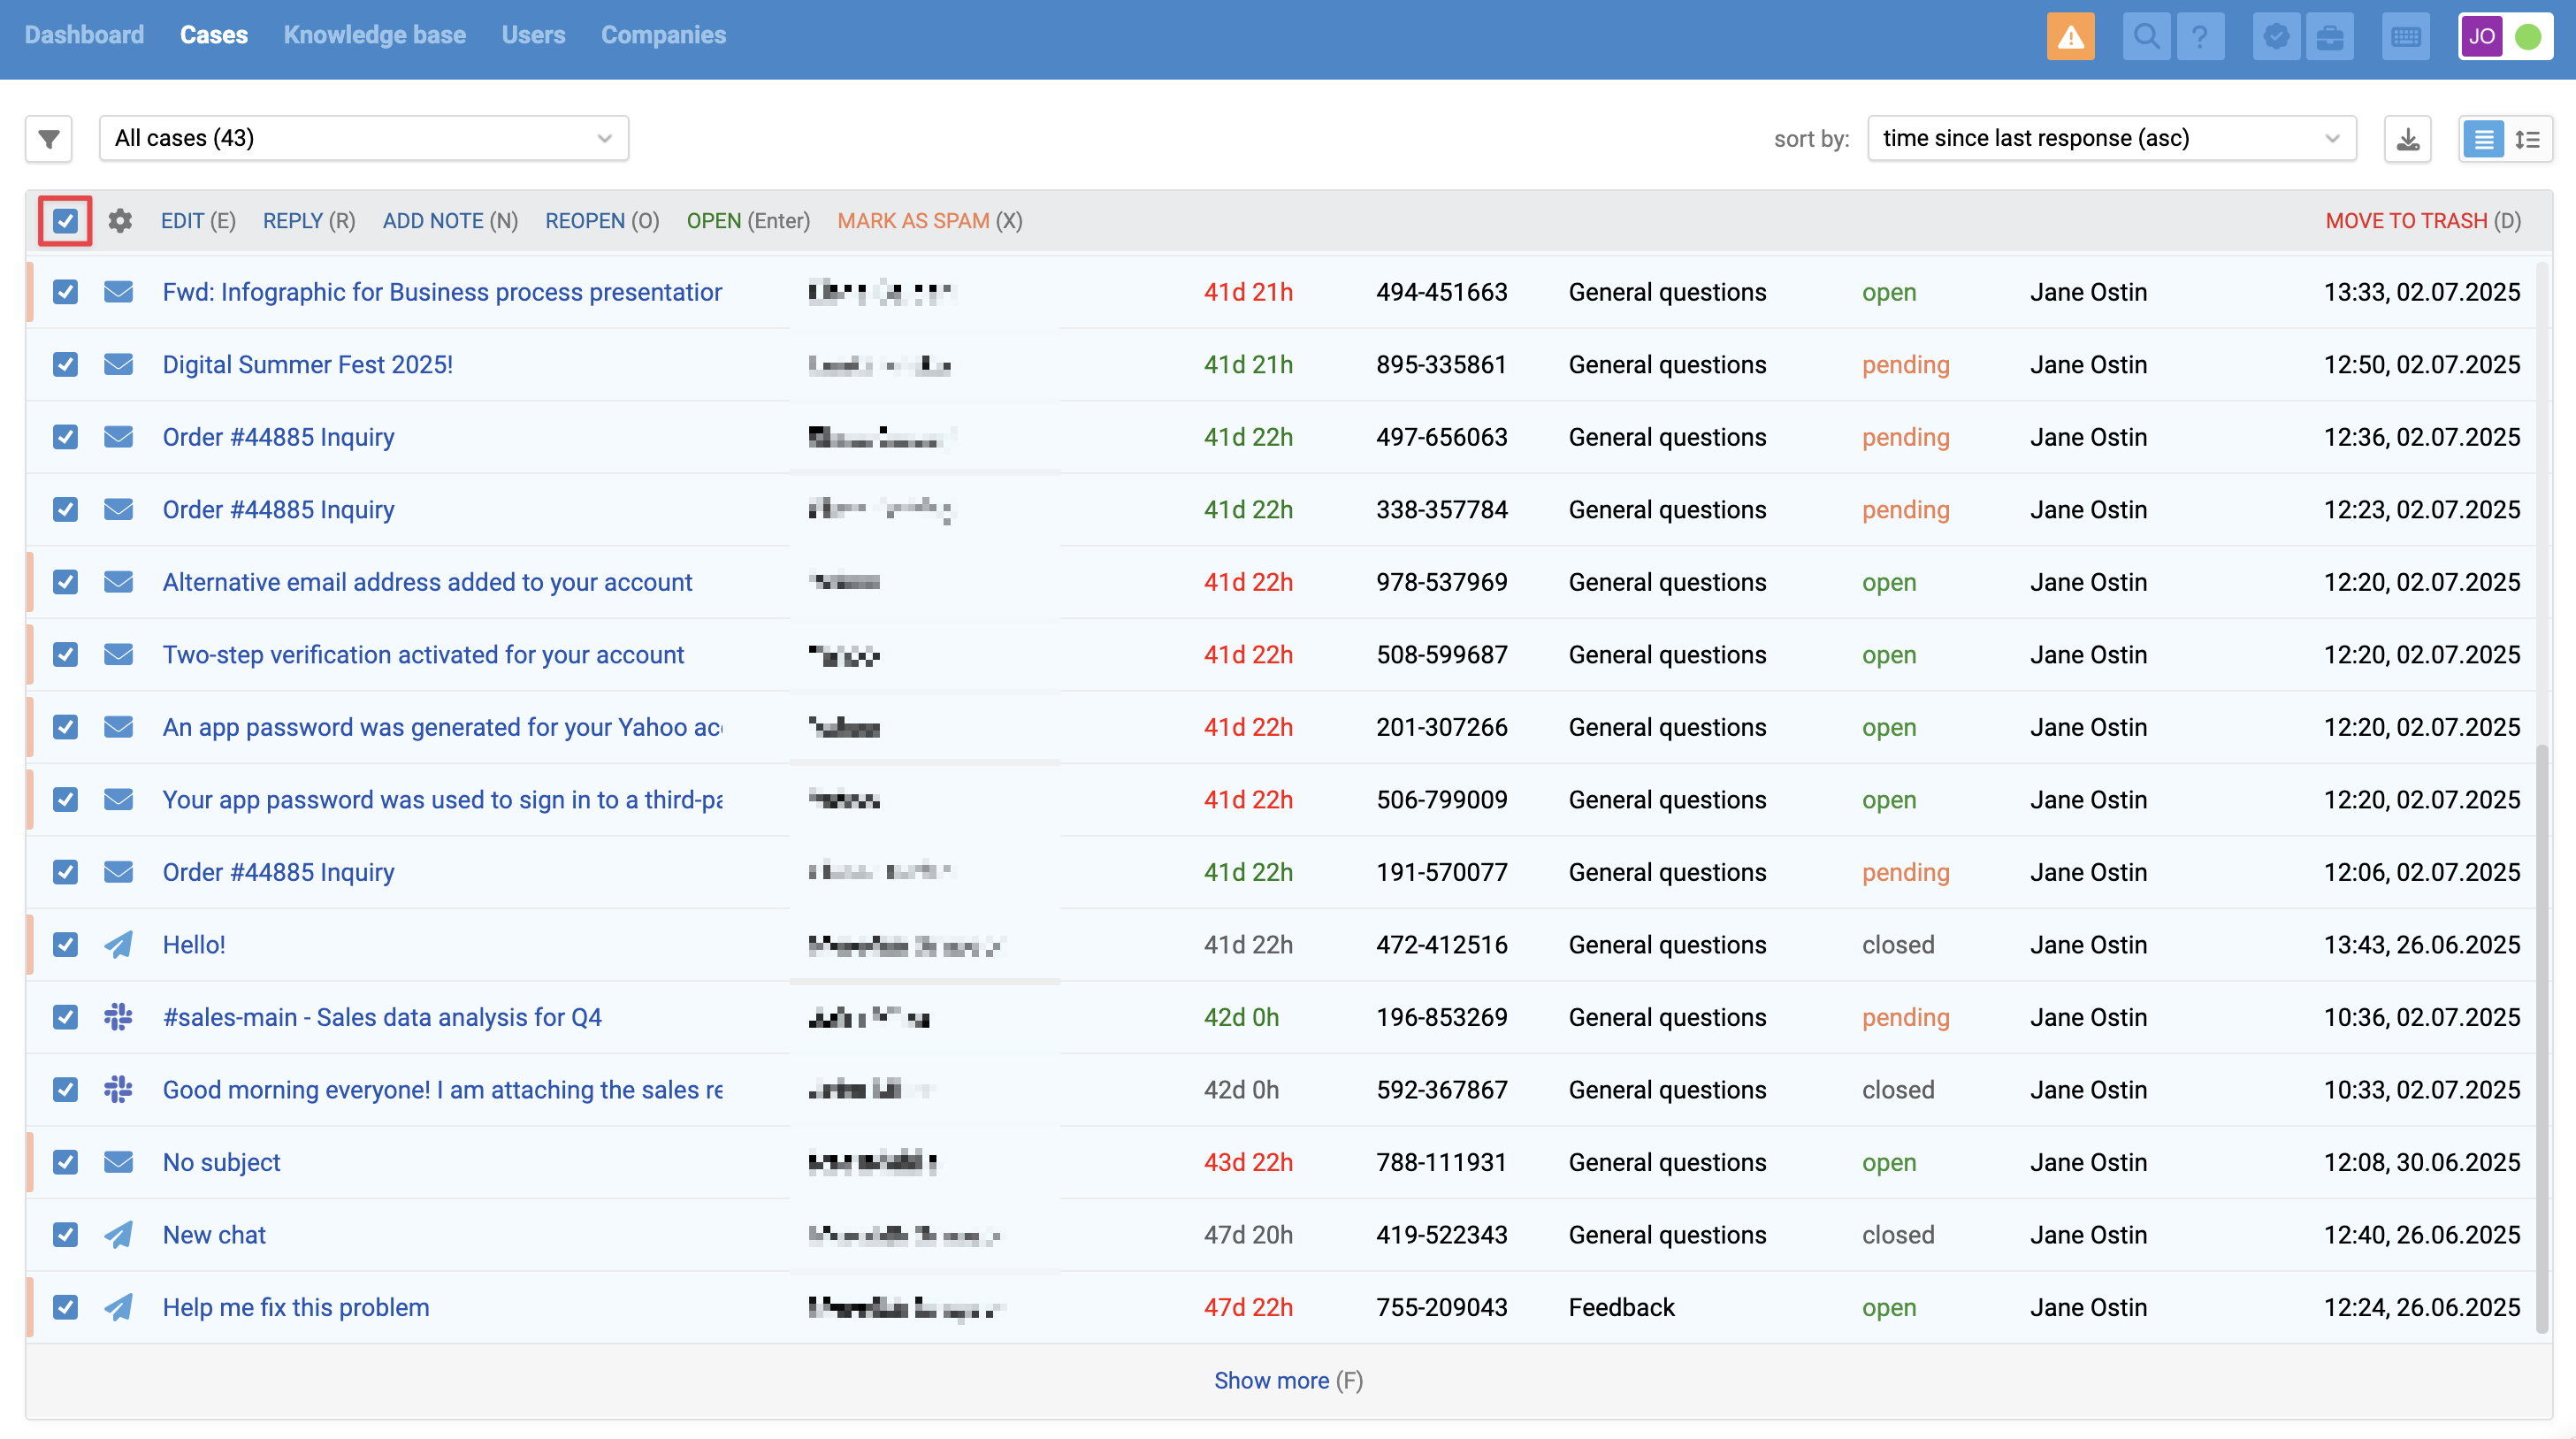
You can select up to 50 cases at once by following these steps:
1. Use filters to narrow down the cases you need;
2. Click the "Show more" button at the bottom of the list twice — this will load up to 50 cases;
3. Tick the checkbox at the top of the list to select all the loaded cases.

Let's take a closer look at the main features:
Changing parameters
The "Edit" option lets you modify key parameters for all selected cases: the subject, as well as standard and custom data fields. You can also reply to multiple users at once or add the same note to each case.
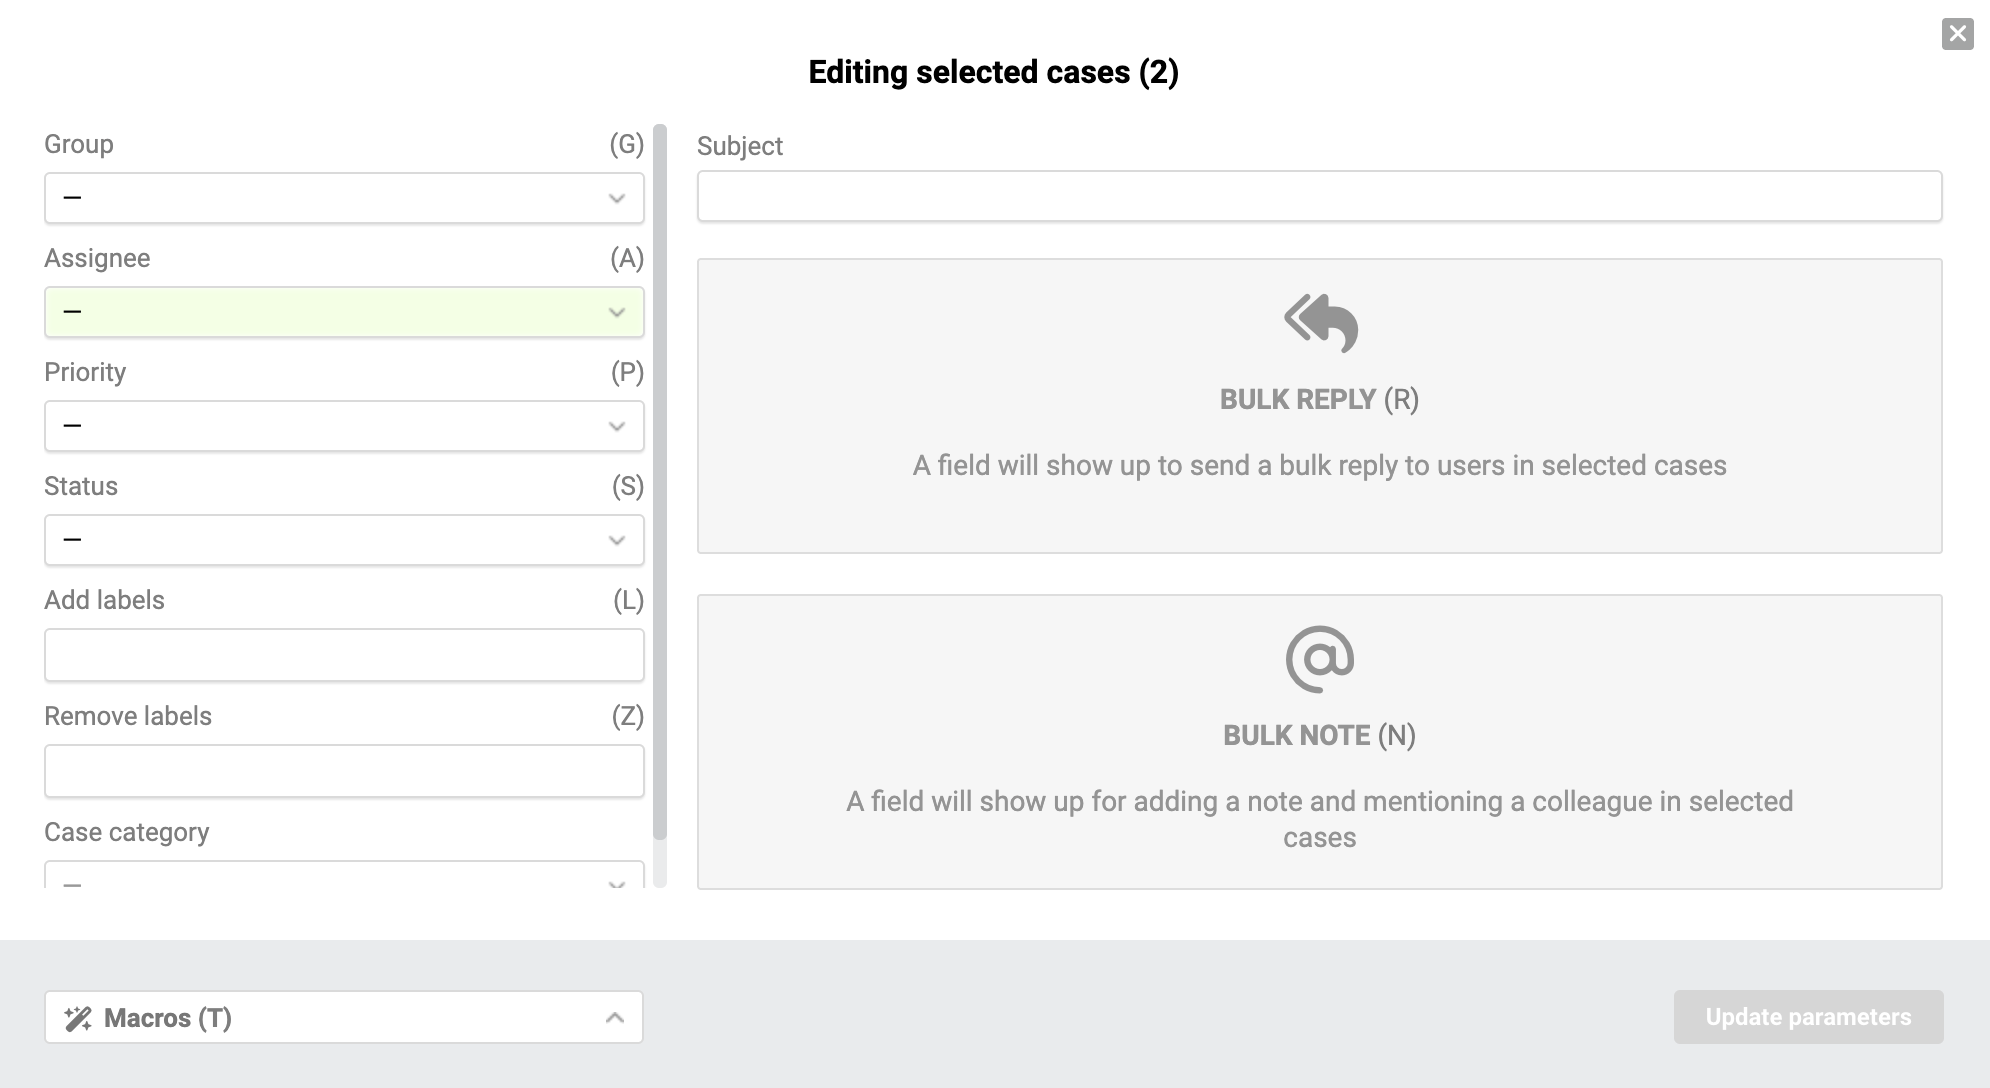
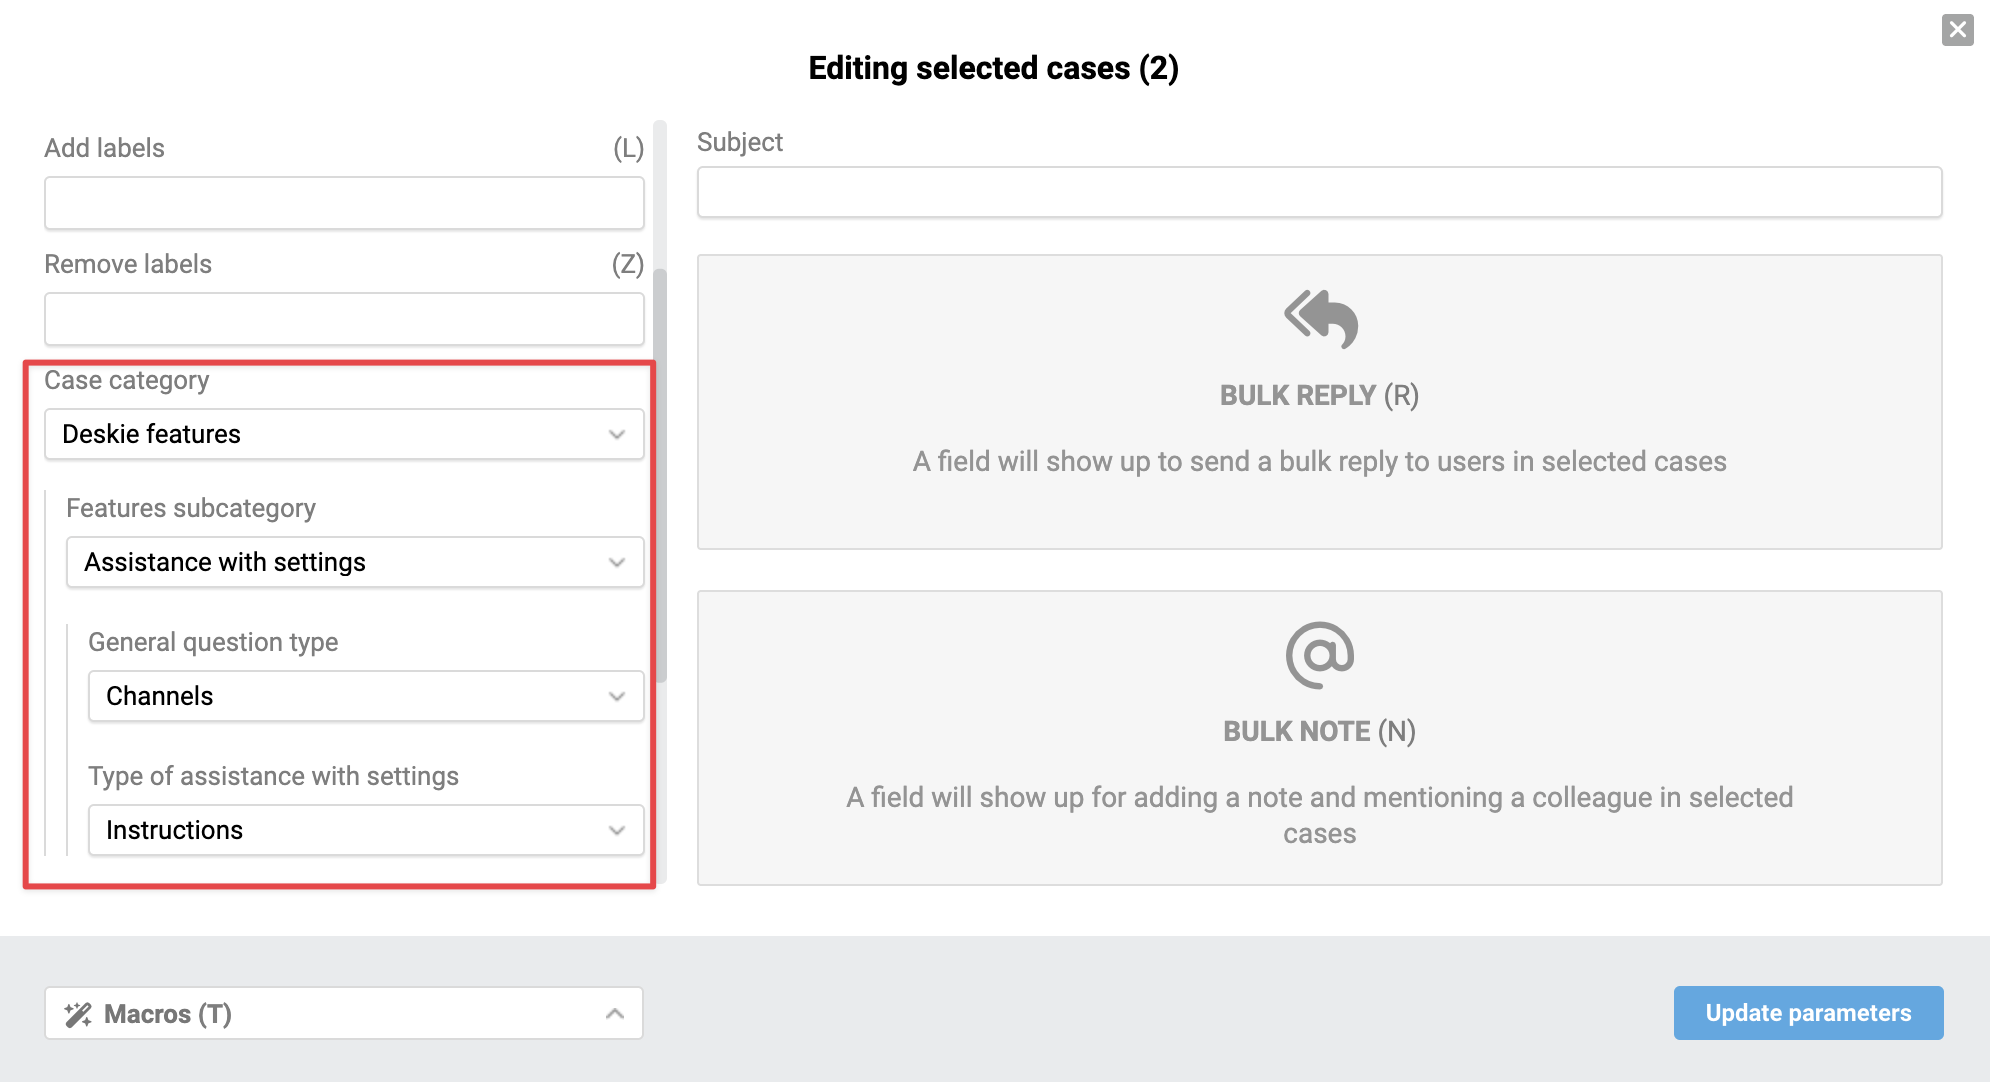
Managing fields
The data fields for case parameters are displayed in the same order as on the case page. Shortcuts are available for standard fields. Dependent custom fields automatically appear when the corresponding value is selected in the parent field.
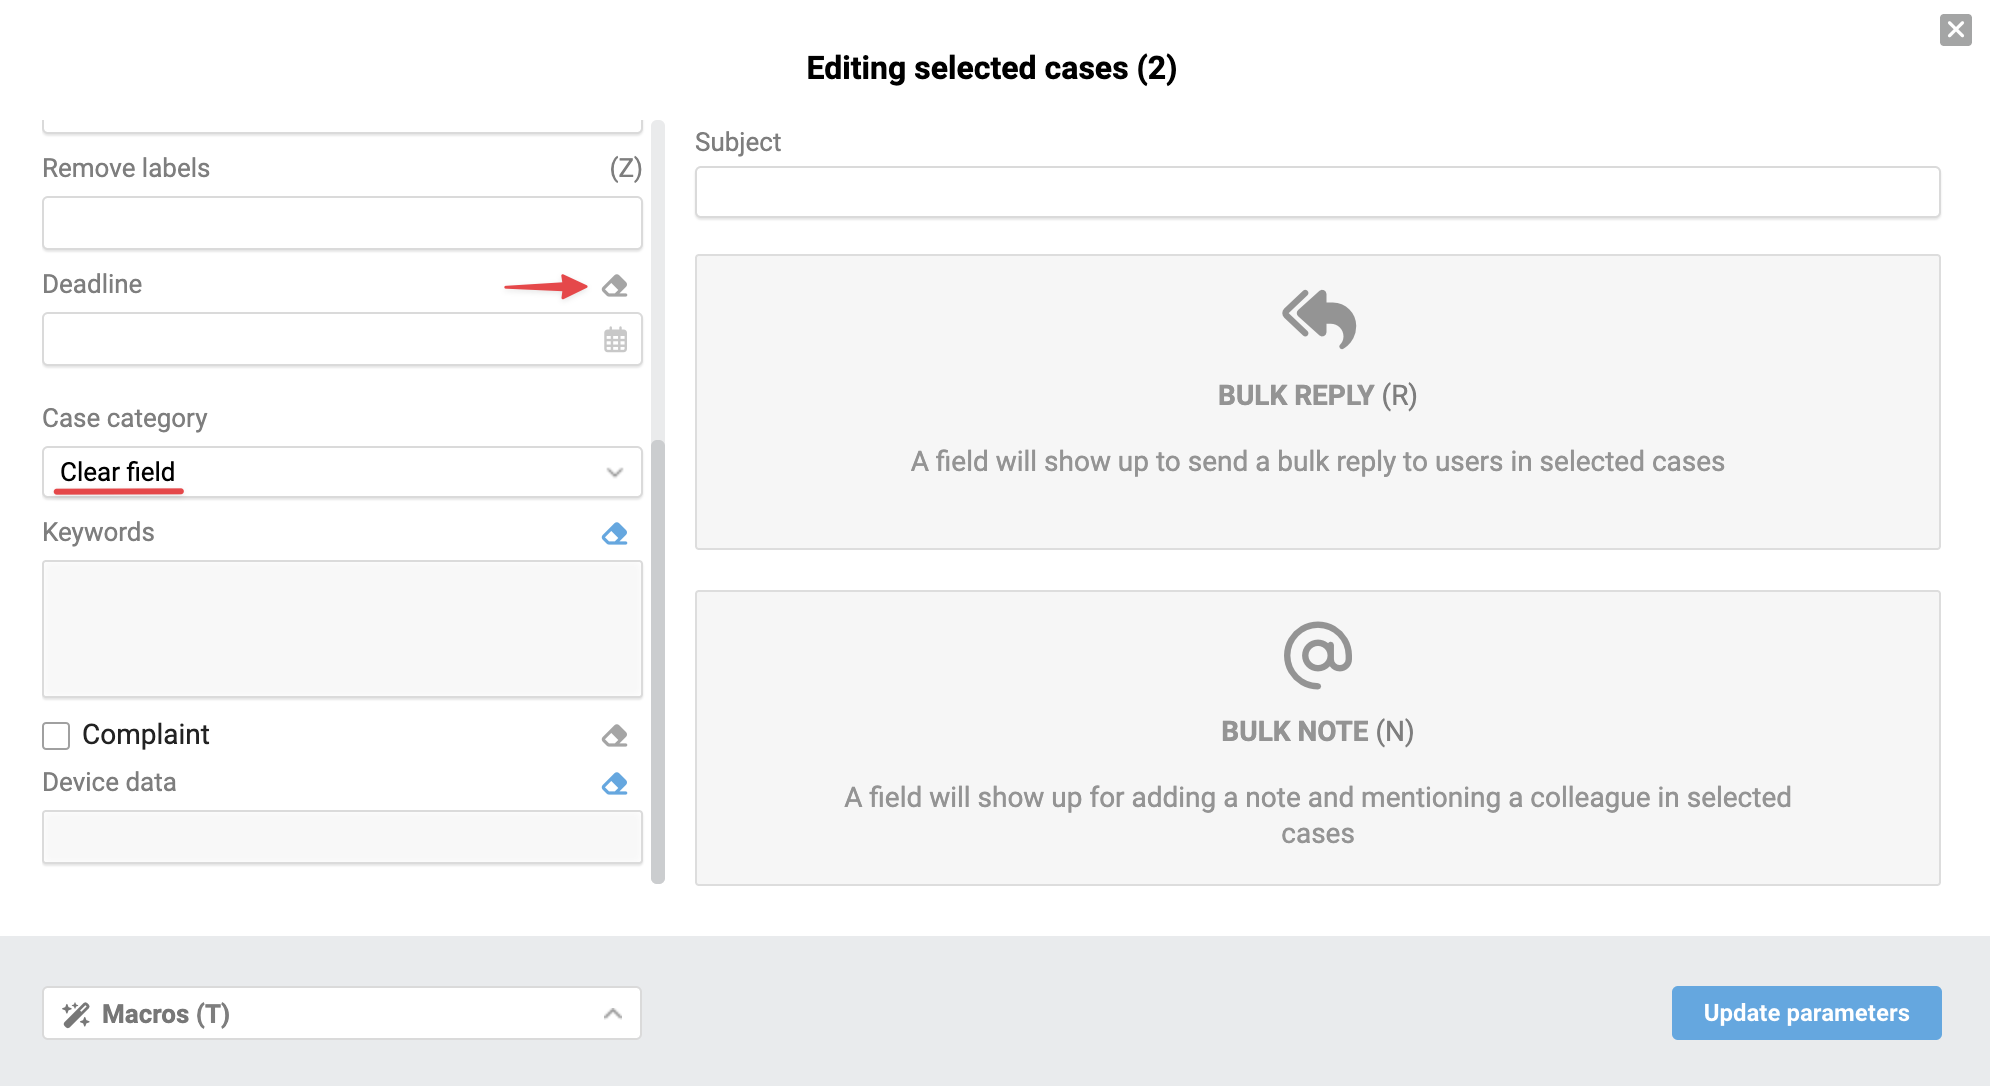
Clearing field values
Custom fields have options to clear current values in selected cases:
- for dropdown lists — the "Clear field" option in the dropdown menu;
- for fields of the type "date", "text field", "text area", and "checkbox" — an eraser icon to the right of the field name.
When clearing is activated, the icon turns blue, and the field gets a gray background.
Handling required fields
If any of the selected cases have required fields left unfilled, changes will not be applied to those cases, and the system will display one of the following notifications:
– partial changes applied — when required fields are completed in only some of the selected cases:

– no changes applied — when required fields are missing in all selected cases:

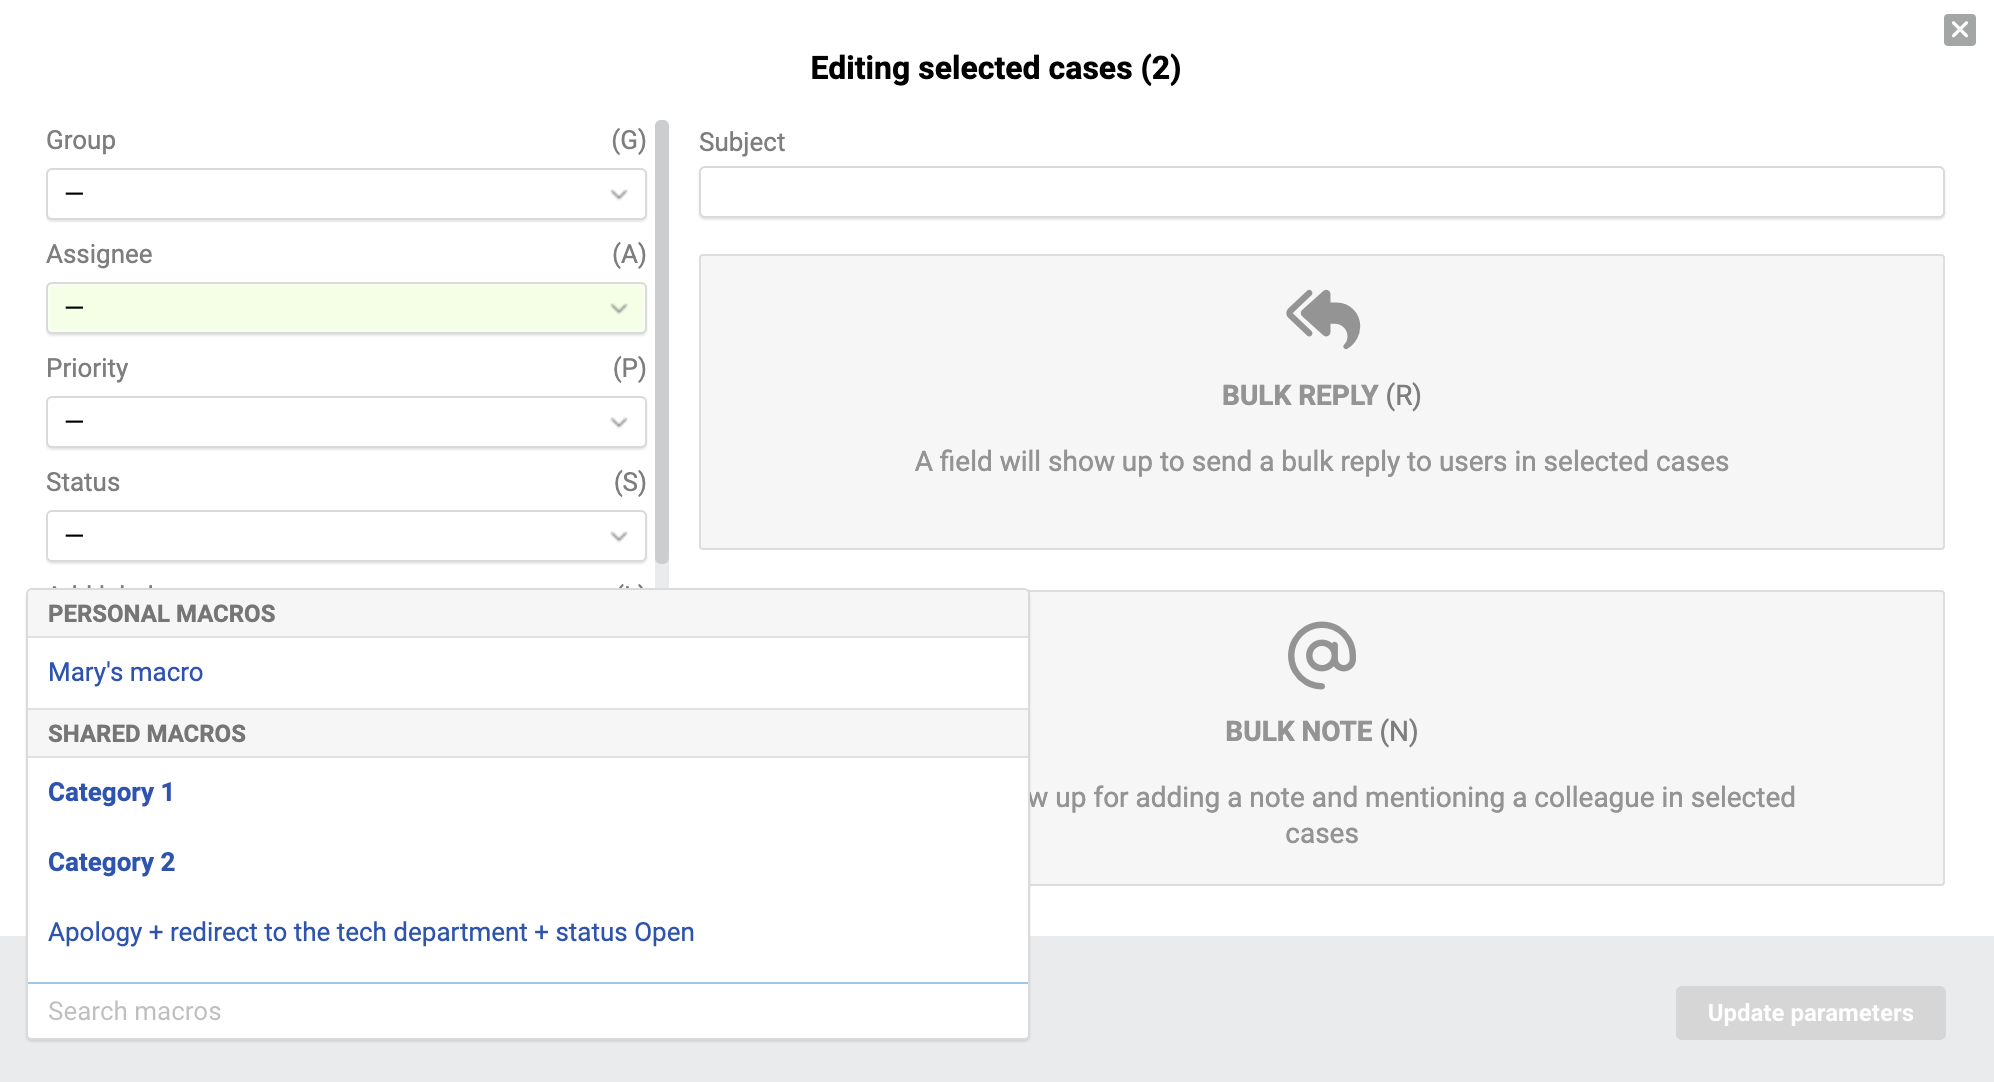
Using macros
Macros are available in the bottom-left corner of the window. The system displays only those macros whose actions are supported in bulk edit mode.
The following actions are not supported in bulk actions:
- changing the reply-to address;
- adding recipients in copy and blind copy (CC/BCC);
- reopening scheduling (this is done as a separate action in bulk editing);
- sending notification emails to agents;
- forwarding messages;
- ending chats with status assignment.
⚠️ Macros actions are applied only after pressing the "Update parameters" button or its equivalent.
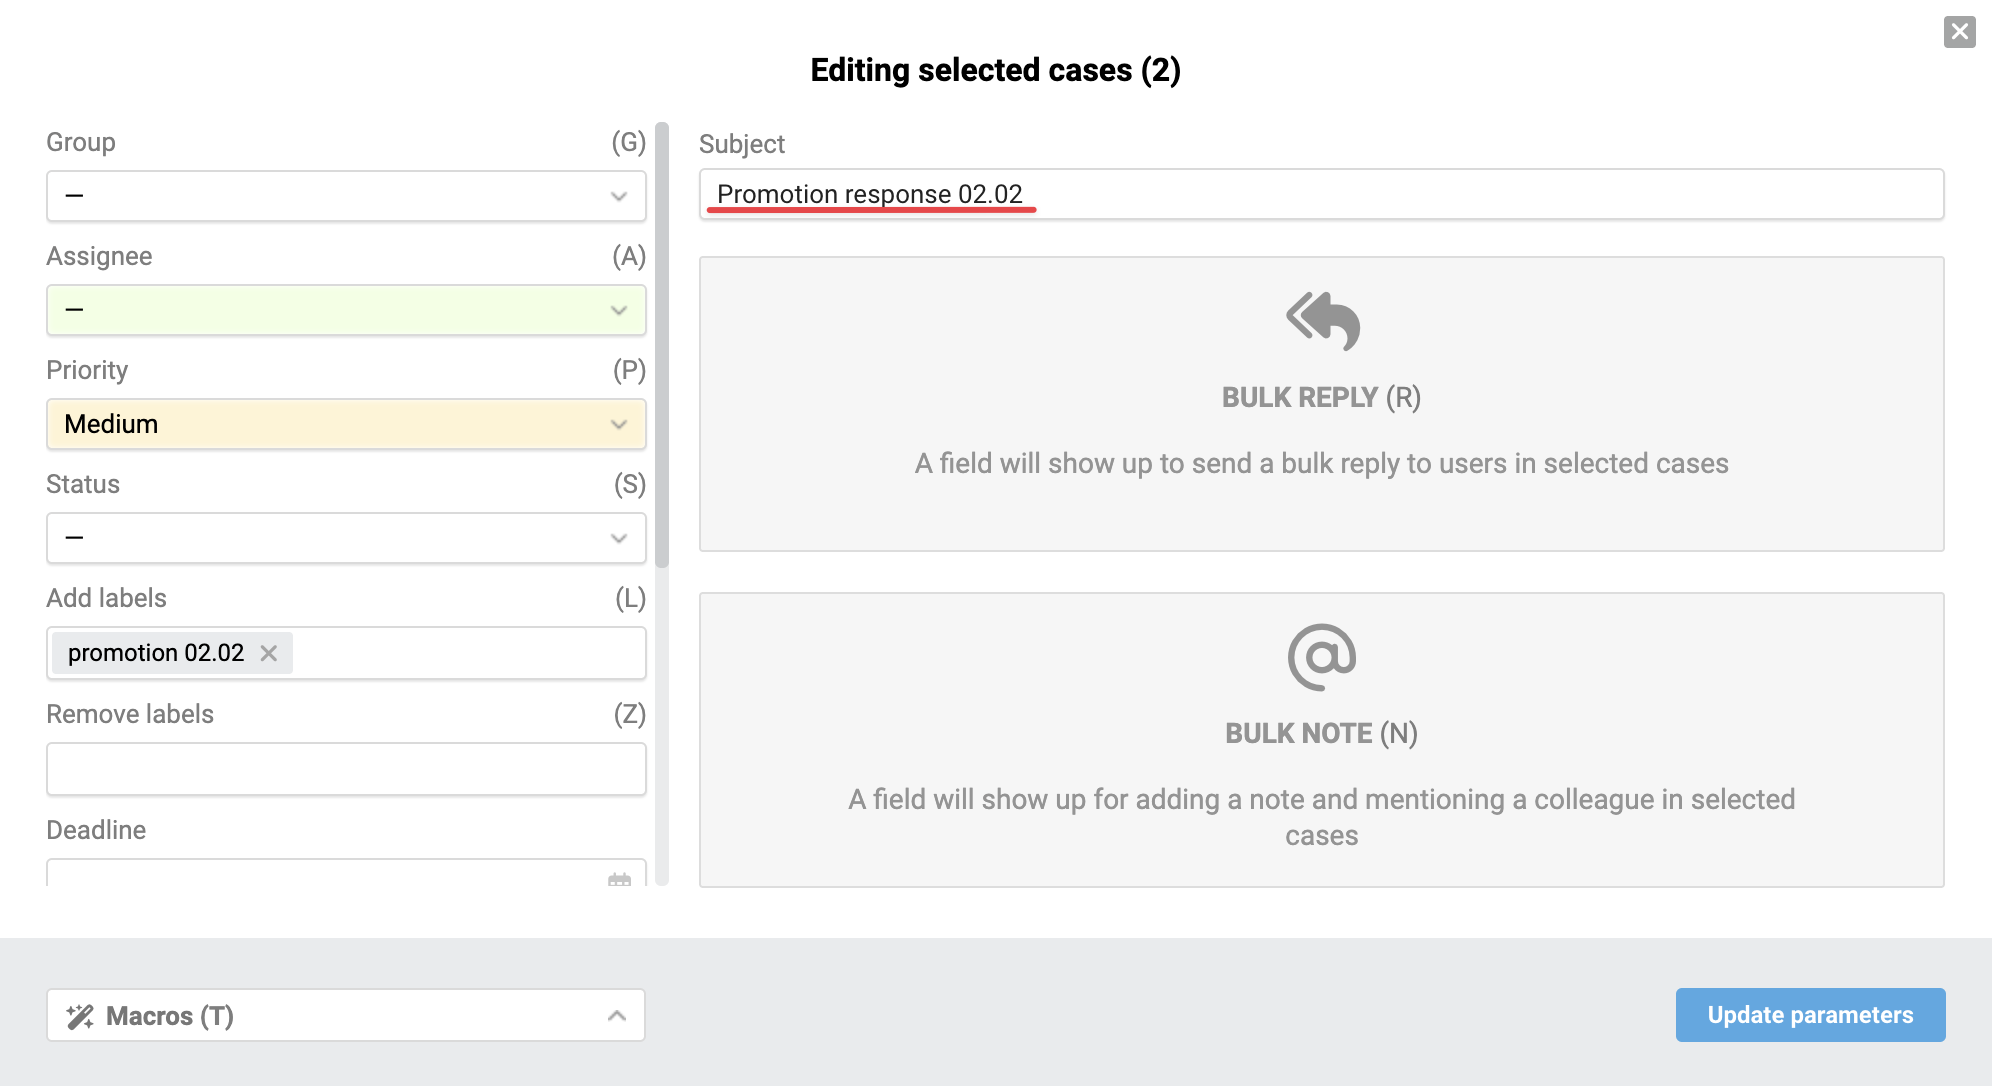
Changing the subject
You can change the subject of your message in the corresponding field.
Autosave
When changing parameters, replying to customers, adding notes, or scheduling reopening, the system saves the entered values and sent text to cache for 10 minutes.
If you reopen the modal window within this time, the fields will be filled in automatically – this speeds up work when sequentially editing a large number of cases.
Text saving specifics
If you've typed a reply or note but decided not to send it and closed the text editor using the "cancel" link, the typed text is saved in the input fields as long as the bulk changes modal window remains open.
The input fields are cleared if the modal window:
- is сlosed manually using the close (X) button;
- сloses automatically after the case parameters are updated.
⚠️ This is not autosave: if you close the Deskie tab or refresh the page, the text will not be restored.
Responses and notes
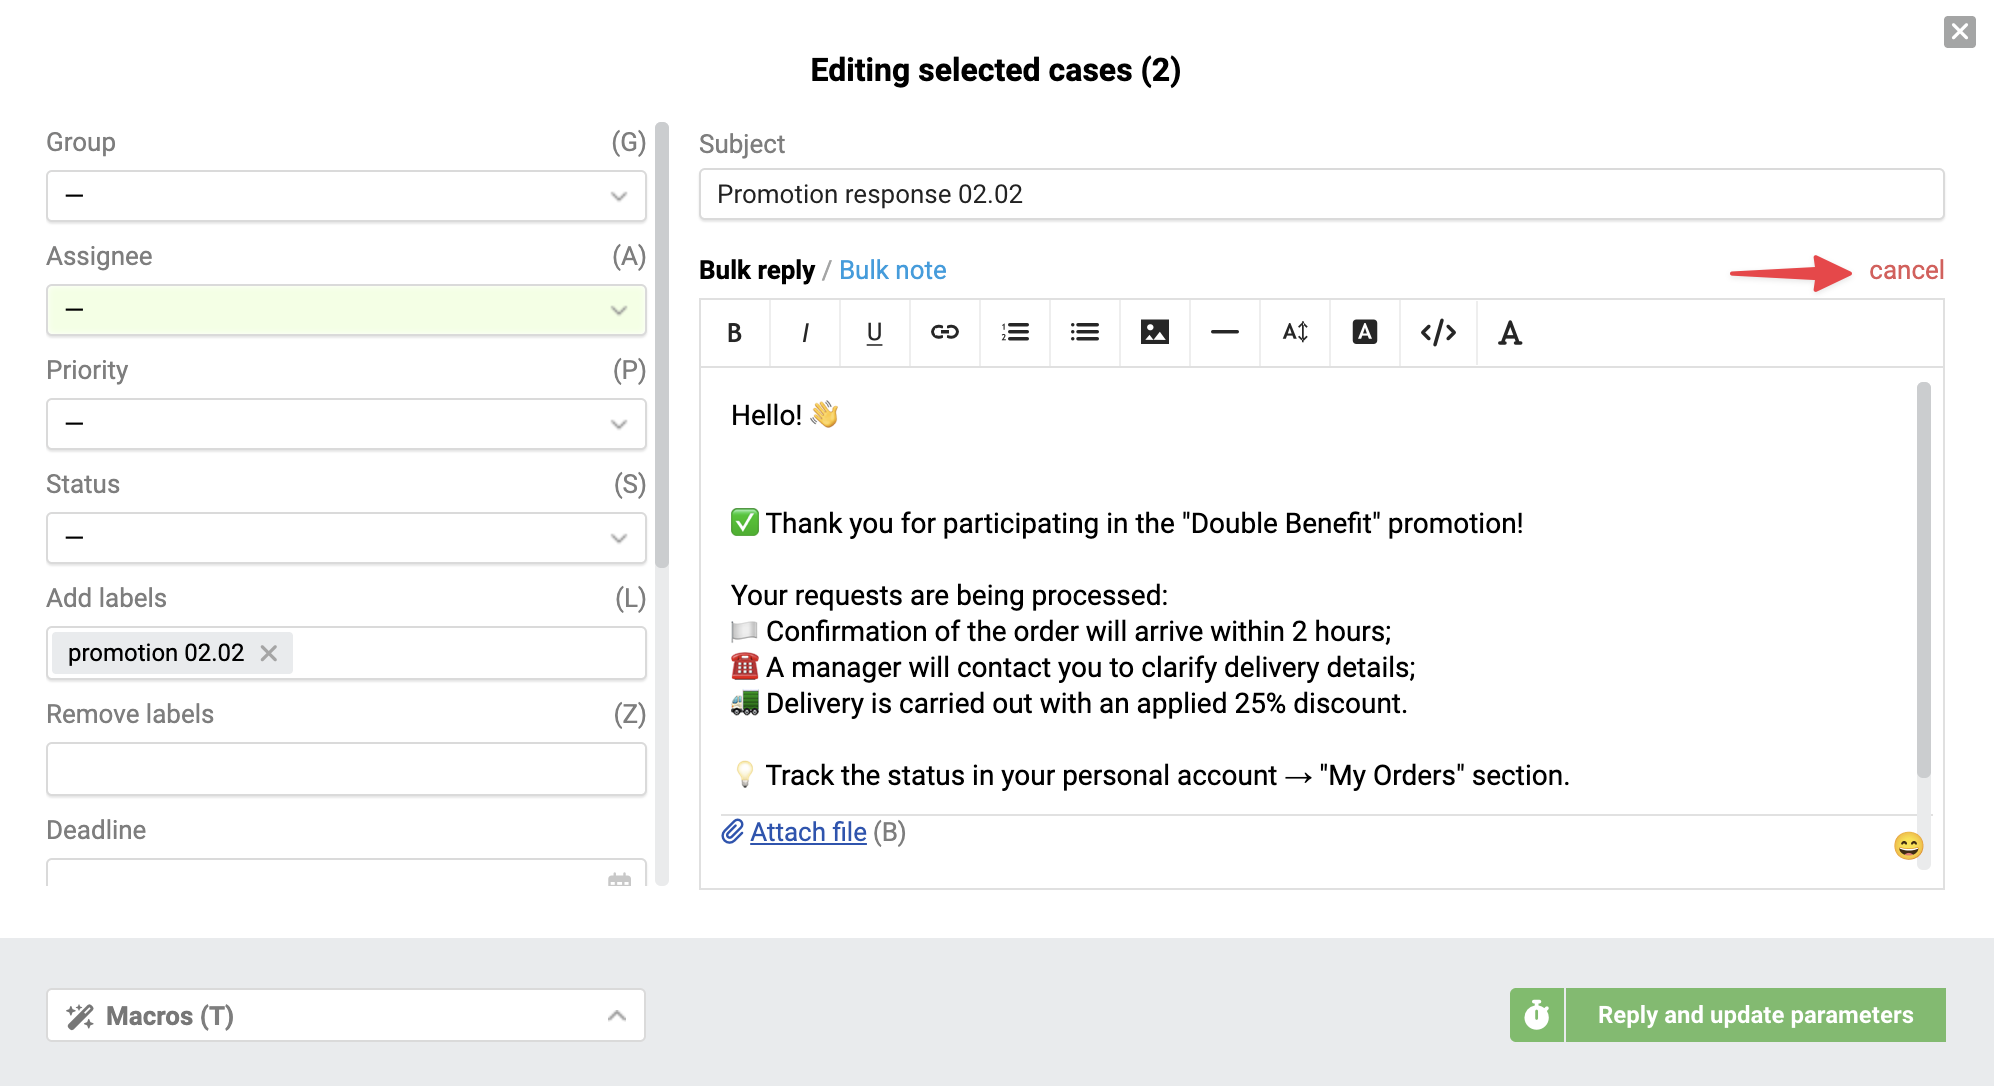
Bulk replies
Bulk replies allow sending the same message to all selected cases.
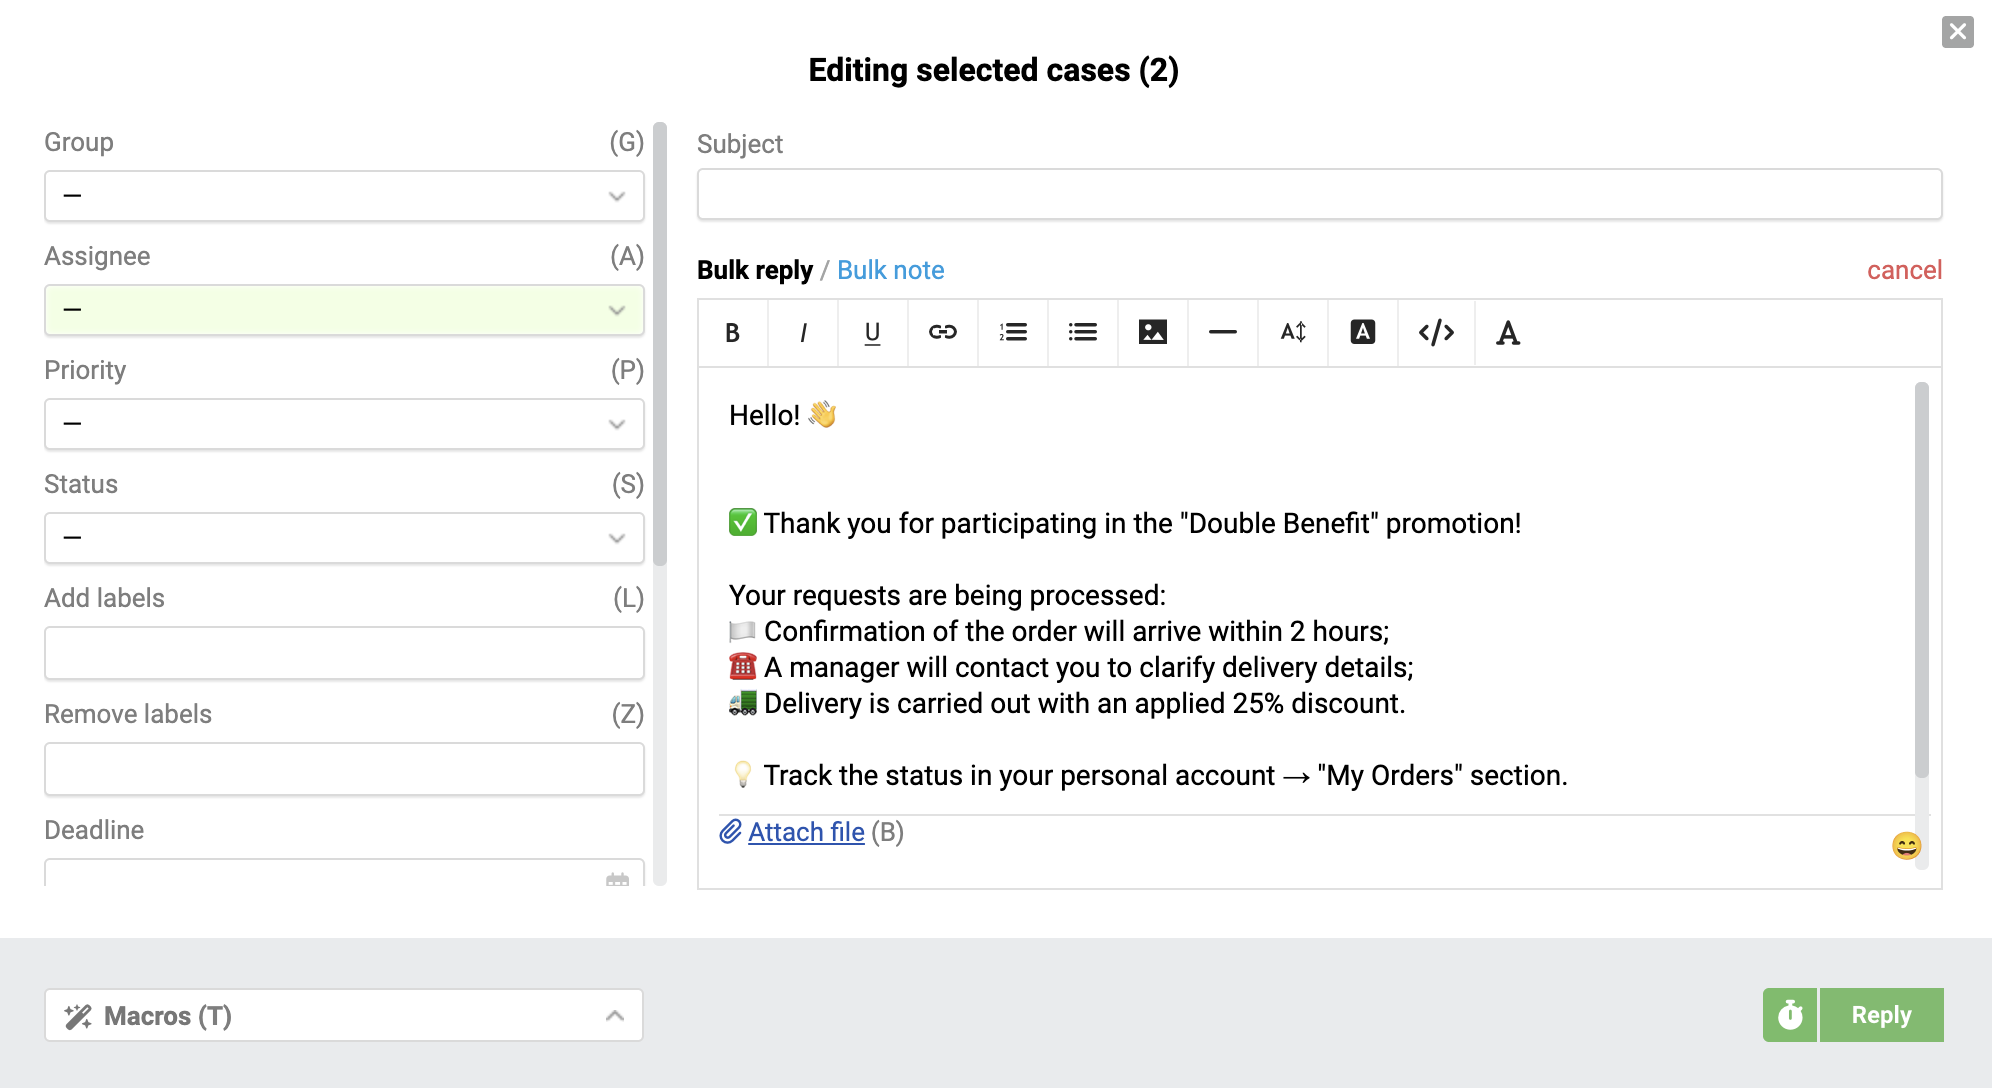
You can open the bulk reply via the "Reply" link in the action list or by switching to the "Bulk Reply" tab in the edit window.
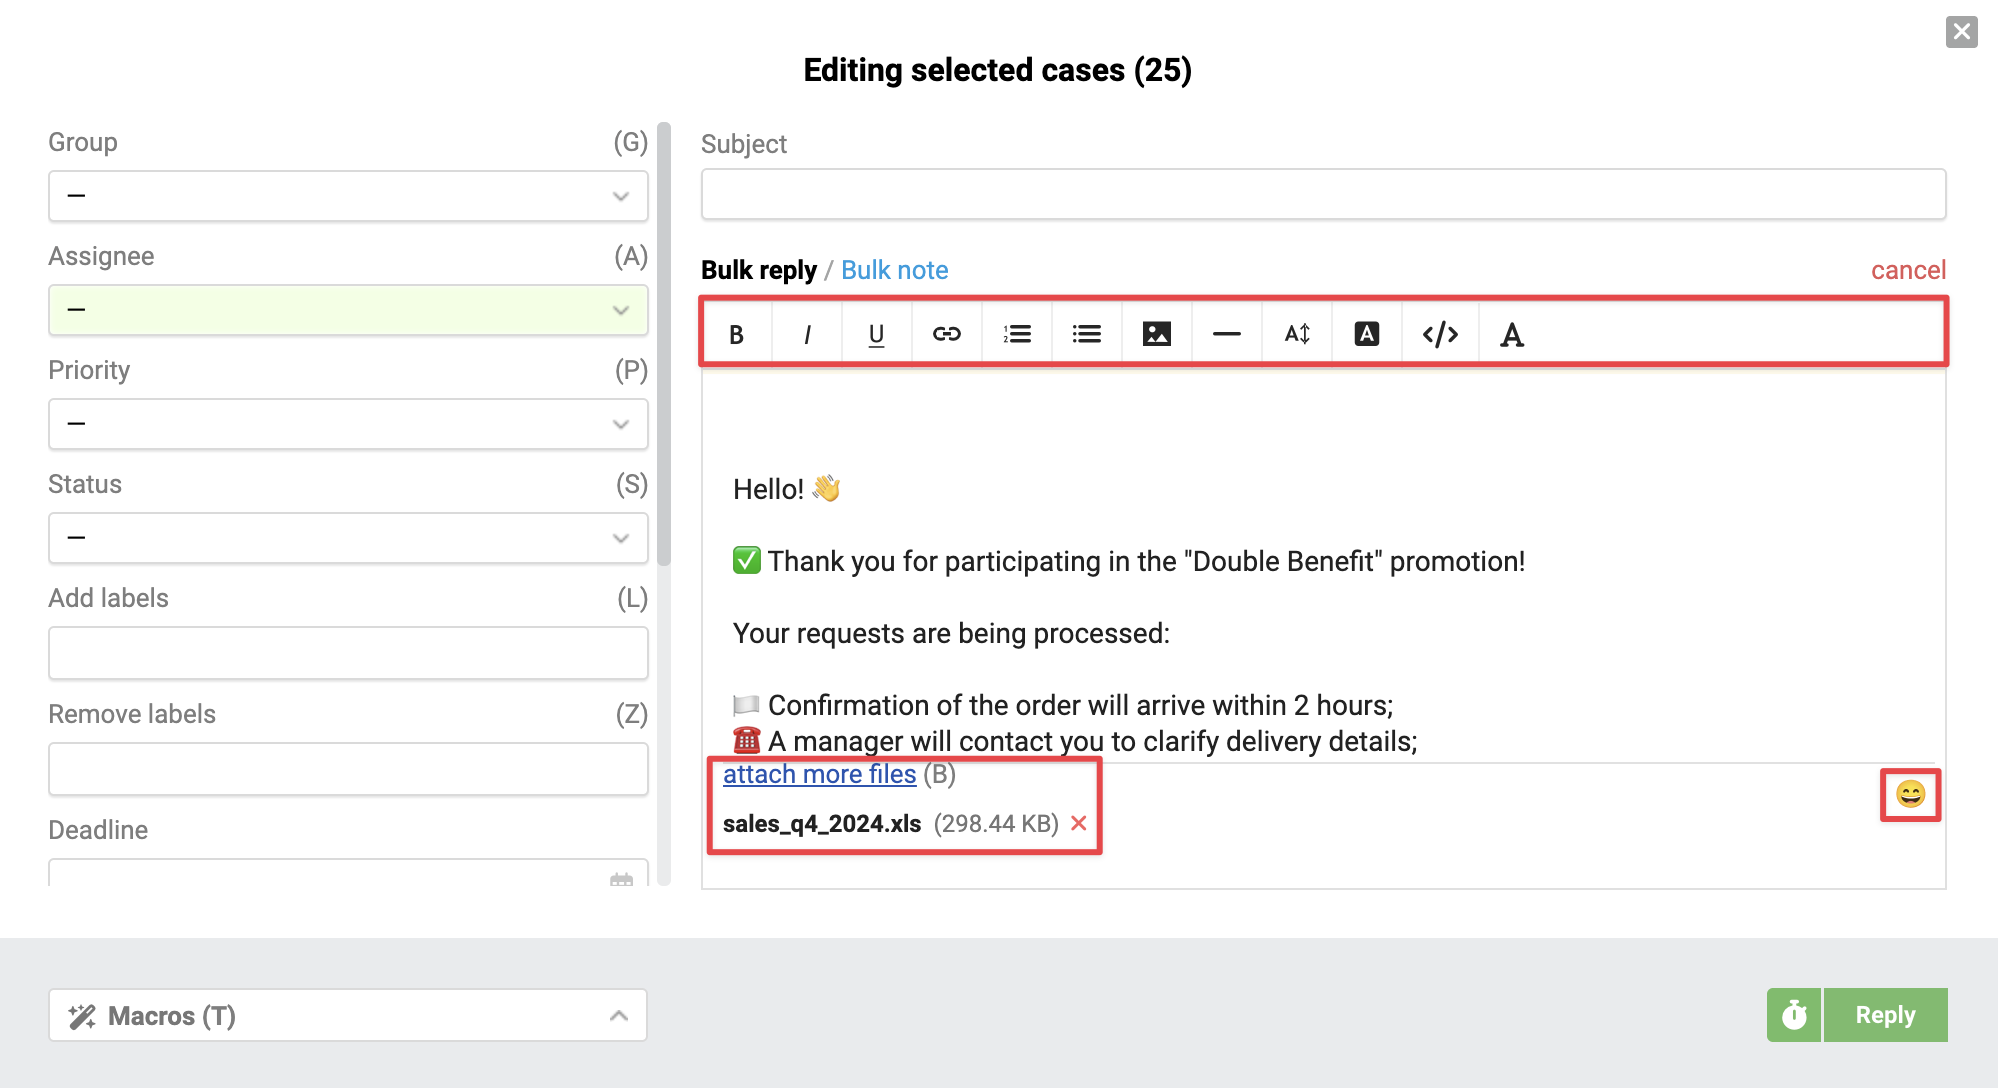
Editor features include:
- file attachments;
- adding emojis;
- for email cases, the standard editor with text formatting support is available.
The logic for saving text in the input field when canceling a reply is described here.
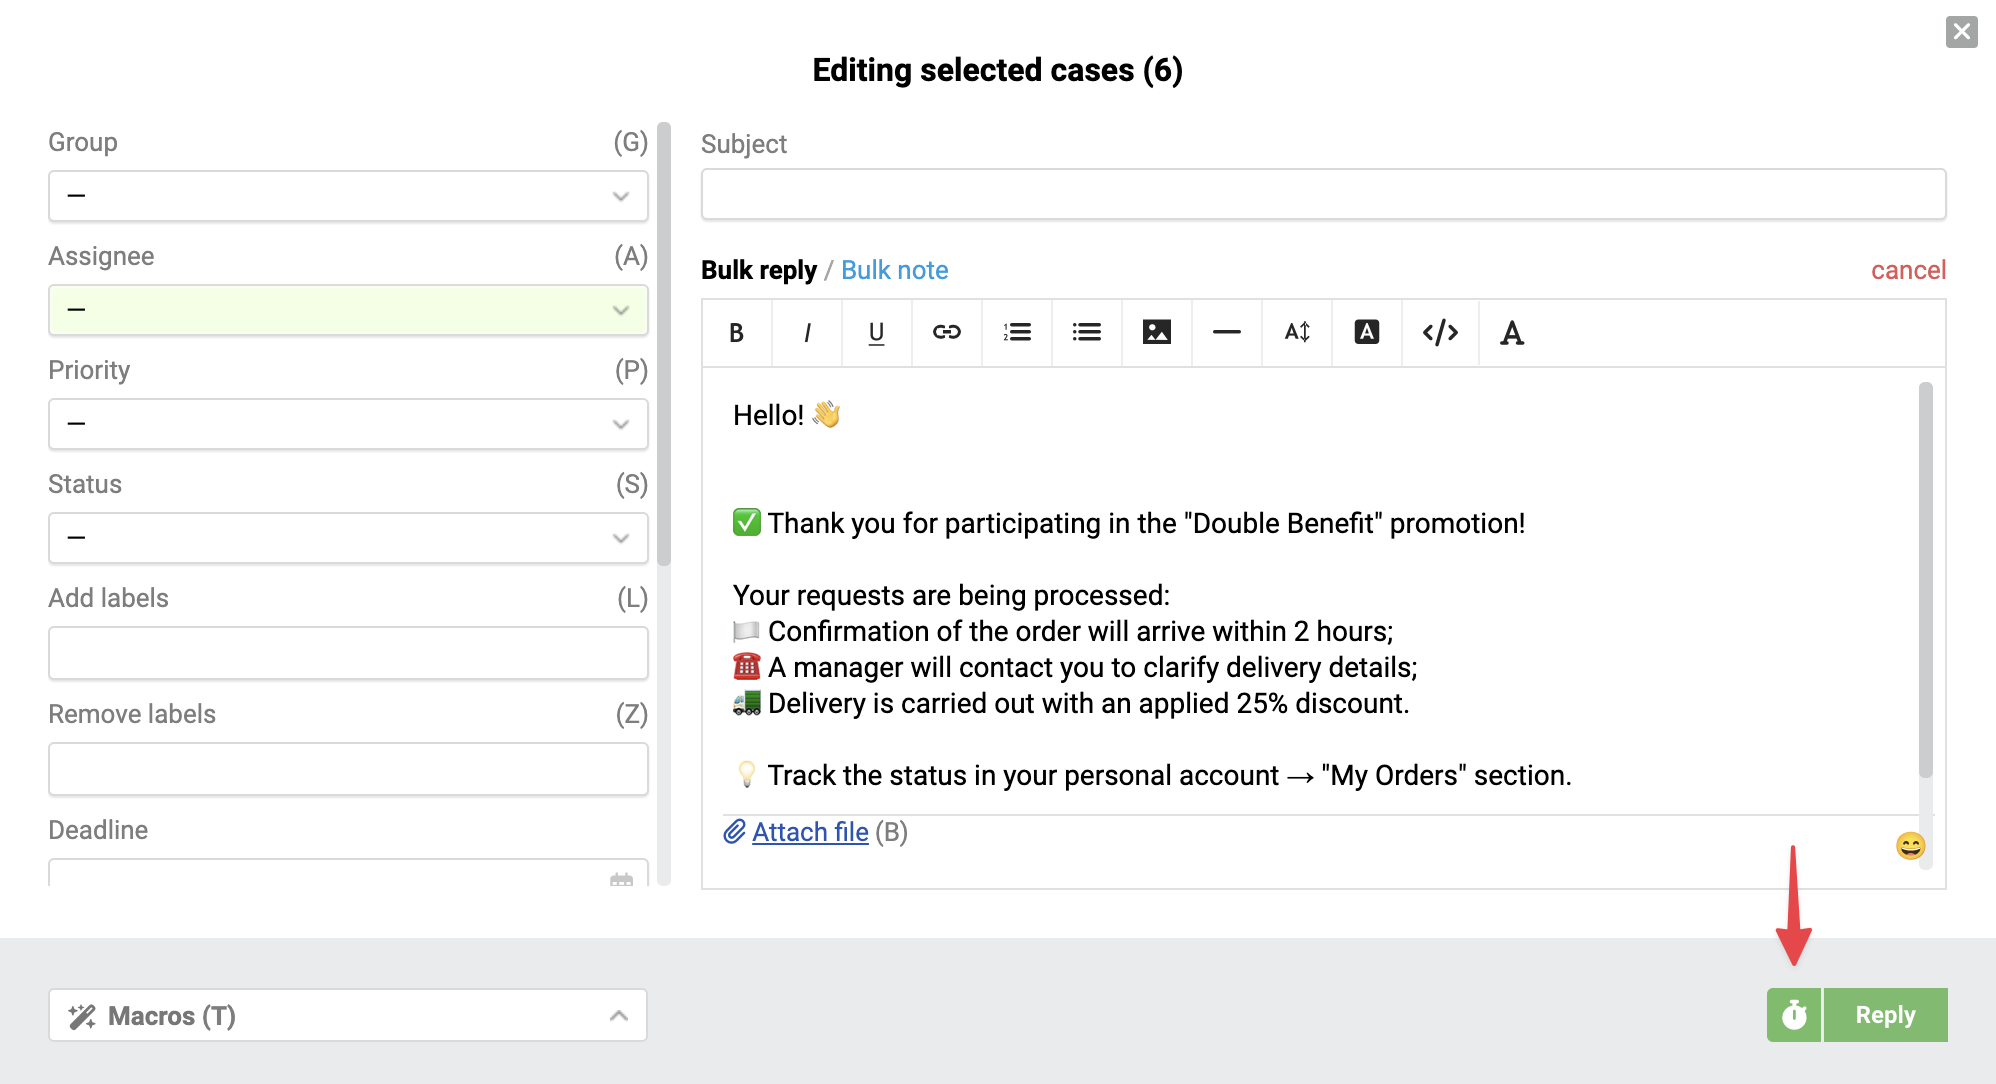
Sheduled sending
In the bottom-right corner, to the left of the reply send button, there's a clock icon. Click it to schedule when the message should be sent. In the window that opens, specify the send time and save the settings. Once saved, the button turns grey — this indicates that scheduled sending is set up.
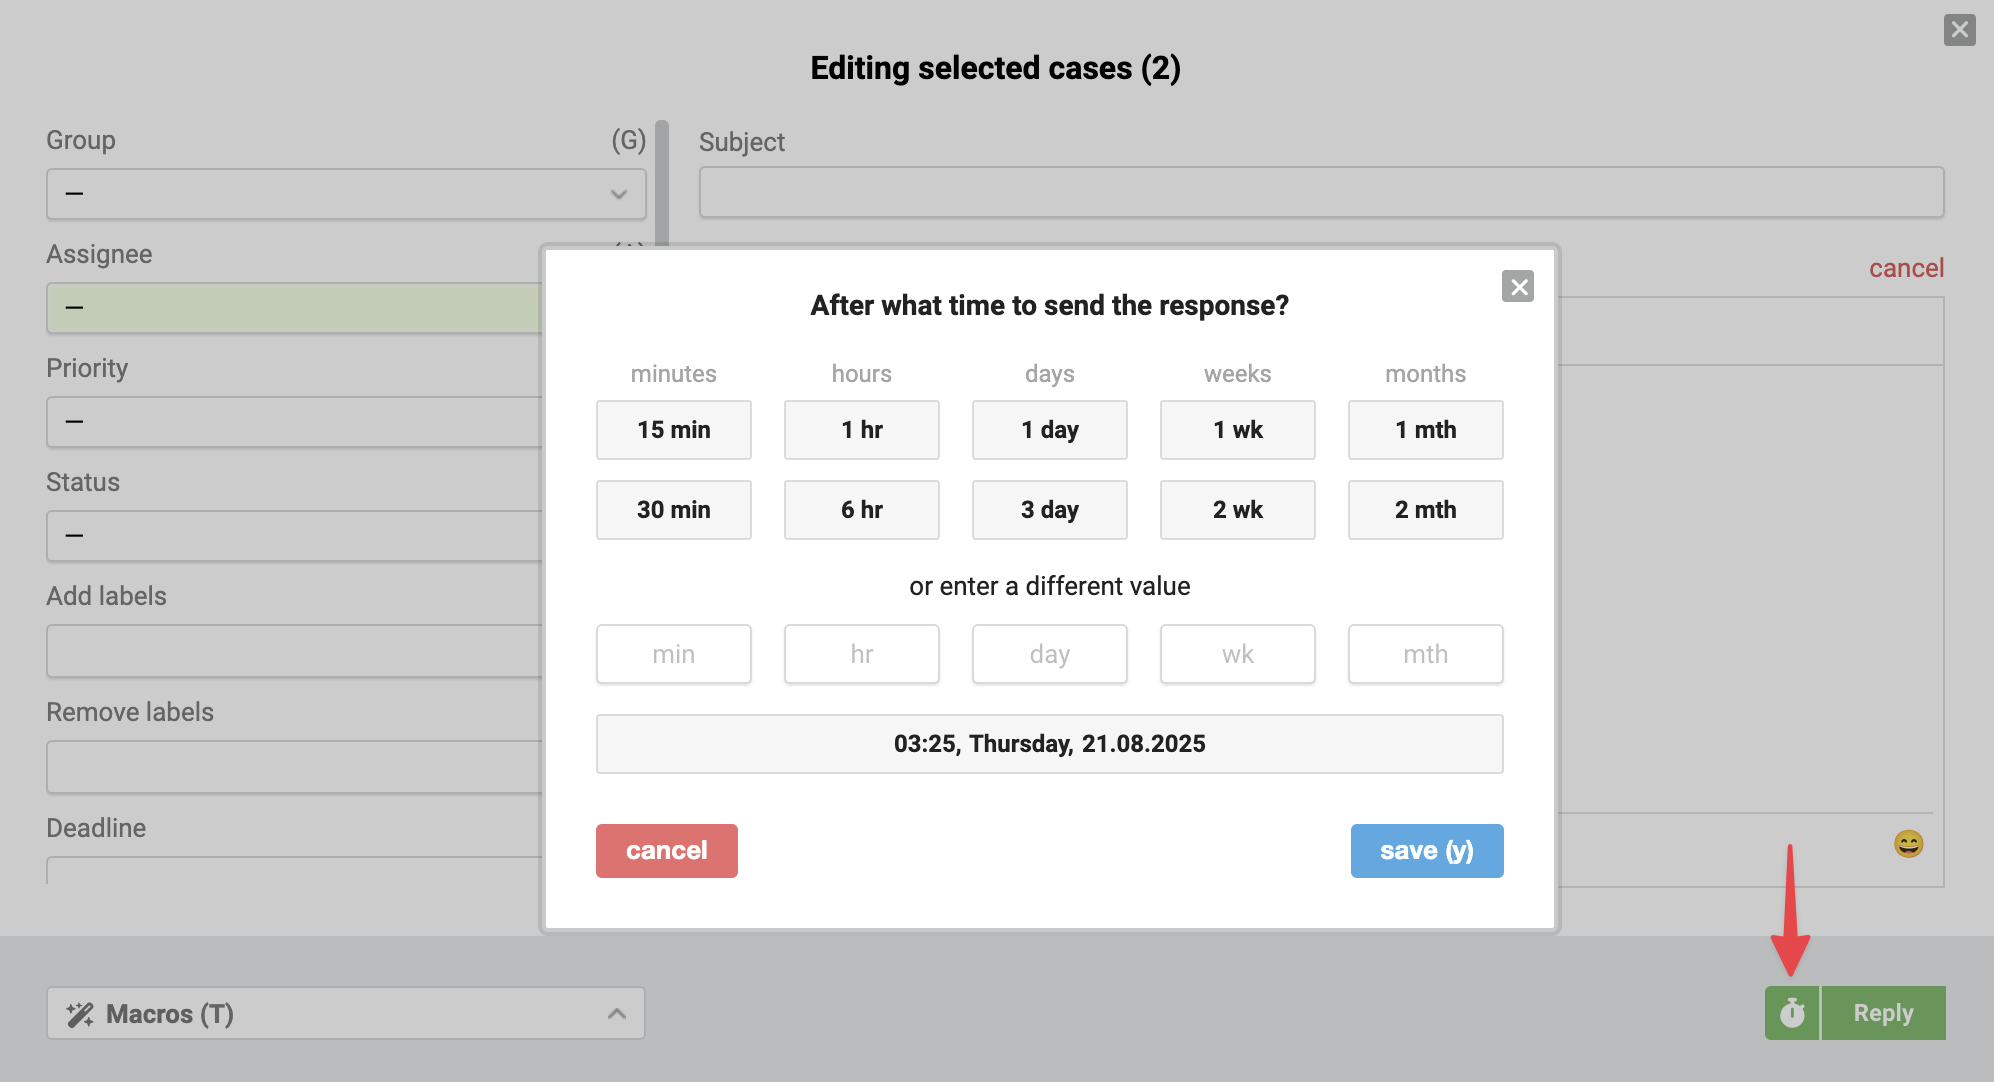
The scheduled sending will only be executed after pressing the main "Reply" button or its equivalent.
Adding notes
You can add the same internal note to all selected cases.
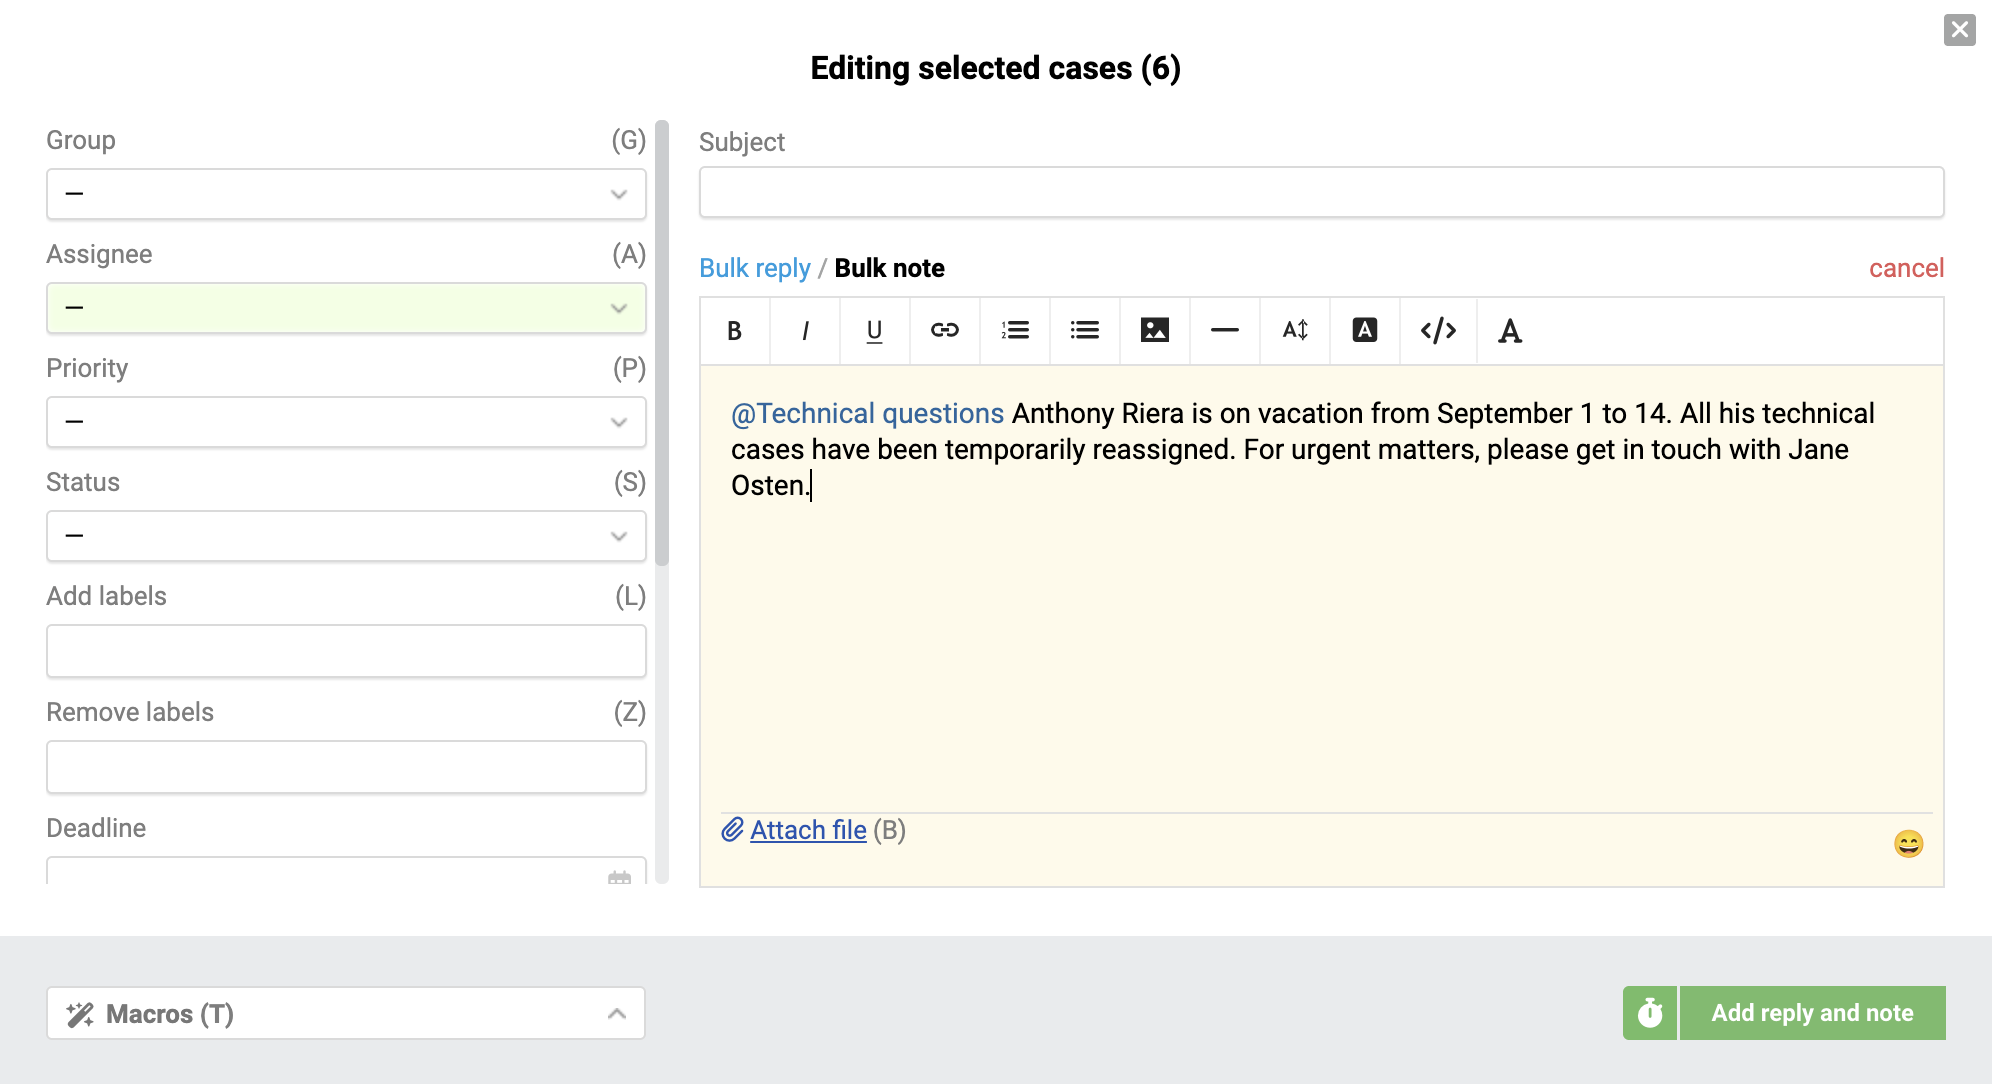
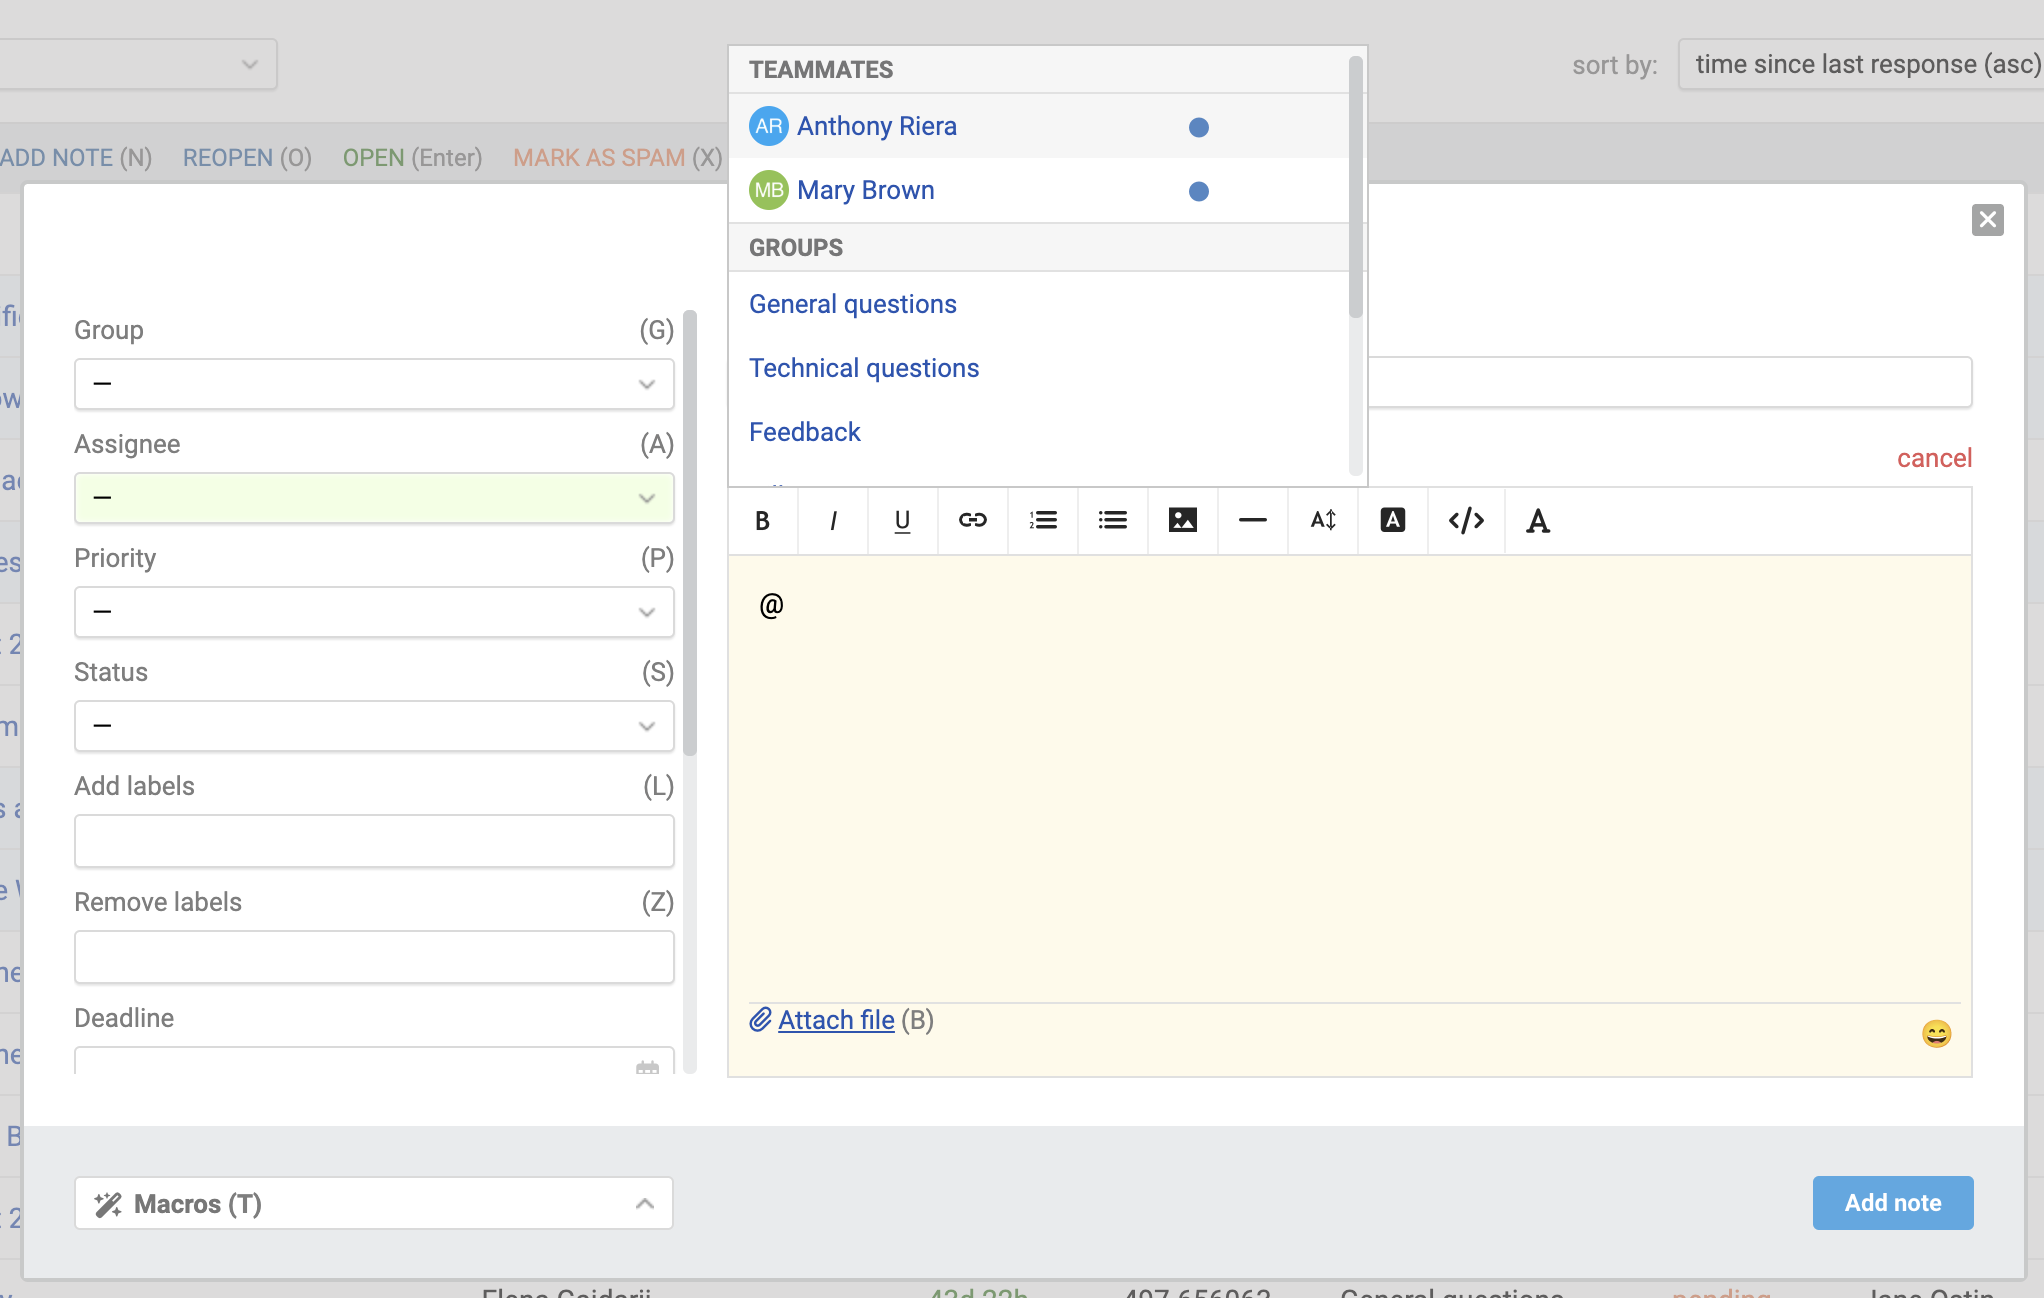
You can open the note-adding feature via the "Add Note" link in the action list or by switching to the corresponding tab in the bulk edit window. In this mode, the following are available:
- file attachments;
- emojis;
- mentioning specific agents or groups;
- a standard editor with text formatting support across all cases.
If a mentioned agent does not have access to a case, the note will still be added, but no notification will be sent to that agent. On the case page, the name of such an agent will be crossed out to indicate the lack of access.

The logic for saving text in the note input field when canceling the addition of a note is described here.
Case management
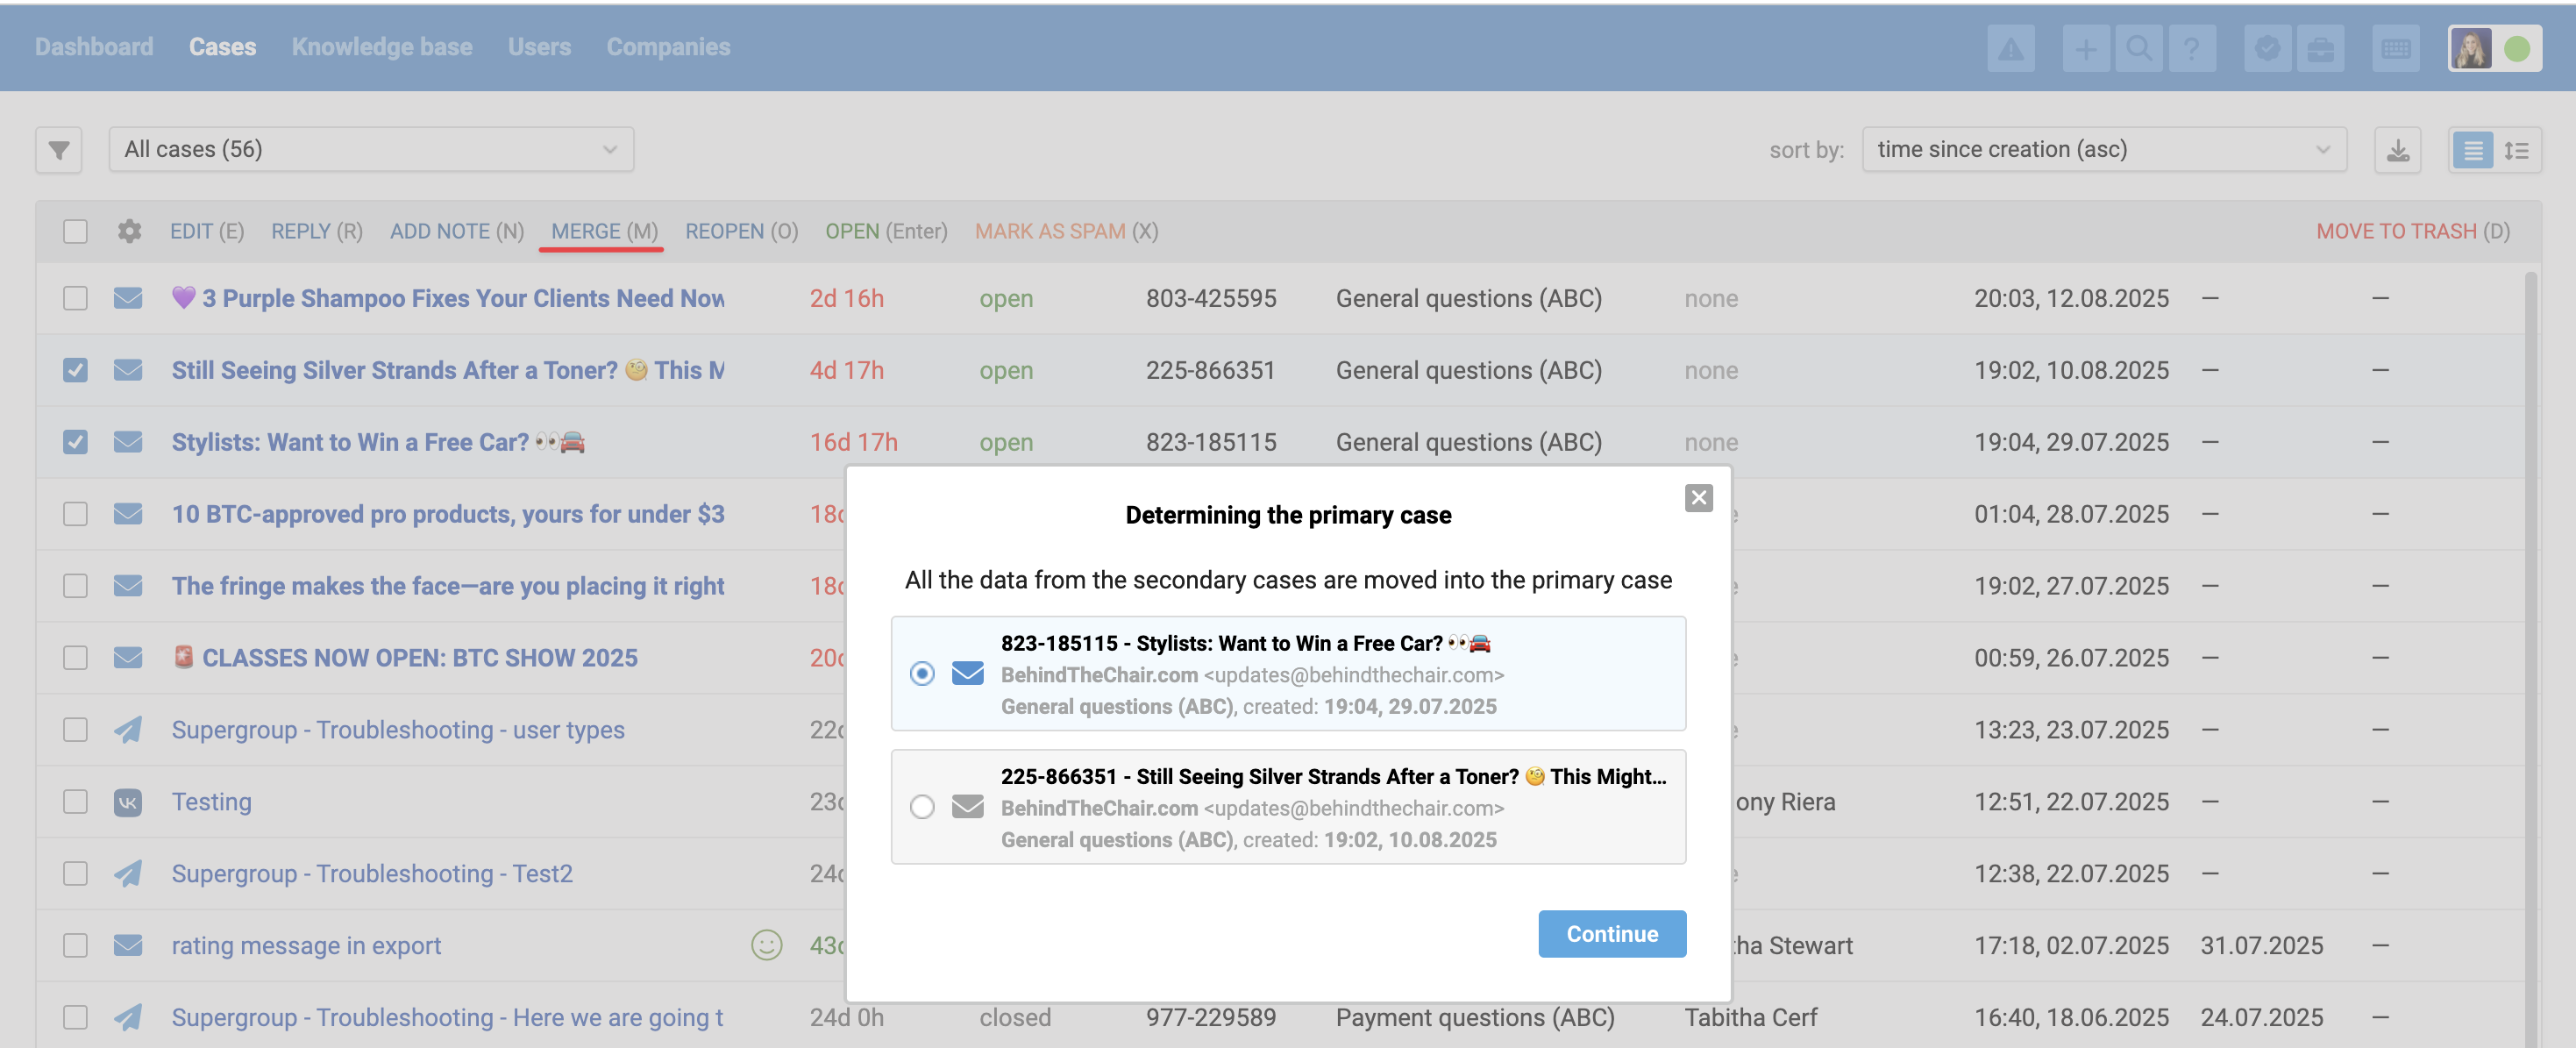
Merging cases
Only cases received via the "Email" channel can be merged. As a result, a single case remains in the list, combining the correspondence and data from all selected cases. More details can be found here.
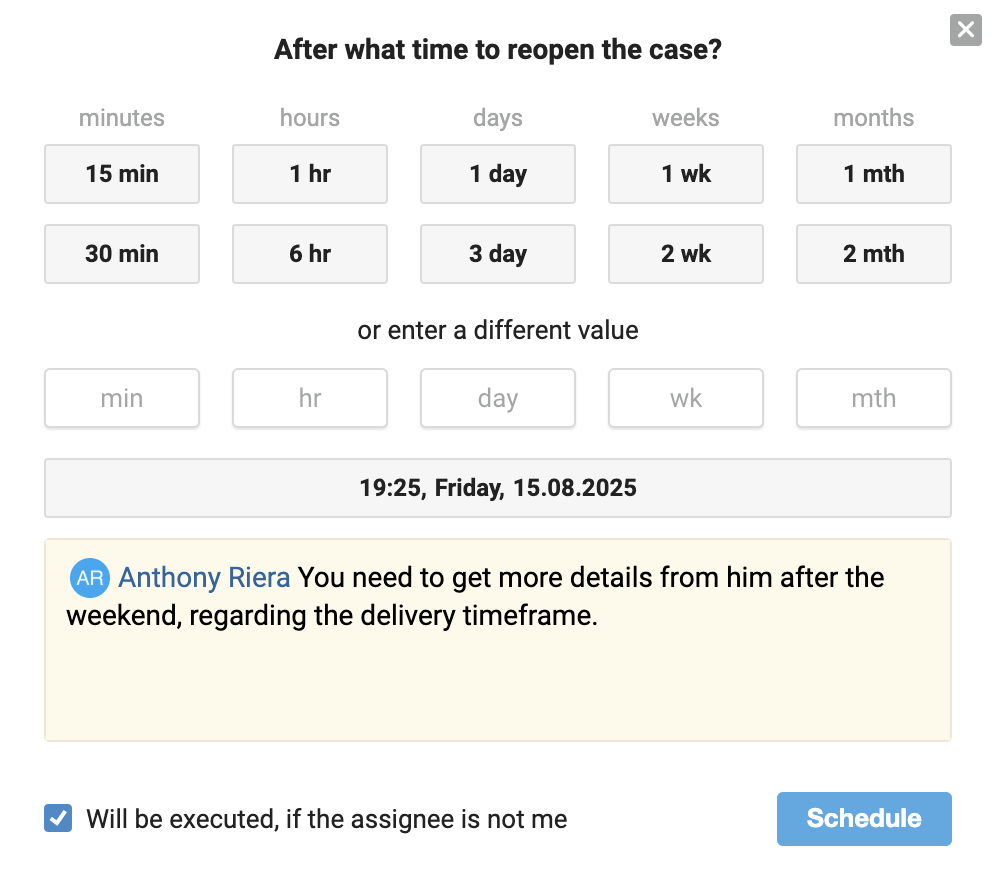
Reopening scheduling
You can schedule the automatic reopening of multiple cases after a specified time. This is useful when you need to return to these cases later – for example, while waiting for a response from developers or suppliers.
Opening in new windows
The "Open" button opens all selected cases in separate browser tabs. Useful for detailed analysis of related cases or when you need to work on multiple cases simultaneously.

Working with spam
When marking cases as spam in Deskie:
- all subsequent emails from those users automatically go to the spam folder;
- the users are added to the blocked list;
- existing cases from these users are moved to the spam folder.

Moving to trash
Cases are moved to the trash, where they are stored for 30 days before being permanently deleted.

To restore from the trash
Cases can be restored within 30 days from the trash. To do this, go to the Trash filter, select the desired cases using the checkboxes, and click "Restore" at the top of the list.
