
In terms of support, there are a lot of things that can and should be automated. And rules are your best option here. Setting them up once will help the agents avoid the routine and save them plenty of time for more important things. You can find examples of these rules, along with detailed setup instructions, in our knowledge base here.
Rules are set up in the administrator's account, in the "Channels" section, "Rules" subsection.
Despite the impressive possibilities of the rules, they have a simple structure. Each rule consists of conditions and actions. All cases are checked for compliance with the conditions. If the conditions are met, then the actions you specify are performed.
Types of rules
For greater convenience, the rules are divided into three types: rules for new cases, updated cases, and existing ones.
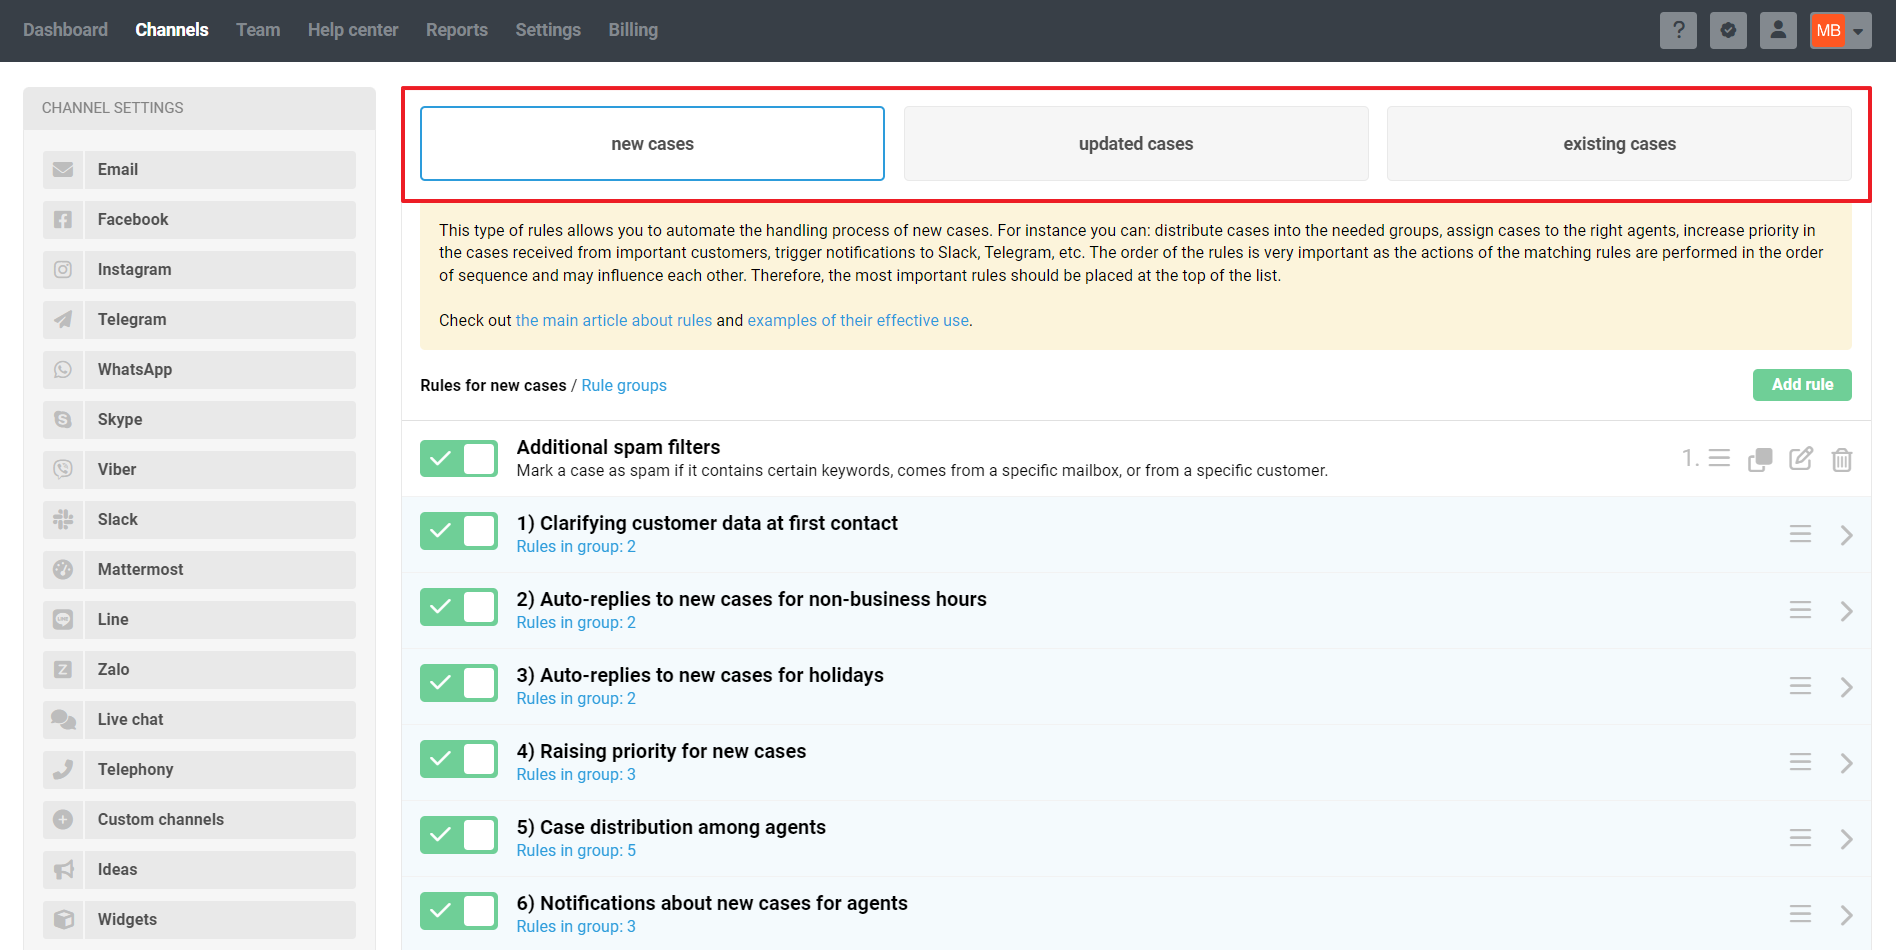
Rules for new cases allow you to automate the handling process of new cases. For instance, you can set groups, priorities, and assignees for new cases under specified criteria. These rules are triggered immediately when a new case arrives.
Rules for updated cases allow you to perform the necessary actions immediately after certain changes in the case. For example, you can send a browser notification when the case is assigned to an agent.
Rules for updated cases don't track actions performed by other rules.
Rules for existing cases allow you to automate the handling process of existing cases. For example, you can configure reminders to be sent to users when an agent is waiting for a response.
When using this type of rules, it is important to take into account the logic of their operation:
— rule checking for existing cases is run once every half hour, at even times: 00:00, 00:30, 01:00, 01:30, etc.;
— all rules of all customers are checked, so it may take up to 20-25 minutes until the queue reaches your rule;
— cases in which a new user/agent response or note has been added in the last 30 days — including through another rule — will be checked;
— the same rule for existing cases will not work twice in a row in a case, except for the following scenarios:
- the condition "The rule is executed — repeatedly — if it was executed during the last check" has been added to the rule;
- a new user response / agent's reply or note has been added to the case;
- an agent added or deleted a label in a case;
- another rule for existing cases has been triggered in the case.
Rules execution order
If you have multiple rules of the same type, such as for new cases, all created rules will be applied to a new case in sequence. Changing the order of the rules in the list will change the order in which they are applied.
Actions from one single rule are processed one by one, so that the actions below can be based on the previous ones.
Rules of the same type can be combined into groups - this will make it easier to navigate the list of rules if there are many of them and massively disable rules or change the order they are executed in. For the convenience of creating rules of the same type, there is a cloning function: in one click, you can clone an existing rule, make spot edits and create a new one based on it.
Creating a rule
Step 1: select a rule type. The first step is to choose the type of rule you're creating. If you need to act on a case as soon as it arrives, add a rule for new cases.
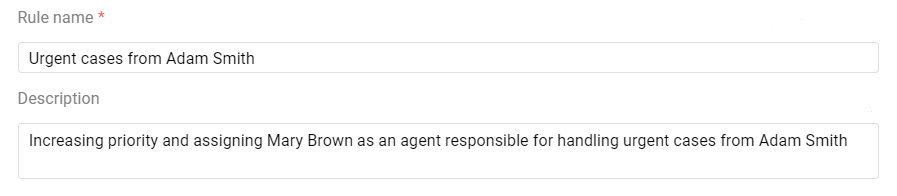
Step 2: give the rule a name. When creating a rule, give it a brief but informative name. Adding a description is optional, but it's recommended to fill in this field so you can remember in the future why you created the rule and what logic you intended for its activation.
Step 3: add conditions. You can add up to five condition blocks to a single rule, and each one can be of type "ALL of the following conditions" or "ANY of the following conditions". Between blocks, you can choose the logical operator "AND" / "OR" to set the relationships you need. Learn more

Step 4: add actions. Actions are added in the "then perform actions" block.

Condition blocks in rules
You can add up to five condition blocks to a single rule, and each one can be of type "ALL of the following conditions" or "ANY of the following conditions". Between blocks, you can choose the logical operator "AND" / "OR" to set the relationships you need.
Combining the two block types with your choice of logical connector between them lets you describe several scenarios within a single rule — this simplifies work in accounts with a lot of automations and helps you avoid exceeding the limit.
The more condition blocks a rule uses, the more carefully you need to check their order and the logic connecting them.
Which block type should I choose?
- In the "ALL of the following conditions" block, the logical operator "AND" is used, so for the rule to be triggered, ALL conditions listed in this block must be met;
- In the "ANY of the following conditions" block, the logical operator "OR" is used, so for the rule to be triggered, all conditions from the "ALL of the following conditions" block must be met, and at least one from the "ANY of the following conditions" block.
If you're using negative conditions with the particle "not" — such as "group is not equal to" or "labels do not contain", etc. — be sure to place them in the "ALL of the following conditions" block, where the logical operator "AND" is used. The rule will not function correctly if you place negative conditions with "not" in the "ANY of the following conditions" block.
Let's clarify with a specific example. Suppose in the "ANY of the following conditions" block, you have two conditions: "Group is not equal to General questions" and "Group is not equal to Billing".

Since this block operates with the logical operator "OR," ultimately the rule will be triggered for any group. Consider this: if a case belongs to the "General questions" group, the rule will be triggered because the condition "Group is not equal to Billing" will be met. Similarly, if the case belongs to the "Billing" group, the rule will still be triggered because the condition "Group is not equal to General questions" will be met.
If the negative conditions with "not" are placed in the "ALL of the following conditions" block, where the logical operator "AND" is used, then the rule will not be triggered in either the "General questions" group or the "Billing" group. Instead, it will only be triggered when the case is in any other group besides these two.
How this works
1. When you create a new rule, there's always one condition block that can't be deleted. You can choose this block's type — "ALL…" or "ANY of the following conditions".

2. You can add another condition block. By default, when you add a block:
- the "AND" operator is set;
- the block type is set to "ALL of the following conditions".
You can add up to five blocks in total, with up to 100 conditions combined.
Once you've added blocks, you can change their type and the operator connecting them to the previous block, subject to the existing restrictions. If a particular block type or operator would break the overall logic of the rule, that option becomes inactive and you won't be able to select it.
If the current chain of blocks connected by the "AND" operator already includes a block of type "ALL of the following conditions", we'll automatically add the new block as type "ANY of…" to avoid breaking the rule's overall logic.
3. When you delete any block, the system removes the operator associated with it:
- if you delete the first block, the operator after it is removed;
- if you delete a middle or the last block, the operator before it is removed.
Restrictions
a) If blocks are connected by the "AND" operator, only one of them can be of type "ALL of the following conditions". Any conditions that must always be met should be added to that block.
b) If the rule already has a standalone "ANY of the following conditions" block (one that isn't connected to other blocks via "AND"), you can't add another block of the same type using the "OR" operator. This is because the system can't reliably determine which of the two independent parts should be evaluated first.
Examples
❌ Not allowed: [Any] OR [All] OR [All] OR [Any]
— here both "Any" blocks are isolated, not connected to others via AND, so the rule is set up incorrectly.
✅ Allowed: [Any] OR [All] OR [All] AND [Any]
— the second "Any" block is connected to the previous one via AND, meaning the rule is triggered by either the condition from the first "Any", the condition from the first "All", or the "All AND Any" combination.
Logic conflict
If editing creates a logic conflict that could "break" the rule:
- the type of one or several condition blocks changes automatically;
- we show a warning at the bottom of that condition block that its type was changed automatically, and ask you to check that the rule's current settings still match what you intended.

The warning disappears automatically after you click anywhere on the page.
How to "read" rules
If two or more blocks are connected by the "AND" operator, they're checked together — meaning the rule triggers only if the conditions of all these blocks are met, according to each block's type.
If blocks are connected by the "OR" operator, the rule triggers if the conditions in any one of them are met.
"AND" → merges adjacent blocks into a single condition.
"OR" → splits them into alternative branches.
Interactions of logical blocks in rules
[1. All] AND [2. Any] OR [3. All]
The rule will trigger in two cases:
— all conditions in block 1 are met, and at least one in block 2;
— all conditions in block 3 are met.

[1. All] AND [2. Any] AND [3. Any] OR [4. Any]
The rule will trigger if:
— all conditions in block 1 are met, along with at least one from blocks 2 and 3 each;
— at least one condition in block 4 is met.

[1. All] AND [2. Any] OR [3. All] AND [4. Any]
For the rule to trigger:
— all conditions in block 1 must be met, along with at least one from block 2;
— all conditions in block 3 must be met, along with at least one from block 4.

Creating a rule using a specific example
Imagine that you have a customer who sends urgent cases to your support team from time to time. The customer's name is Adam Smith, and his email address is [email protected]. He is very important to you. Therefore, you decided to create a rule that will increase the priority of his urgent case to "high" and assign that case to the most experienced agent, Mary Brown.
So, each of the conditions added in the "ALL of the following conditions" block must be met — it uses the "AND" operator;
In the "ANY of the following conditions" block, at least one of the above conditions must be met for the rule to be triggered — that is, the "OR" operator is used.
First, you need to check the sender of the case. To do this, add the condition "Email address — is equal to — [email protected]". This condition must be met, so it is added to the "ALL of the following conditions" item.

You may want to add the condition "Full name — is equal to — Adam Smith". But in this case, it makes no sense to do so. Firstly, you can accurately determine the case sender by the email address. Secondly, the user can change the name (for example, to a nickname), and the condition will no longer be met.
As a next step, we need to set conditions that will allow us to select only urgent cases. To do this, we add two conditions: "Subject or content — contains — important" and "Subject or content — contains — urgent". It is enough for us to meet only one of these conditions, so they need to be added to the "ANY of the following conditions" item.

Thus, with the help of three simple conditions, only urgent cases sent by Adam Smith will be selected from all incoming cases.
We want to increase the priority of cases to high and assign them to Mary Brown. To do this, just add two simple actions: "Change priority to — high" and "Assign to — Mary Brown".

As a result, you will get this simple but very effective rule:

We also recommend that you check out the sample rules in our knowledge base, the rules that were automatically added to your account as soon as you registered, and the rules video tutorial.
Other points
Time of the last rule edit
To find out when the rule was last modified or enabled/disabled, open it for editing: the date and time will be shown at the bottom of the page, to the left of the save button.

Rules that were created or last edited before 9.07.2024 don't have a record of which admin made the changes.
Features of the distribution rules
If there are multiple values in the "Assign to" action when creating rules for automatic distribution of cases, the following logic will work. If you specify:
— specific agents and/or roles, the logical OR operator is used, meaning the rule will assign the case to any of the agents listed;
— only groups, the agent must have access to at least one of the listed groups, and also to the group set on the case, for the rule to be able to assign them;
— only agent statuses, the agent must be in one of them to be included in the pool of agents the rule assigns cases to;
— specific agents / roles / groups together, the logical OR operator is used, meaning the agent qualifies if they're one of the listed agents, or have the specified role, or have access to one of the specified groups;
— agent statuses + specific agents / roles / groups, the rule will only consider these agents if they're also in one of the specified statuses.
In the "Except" option, the logical operator OR is used — if any of the listed conditions match an agent, the rule won't assign the case to them. For example, if you specify "Any agent" in the actions, and list agents with access to the "Technical Issues" group and agents with the standard "Offline" status as exceptions, the rule won't assign cases to any agent with access to that group, or to any agent with "Offline" status.
Understanding label logic in conditions
When multiple labels are listed within a single condition, they are connected by the logical operator "OR" – meaning the rule will be triggered if the case has at least one of the specified labels.

To check for the presence or absence of multiple labels in a case, you need to specify each label in a separate condition.

If the condition is negative — "Labels do not contain", and you list several labels in it, the condition is fulfilled only if none of the specified labels are present in the case. In general logic, this is called the joint negation operator (NOT OR / NOR).
If it is enough that at least one of the labels is absent, then each label must be specified in a separate "Labels do not contain" condition within the "ANY of the following conditions" block. This technique in logic is called partial negation.
Sending auto-replies
Choosing an action to send a message
When setting up auto-response rules, make sure the action in the "sending and webhooks" section matches the channel specified in the rule's conditions.
- for chats, select the action "Send message to chat";
- for emails — "Send email to user".
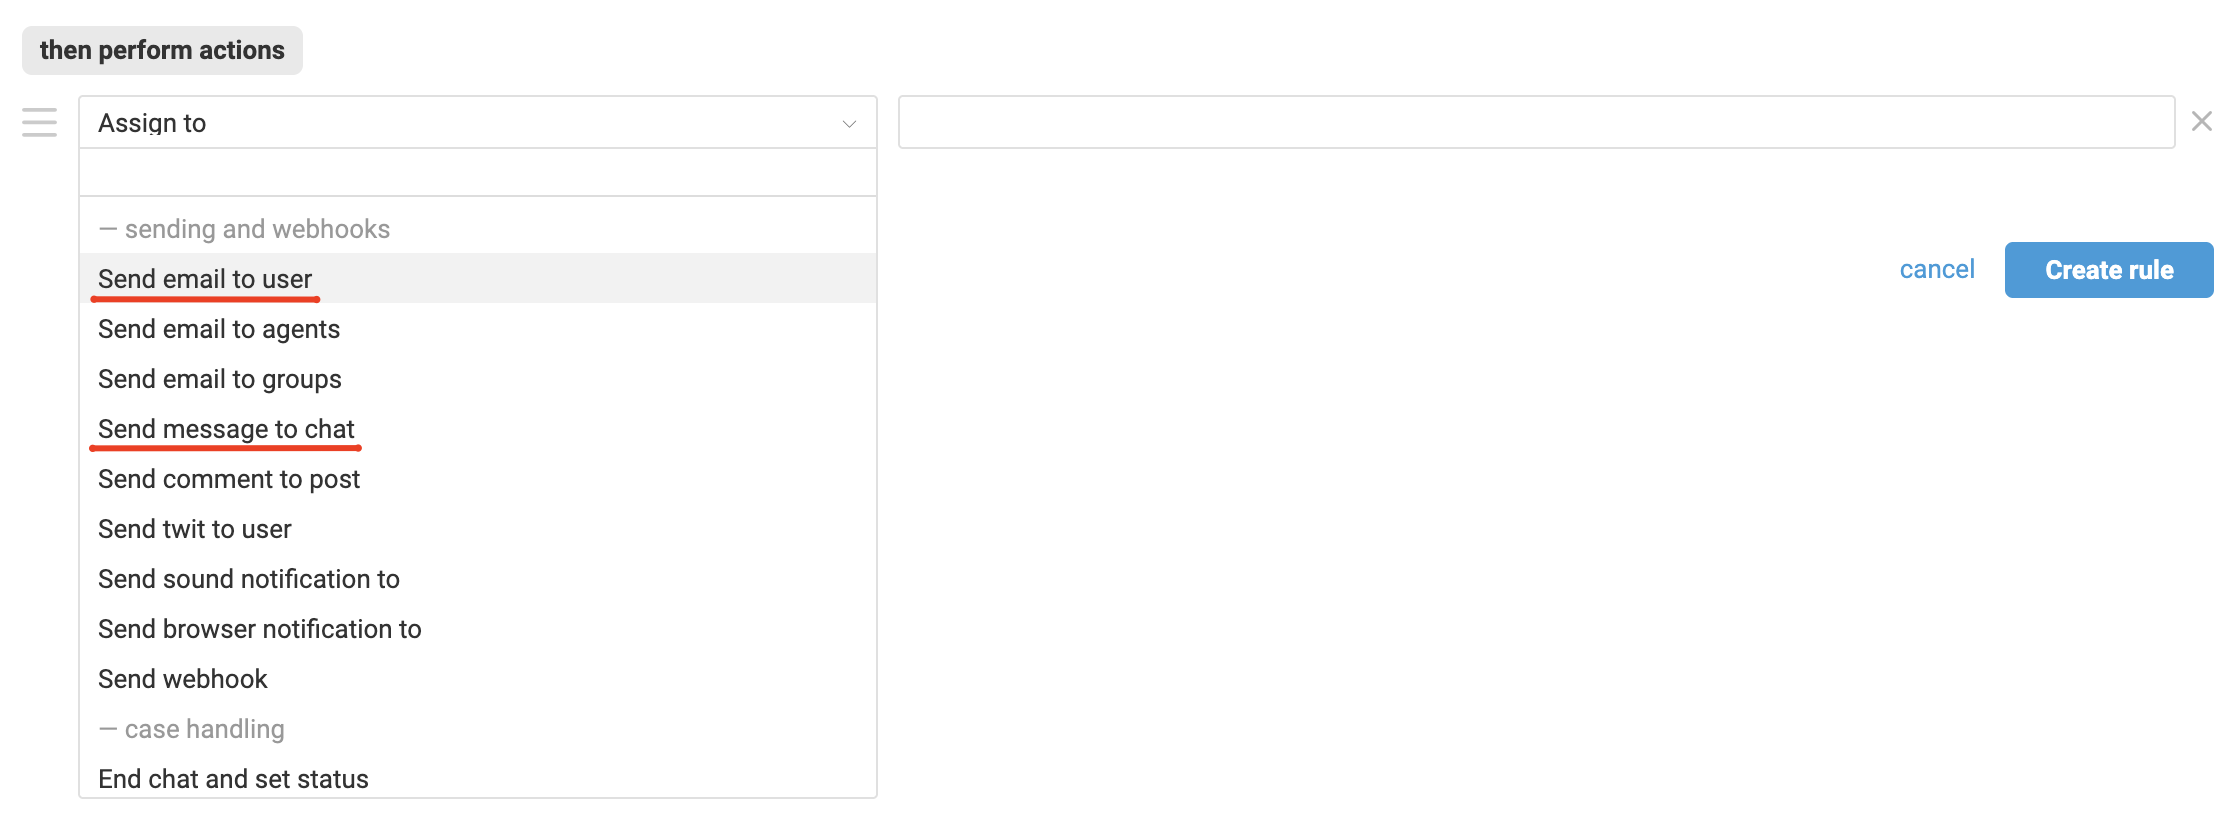
If the auto-response needs to work for both chats and email, there are two options:
a) Create separate rules for each channel, specifying the appropriate action in each one.
b) Create a single rule for all channels and include both actions — then the system will automatically choose the right one:
- for chats, the "Send message to chat" action will be triggered;
- for emails — "Send email to user" action.
Auto-reply variants
In the "Send message to chat" and "Send email to user" actions, you can now use + to add up to five variants of the auto-reply text. When the rule triggers, the system randomly picks one of them.
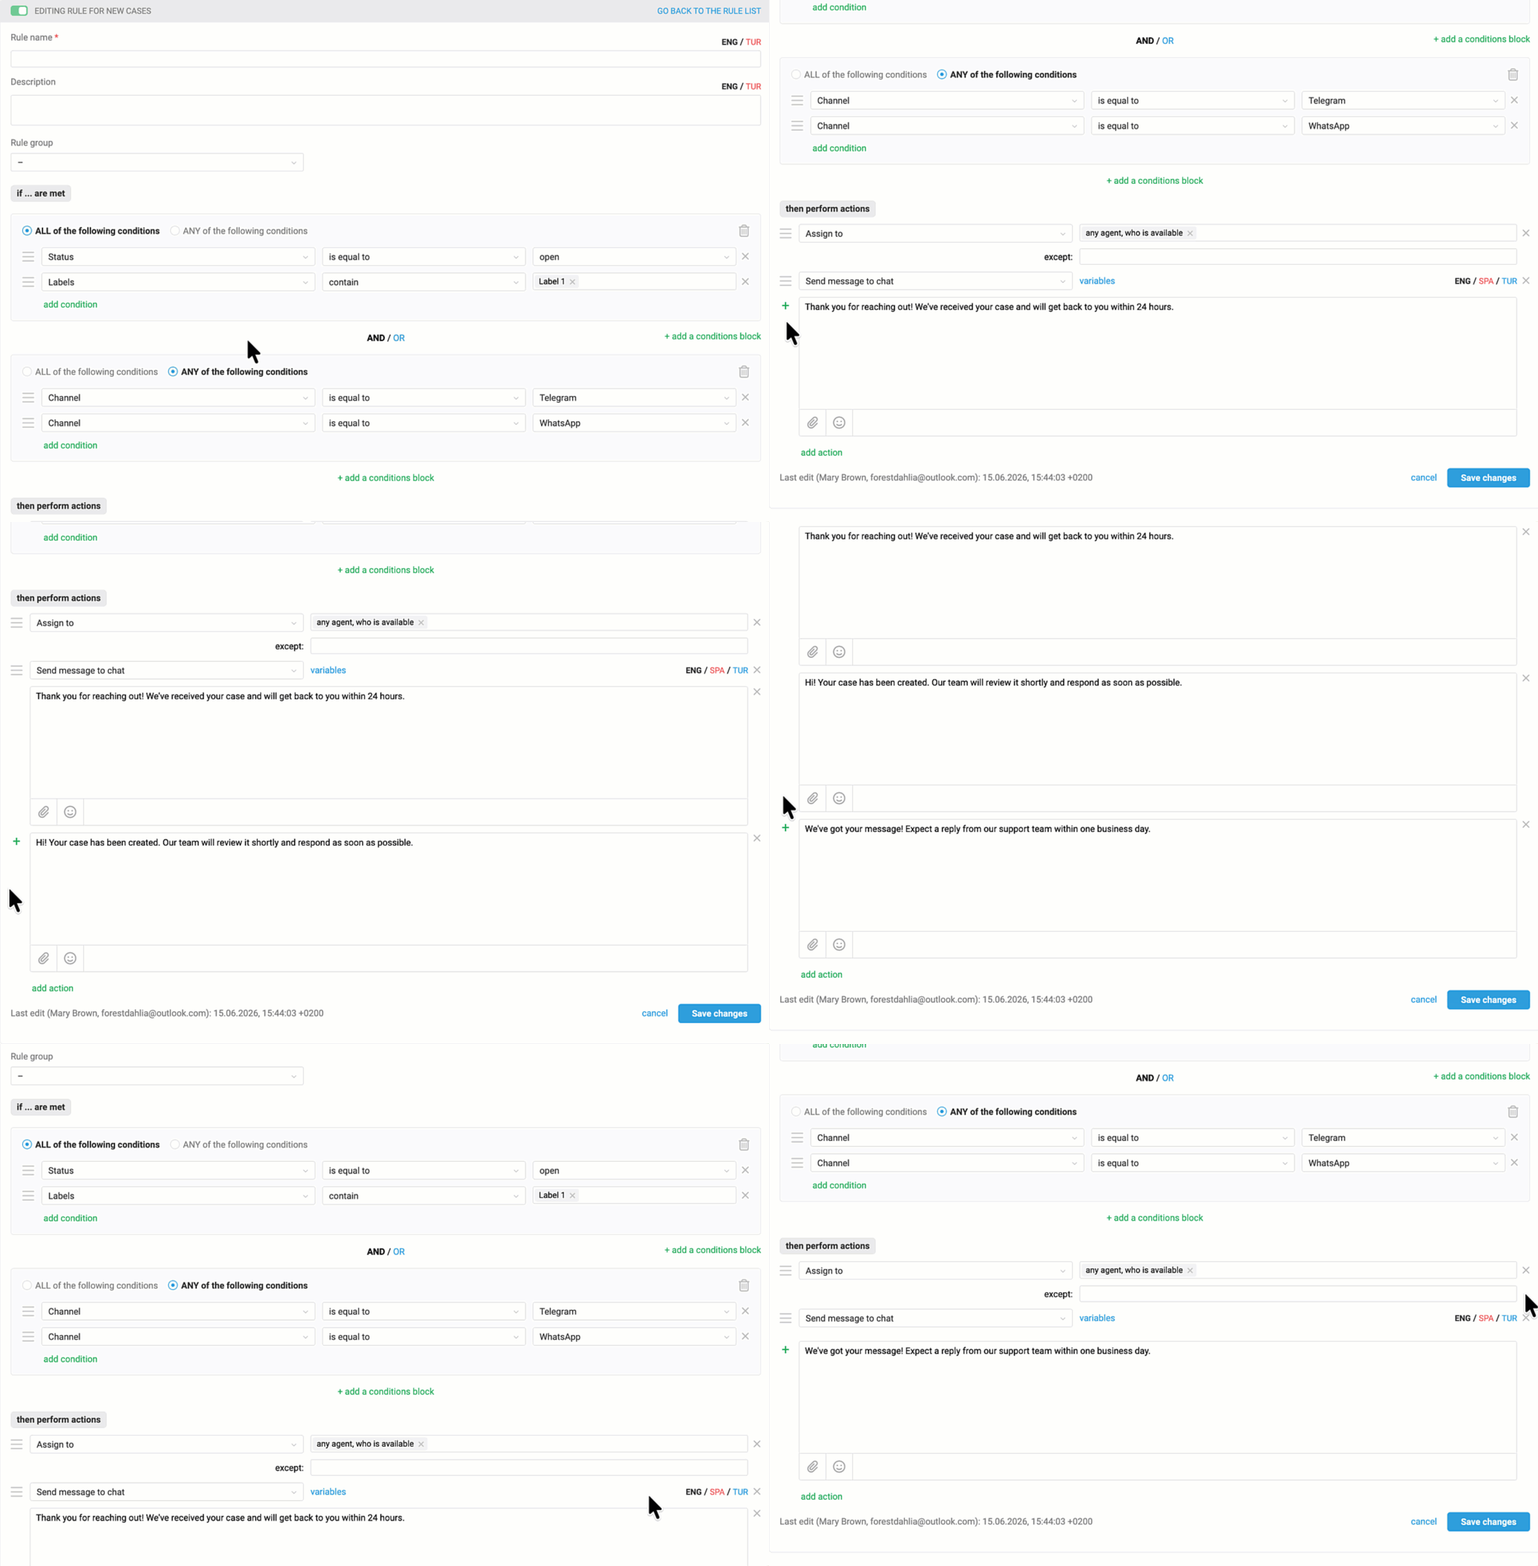
This makes automatic replies more varied and natural — more users will read them carefully instead of skimming past important instructions :)
Video guide to rules
Please note: because the service is updated regularly, by the time you watch this video some interface elements may look different, and some options may be missing or new ones may have appeared.
You can jump to the desired part of the video by clicking the icon in the player's panel.