You are here because you are fed up with the current way of providing support:
communication with customers is conducted chaotically: by email, through social networks, instant messengers, and personal accounts;
agents do not see a single history of communication with the customer and spend more time processing cases;
there is no way to automate routine processes;
agents cannot discuss customers' questions in the same place where the answer is sent to them;
there are no general statistics to track agents' progress;
you cannot upload data from third-party services or your own admin panel to the customer communication interface.
This guide will introduce you to the basic features of Deskie and help you complete the settings to get started with the service.
Each of the seven steps contains a brief description and links to detailed instructions for connecting and configuring specific functionality. For convenience, we have indicated the approximate time required to complete the settings.
Step 1. Collect all communication channels in one place
Step 2. Organize your work with groups
Step 3. Transfer customer data to Deskie
Step 4. Add agents
Step 5. Prepare agents for work
Step 6. Set up notifications for customer messages
Step 7. Create a customer knowledge base
Step 1. Collect all communication channels in one place
In Deskie, cases from different sources are combined in one interface, which significantly simplifies their processing:
Messages from all channels will be converted into cases. Select the desired channels and follow the detailed instructions to connect them:
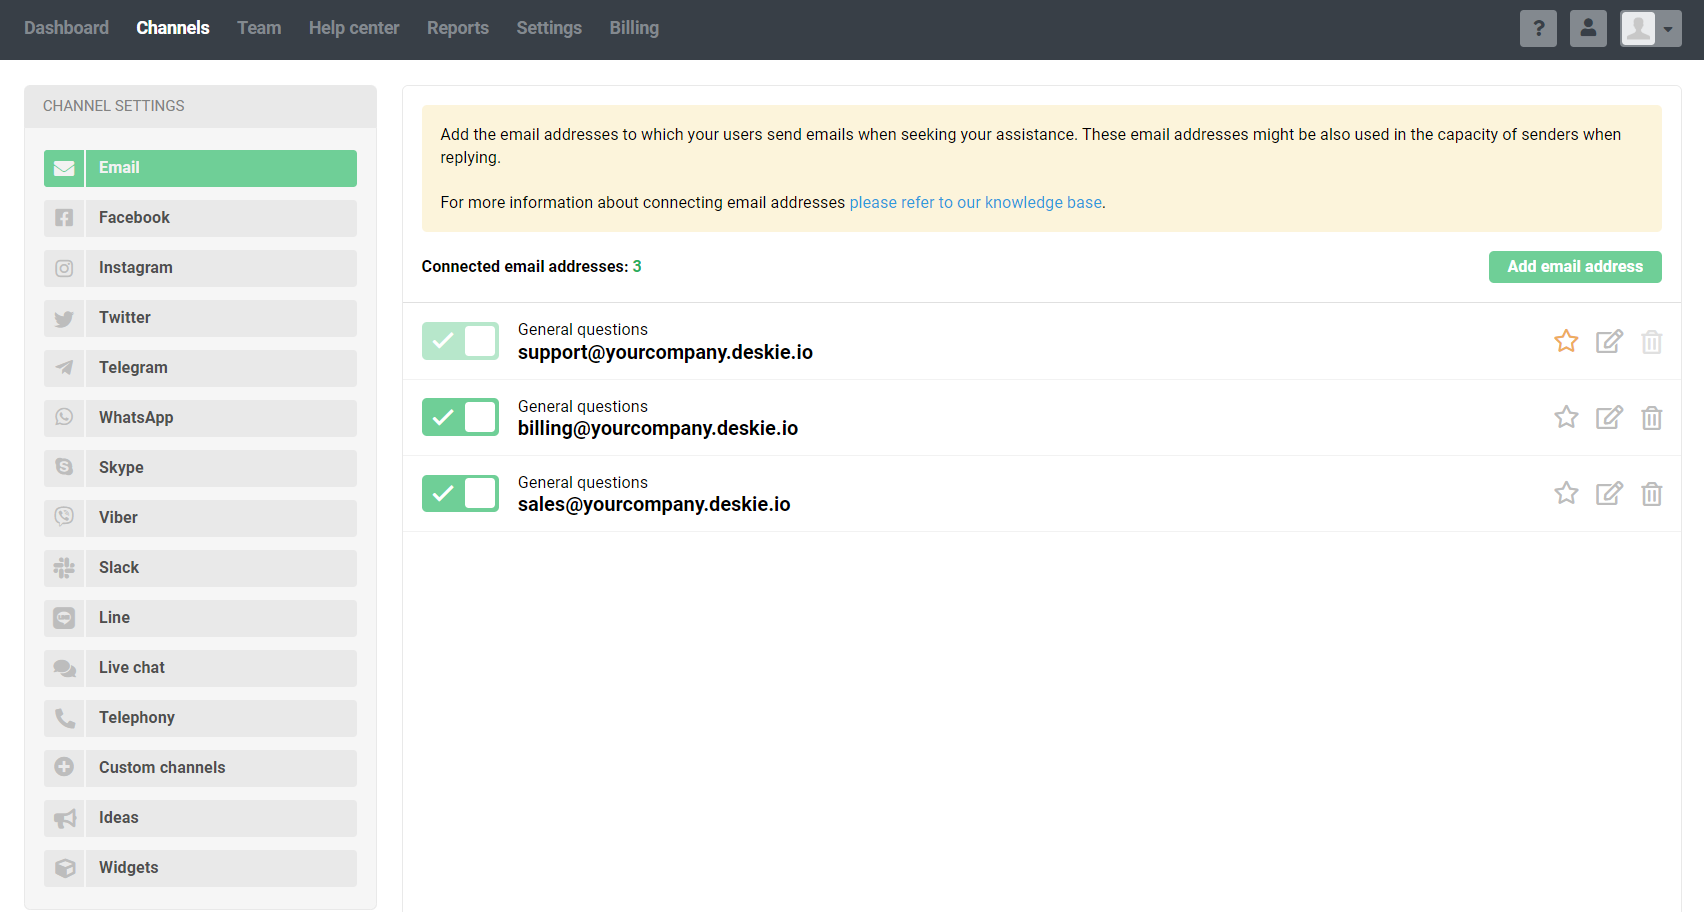
Email: all incoming emails are converted into cases
(10 minutes to connect)Facebook: posts, comments, and direct messages to your page
(1 minute to connect)Telegram: messages to the bot
(10 minutes to connect)Microsoft Teams: messages to the bot
(10 minutes to connect)Viber: messages to the public account
(10 minutes to connect)Slack: messages to the bot
(10 minutes to connect)WhatsApp: Integrations with WhatsApp providers
(10 minutes to connect)Line messenger: messages sent to the channel
(10 minutes to connect)Zalo: messages sent to Zalo account
(10 minutes to connect)Mattermost: messages to the bot
(10 minutes to connect)Live Chat: Integration with Chatra or Chaport
(15 minutes to connect)Calls: integration with virtual PBXs (Asterisk)
(15 minutes to connect)Reviews from the App Store and Google Play: integration with AppFollow
(10 minutes to connect)Ideas: section in the "Help center"
(1 minute to connect)Widgets: buttons with feedback channels and/or knowledge base for your website
(10 minutes to connect)Custom channels: connect your channels to communicate with the customers
(30 minutes of developer work)API: connect your feedback forms to Deskie
(30 minutes of developer work)
Step 2. Organize your work with groups
Use groups to conveniently distribute cases across departments, support lines, or different products.
For instance, create groups for different departments: "General questions", "Technical questions" and "Payments" to give agents of each department access to only certain cases:
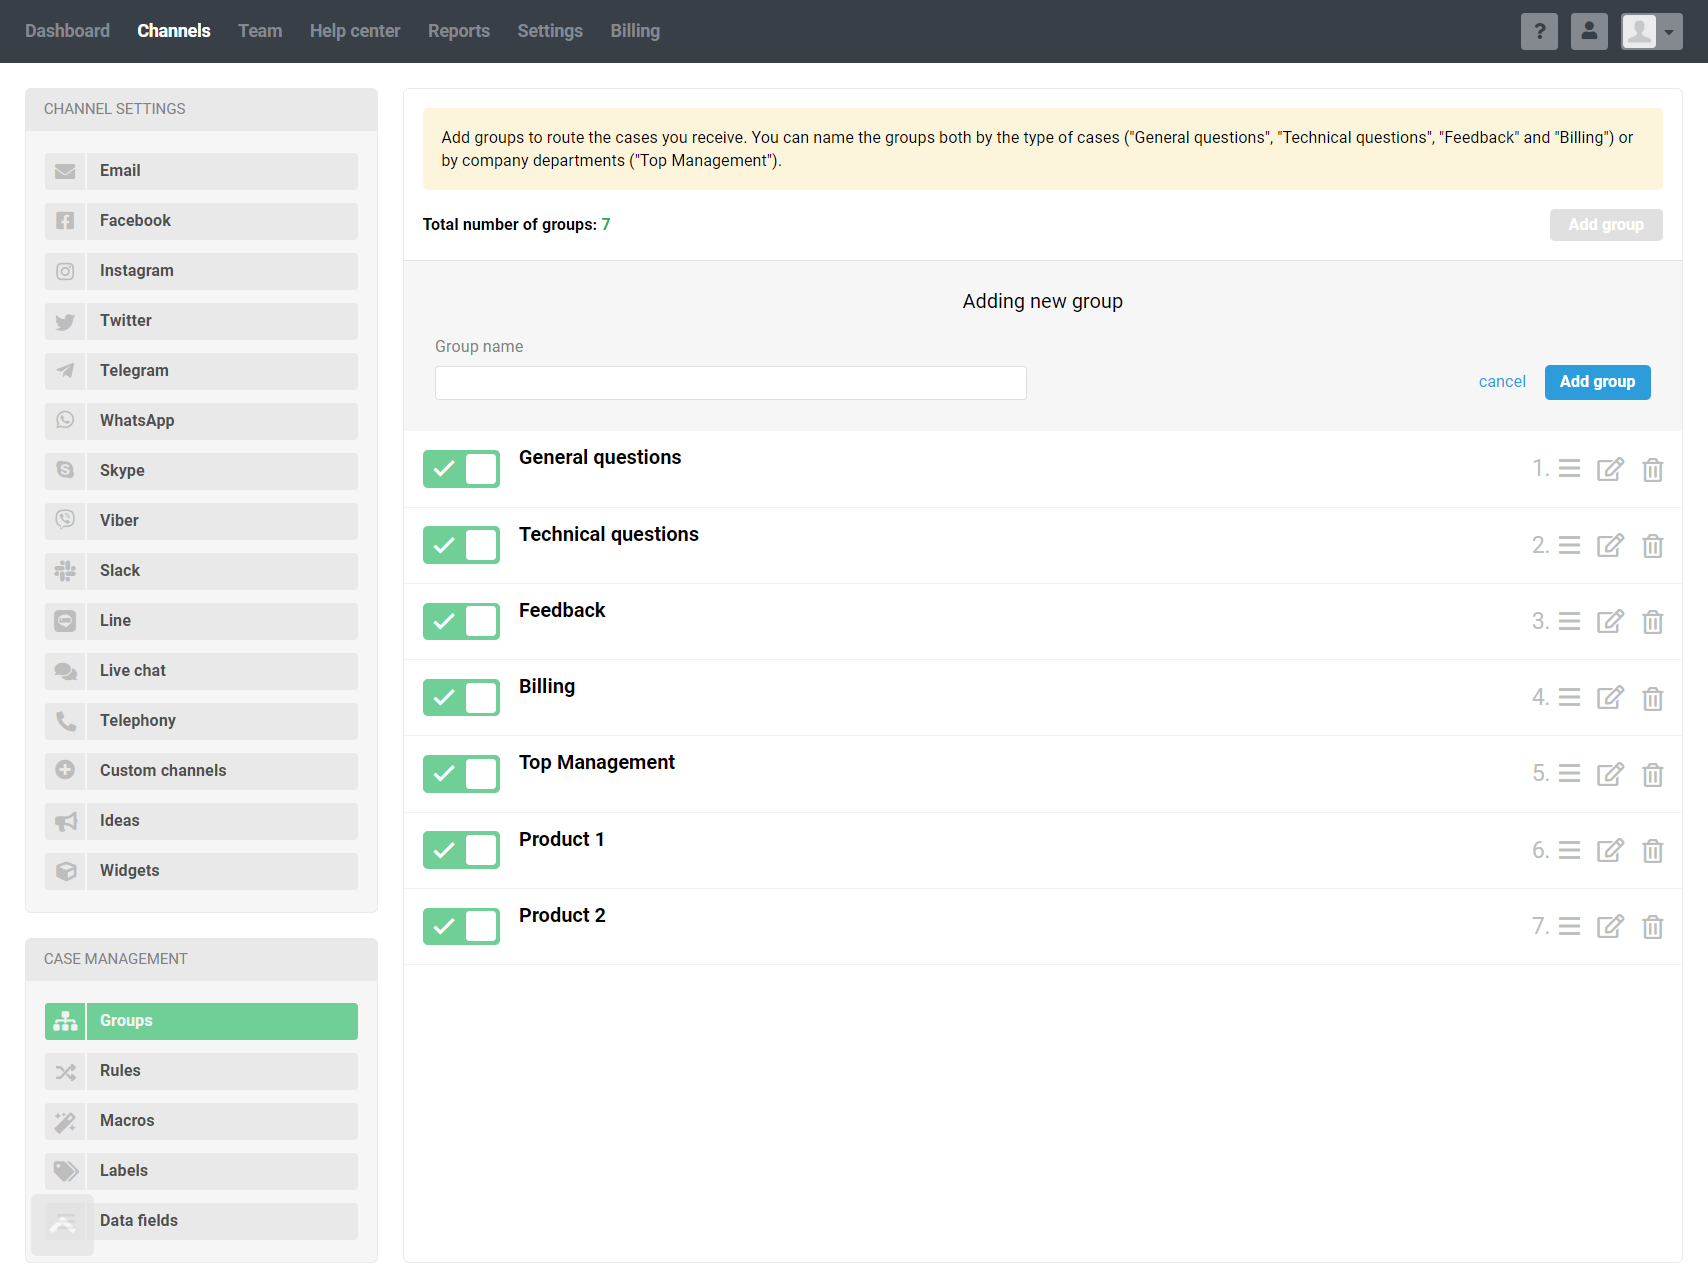
Learn more about setting up groups and how they can be used.
Step 3. Transfer customer data to Deskie
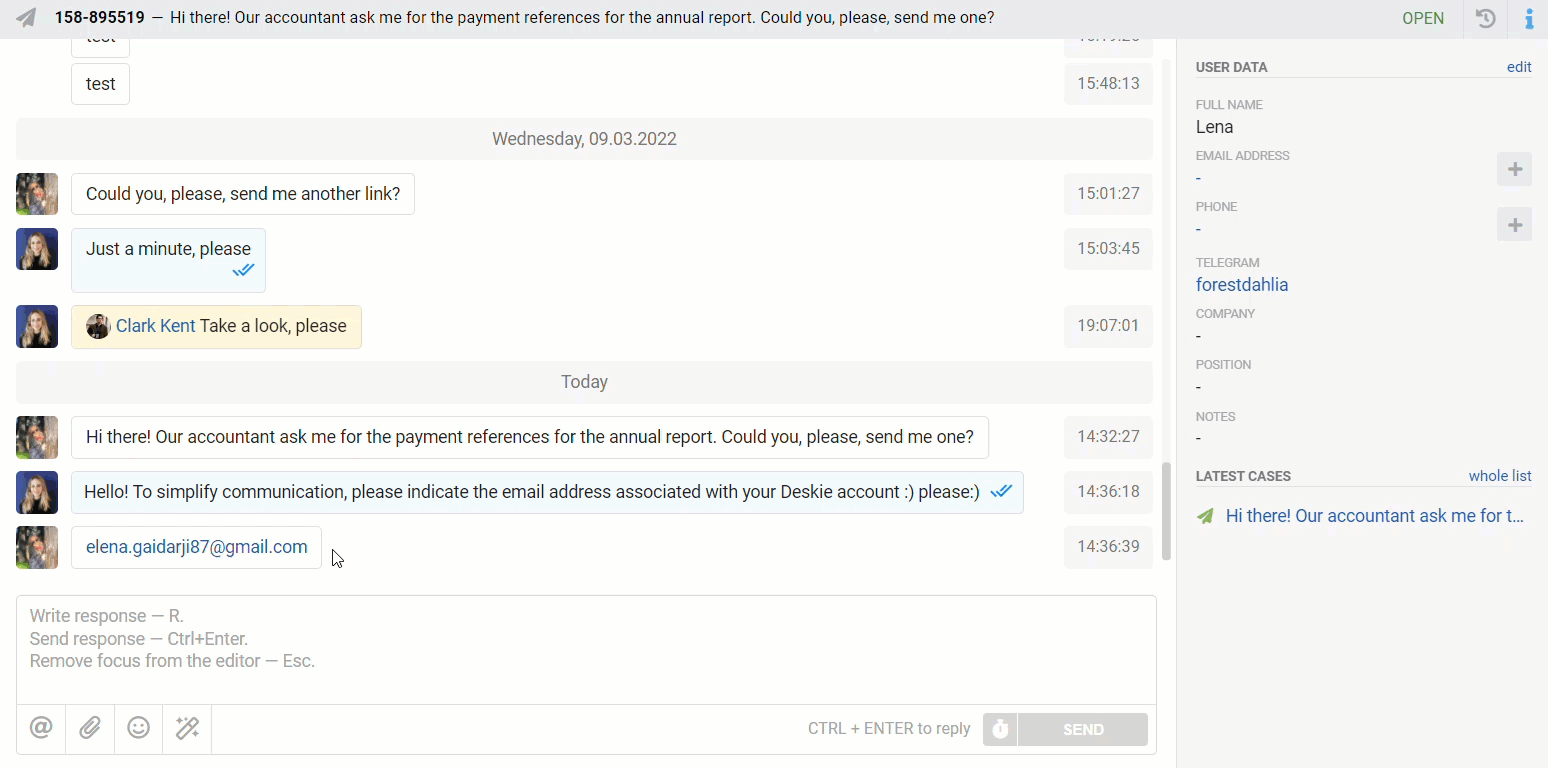
To provide fast and high-quality support, it is important for agents to see comprehensive information about customers in one place:
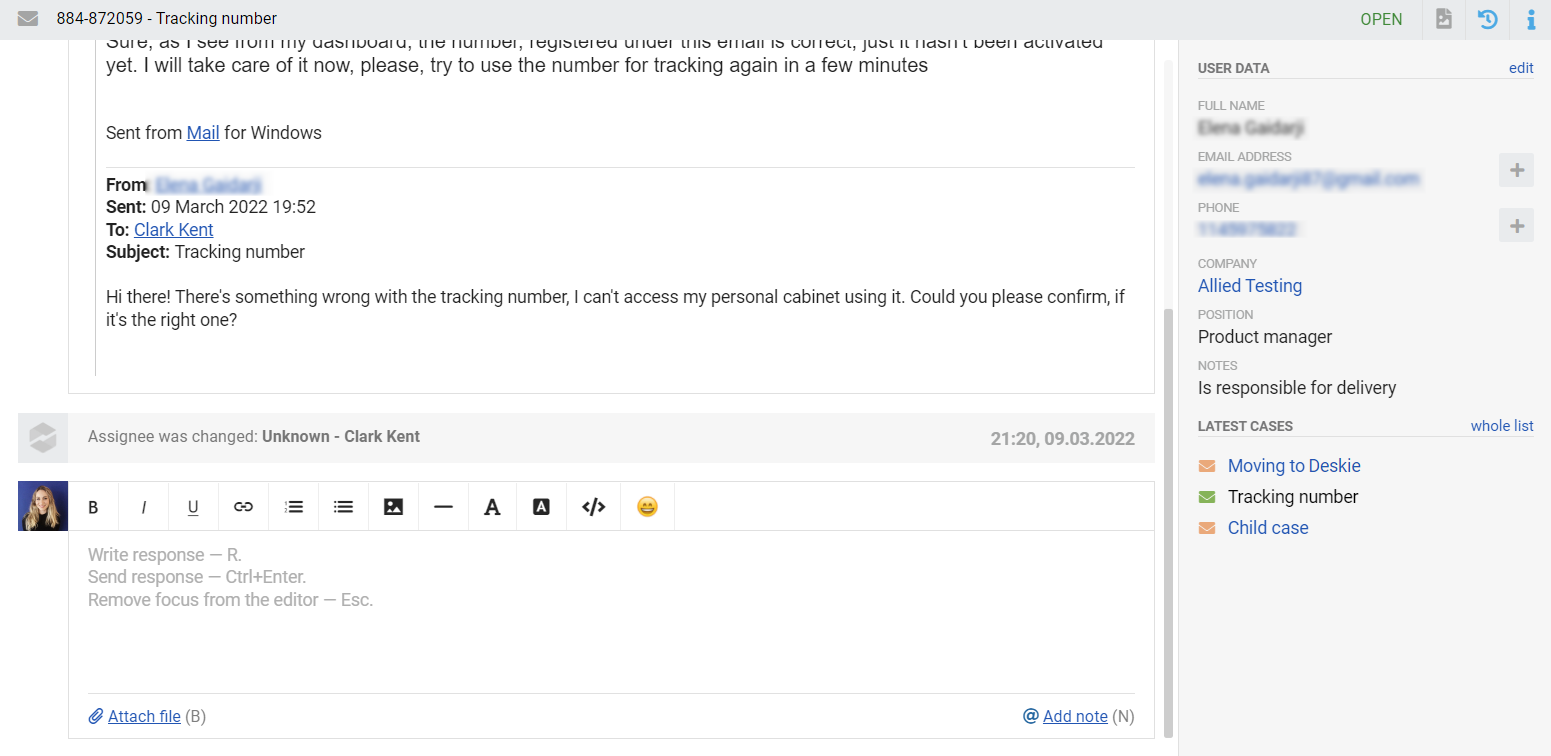
There are several ways to transfer and display customer data in Deskie.
a) If you maintain a customer database in Excel or the site admin panel, you can import customer data from a CSV file. This option is available along the path: administrator account — section "Settings" — subsection "Data import" — tab "Users import from CSV file".
For the service to pick up all the data, match the fields from the file with the data fields in Deskie:
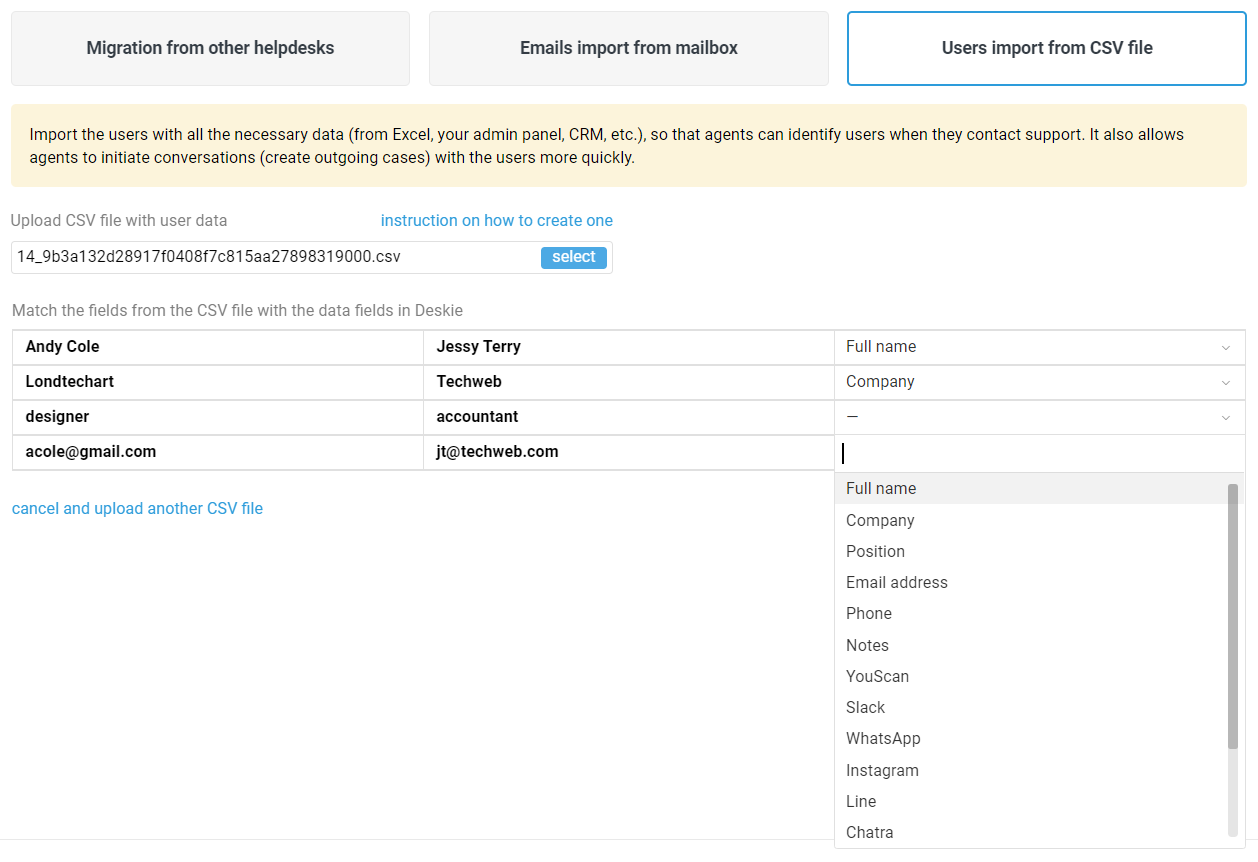
Please note that the file must be encoded in UTF-8. Here is a detailed article on creating a CSV file.
b) Social networks and instant messengers do not allow initiating communication with users. Therefore, in Deskie, you can link the customer's email and, for example, their Telegram only after the customer has written to you via Telegram at least once.
If a customer contacts you through these channels (Facebook messages, Telegram, Microsoft Teams, Viber, Slack), ask them for an email address or phone number by which you can identify them. This will allow you to quickly link the customer's data so that in the future you can see the history of correspondence with them across all channels:
A message to clarify the customer's data (email address or phone number) can be sent automatically using the rules, which saves a lot of time in the process of account linking. Check out the examples of setting up auto-replies in our article.
c) To automate the process of the data import and perform it on a regular basis, use our API. Just keep in mind, that you might need the developer's help if you are not familiar with API usage.
d) To display data from the CRM system, connect one of our integrations with the following services: Kommo, and PipeDrive. As a result, customer data and data about completed transactions will be automatically pulled into the "User Data" panel or placed in a separate integration panel (depending on the type of integration connection).
e) If some of your customers' data changes frequently (products in the cart, completed courses, purchased tickets, last visits), it can be uploaded to a separate custom block in Deskie, which will be automatically updated every time a case is opened.
Step 4. Add agents
For agents, access levels to channels and group cases are very flexible, as well as additional rights that limit or expand their capabilities:
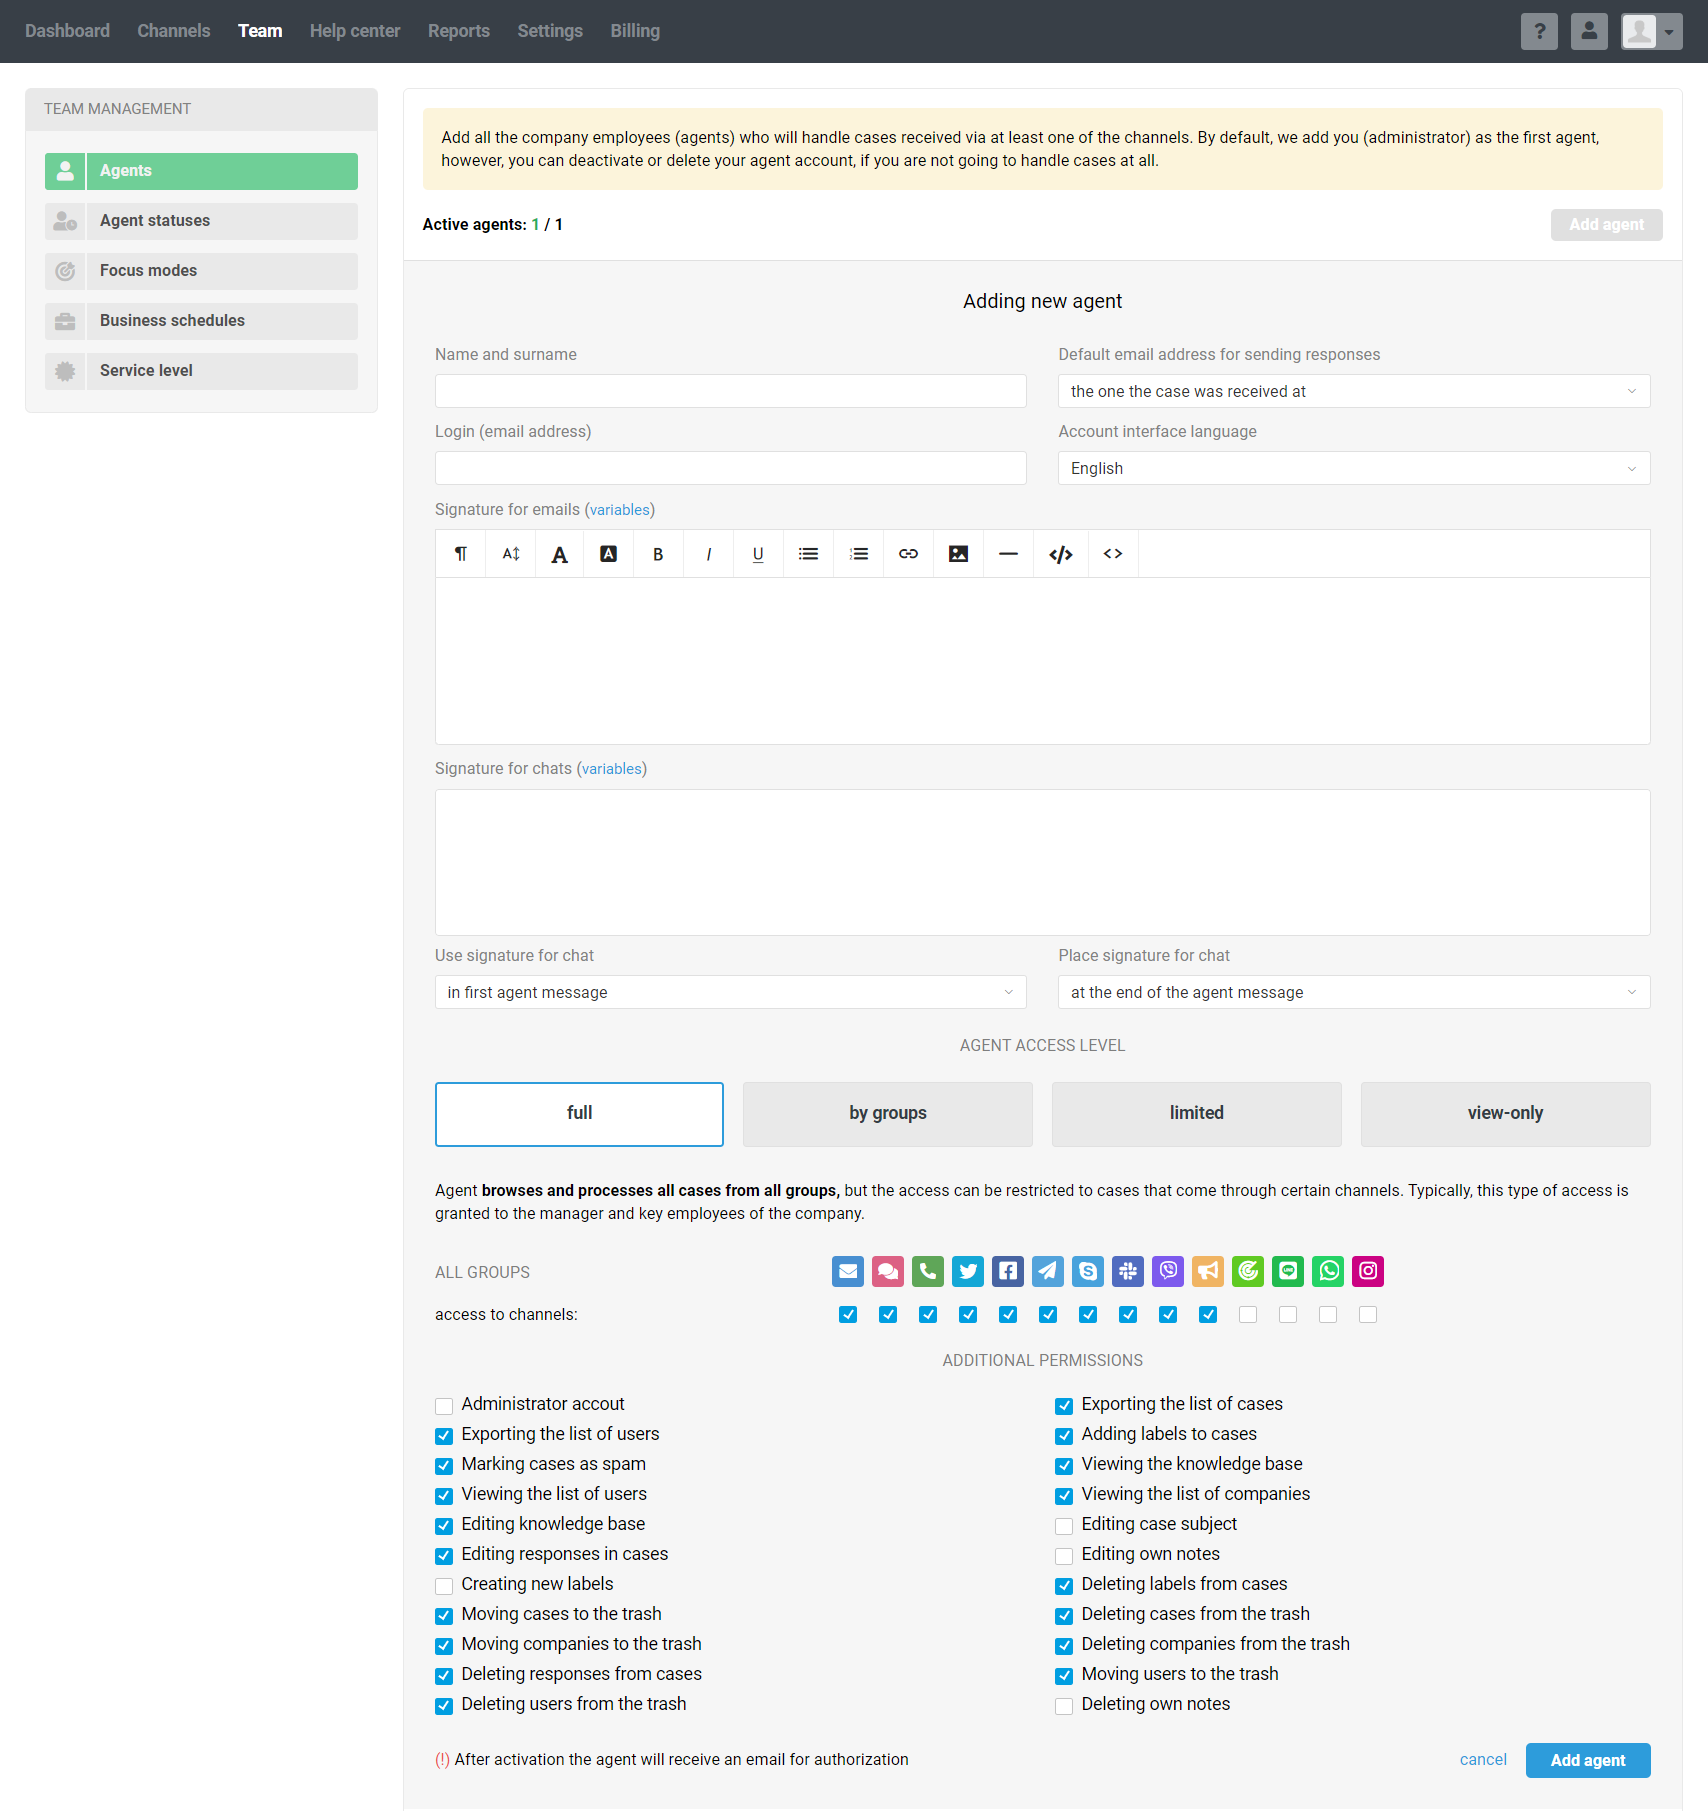
Agents are added and edited along the path: administrator account — section "Team" — subsection "Agents".
By default, we add you (administrator) as the first agent. If you do not process cases, you can disable or delete your agent account.
If some agents in the company do not respond to messages (accountants, developers, marketers, analysts), but they also need to have access to the cases (for example, to leave notes to colleagues), select the "view-only" access level for them. The cost of such agents is reduced to 10€ per month. They have access to almost all the functionality of Deskie, with the exception of sending responses to cases.
Learn more about adding and editing agents.
Step 5. Prepare agents for work
1. Communication with colleagues through notes to capture important points and discuss issues. If you mention an agent in a note using “@”, they will receive a notification and can quickly read the information in the case to help with the answer (7 minutes to read).
2. Macros to handle the cases quickly — predefined responses or actions that agents can use with two clicks (2 minutes to read).
3. Labels for organizing information in cases. They help you respond faster in emergencies, track the need for training materials, and record customer suggestions for service improvement (5 minutes to read).
4. Favorite messages and notes to highlight key points in your communications with clients and colleagues will save you a lot of time when searching for the right information in cases (2 minutes to read).
5. Global search allows you to search for cases by parameters, users, companies, articles, note content, additional data fields, and attachment name (3 minutes to read).
6. Your own filters for quick access to cases with certain parameters: status, priority, channel, group, assignee, labels, etc. (3 minutes to read).
7. Case reopening by a scheduled time for cases when it is necessary to return to the case in the future. (3 minutes to read).
8. Agent teamwork to avoid situations when several agents respond to the same case (3 minutes to read).
Step 6. Set up notifications for customer messages
Agents do not always have the opportunity to follow the list of cases, so notifications about new cases and new customer responses allow you to keep abreast and not miss important cases.
Follow the detailed instructions to set up the desired notification type:
sound and browser notifications (2 minutes each to complete)
email notifications (2 minutes to complete)
notifications in Telegram (10 minutes to complete)
notifications in Slack (10 minutes to complete)
notifications in Mattermost (5 minutes to complete)
notifications in Discord (5 minutes to complete)
Step 7. Create a customer knowledge base
Give customers the opportunity to understand emerging issues on their own, with the help of articles and instructions.
A well-prepared knowledge base takes off the load from support agents and helps to work with cases faster by sending customers links to articles and manuals.
Read the detailed instructions on how to create a knowledge base (3 minutes to read) and customize the Help Center (2 minutes to read).
Conclusion
In this guide, we have considered only a part of the service's capabilities. Take a closer look at the Deskie if required, we have much more enjoyable moments:
integration with CRM systems (Kommo, PipeDrive)
integration with email marketing services (Mailchimp, Campaign Monitor, SendPulse, GetResponse, Selzy)
cloud storage integrations (Google Drive, Dropbox, OneDrive)
If you have any questions or suggestions, please contact us in any convenient way.
We are constantly developing the service to make it comfortable and easy for you to work with it.
Subscribe to our channels, so you will always be up to date with the news: Facebook, Telegram, Twitter, and YouTube.